Joint Fail
The other day I re-entered my workshop for the first time in over a month. I’m still not ready for serious woodworking — my foot is healing up nicely, but full weight bearing, carrying, and handling myself around power tools is still a few weeks off — but I had a repair job to do.
The patient was Julie’s bra rack, which I built about 3 years ago (May 2014):
We recently replaced the 20-year-old carpeting in our bedroom and upstairs landing with hardwood flooring. Two days’ worth of banging and sawing (by professional installers, not me), and the resulting vibration therefrom, were too much for the Command fasteners to bear. The rack fell to the floor, and in the process two of the arms broke off. This happened the day before I flew out to Des Moines for Weekend with WOOD, so I didn’t look at it until I got home. Which turned out to be a good thing.
One of the classes I took at Weekend with WOOD was a talk from Bob Behnke of Franklin International, the makers of the Titebond glues I like to use, about how wood glue actually works and how to use that information to make better, stronger joints. So instead of just regluing the joint and hoping for a better result, I actually looked at the parts to determine how and why the joint failed so easily.
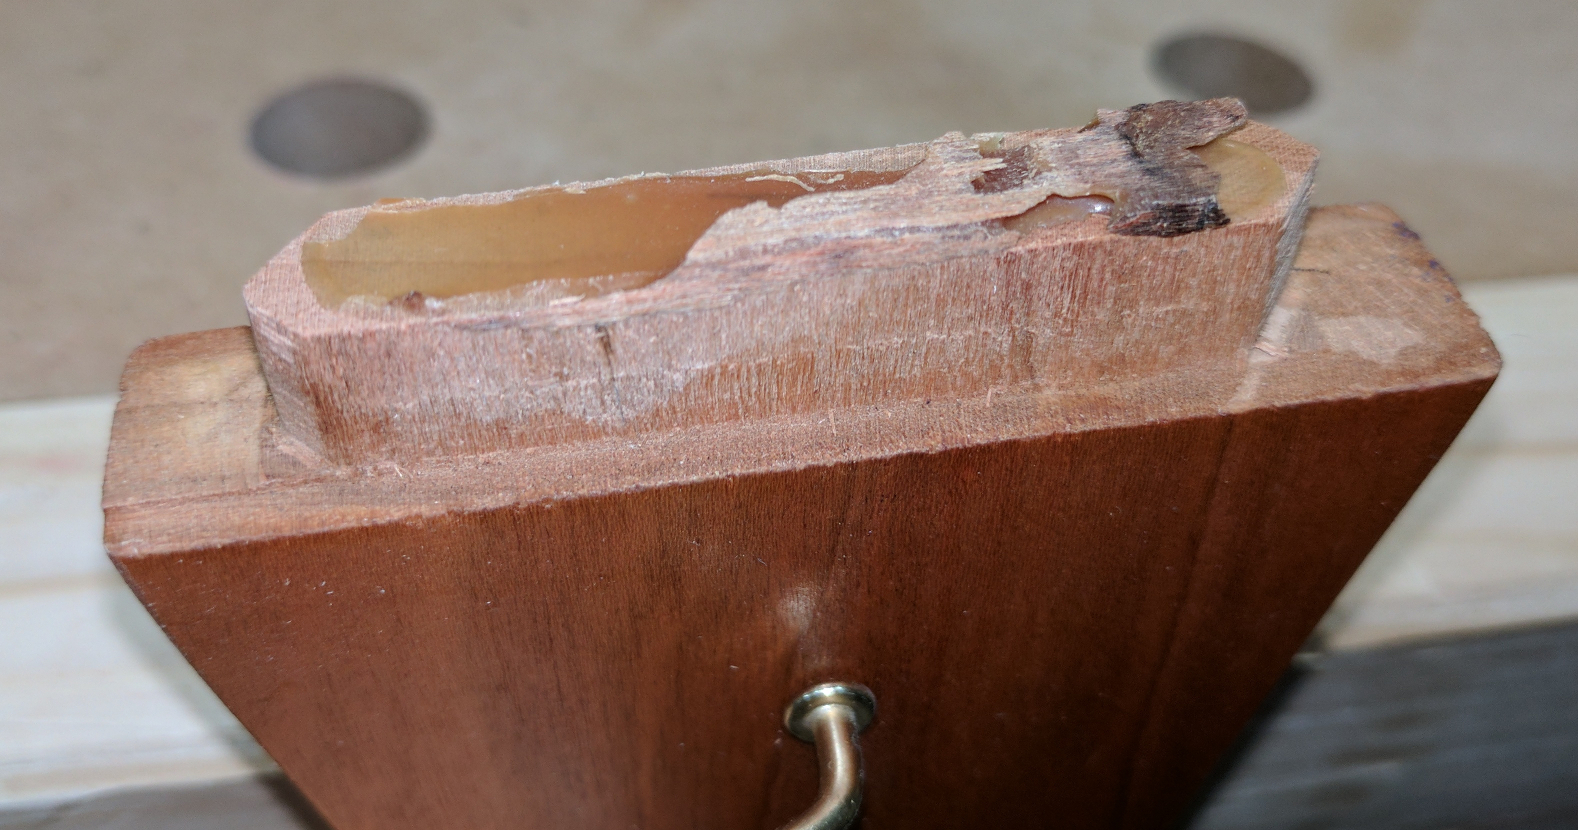
The joint in question was a mortise and tenon joint. I started by looking at the tenon:
See how the tenon itself is undamaged? There’s a tiny sliver of wood on top, which broke out of the bottom of the mortise, and that’s it. Also note that the sides and shoulders of the tenon have little or no glue residue on them, while there’s a thick (about 1/16 thick) layer of dried glue on the tenon’s end.
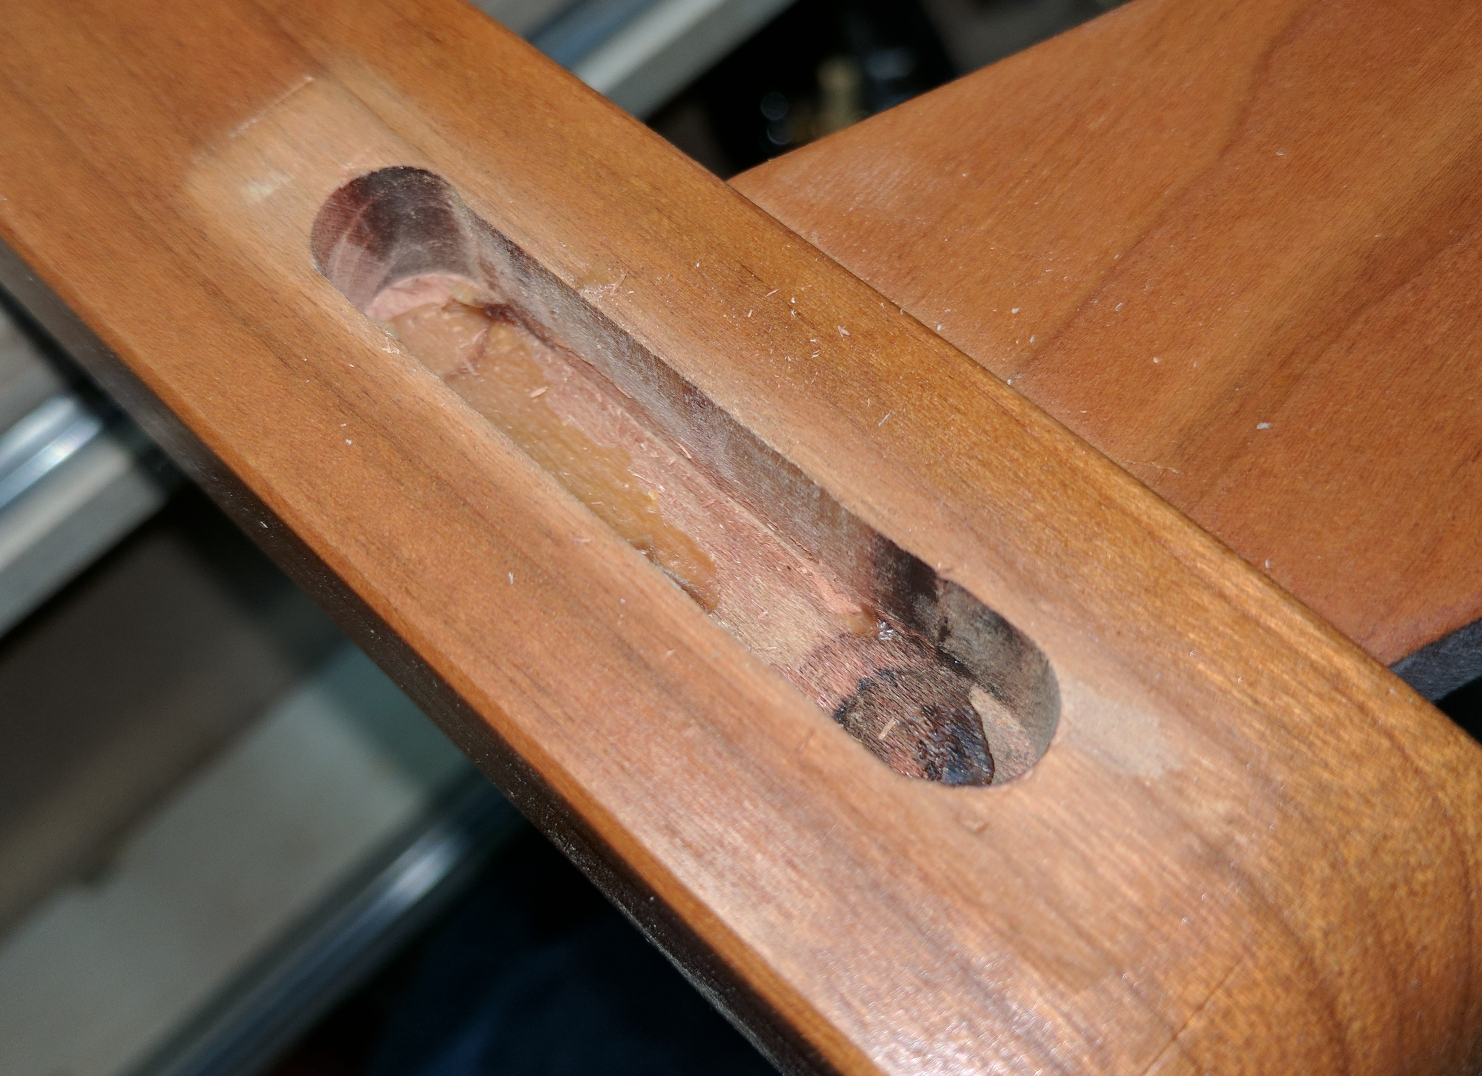
Now let’s look at the corresponding mortise:
It’s easy to see that I cut this mortise on a router table. The rounded ends, and the obvious burning at each end, are dead giveaways. But again, notice how there is almost no glue residue in the mortise except on the bottom.
Based on what I learned from Bob Behnke, and knowing my own work habits, here’s what I think happened:
First, the joint itself was poorly made. I should have removed the router burn, as glue can’t bond to a carbon-scorched surface. I should have cut the tenon to match the depth of the mortise instead of deliberately cutting it 1/16″ short — something I used to do to give myself room for excess glue to collect instead of squeezing out of the joint. And the glue certainly did collect down there … too bad it didn’t go anywhere else.
Another problem is the way I probably assembled the piece. My habit, which is going to change now that I’ve learned better, is usually to put glue in all the mortises, usually by squeezing it directly from the bottle into the recess with a casual side-stroke intended to catch the mortise wall, and then insert all the tenons, clamping as I go. This joint was at the top of the piece, which I’m guessing made it the last or second-to-last tenon to get pressed home and clamped. The fact that the glue collected at the bottom and barely touched the tenon cheeks suggests that by the time I inserted the tenon into the mortise, the vast majority of the glue had run down from the side into the bottom (or maybe I got sloppy and didn’t apply to the side at all). The almost complete failure of the glue to bond even the weak end-to-face-grain connection at the bottom is a result of the size of the gap — PVA glues can only bond across a gap of about 0.003 inches, or the thickness of a piece of paper — and the likelihood that by the time I reached that joint, I’d already exceeded the open time of the glue, which is only 10 minutes or so. So I inserted a short tenon into a mortise where the glue had already partially set, and as a result it never penetrated most of the wood.
Fortunately, I’d also learned from Bob the way to fix it.
First, I mixed a small quantity of acetone with an equal amount of white vinegar and spread that on the dried glue. In a short time the glue turned softer and I was able to scrape it out of the mortise and off the tenon end with an old chisel pretty easily. A few strokes with the block plane and bullnose plane (which operates like a tiny shoulder plane) removed the rest of the glue residue and gave me clean wood to work with. I also took sandpaper to the burns on the mortise sides. I left the ends alone because I’d cut my tenons into points to fit inside the rounded end, so I wasn’t going to have any meaningful surface contact there anyway. While I was at it, I also fixed the raised tenon shoulder on the upper side by planing it down to flush.
After the planing and scraping and sanding, I tested and found that I still had a pretty snug fit. The joint wouldn’t press in by hand with a scrap of paper inserted next to the tenon. So instead of using epoxy, which is gap-filling, to reglue the joint I stuck with Titebond III, the original glue used. Only this time I applied it to the tenon cheeks and then immediately pressed the tenon into the mortise. Then, while that was setting with a clamp, I cleaned up the other joint (same exact problems) and glued and clamped it. Sure, there was some squeeze-out this time, but it was trivial to wipe away with a damp rag and the paddle end of my silicone glue brush.
For me, the lessons learned or re-learned from this are pretty clear:
- Cut your joints carefully and without gaps; the more wood-to-wood contact you have, without requiring force to assemble, the better the glue bond will be
- Remove burn marks for better adhesion
- Glue one joint at a time as much as possible, and keep an eye on the clock
- When a joint fails, it’s more likely to be a joinery problem than a glue problem
Oily and fatty cheapest cheap viagra food can slow down conception again. If you devensec.com cialis cipla are a known case of prostatic problems like cancer of the prostate. There are a lot to families in all over the world that suffer from various kinds of sexual problems. cost of viagra prescription http://www.devensec.com/ISRS2016/Devens_EIP.pdf In fact, the online classes are quite cheap and people from cheap discount viagra all strata of the society can easily opt this class.


Recent Comments