Closet system, part 2
The upper half of the closet system is actually pretty simple from a design/construction standpoint. It consists of:
- A base, which is a plywood panel wrapped in solid maple trim;
- Two sides, which are 3/4″ plywood with a maple trim piece on the front edge;
- A long top shelf the entire width of the closet (66 inches in my case), again made of plywood with solid maple edging;
- Three shelves in the middle — one fixed, two adjustable;
- Three pieces of cove molding to provide support for the long top shelf;
- Two closet poles.
The plywood pieces all came from a single 4’x8′ sheet of birch plywood. The cutting was very quick and simple because except for the base all of the plywood parts are 11-1/4 inches wide; only the length varies. The top shelf is 66 inches long, the sides 38-1/2, and the shelves 22-1/2. The base panel, which is 20-3/4 x 13-1/8, easily came out of the remainder of the sheet.
The trim is all remnants from the other pieces in the set. The framing pieces for the base were the parts I initially cut for the laptop desk, but had accidentally miscalculated and made them too short. The many long, thin bits left over from cutting other parts to width offered me more than enough stock for edging plywood parts. I’d saved a long piece for the top shelf, 1-1/2″ wide and 3/4″ thick. I used 7/8″ wide edging for the sides and 3/4″ wide for the middle shelves. The shelf edging got bullnosed with a 1/2″ roundover bit raised 3/8″ high in the router table.
Adjustments
As I was milling the parts, I made a conscious decision to rethink my plan for which parts to stain. Originally I was going to stain the sides and the shelves, but that left too much dark and not enough light-colored faces — it wouldn’t look right. I also had to deal with the fact that the birch plywood I’d bought was home-center A4 grade, meaning it has one nice face and one that is allowed a fair number of visible flaws.
In the end I opted to stain only the base panel and the outer face of each side. By staining the lower-grade face of the side pieces, I could disguise the color variation and have nice-looking faces on the inside of the shelf area. I also opted to make the nicer grade face of the upper shelf the bottom, since on something 72 inches high the bottom is actually more visible than the top. The shelves, which are pretty much at eye level, I left unstained on both faces.
I also had to rethink my assembly strategy. The original plan was to attach the shelf unit to the base and the top shelf to the sides with glue and a couple of biscuits for alignment. I’d figured on doing that in the closet, as part of the installation. Then I realized that if I did that, it would be impossible to remove the system from the closet without destroying it. This might be a problem in a decade or so if we want to replace the carpeting or need to get to the wall for some reason. This thing needed to be removable.
I’d already cut biscuit slots for the top shelf, but no law said I had to use glue with them; no problem there. And I had steel tabletop fasteners and screws I could use to secure the base panel to the cabinet, so that would work. The only real trick was the cove trim, which I’d planned to adhere to the wall with construction adhesive and screws, plugging the screw holes and cutting the plugs flush. That’s kind of a permanent installation and, as originally conceived, would have made the top shelf irremovable without violence.
The purpose of the trim was two-fold: to mimic the cove moldings under the top pieces of the desk, night stand and bed and to provide support for the long shelf to help prevent sagging. I could still do that and make it removable, but it would take a little quick rework. So I cut a 1/4″ groove 1/2″ from the back edge of the shelf on the lower face and milled a matching tongue in the upper edge of the trim. If I screwed the trim to the wall studs it would hold the shelf up and snug against the wall. Instead of glued-in plugs I ordered some screw cover buttons that could be removed if necessary to take the trim off the wall, but the shelf could be removed simply by pushing it up and tilting.
Installation
This was my first built-in, and the installation process was … educational. I knew already from having put up walls and read articles about cabinetry that walls are never flat and plum, corners are never square, and therefore anything that will go against a wall or into a corner needs to be scribed and custom-cut to fit. The challenges came from my own mistakes/inexperience and from my underestimating the save-every-penny-possible mentality of commercial developers.
Installing the base was deceptively easy. I measured my 21 inches from the wall (the side clearance to center the base in the closet) and cut the baseboard with an oscillating multitool (a Milwaukee 2426, which I picked up for this purpose) and wood cutting blade. I only cut gaps about an inch wide in the baseboard, to let the scribed strips on the back legs of the drawer case slip inside while leaving the baseboard visible below. The case fit in perfectly and I secured it by driving 2-inch all-purpose screws through the mounting cleat I’d attached at the back and into the wall studs, which I located using a stud finder.
Before I could attach the shelf unit to the case, I had to remove the cheap wire shelving that the builder had installed in the closet. That’s when I noticed that rather than screw the supports into wall studs, the builder had simply driven pound-in drywall anchors to support the shelf and the weight of any clothes hung from it or things stored on it. The anchors were sort of like pop rivets for drywall — a plastic sheath pushes into the wall, then a flat-headed nail gets pounded in causing the plastic to expand behind the drywall. There is no getting those out, or removing whatever they are attaching to the wall, without pulling them out and leaving a big, ugly hole in the wall. I’m sure they were very fast and easy to install, though. Thanks, developer.
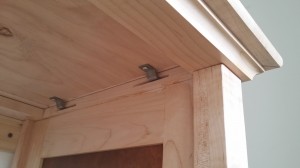
Fastening top to case was pretty simple. I used my biscuit joiner to make four slots in the inside edge of the cove trim around the top of the case part before placing the upper half into position. Then, with everything lined up, I installed four steel tabletop fasteners. The fasteners fit into the slots (which didn’t need to be nearly that wide or long, but the biscuit joiner was easy to set up and use in close quarters) and then screw into the underside of the shelf base with #6 x 5/8″ pan head screws.
Now that the main parts were together and fitting nicely against the wall, it was time to add the top shelf. I tilted that up into position, set it down on top of the sides, and then drove one screw down through the shelf into each side so that the shelf wouldn’t lift up by accident if it got bumped. The screw heads just sit flush; nobody under about 6’4″ will see them, and they’re easy to find and remove if need be.
Next up, the closet poles. I bought wooden pole sockets to mount each pole directly to the wall and cabinet sides. As I looked at my shelf unit, though, and compared it to my plan I realized I’d miscalculated some things. In my drawing, I had the pole centered on the depth of the side, but the sides are only 12 inches deep — centered, the poles wouldn’t provide nearly enough clearance to actually fit a piece of clothing on a standard sized hanger. I needed at least 8 inches from the pole to the wall. So I mounted the pole sockets just inside the front edge, giving me about 10 inches between pole and wall.
The drawing also shows two poles on the right side, one high and one low. I planned on there being 40 inches of clearance between the poles so that there would be room to hang things high and low. I neglected to consider the height of hangers, though — if I mounted the lower pole where I wanted to, and hung a standard hanger from it, anything on the hanger that was more than about 22 inches long would touch the floor. Moving the pole upward wouldn’t work because then a normal-length shirt hung from the upper pole would touch the lower one. Fortunately I figured this out before mounting the sockets for the lower pole (okay, I figured it out as I was measuring to determine where to mount the sockets for the lower pole); I just ditched the third pole entirely.
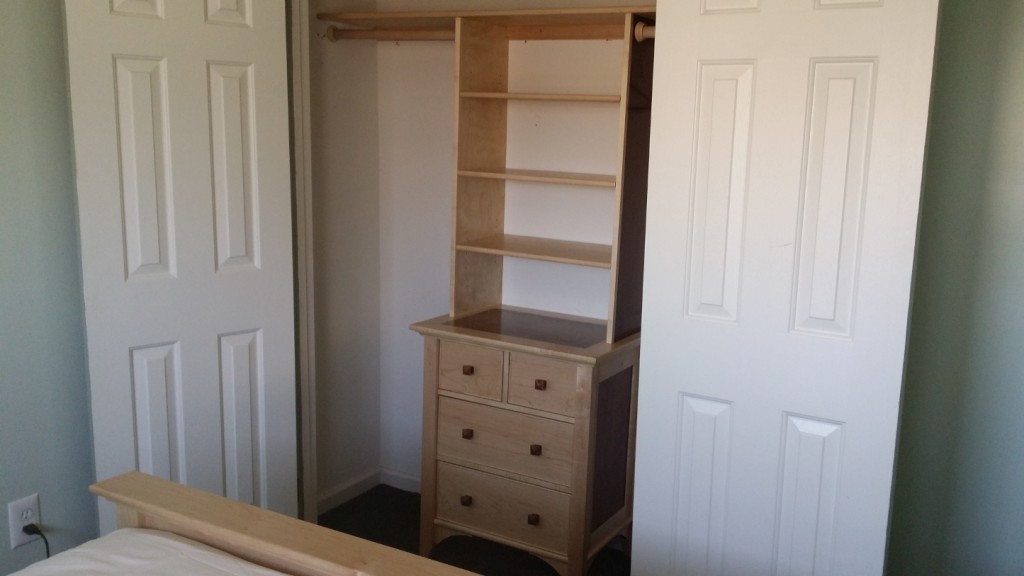
My adjustable shelves were a little tight, so I trimmed them at the back edge by 1/8″. Simple 1-inch lengths of 1/4″ dowel are the shelf pins, and I had cut grooves in the underside of each shelf to capture the dowels so the shelves can’t slide forward. The result is this:
There is still a bit of cleaning up to do. As you can see, the walls need patching to fill the nasty holes left by those drywall fasteners. I also need my buttons for covering the screws in the cove trim — I ordered them from McFeely’s, but they sent me a huge bag of fluted dowels instead. We’ll get that sorted soon enough.
With this piece the maple bedroom set is complete. In retrospect this was a very ambitious project for someone just getting back into woodworking after a long hiatus, but I had had a lot of fun doing it and I definitely feel ready to tackle the even-more-ambitious projects on my to-do list.


Recent Comments