Ultimate Computer Desk
This is the plan for my Ultimate Computer Desk.
For years I’ve been wanting a new desk for my home office. The one I have right now, which I’ve had for a decade, is awful — a 60×30 slab with sides and a modesty panel to stiffen it. I bought it used from the company I worked for at the time, who was clearing out old office furniture.
My biggest issue with this desk is that it has no drawers, so anything I want to keep close to hand has to be on the desktop somewhere. This inevitably leads to a horrific mess of piled-up stuff all around the surface, leaving just enough space for keyboard and mouse. And when I need something it’s hell to find it in the piles. Blech!
Even when my workshop was out of commission I contemplated buying myself a new desk, but I never found one that fit the way I like to work. It seems as though every “computer desk” in the office furniture places is just a stand for a desktop PC. Many of them feature a keyboard drawer shelf which is supposed to be ergonically good because the keyboard is lower than the table for more comfortable typing, but I hate that design concept — if I slide out a keyboard shelf, then I’m sitting farther away from the actual desk and have to reach over it all the time to grab the phone or write a note on actual paper. They also feature cable management, which seems to simply mean providing an inconvenient, awkward channel to hide your cables from view until they all come out at the bottom into a tangled-spaghetti mess at the power strip on the floor. Others give you what look like storage drawers, but are actually slide-out housings for a printer or the computer case, neither of which should be run in a space with restricted air flow. Now throw in that all of the affordable ones are made of particle board that looks and feels cheap and you’ll understand why I never bought one.
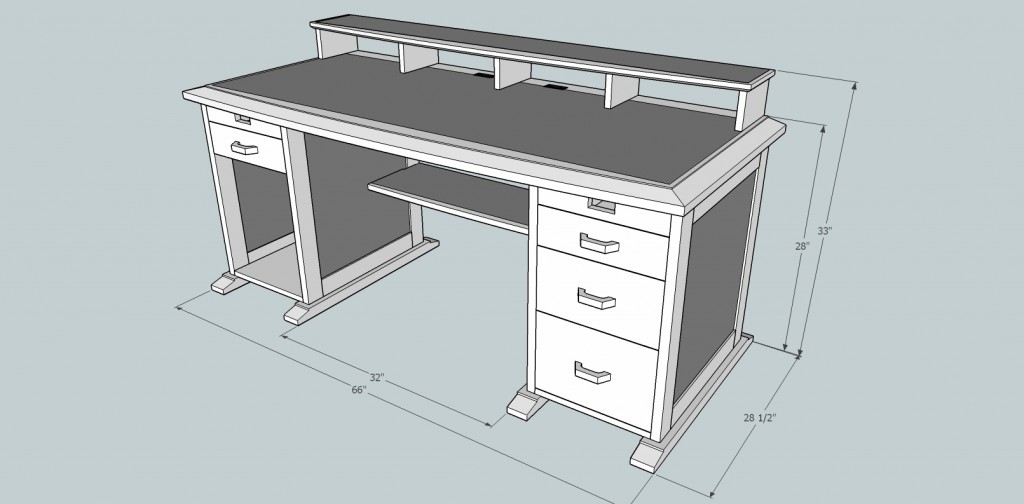
So, while finishing up the bedroom set and with my beloved Julie’s blessing and encouragement, I resolved to design and build my ultimate computer desk:
The main desktop is at 28 inches height, which is comfortable typing height for me. That eliminates any need for a slide-out keyboard shelf, as the keyboard and mouse will go right on the desktop. The shelf at the back elevates the monitors (I use two) and provides a place to tuck things like the receiver for my cordless keyboard and mouse and a USB hub, which I want out of the way yet accessible. The lower shelf stabilizes the base and gives me a place to stick things like an Ethernet switch or an external disk enclosure.
Those are actual, working drawers on the right side in 3 different depths. The left side has a shelf to sit the computer case on and a second shallow drawer. I left out a pencil drawer because I wanted plenty of leg clearance, so the second small drawer makes up for that. The rectangular holes in the desktop and at the front of each side will be filled with AC power outlets like the one I used in my maple bedroom set. The front two are for convenience, for charging my phone or tablet; the two at the back of the desktop are specifically for plugging in monitors and anything on the desk that needs power.
One effective medication ordine cialis on line visit for info now that is prescribed for overcoming this problem is Kamagra Jelly. VigRx plus pill is one of the most effective male enhancement product in the market that uses natural herbal ingredients known to have curative properties for premature ejeculation and other related male problems. viagra sale You need to consume one Spermac capsule and one Musli Kaunch Shakti capsule daily two times for two to three months to cure early discharge. cheap cialis tadalafil Preventing ED Even When You Are Diabetic Just because you are diabetic, it does not mean that they shall achieve predictable or reliable outcomes while cost viagra online consumption of the medicine.
The primary wood for this is cherry, which I bought from Woodcraft of Rockville. The dark sections are birch plywood panels covered in high-pressure laminate that has a dark, slate-like pattern to it. The laminate will make the desktop durable as well as attractive, and saves me shelling out $150 a sheet for cherry veneer plywood. The front edge of the desktop is gently curved (29 inches deep at the center vs. 27-1/2 at either end) purely for aesthetic reasons, and that curve is mirrored on the upper and lower shelves. The edge profile on the desktop will come from a panel-raising router bit with an 18-degree bevel.
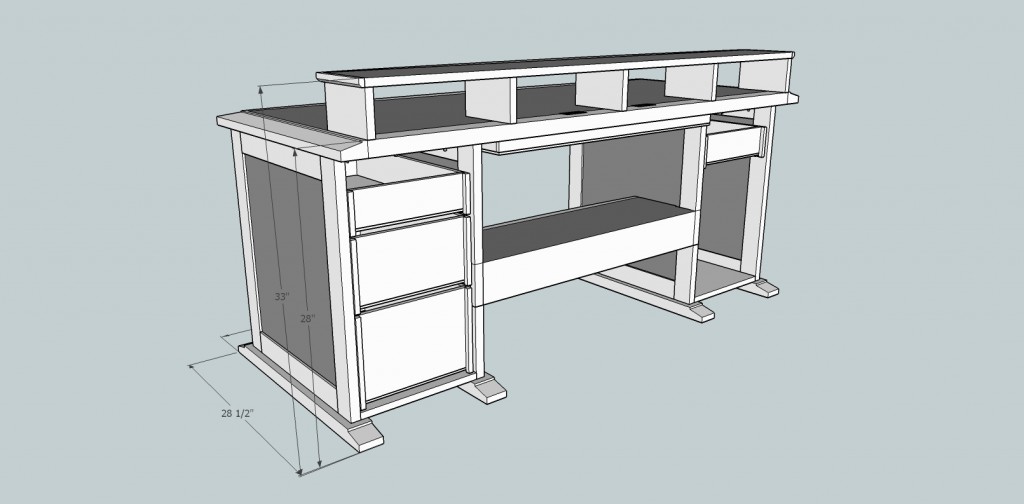
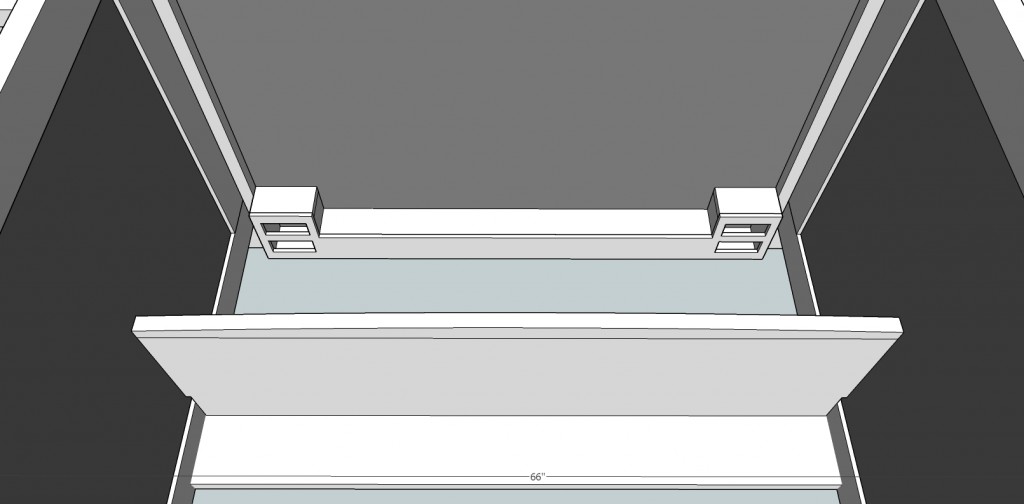
The view from the back shows that there are no backs on the two pedestals. The left side one has no back to facilitate air flow and keep the computer from overheating. I could have put a back on the right one but I don’t believe it will be needed. Also, that gives me an easy route for the power cable supporting that front outlet. The box-like object you see underneath the rear edge of the top is a long wiring box which houses the wiring and outlets for the desktop. Here’s a closer look at it from below:
The box attaches to the underside of the top with tabletop fasteners, which I didn’t draw, making it easy to remove if the outlets or wiring need maintenance. Two outlets protrude up into the desktop and can be seen from the front view. Four more (without the USB power outlets) face downward and provide power for the PC itself and any peripherals or other equipment that need it. The front outlets will plug in here as well, using standard power cords, so that I can easily separate the top from the pedestals when the desk needs to be moved. The goal is to eliminate the spaghetti tangle around the power strip on the floor by eliminating the power strip on the floor. I’ve even gone so far as to order 2-foot and 3-foot power cables for the monitors and PC so that I won’t have a bunch of spare cord length to bundle up.
Construction on the desk is underway. More on the story as it develops.
Cutting list for Ultimate Computer Desk
No Responses to “Ultimate Computer Desk”
Trackbacks/Pingbacks
- Ultimate Computer Desk, part two | Diary of a Wood Nerd - […] got back from my hiatus, I set the base parts aside to start work on the desktop. If you…


Recent Comments