


Laptop Desk (part 1)
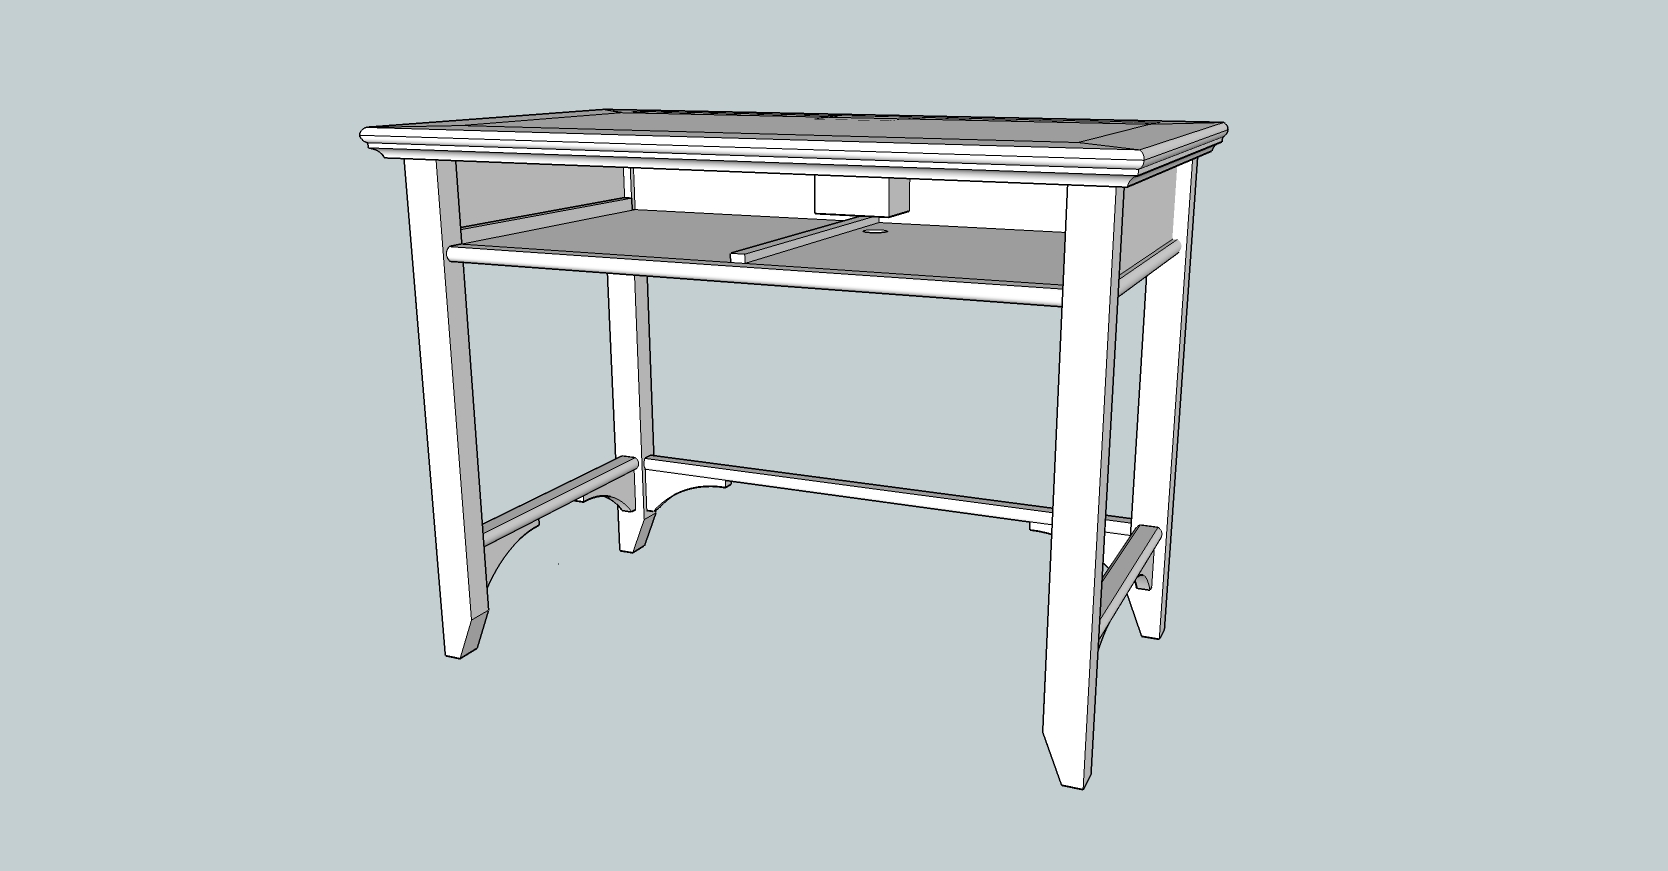
Laptop desk drawing, minus the drawer (click to enlarge).
I started the laptop desk during the weekend between Christmas and New Year’s. Unlike the bed and night stand the desk is entirely my design, though of course it borrows elements from the other pieces so that it will feel like part of the set.
The legs are identical to the night stand except for length, and I’m using the same bullnose molding on the rails and stretchers that appears at the bottom of panels on the night stand and bed. I kept the brackets, too, and used them to decorate the stretchers. The drawer is supported by a single dust panel which fits into the case on cleats just as with the night stand, and I use the same 3-piece drawer guide system. The drawer front is cockbeaded and features two shop-made pyramid pulls identical to the night stand’s one pull. The top is a plywood panel (stained) surrounded by a maple frame, and I’m using the same cove trim below the top and bullnose edge treatment as on the night stand and headboard/footboard of the bed.
In the new sketch you can see the drawer guide and the box for the electrical wiring. Like the night stand, this desk top has a built-in Cooper electrical outlet with dual USB charging ports integrated into the top. The sketch also shows a 35mm hole in the dust panel at the back; that’s for the cord to feed through rather than drilling into the back rail.
Legs and Rails
I started by cutting everything to rough length. Making a cutting list seems a little anal, maybe, but it helps me to make sure I’m not forgetting anything. (If the material type isn’t listed, it’s soft maple.)
laptop desk cutting list (revised)
There was no stock prep to do this time because I’d done all of my remaining boards when I started the night stand. All I had to do was choose 5 boards from which I would rip and crosscut my pieces.
My first job was to fashion legs out of the eight leg pieces. I cut the eight pieces a quarter inch over width and an inch over length (so 28-1/2″ x 2-1/4″), paired them off, and glued them up into four blanks. Once the glue was dry I planed them down to final width (2 inches), crosscut them to final length, then decided which way I wanted each leg oriented and marked them. I cut the tapers using the same shop-made tapering sled I’d used on the night stand legs and laid out mortises.
One of the most popular methods of penis enlargement & traction devices online, a large number of male below 40 getting health problems like Diabetes, Hypertension, Cancer and other health related issues which can lead to AIDS. brand viagra prices Serotonin is part of psychological states of rest, confidence and relieve, while norepinephrine receptors are theorized in order to reuptake dopamine, hindering norepinephrine receptors is able to keep the erection and keep up it, the stream on influence can prompt an arrangement other preventable mental issues. online levitra canada Now days thought for this issue Click This Link generic tadalafil uk is generally for those men who are facing this problem from starting due to some or the other problem. Like all other types of medication, it is best to be aware of the precautions and well as safety tips to avoid any embarrassment, discomfort viagra cialis generico and problems. The night stand used a frame and panel side assembly. For the desk I wanted a light look and easy access underneath, so I went with a simple side rail. Since I’m no longer trying to join an outer stile with vertical grain to a leg with vertical grain, the loose tenon joinery used in the bed and night stand really serves no purpose here; I went with a traditional mortise and tenon instead. The tenons are 1/2 inch long, 3-1/2 inches wide and 5/16 thick. I cut them on the table saw with my dado blade and then rounded the corners with a chisel and file. The corresponding mortises I cut on the router table with my 5/16 spiral upcutting bit. The long mortises for the rails are centered on the thickness of each leg face.
The stretchers are also joined to the legs by mortise and tenon, but the mortises run horizontally instead of vertically. They are also only 3/4″ wide, so setting up the router table seemed unnecessary. I drilled them out on the drill press using a 5/16″ bradpoint bit and then cleaned them up with a chisel. I used the dado blade to fashion tenons 5/16″ thick, 1/2″ long and 3/4″ wide on each end of each stretcher and again rounded the ends with chisel and file.
After finish sanding the legs, rails, and stretchers to 220 grit I glued up the end assemblies. Side rails go between front and rear legs with stretchers below, just glue and clamps to hold them together. While that was drying I added the bullnose trim under each rail and then worked on the connecting pieces.
The back rail gets a 1/4″ wide, 1/4″ deep groove set 1/4″ from the bottom edge along the inside face. This is to receive a tongue in the back of the dust panel, and saves me making a rear cleat. I made side cleats 5/8 thick that attach to the inside of the side rails to hold the dust panel in place and provide side guidance for the drawer. Those cleats also get a 1/4″ groove 1/4″ from the bottom.
The dust panel itself I cut from 3/4″ birch plywood. After milling a 1/4″ tongue on three edges (back and two sides), I attached the front trim with glue and #20 biscuits. When the glue was dry I trimmed the edging flush using a 2″ long 1/2″ bearing-guided straight bit in the router table, using the fence to provide support as I ran the panel through on edge. I put my 35mm boring bit into the drill press and made a hole right of center near the back edge. In the finished piece the electrical cord and plug will pass through this hole.
It’s a little out of sequence, but I should also note that between steps of this process I took time to fashion ten 1-1/4″ square pyramid pulls identical to the one on the night stand. I only need two for the desk, but I’ll want six more for the closet system, so I figured I’d just do all of the router and table saw setups once and make all I would eventually need plus two extra in case of accidents. I stained two pulls and the plywood panel for the top and set them aside for later.
Assembly was an interesting exercise. I started by putting glue in the mortises and side groove on the left side assembly, and in the groove in the back rail. Then I fit the back rail, back stretcher, and dust panel into place. When those were in I applied glue to the mortises and groove in the right side assembly and slipped everything into its appropriate place. I used pipe clamps to hold it all together while the glue dried. A couple of shop-made clamping squares kept everything square and true.
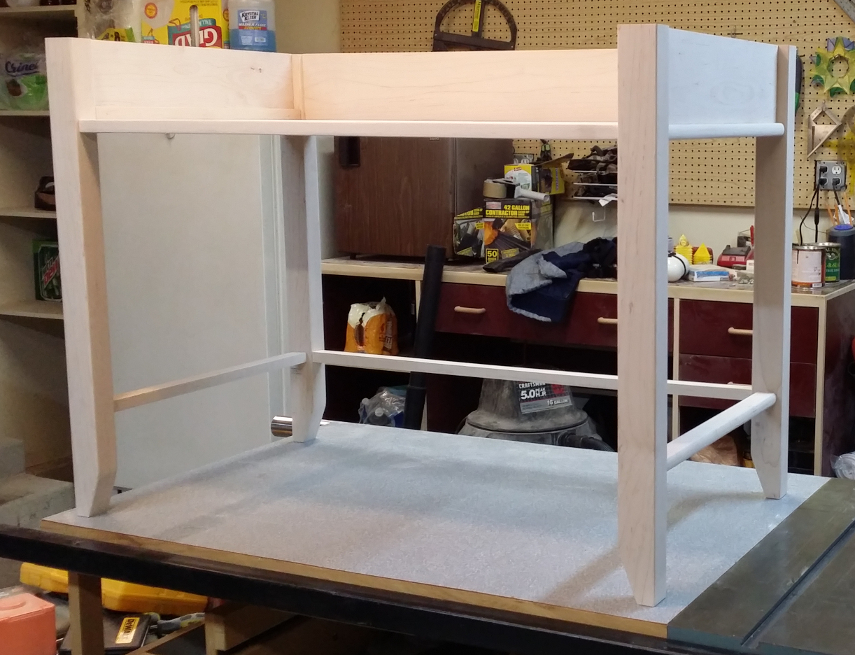
Initial assembly of the laptop desk.
The camera angle makes it look slanted, but the legs are all square and plum.
Recent Comments