Part 1: Crosses
First up was the pair of St. Andrew’s crosses, which are normally pretty straightforward. I looked at a lot of designs online, and the first thing that struck me is … well, they are almost all made out of ugly construction timbers. Heavy, plastered in polyurethane, and not at all pleasant to look at, but certainly plenty strong.
I figured we could do better, and make it break down into pieces under 5 feet long so it could be transported in a car. I did find a set of plans for inspiration, but I deviated from them a lot as I went so this was largely an improvisational exercise.
It started with a visit to Woodcraft to see what they had. They had a lot of ash that day, and it was priced well. They also had heat-treated ash, which I’d worked with before. So I took liberal amounts of both home and started constructing.
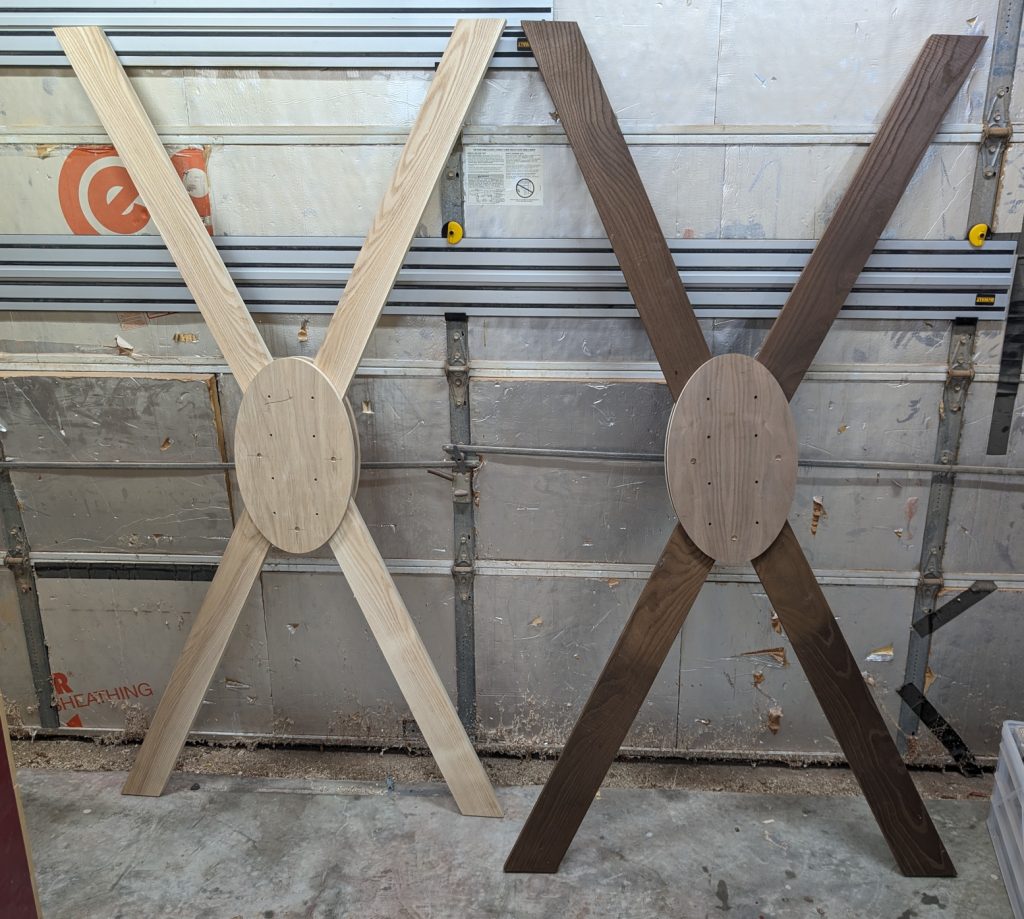
The first problem to conquer was forming a cross from 4 individual legs, so that they would fit in a smallish space. I thought about fastening them all together with mortise and tenon joints, but the multiple angles made that seem too difficult; I decided on a design that bolted the individual legs onto a front and rear plate instead. I took this idea from some of the crosses I’d seen online, and drew that up in SketchUp. The legs would splay at a 25-degree angle and would be held immobile by two bolts each running from the front plate through the legs and out the rear, where hand knobs could be used to tighten them.
I started by drawing the plates in vCarve so I could cut them out on the CNC. An oval shape looked good to me, and I had the machine cut the 8 holes and mark crosshairs where the legs would fit. Then I cut my 4 legs and placed them inside and used the CNC holes to drill through the legs themselves. I was able to mount the legs and send 3-inch carriage bolts through the top plate, legs, and bottom with enough left to thread on 3-wing knobs.

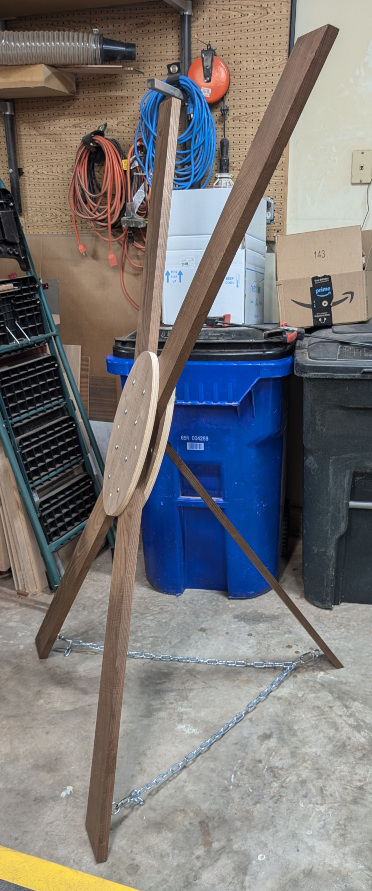
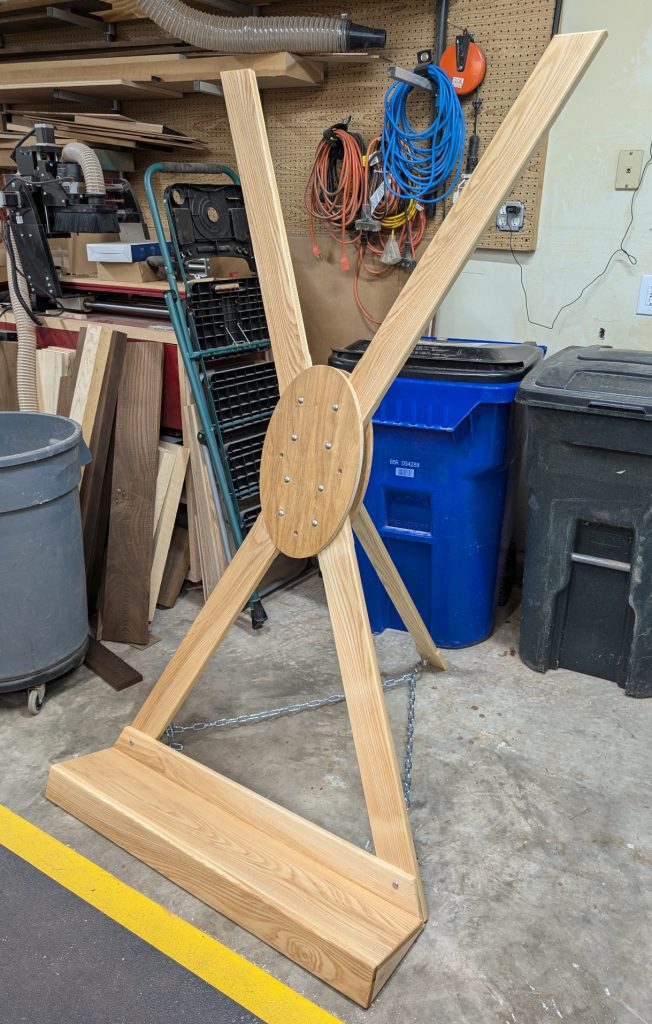
So far, so good. In order to stand at about a 15-degree angle, though, they would need an extra leg extending back, and that leg would have to be held in place. My solution was to extend the leg from the rear plate, attached with a simple door hinge, and use chain to secure it at full extension to the other two lower legs.
Except I discovered that the plywood was too easy to pull the bolts through by overtightening them! So I first made mortises to insert some actual wood at the back, to make the plywood stronger, and that worked nicely. A little standoff block gave me room to hinge on the support leg, and some large screw eyes formed mounting points where I could secure the chain.

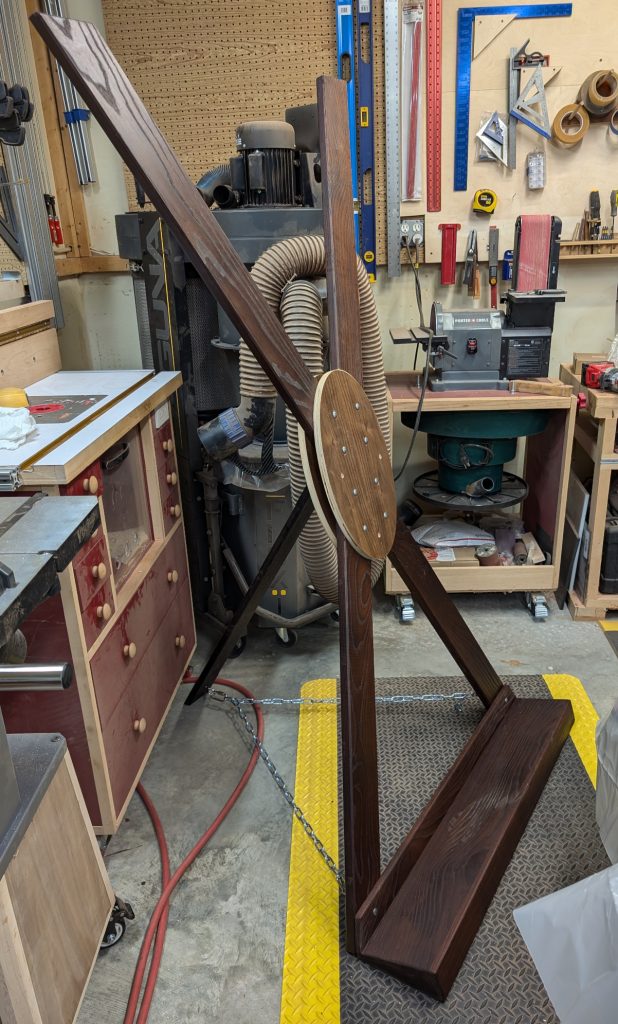
Now I just needed a platform for the front so a person could stand on it and be tilted back to that same angle. So I cut a bunch of 15-degree wedges, applied them to the bottom of a step, and put an extra piece at the top back and bottom front for show. They connect to the legs with simple lag bolts and more hand-tightenable knobs, and the woodworking was done.
For finish, I want with tried and true Arm-R-Seal on these. Hard wax oil probably would have felt better, but it’s not very durable and these crosses are going to be put through more abuse than dining chairs. Arm-R-Seal will keep them protected better.


The last piece was to upholster the front ovals, and I shopped that out to someone else. They came out nice, but I forgot to take a photo before the completed crosses were picked up. So just imagine about 2 inches of padding and nice marine-grade black vinyl on both front ovals.
Next up, a bit more complexity as I try my hand at spanking benches.


Recent Comments