Part 3: A Pillory
Now things start to get really interesting, in a medieval way.
Centuries ago, lesser offenses were considered unworthy of jail time; instead the miscreant was put on display and the general public invited to insult, abuse, and otherwise make their lives miserable for a few hours (or longer). All kinds of devices were used for this, but the most recognizable of these were probably stocks (also called a yoke) that fit and locked around someone’s neck and wrists, or possibly ankles and wrists. When these devices were mounted on a fixed base or pole, the result was called a pillory. For my next dungeon-equipment project, I needed to produce a pillory that could be easily transported, set up, and taken down again.
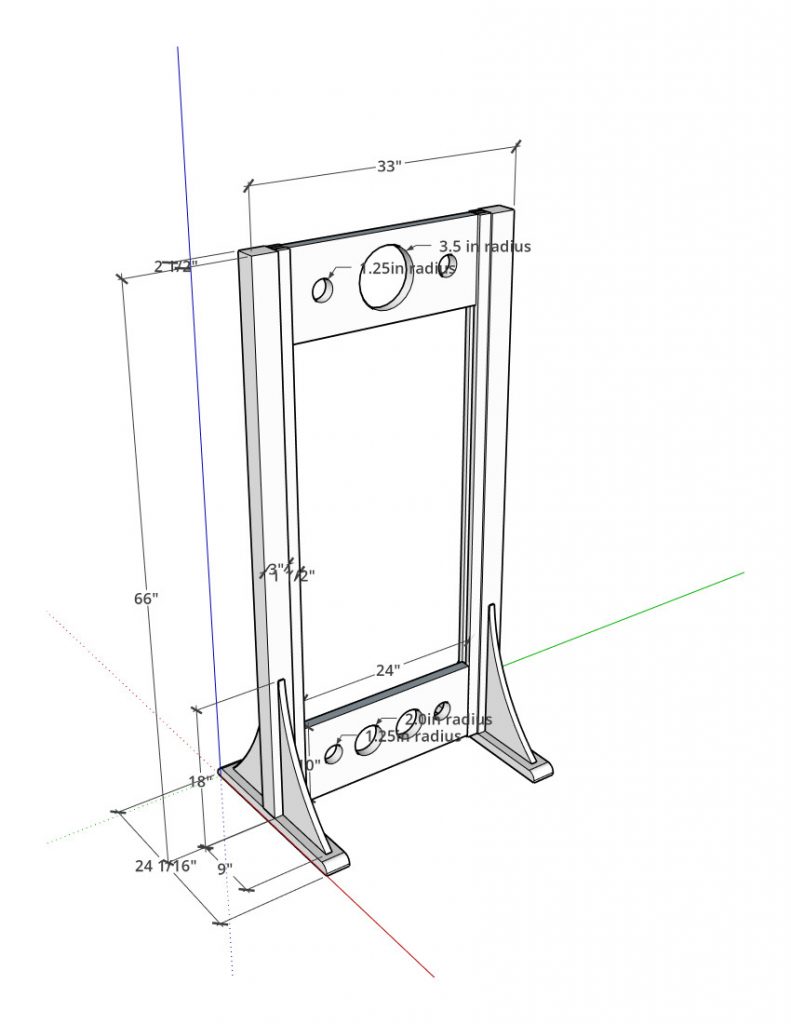
Here is what I came up with:

To make it as flexible as possible, the stocks in this were secured by pins inserted through a series of holes on either side (not drawn). The pillars are freestanding. At least, that was the plan.
It started with more cherry. I cut two large pieces 2-1/2″ by 3-1/2″ by 66″ long and cut a shallow rabbet 1 inch deep along what would be the inside of each. Then I carefully drilled 1/4 inch holes from top to bottom, 2 inches apart, on the drill press. Next, I took the pieces back to the table saw and made a dado just over 3/4″ wide and an inch deep so that the middle was gone and I was left with two identical inner sides, with holes that matched.
Next I made the feet the four braces, which should have been simple. It wasn’t because I had a mental lapse at the bandsaw and cut about halfway through my right thumb, requiring stitches and a heavy bandage. That took me out of the shop for about a week.
But I didn’t have a lot of time so I got right back to it.The braces got tenons cut on the tall side and the bottom, to match mortises in the pillars and legs. (Yes, I had the Domino and deliberately decided not to use it here.) A little simple shaping on the posts — rounding the corners and cutting the tops into a little pyramid shape — and they were ready to assemble.
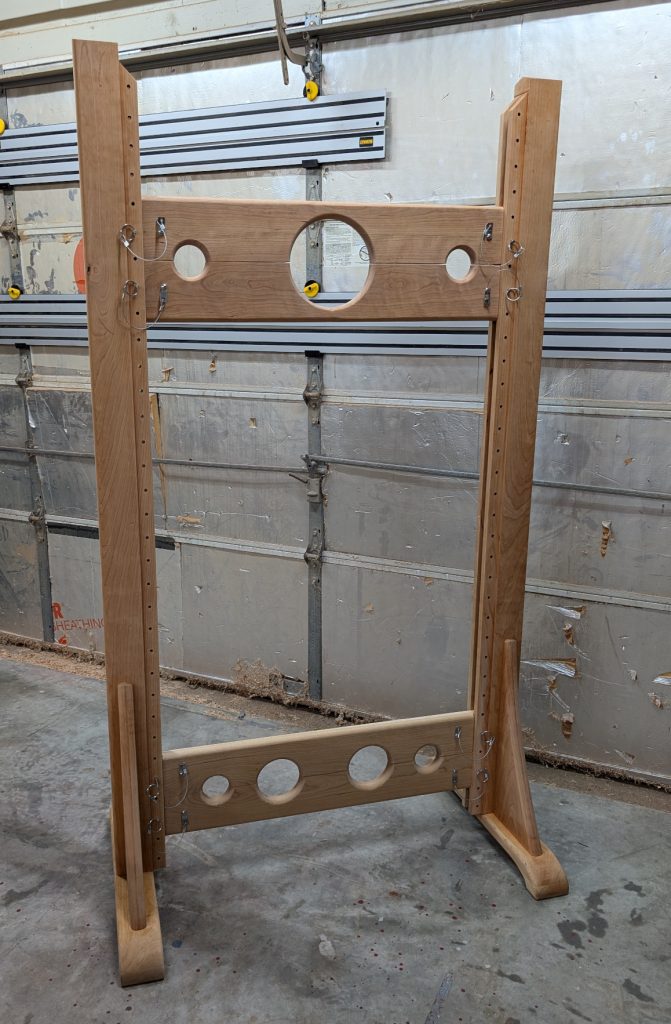
I deliberately made 2 different stocks for maximum flexibility. One has a big head hole and two wrist holes, 7″ wide for the head and 2-1/2″ for the wrists. The other has two wrist holes and two larger 4″ holes that could be used for large wrists or ankles. Both were made out of a whole piece and the holes cut with a router, then shaped with roundovers for comfort. I narrowed the last 7/8″ down to 3/4 to fit into the grooves in each pillar, and drilled 1/4″ holes to match the holes in the pillars. Each piece (top and bottom of each stock) was drilled such that there was exactly 4 inches between the holes, so they would fit anywhere on the pillars and be locked in place with four locking pins I got from Amazon.
The whole piece then got coats of Arm-R-Seal, per usual for this lot.

I anchored the locking pins to the stocks so they wouldn’t get lost, and this one was done. The pillars do not stand by themselves as much as I wanted — they should probably have a wider base to do that — but once one of the stocks is inserted and locked in they are stable. And the stocks can be placed anywhere inside of this, so it is very flexible and can even accommodate two people at once if desired.


Recent Comments