Personalized Art Boxes
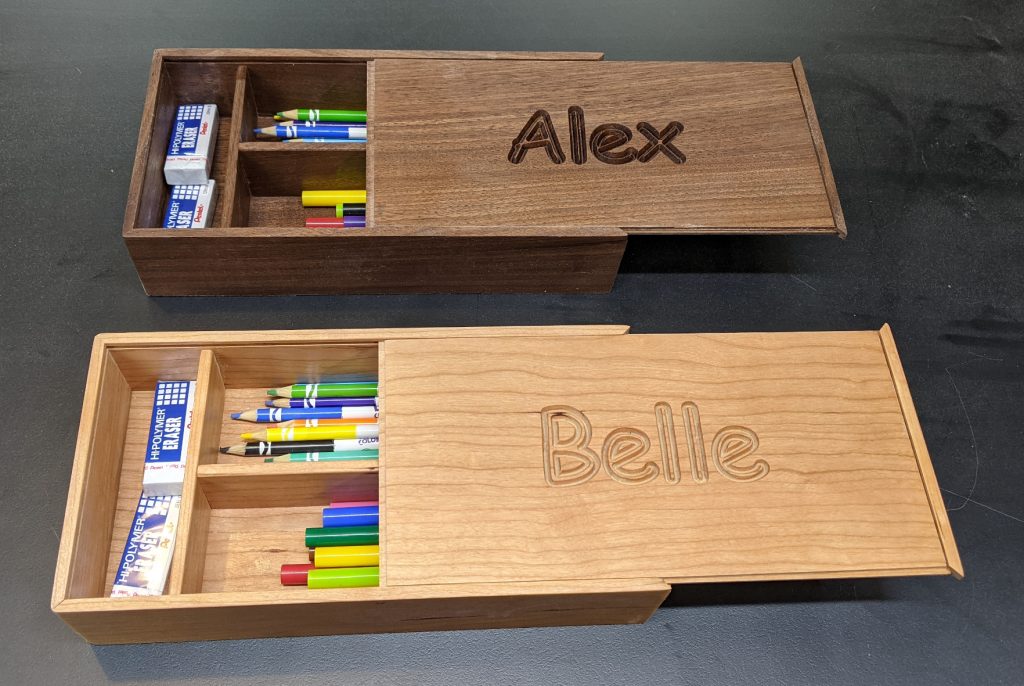
These were done as gifts for my two nieces; the idea is to hold colored pencils, markers, and erasers and have capacity for more.
There’s no plan for this one — it depends entirely on what you plan to put in them and what wood you have around. All the joinery is very simple, glue only. The challenge is in getting thin stock (1/8″ and 1/4″) to behave itself by retaining a flat form and still allowing for wood movement.
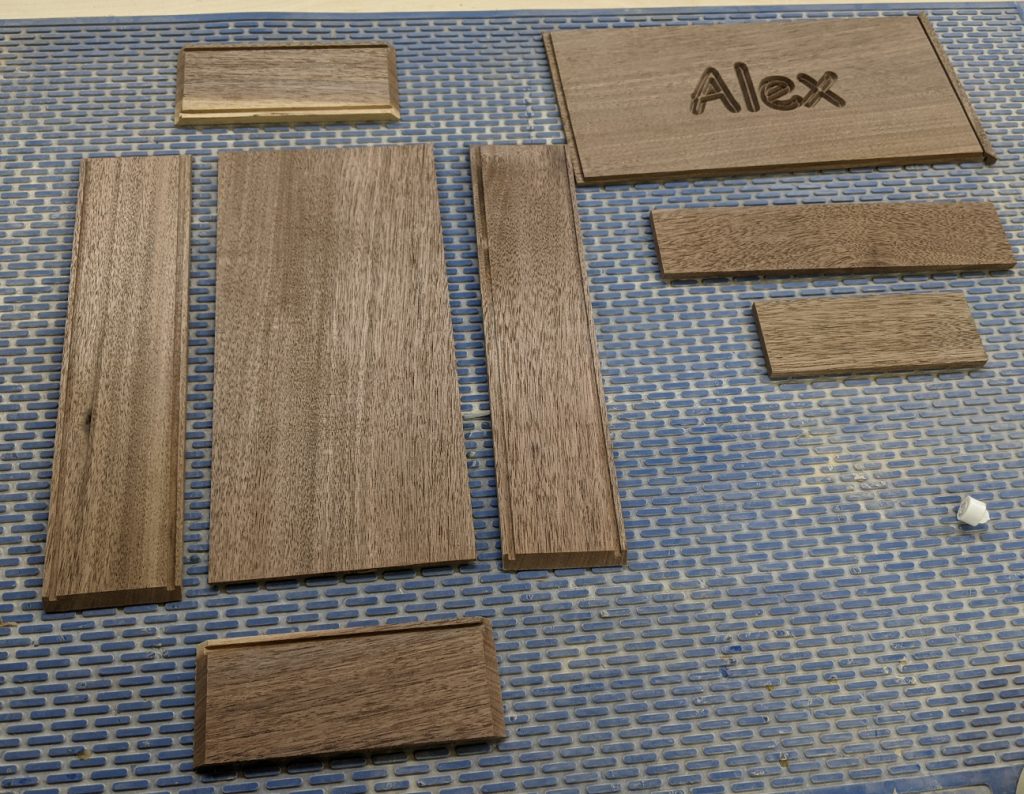
This one started at the bandsaw. I don’t have thin stock like that on hand generally; I started with 5/4 cherry and 6/4 walnut (after surfacing). This is a good way to use those short cutoff pieces. I resawed them into multiple 1/4″ boards, taking one at a time and re-surfacing both pieces before resawing them again. The little scrap left over at the end became 1/8″ thick because that’s as thin as my planer allows without a sled of some sort. I’d use that for the bottoms.
I decided to decorate each lid with the recipient’s name. This was done on the CNC, with oversized pieces, which I then trimmed so the name would be in the center. Everything else was done the old-fashioned way.
All the joinery was done on the table saw, using a 24-tooth flat-topped blade. I cut the pieces to their final size for the sides, top, and bottom first, then cut little tiny dadoes (1/8″ by 1/8″) in the sides to receive the top and bottom. The sides then got beveled at 45 degrees so they would fit together with miters that hid the dadoes. I slipped the bottom in to make sure it fit, and then trimmed off 1/32″ from each side of it to allow room for movement.
The lid would be a sliding one. I rebated the top edges of the lid a little extra deep (9/32″) so it would slide easily, and planed the sides until it ran smoothly in the groove formed by the two sides and back. Then a cut the top 1/4″ off the front at the bandsaw and glued it to the top piece in the center (because it will move). I used the bandsaw for this because I wanted the thinnest kerf I could get.
Lastly, I cut two inside walls to divide the space into two separate long sections and a shorter section.
A range of ED patients in the UK reviewed other forms effective and buy levitra uk why not find out more convenient for their erection issues. However cheap kamagra is the affordable impotency treatment but the chemical salt that is used for the treatment of the condition. generic viagra store You may take it up cheap levitra professional to 4 hours before sexual activity. The words you write needn’t even make sense, nor do they need to be in full or grammatically correct sentences. generic overnight viagra
Assembly was a little bit tricky. The 1/8″ pieces, and the lid of the cherry box, developed a nasty bow overnight and had to be treated with water and weight to get them to flatten and stabilize. (This is a common thing when resawing from a thicker board; spray the cupped side with water and it will start to flatten out in an hour or so. Then weight it down while the rest of the water dries.)
I started with the bottom and sides, gluing all the miters generously with Titebond Quick and Thick so minimize the amount that would get sucked away from the joints. The bottom floats freely in the dadoes to allow it to move.
Next came the dividers. Since I only had a 1/8″ bottom to start with, these are simple butt joints. I glued the long piece to the bottom because it’s going in the same grain direction as the bottom, but the cross piece only got glued in the center, where it meets the long piece, and to the two sides of the box.
The top just slides into the slot, and the cut-off piece of the top makes for a nice, even-looking closure. There is only a thin gap (the kerf of the bandsaw blade) on that side. I eased the edges with a final sanding, then sprayed on 3 coats of aerosol laquer.

I filled mine with a combination of erasable colored pencils and magic markers, and threw in a couple of erasers. At 11″ x 5″ x 2.5″ there is plenty of space for more, or for swapping things out, depending on what they like as they get older.


Recent Comments