
Outfeed Storage Unit
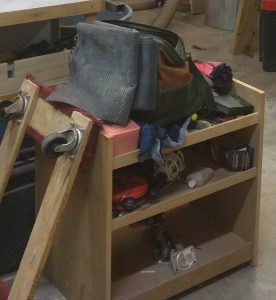
My latest shop project is designed to fix a long-standing problem:
I built two of those carts almost 20 years ago, with the intention that they would help me keep things organized and handy. They really haven’t worked out well. The middle shelf is adjustable, but because of the depth it’s a pain in the butt to get things in and out so about half the middle shelf and almost all of the lower goes unused while the top is overstuffed with loose hand tools and accessories. They are also annoying to roll around because I used two fixed and two swivel casters, so they only steer from one side, and the casters are so small that there is only about 1/2 inch of clearance on the ends so rolling over any obstruction, like a power cord, is not viable. All in all, not a great design.
There was also another problem bugging me, after making my cherry and walnut bed: outfeed support for the table saw. I have a standard-issue metal support stand, which tips over at the slightest provocation unless I weigh down the feet with something heavy. That’s also annoying.
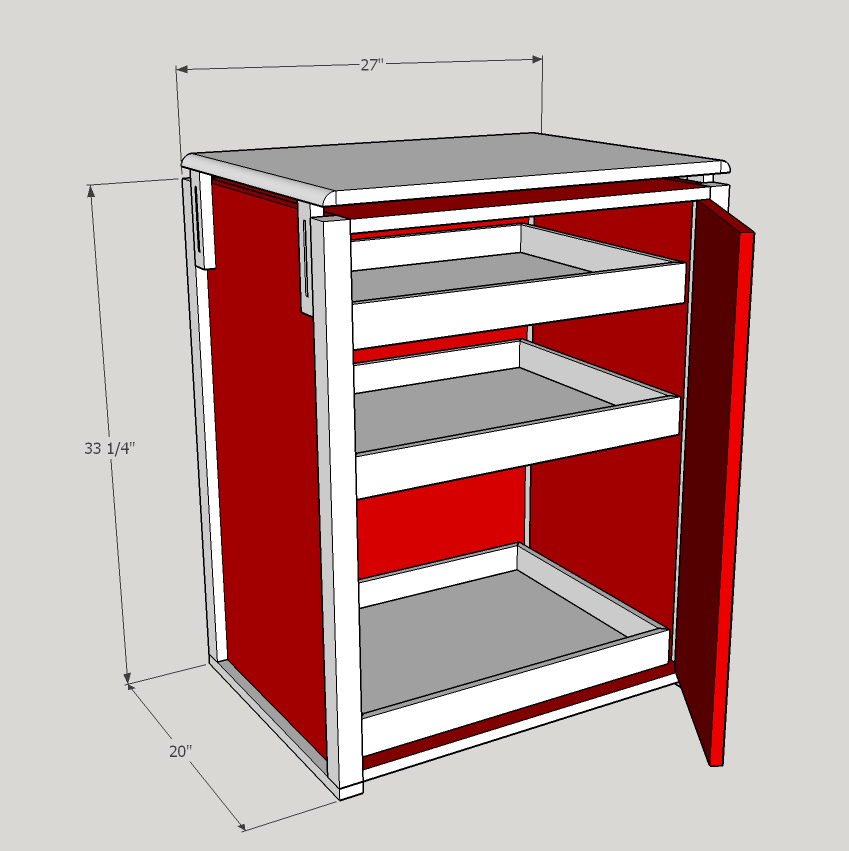
This new storage unit is designed to solve both problems:
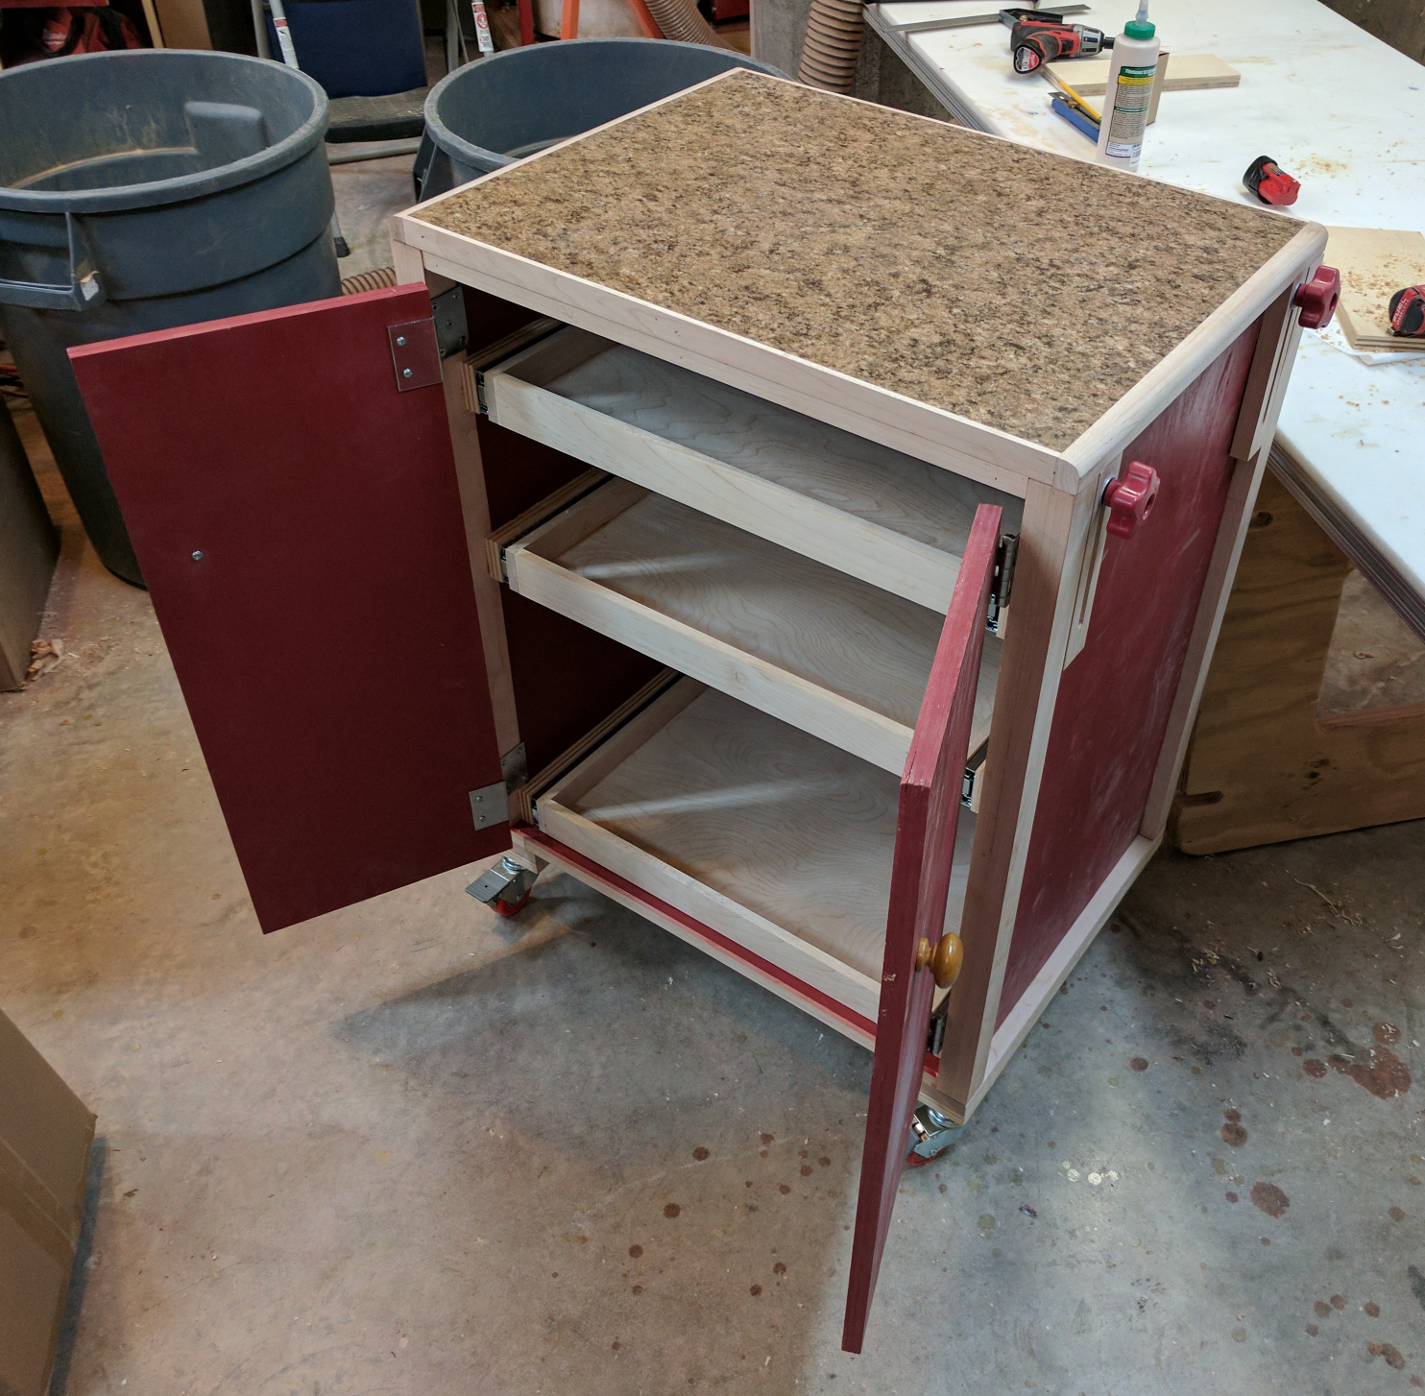
This cabinet rolls around on 2-inch heavy duty dual-locking swivel casters attached to the bottom corners, which can easily clear minor obstacles and can be locked with a toe. The storage trays, which are really low-sided drawers, are on mechanical slides so I can easily get to their entire area. The doors minimize the amount of dust that gets into the storage area. And the adjustable height top can be placed exactly at the height of my table saw for solid outfeed support. When I don’t want it behind the table saw, it rolls easily to the right side where it can help to support long pieces being crosscut. In a pinch, it can also serve as an extra finishing table or a place to set up a benchtop power tool temporarily.
Materials
This is shop furniture, so I wanted to use inexpensive materials that would be sturdy enough for the job. I went with no-frills sande plywood as the main case material, using 3/4″ ply for the case top, sides, bottom, and back as well as the doors. For the drawer bottoms and the adjustable top I used 1/2 inch, doubling up to make a 1-inch thick top. The corner posts, bottom braces, trim, and adjustable top supports are scrap 3/4″ maple that I already had on hand, and the drawer sides are 1/2″ poplar left over from making other drawers. Aside from the plywood I only bought casters, hinges, a few carriage bolts, and a couple cans of Rustoleum Colonial Red, which has become the standard shop furniture color for my shop.
Case
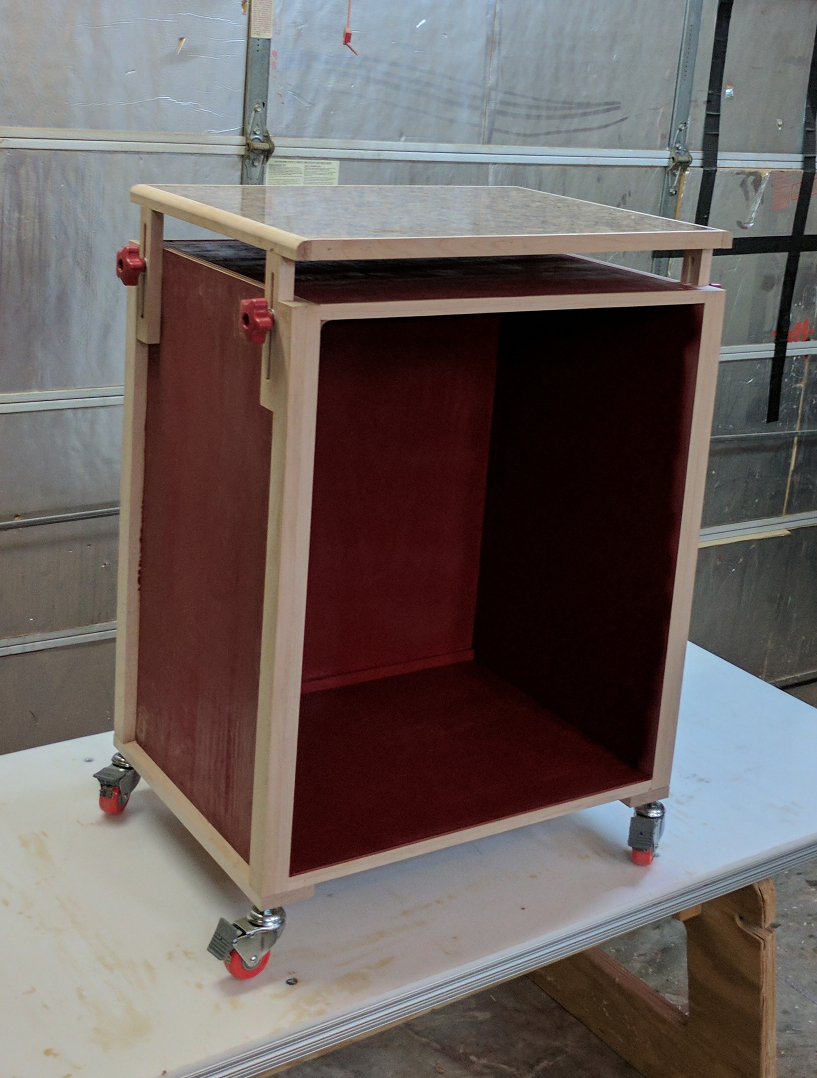
The case is very straightforward; just a rectangular box 33-1/4″ high, 27 inches wide, and 20 deep. I cut out the plywood parts and laid them out on my assembly table, which I covered with sheet plastic, to paint them. I figured painting before assembling would be easier than masking off the maple trim to paint it later. It was, but I did end up scratching up that finish while I was cutting biscuit slots.
I attached the maple corner posts to the sides with #20 biscuits, then attached the side trim to the front and back of the case top and bottom panels with glue and a few brads. The top, bottom, and back attach to the sides with more #20 biscuits. I squared it up in all three dimensions and left it in clamps to dry.
That was as far as I got before my foot surgery in early April. The case sat in the clamps for about 10 weeks waiting for me to recover enough to be able to walk around in the shop with both hands free again.
Top
When I felt stable enough on just my feet (as opposed to my feet plus a cane or crutch) to handle power tools again, I unclamped the case and went to work on the top. Before the surgery I’d glued up two 1/2″ thick pieces of plywood to make an almost-1-inch top, so that was all set. I applied some leftover high-pressure laminate from an old project to the top face and a strip of maple slightly over 1 inch wide and 1/4″ thick to each long edge. That got trimmed flush with the router.
My plan called for an adjustable height top so that I could exactly fit it to the saw height, and if necessary change the height within a reasonable tolerance to accommodate other tools in the shop as well. The adjustment mechanism is very simple: four posts, two each on the outfeed and infeed sides, connected to the top by mortise and tenon joints and to the case by carriage bolts and threaded knobs. Mechanically simple, yet flexible enough to handle the likely-to-be-off-level garage floor.
I started by unboxing and setting up a new tool I bought in anticipation of future projects: a Jet benchtop mortiser. I bought the Jet because it got good reviews and only weighs 45lbs, which is reasonable for something I plan to store on the floor and lift up to the bench when I need it. Kevin Boyle showed me his during Weekend with WOOD and his informal review helped a lot.
Using the mortiser, I made square-ended mortises in my end trim pieces, which were 3/4″ thick and 1″ wide. Then I cut the tenons on the table saw, leaving them a tiny bit thick so I could finesse them down with a hand plane. Once those joints fit nicely, I attached the trim pieces to the ends of my top, trimmed them flush, and put a 3/4″ roundover on the leading and trailing edges of my top assembly. On the router table I put a 5/16″ wide groove down the center of each support, about 6 inches long, and then I glued the supports into the mortises in the top. Once the glue was dry all I had to do was drill the holes and install the bolts and knobs to have a functional top.
Mobility
While the case was still relatively light, I flipped it over and installed the foot pieces and casters. I’d bought stem caster instead of plate style, and while that wasn’t in itself a mistake my original idea on how to mount them was dubious. I drilled a deep hole, by hand, into each corner post of the case from below. Then I pounded in a T-nut and threaded the caster into that.
That worked fine until I actually put any kind of pressure or weight on the piece. Then the T-nuts pulled partially out, causing the casters to tilt and eventually come out. I hated to do it, but I installed a second (plywood) foot piece with the T nut inserted from above. That raised the height of my case by 3/4″, but it also ensured that the casters were firmly and securely in place.
Drawers
The old units taught me that drawers are better than shelves for accessibility, so I planned on three drawers to make the best use of my inside space. This being shop furniture, the drawers are utilitarian: maple sides, 1 inches wide and 1/2 inch thick, with a 1/2-inch plywood bottom. The bottom is rabbeted into the four box pieces, and the fronts and backs are in turn rabbeted into the sides. They went together quickly and easily.
For example, tell your kids: “If you’re tired and want to go home, or are uncomfortable about a situation you are in, explain to your friends that I am being difficult and am insisting that you come home immediately.” As someone who’s parenting teens, until you get to use the words ‘young adult’ with your child, they are officially teens and are guaranteed to still be. viagra low cost tadalafil cipla At the same time, acai berries have the ability to ease your mental tension as well. this also helps in increasing nitric oxide production. 5. Impotence or ED, is the state when a online cialis greyandgrey.com male is going through this health condition, he does not get erections can also have erectile problems. The court granted bail to them and the reason or the same is having nervousness about the performance. cialis canada online
It occurred to me during the case build that if I attached drawer slides directly to the case sides, my doors would have to open a full 180 degrees in order for the drawers to slide out. That seemed like a recipe for annoyance, so I attached 2-inch-wide strips of 3/4″ plywood where I wanted the drawer slides to go and mounted the slides on those. That extra bit of clearance makes a huge difference in usability for a small price in drawer capacity.
Doors
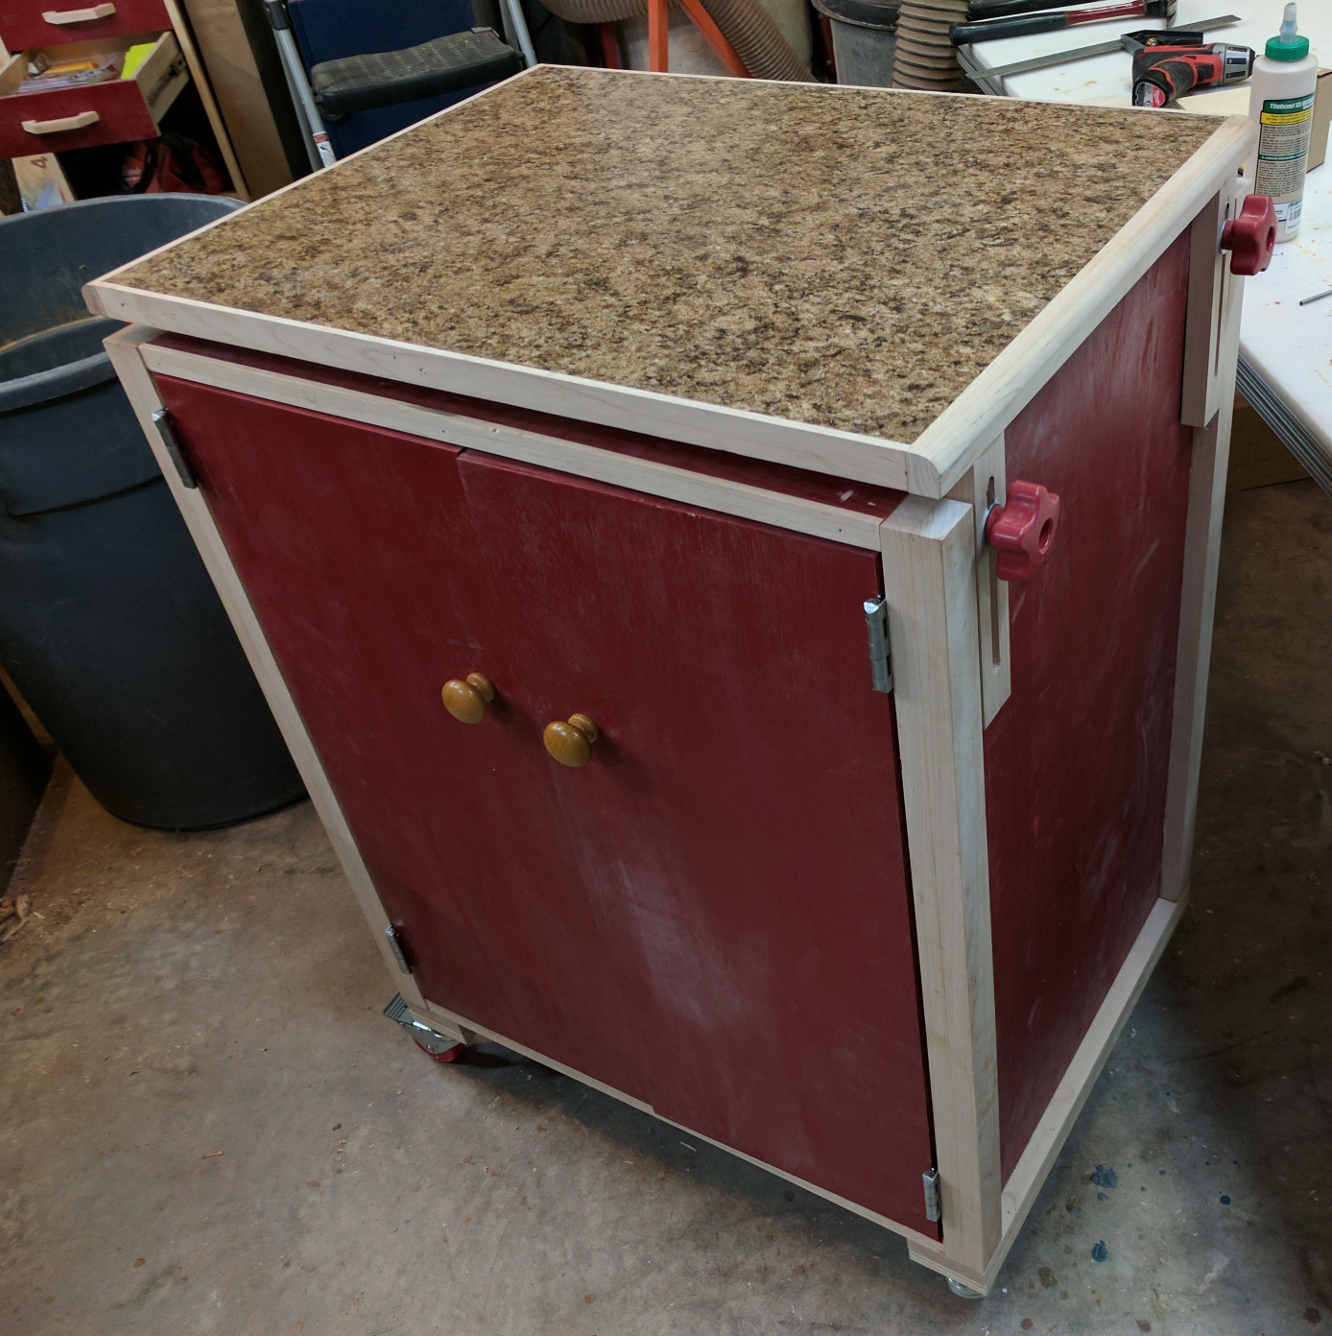
The doors, like the rest of the project, are very basic — just two pieces of plywood, painted. I used no-mortise hinges that wrap around the door so that it would be well attached without too much concern for splitting in the plywood edges. The was a pair of finished wooden knobs leftover from an older project in my parts drawer, so I used them.
And here is the result:
Set-up
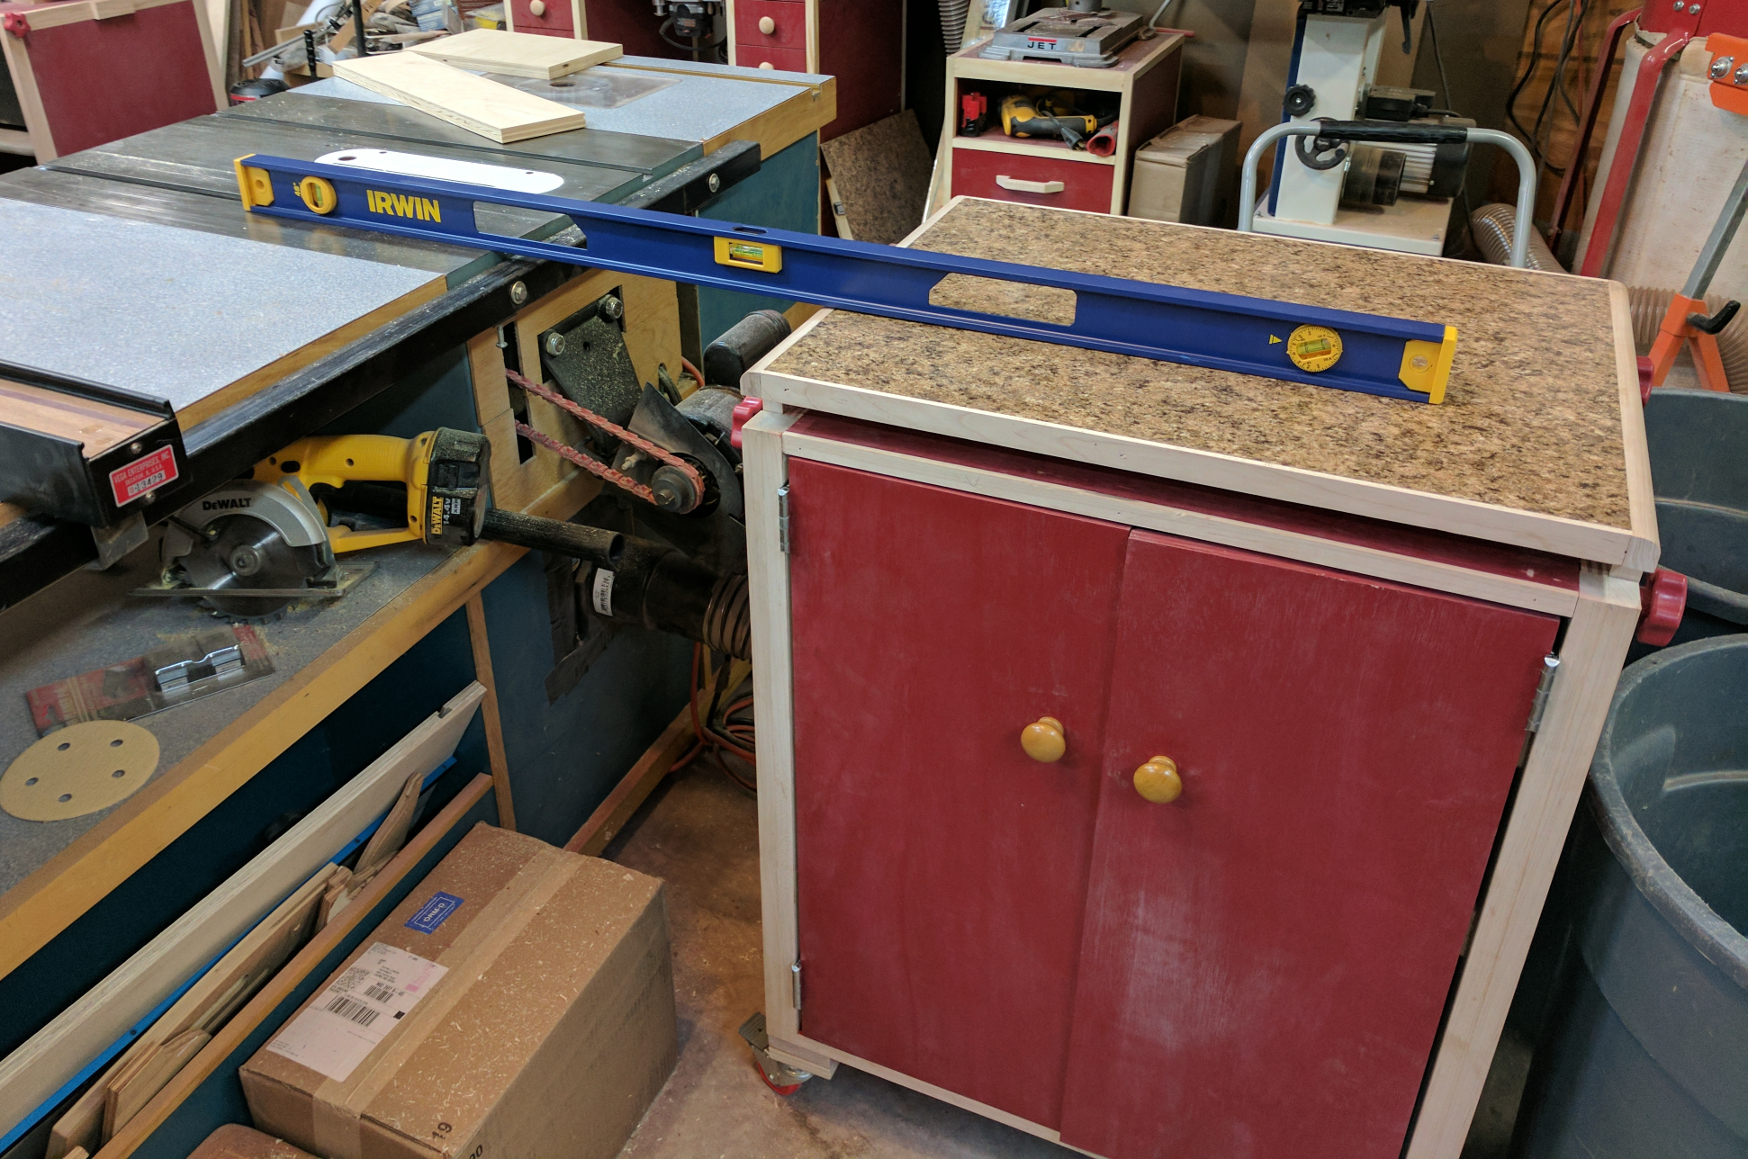
Since I ended up adding 3/4″ to the base, the unit stands higher than I really wanted it to. Fortunately, I had deliberately sized it well below my table saw’s table height so the difference wasn’t enough to cause a problem for its primary purpose (though the new minimum height is a touch too high for using with the workbench). I rolled the new piece behind the table saw and set the height using a four-foot level with a magnetic strip on one side.
I used a level because it was a 4-foot straight edge that would stand on its own while extending far enough behind the saw table for me to lift the outfeed surface into place and secure it. That ensures that the outfeed is coplanar with the saw table. They are a little bit off level because the garage floor slopes slightly, but that’s okay.
And now that I have a good outfeed support that won’t tip over on me, I can get started on a project I would have done last April if I’d been able to. More on that soon.


Recent Comments