Sarah’s New Desk, part 2
So, the desk was coming together nicely. There were only a couple of things left to do to it.
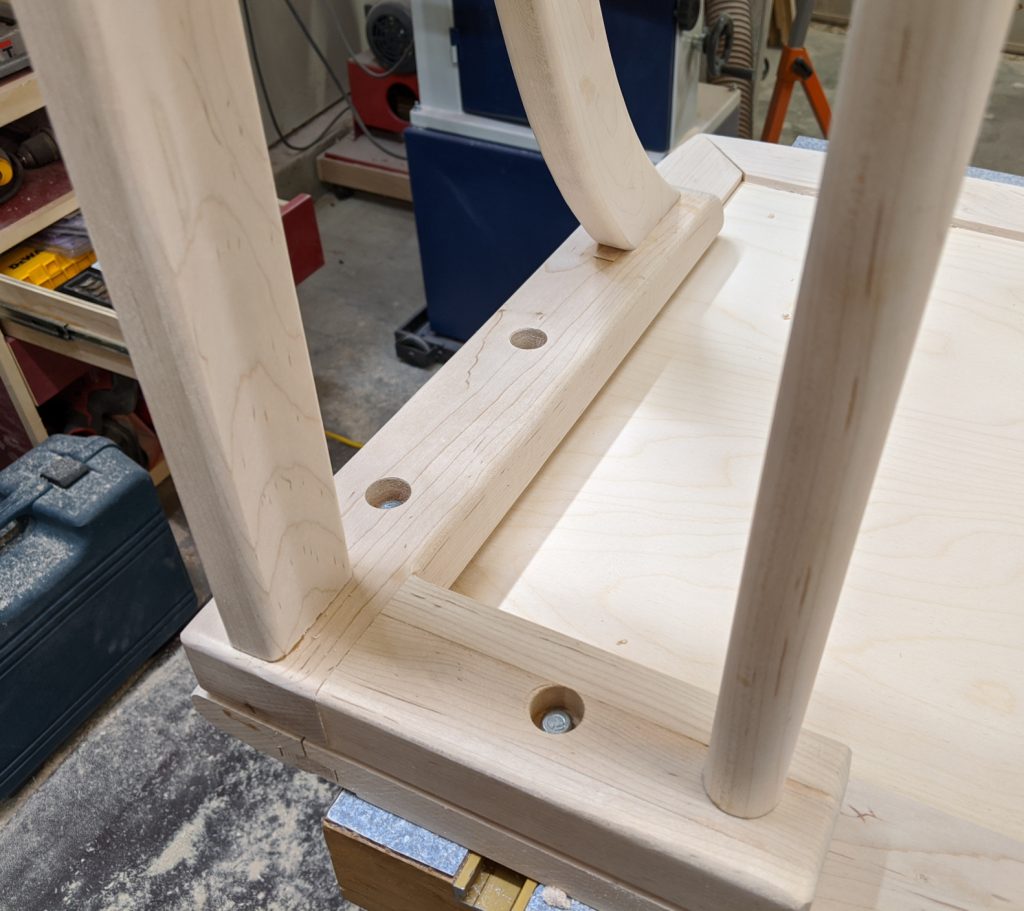
One was to actually join the legs to the base. I decided to do something a little different; I used threaded inserts and bolts. That way only one side of the joint needs to be accessible (as opposed to two sides if I left the nut loose). So I bought a handful and tried them out.
I started by drilling a 5/16″ hole in my legs, which would provide a little wiggle room for a 1/4″ bolt. I used a straight drill bit in the drill press to make sure it was absolutely plumb. Then I used a 3/4″ Forstner bit to make 1/2″ countersinks for the actual bolt head (I knew that would leave enough room for a socket wrench).
Next, I put the legs in place over the top (inverted) and made sure they were in their correct positions. When they were, I used a bradpoint bit — just the bit, no drill — inserted through the holes in the legs to mark the centerpoint of the hole in the top. The bradpoints have that nice spike in the middle that left a nice, easy to follow mark. Then I drilled on the marks with a 3/8″ drill bit to a depth of 3/4″ and screwed in the threaded inserts. I made a guide block to make sure I was still drilling vertically, since I couldn’t support the desktop at the drill press.

It worked really well; I was quite happy.
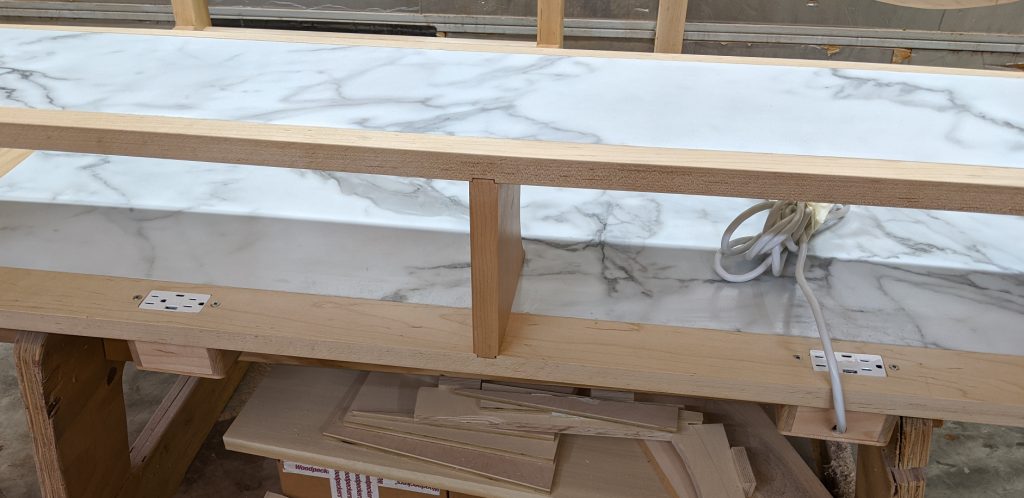
Now I glued on the upper shelf. It was no big deal; just glue in the dadoes and a few clamps held it nicely. (Too nicely, I would discover later.)
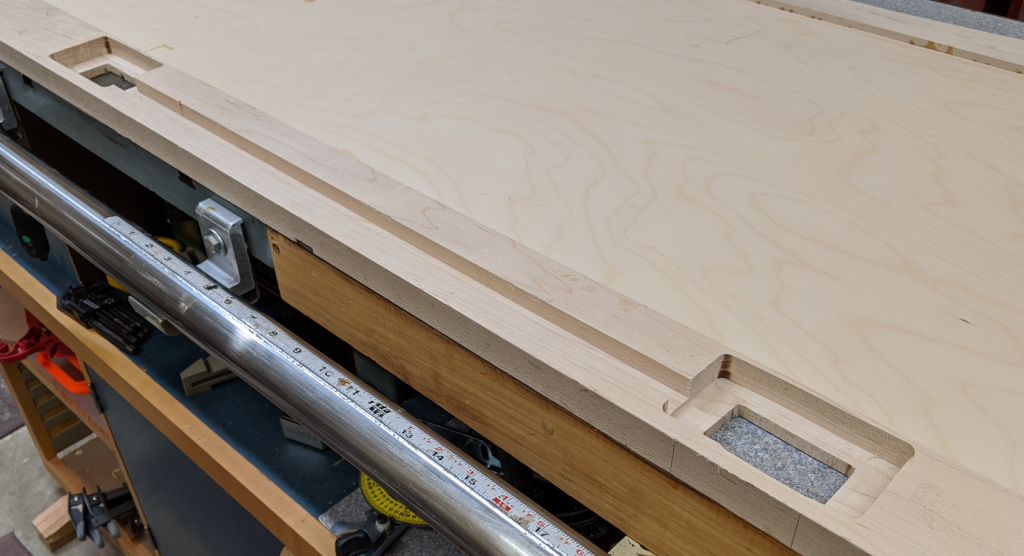
Finally, before finish, I made two boxes 4-1/8″ x 2-3/8″ x 2-3/8″ out of scrap maple to house the onboard electrical outlets. These would fit into routed-out recesses in the top, like so:

I connected the two box cutouts with a groove for the wire to run between them. I cut and carefully press-fit a lid for that wire channel, and then put everything aside to finish it.
A few coats of Arm-R-Seal later, it was time to install the electrics. I bought a 3-wire extension cord from Home Depot and snipped off the outlet side, which gave me a nice molded 3-prong connector with 15 feet of cord attached. That goes into the right-side box and connects the first outlet; then a piece of Romex goes from there to the second outlet. In case the Romex needs replacing, I left the lid to the channel just press-fit into the opening (it’s a tight fit deliberately).

Sometimes sequence is everything. Having attached the top shelf already, my drill wouldn’t fit to drill the holes for the mounting screws! Oops. Fortunately, I’d purchased a right angle power drill that did fit, so it was no big deal. (Funny thing — a couple of months after I bought that, it was featured on a YouTube video of “tools I wish I hadn’t bought”. The guy actually made good points about it; I just haven’t run into the situations he does.)
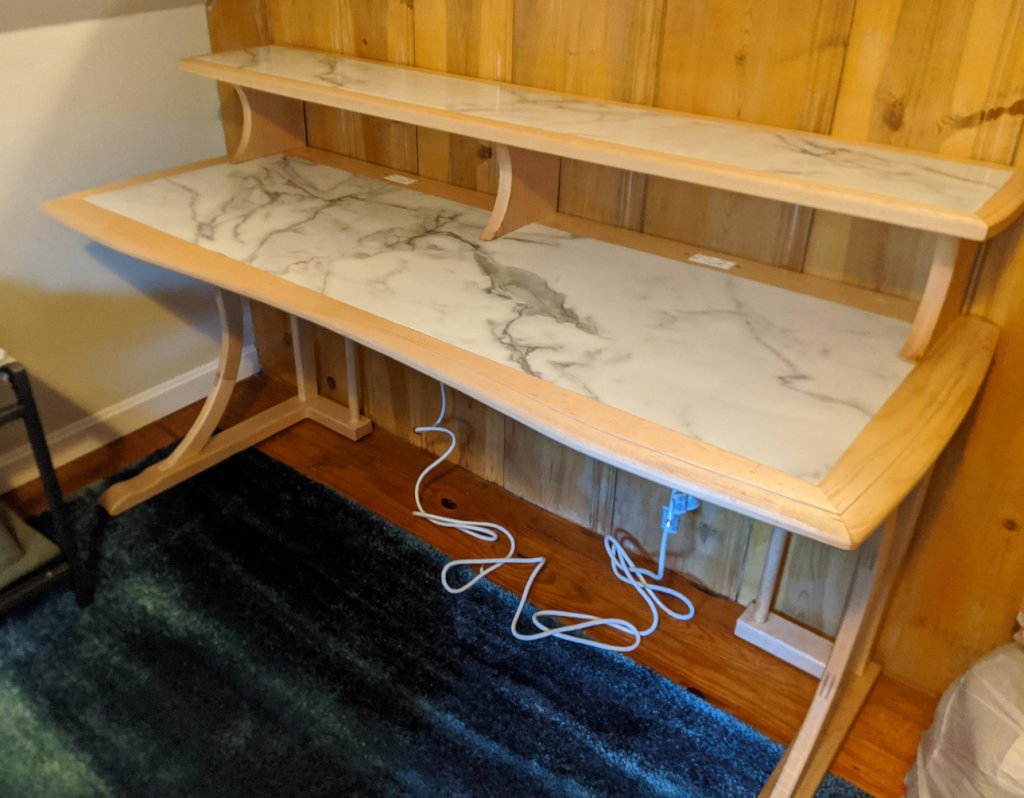
Now we just had to deliver and install it. With the legs removed it fit into my Outback with room to spare. My son Ben and son-in-law Matt helped carry it upstairs, and assembly was nice and quick.

I really like the way this came out, especially the curved front and the big curved legs. Next up is a freestanding drawer unit to go with it.


Recent Comments