
Sarah’s Drawer Unit
This was a great example of what can happen when you start building something before your plan is solid. There was a comedy of errors (except it wasn’t really funny), and they mostly stem from ad-libbing because I didn’t take the time to draw and dimension the unit properly before I ever cut anything.
Here was the plan:
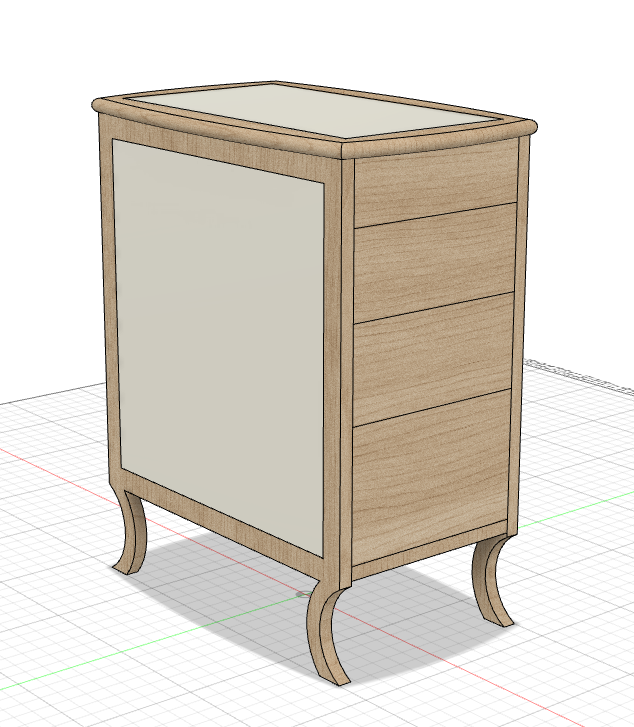
The off-white panels would be replaced by the same marble laminate I used for the desk. There were several problems with this drawing as a starting point for construction:
- It is, overall, too tall to fit under the desk! I made a mistake and drew this as 27 inches tall, when the underside of the desk is 26 inches off the floor. I realized this fairly early in the process but never revised the plan.
- As a direct result of that, the dimensions on the drawers were too big by a total of an inch over the height. Sarah wanted them to be 6, 5, 4, and 3 inches with a 6-inch gap underneath so her cats could fit and fairly open so she’d be able to get a broom under there once in a while.
- The legs could never actually be made as shown. The frames around the plywood-and-laminate panels would, of course, be hardwood and kind of by definition couldn’t include those legs. At a minimum they would have to be cut separately and joined to the frames. And I wondered how strong they would actually be all the way out on the corners.
But I was trying to hurry, so I didn’t revise the drawing. That was my first, primary mistake — not solving those problems before cutting anything. It would haunt me almost every step of the way.
I realized the height problem as I was starting to cut the pieces. I couldn’t just make the legs shorter because of the cat clearance issue, so I had to make the plywood sides shorter instead. I gained a quarter inch back by making the top thinner — 3/4″ instead of an inch — and figured I’d make the drawer fronts a tiny bit undersized to make them fit. The adjusted height was now 19-3/4″ (plus the legs), which still isn’t quite right. But we’ll come back to that.
As I looked at the side pieces in clamps, it occurred to me that they would look a lot nicer if I did a simple detail, like a radius, where the rails and stiles met the panel. The correct way to do that would be with a pair of cope and stick router bits, but I’d already cut my pieces to length and not allowed for that. So instead I clamped the frames tightly together without the panels and used a 3/16″ roundover bit in the router. Which, of course, left rounded corners where the stiles and rails met. Coping would have looked much better.
Then it was time to address the drawers. This was already a narrow unit — exactly 10 inches from inside face to inside face — so sacrificing another whole inch to drawer slides was not a good idea. Instead, I decided to embed 1/4″ strips of wood into the sides and capture those inside grooves in the drawer sides. Almost zero overhead that way, and I’d done it before so it was a familiar process. Piece of cake.
I grabbed a 23/32″ straight bit (figuring I’d then use a 3/4″ bit in the drawers), measured out where my runners should be, and cut the dadoes in both pieces. Having a router table in the table saw helps a lot here, because I couldn’t have done these dadoes on my main router table — not enough support or table depth. Then I reached for a scrap of 3/4″ thermally-modified poplar and milled matching strips. It looked pretty good.
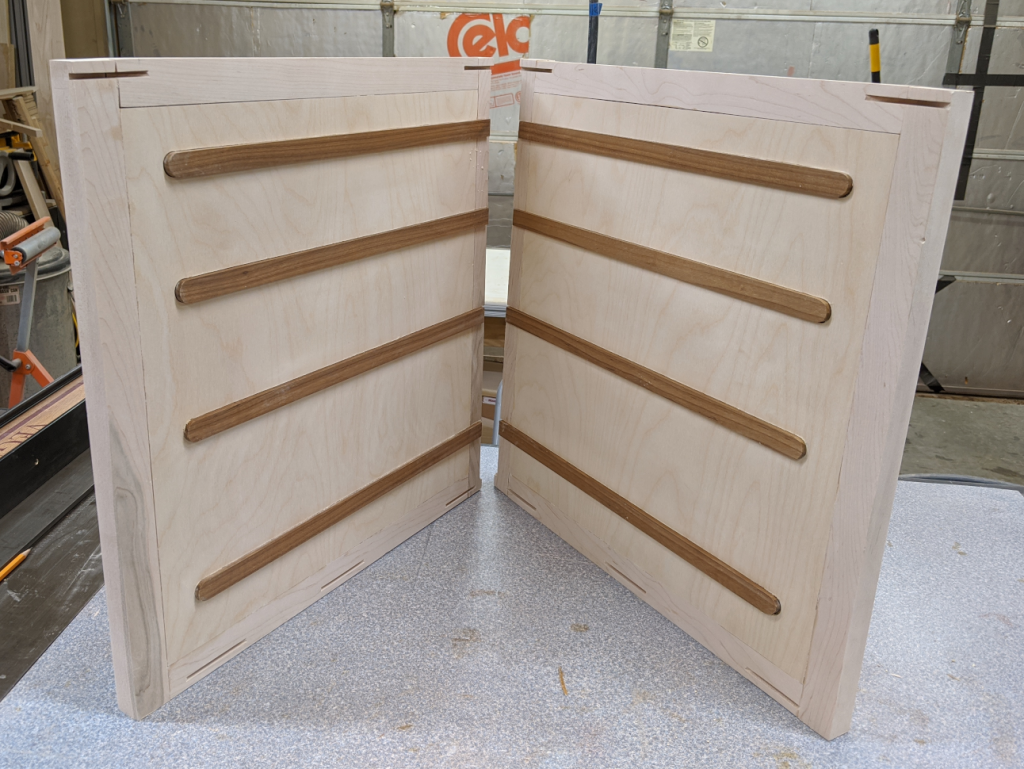
The contrasting wood looked nice, and I’d planed both sides to final fit so the bearing surfaces were glass-smooth. I made up another 1/2″ in height by making the base panel and top braces 3/4″ instead of a full inch. Now all I had to do was cut the drawer parts correctly.
I actually ended up taking about 2 weeks off here because of a back problem. That got sorted, but I felt like I had to hurry now because the project was behind — and haste, as many know, is often the enemy of good woodworking. I quickly cut drawers from the stock I’d already planed to 1/2″, graduating the heights between 5-3/4″ and 2-3/4″. I figured I’d just use the simple 1/4″ system of interlocking dadoes, because that’s just as strong as dovetails but way faster to do.
Of course, you have to do it right, and I … didn’t. I grooved the fronts and backs on the wrong side, and naturally I didn’t have enough stock to recut those pieces. So I had to cut off 1/4″ on the front of the drawers and my rabbets were no longer locked. Then I realized I hadn’t allowed for which was left and right, so I’d inadvertently cut from the wrong side on half of them, and had to cut off the other end too. Argh!
Next, I went to cut the side grooves to receive the runners. These would have to be hand fit, of course. I’d measured out the locations on the sides to place the grooves in the middle of each drawer, but measured to be sure. I started from the top for some reason, which was my first mistake. The second was not checking the bottom measurement before cutting. I ended up with two perfectly fitting, smooth-sliding drawer sides that hung down at 3-1/4″ — too low.
I cobbled together enough pieces to make another pair of drawer sides — if it was any other drawer I couldn’t have done that — and started from the bottom instead. That went better, except that the lower two drawers somehow were a tiny bit wider — about 1/16″ too wide, it turned out. I had to plane them down, and route those grooves again, to get them to fit. On the third drawer I accidentally measured the location of the groove 3/8″ too low, and had to redo it. I didn’t have stock to make new sides, so the groove is way wider than it needs to be. All in all, not a great example of precision woodworking.
Now I looked at my four drawer front pieces. I’d milled them from 5/4 stock, and for the life of me I didn’t know why. They were way too clunky-looking, but they were also way too short to put through the planer to thin them out. I ended up using lots of double-sided tape to stick them down to a larger piece of MDF in order to plane that 1/4″ off, and then took off a tiny bit more to allow for laminate thickness.
Originally I was going to go with maple drawer fronts. But frankly, the grain in these pieces wasn’t anything special, and it just didn’t look that good. I decided to laminate them, and arrange the laminate so it flowed from top to bottom. I think it does look better this way, though I have my doubts if anyone will actually be able to tell that the pattern flows. I mounted the fronts on the drawers and my piece was finally taking shape.
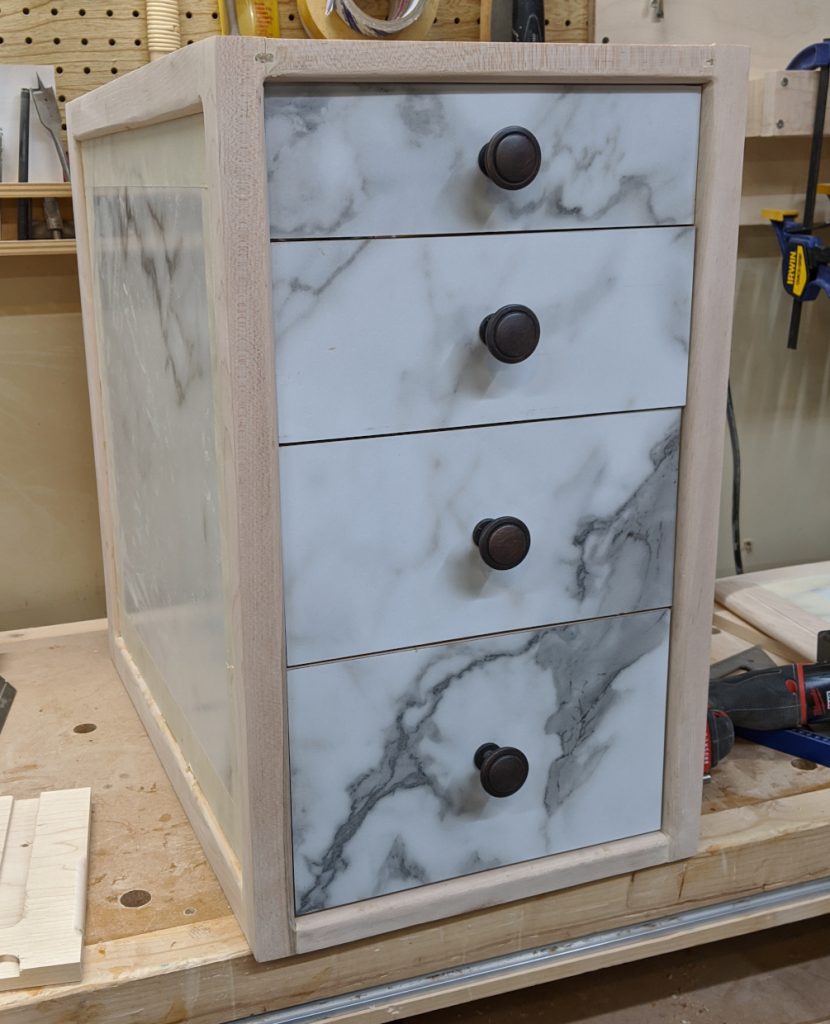
Now, just the top and legs to go. The top was pretty simple; I just mitered the corners around the laminate panel and applied a slightly smaller version of the same router profile I’d done on the desktop. That part, at least, was drama-free.
The legs … not so much. Again, part of this was that I was ad-libbing. I figured I’d cut them out with the CNC machine, and arrange the stock to get the most straight grain through them. But I did something horribly wrong in setting up the toolpath, and my CNC machine choked and died. (It was only a burned-out fuse, it turned out, but it took me 3 days to get an answer from NextWave Automation about where the fuse was and what specs the new one needed to be.)
So I grabbed my last piece of 5/4 maple and some graph paper. I drew out the leg shapes by hand: half-moon front legs and straight, tapered back legs. I cut them out on the bandsaw, keeping straight grain as much as possible, and smoothed them with my spindle sander. I cut 1/2″ long tenons on them and made mortises in the underside of the case, placed just inside the plywood. I did a quick measure of the case with the legs on, and realized I still had to take 3/8″ off to fit under the 26-inch mark, to I did that carefully at the belt sander. (So yes, if you measure it, the top and bottom of the front legs are unequal.)
I glued the legs in and set the case on them with the glue wet, so I could make little adjustments to make sure they were all touching properly.
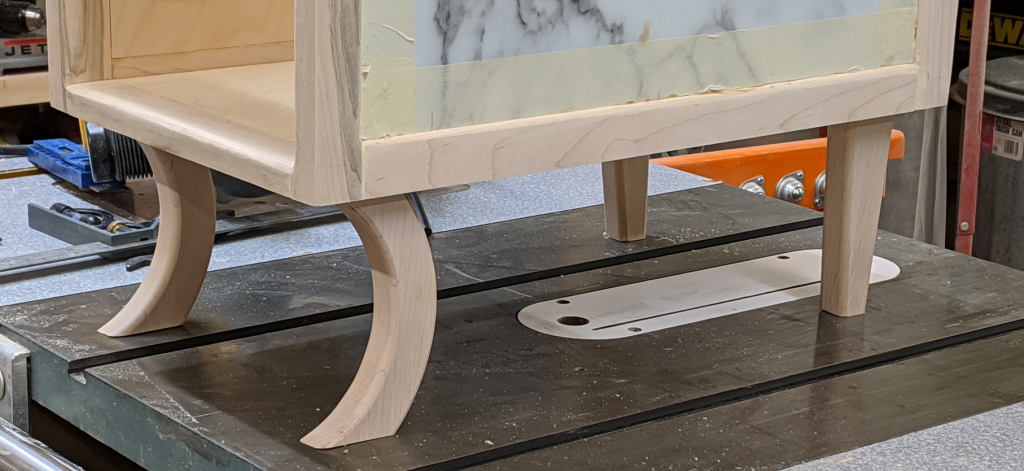
I left that sitting until the glue was nice and dry. I actually like the way these came out — with mostly straight back legs and the curved front, they complement the legs of the desk and tie the two pieces together better than the original plan did. And by offsetting them to the inside, they look better.
Finally, 4 coats of Arm-R-Seal later, it was time for final assembly. First I attached the back. I actually used glue as well as brads for that, because — naturally — the case was slightly off square. I racked it into square first, then applied the glue and pressed the back into place. To hold it I used 5/8″ brads so the case will have no choice but to stay square.
Then it was time to attach the top. I drilled countersunk holes in the upper braces and into the top piece — nothing fancy because it’s mostly plywood, so movement won’t really be a thing. With that done I could put in the drawers and call this one complete.
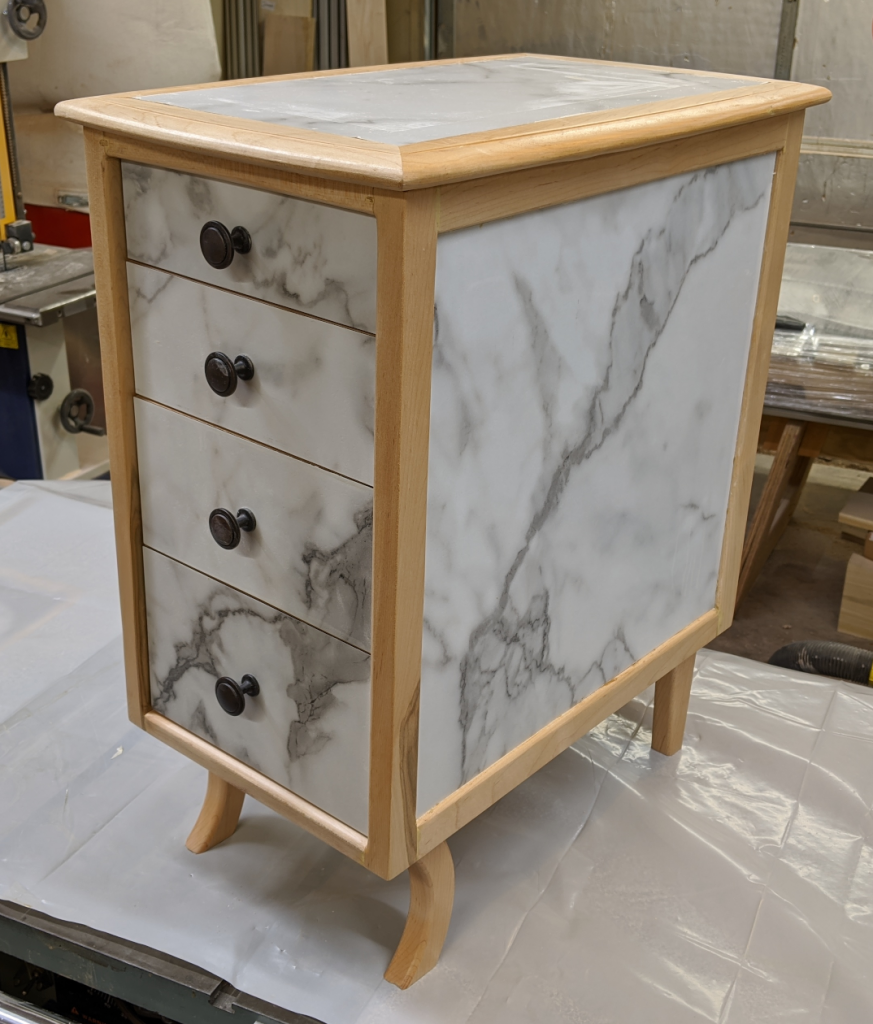
It’s exactly 26 inches tall, which means we might have to put thicker feet on the desk to fit it underneath. But it’s done, and it’s the last project I am going to do on my old Delta tablesaw. The SawStop is coming soon!


Recent Comments