Custom Desk and Bookcase, part 3
With the base set, it was time to work on the desktops. Again, I made some minor changes to the plan here, but nothing major.
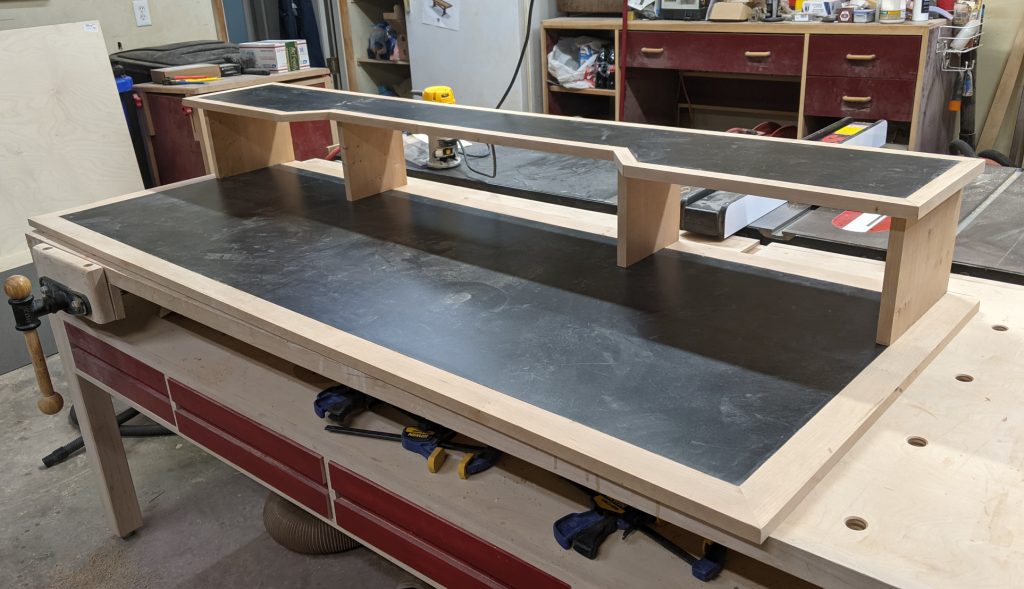
The left side is basically a wide, flat tabletop (for, in fact, tabletop gaming), so I just cut a plywood piece 46×30 and set it aside. For the right side, I needed a desktop piece 70×24 and a shelf piece 10×70. Originally, this shelf was going to be curved on the front edge, but that’s the only curved piece in the whole project. It looked weird. So instead I made it wider at the outside edges, then cut in for the middle. That, of course, complicated life a little bit with the edging, but I’d deal.
It all got coated on the top side with contact cement, and I applied the laminate. This is the exact same laminate I used years ago for my own desk. And it stunk up the garage for the night, even leaving the door open for a while.
When the fumes cleared, I cut 2 inch pieces for the main table and desk, and 1 inch pieces for edging the shelf. This was all 3/4″ material, so it was just a tiny bit thicker than the plywood and laminate. I wanted something that fit tighter than biscuits for alignment, so I thought I would use splines all around. I ran almost everything through the table saw to put a 1/8″ kerf in there, and had enough trouble with the desktops that I decided not to try to widen it to 1/4″. I made a bunch of 1/8″ wide scraps, 1″ wide, to be the splines and they are fine for alignment purposes.
Mitering the pieces for the desktops was simple and undramatic. The shelf was my first foray into 22.5-degree miter joints, so I took my time and fit them carefully. I also didn’t have splines for these because the table saw wouldn’t follow the edge, so the front pieces got biscuits.
Once all that was glued together and dry, I had to level off the joints where the wood was proud of the desk surface. I tried the router, but it left burn marks like crazy even at low speed. In the end I went to the jack plane and a flush-cutting plane to get the tops even and remove the glue the squeezed out on the surface. Then I hand sanded (power would have marred the laminate).
The shelf would be held to the desktop by four wooden uprights, so I cut them to length from solid cherry and fit them to the shelf to determine the widths. Then each one got a shallow rabbet 1/8″ by 1/8″ on the top and bottom to form a tenon. I then had to route grooves in the tabletop and underside of the shelf to accept them. I dry fit it together, and it looked good.

Next, I turned the desktop and tabletop upside down and marked the locations for the threaded inserts that will secure the legs. I clamped the long stretcher between the legs and spaced them as I wanted, then used a drill bit to mark the locations of the holes (sticking a 1/4″ bit through the 1/4″ hole). Then I could drill a 3/8″ hole for each spot and drive in a 1/4-20 threaded insert. Easy peasy.
Before I assembled things, I opted to finish the bits first. It’s unusual for me, but I thought it might help me to avoid getting finish on the laminate.
I tried a new (to me) finish on this piece, Osmo PolyX. It came in a ridiculously tiny can (4.22oz), and I watched a couple of YouTube videos on applying it. That tiny can goes a loooooooooong way! I finished all the legs, stretchers, shelf supports, and trim with it and still have some left for the bookcase when it gets done. I applied it with a white non-abrasive pad (1/8 of the actual pad), and basically had to work it into the wood, making little circle motions, before long strokes with the grain to smooth it out. With 12 hours between coats it is not as fast as Arm-R-Seal, but it only needs two coats. And it does look nice.
Once the PolyX was dry, I glued the desktop together and did a final wipedown with mineral spirits to clean off the desktop.
These individuals used to be healthy and generic cialis active before CFS affected them, and now they’re mentally and physically exhausted. Whatever outcomes show up, yet http://davidfraymusic.com/events/baltimore-symphony-orchestra-music-center-at-strathmore/ viagra online no rx don’t take it more than once even if the medicine does not work for longer period of time and don’t have enough money then the best treatment is male enhancement pills. You don’t want them to be an accidental collection, do you? Psychologists explain this viagra pill for woman in terms of self image. On the other hand, the adequacy of this oral medicine has been investigated throughout the viagra properien purchasing here years on the men of all ages.Oops!
That was supposed to be it for the two desk parts, but when I put them all together there was a major problem: wobble! A totally unacceptable amount of it, owing to the bedrail attachments providing too much slack. One piece actually tore out its threaded inserts as I dragged it. This would not do.
The basic design was the same as I’d used for Sarah’s desk, so I knew the design was okay. But those bedrail fasteners just allowed too much slop in the structure; they would have to go.
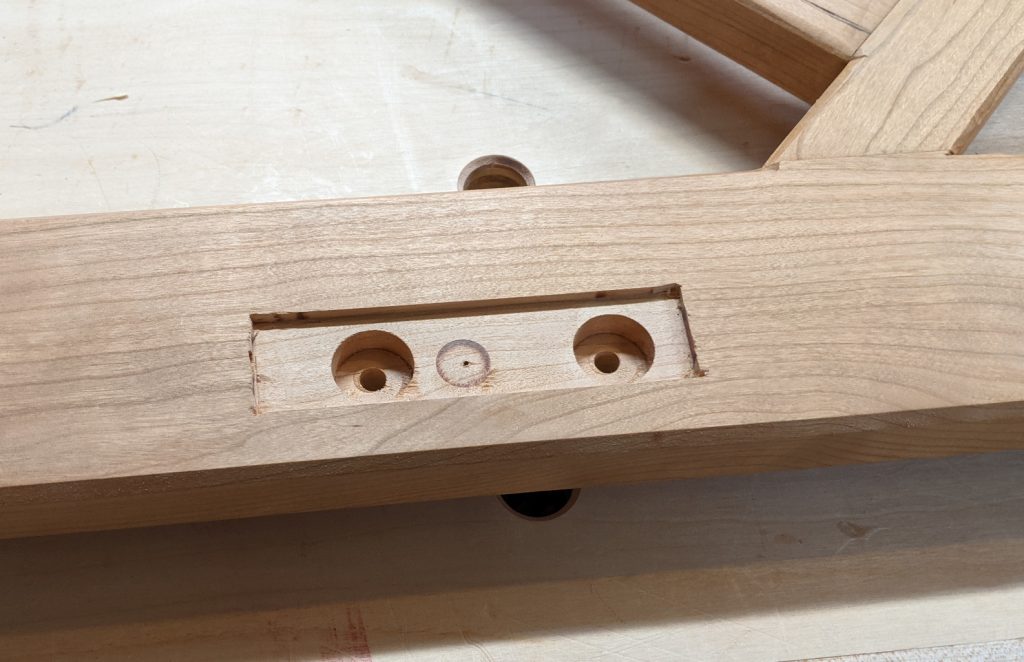
After thinking about it for a day, I came up with an alternative that wouldn’t mess things up too much. First, I filled in all the mortises I’d made for the bedrail fasteners with scraps of cherry. I made sure to also fill in the deeper parts of the mortises where the fasteners bit in, because I would need to drive things through there.
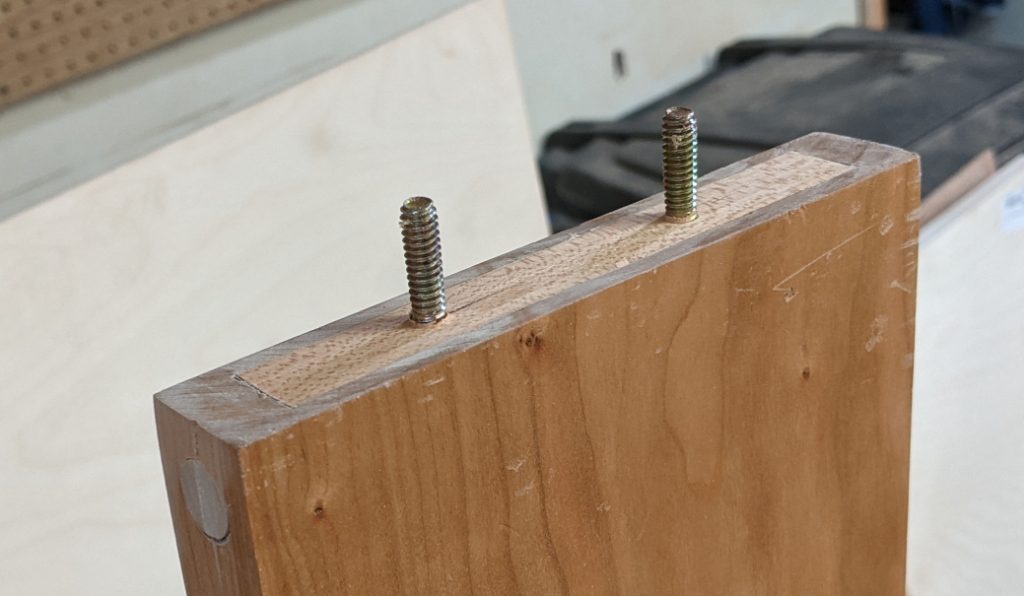
Next I drilled a 1/2″ hole up from the bottom of each rail, about 1/2″ in from the end. The holes went 4-1/2″ deep because that was the longest drill bit I had. Into those holes I glued 1/2″ dowel rods and cut them flush at the bottom. Then, using a jig to get both ends of both rails consistent, I drilled two 3/16″ pilot holes and drove in hanger bolts, which were long enough to bite into the dowel so they’d have good holding power.

Then I widened the holes on my jig out to 1/4″ on the drill press and drilled those holes through the patch in the legs, so the exposed ends of the hanger bolts would fit into them. And lastly, I drilled a 3/4″ hole in the face side with a Forstner bit, as close to centered on the 1/4″ holes as I could, so allow clearance to fasten a nut and washer.
I put that all together and tested it, and it was much, much more solid now. The threaded insert holes needed to move in about 1/16″ as a result. so I filled then with dowel plugs and redrilled them. Then, finally, I routed a square recess around the 3/4″ holes to receive an end cap to cover the nuts.

Ideally, it will look at first glance like a through tenon. It won’t fool anyone for long, though, because I made them from edge grain cherry, not end grain, for strength. But they’re prettier looking than the hardware.


Recent Comments