
A Wedding Present
Two friends of mine, Jenni and Scott, are getting married soon. We can’t be there at the wedding (pandemic!), but I wanted to make them something special for a present. I settled on this:
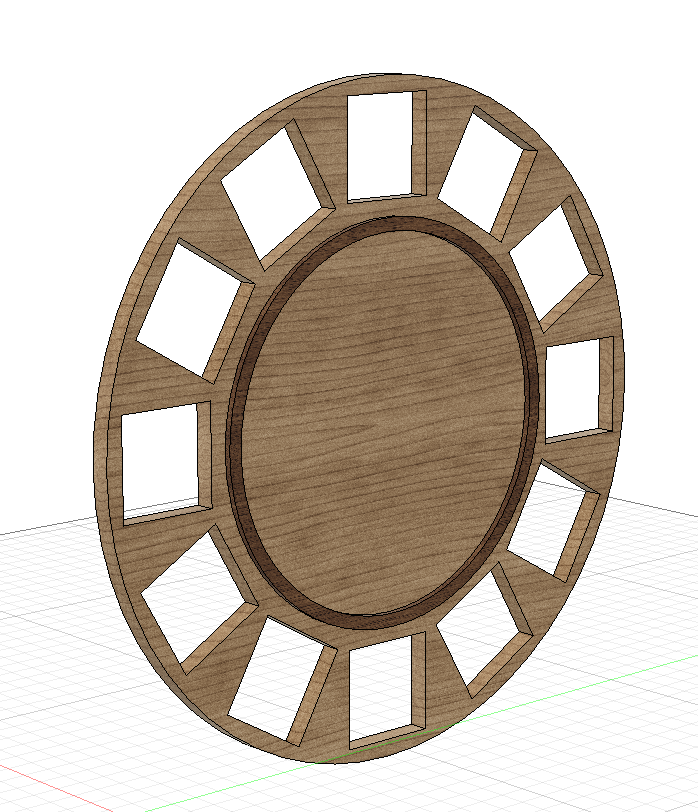
As often happens, it turned out a little different, but this was the start. The idea was to have an interesting veneer in the center, with a contrasting wood for the ring and then in place of numbers have a dozen little picture frames at the clock positions.
Now I’ve never done anything with veneer before, nor anything requiring circles that fit within each other. That made this project very interesting and fun for me.
As it happened, I had just recently seen Tamar of 3x3Custom making another attempt at a roll-up chair, and she mentioned a website — https://www.blocklayer.com/woodturning-segments.aspx — that was helpful in doing the math required for a segmented circle. So I started there.
I put in the dimensions of the outer ring (12 segments, 5 inches deep, 12.5″ radius at the outside) and got a wonderful diagram showing exactly what pieces to cut for that, at what angles, with allowance for waste. I did another for the middle walnut ring. The center would be a single piece of plywood, so my veneer would have a stable substrate.
Cutting the segmented parts was then just a matter of careful saw settings and repeatability. I have a Dubby sled, which I’ve had for a long time, to do the precise 15-degree angles that I needed for a 12-segment circle; I just had to measure the length of the pieces for each one and set a stop block to make them consistent. And I did pretty well — here’s the middle ring all glued up:
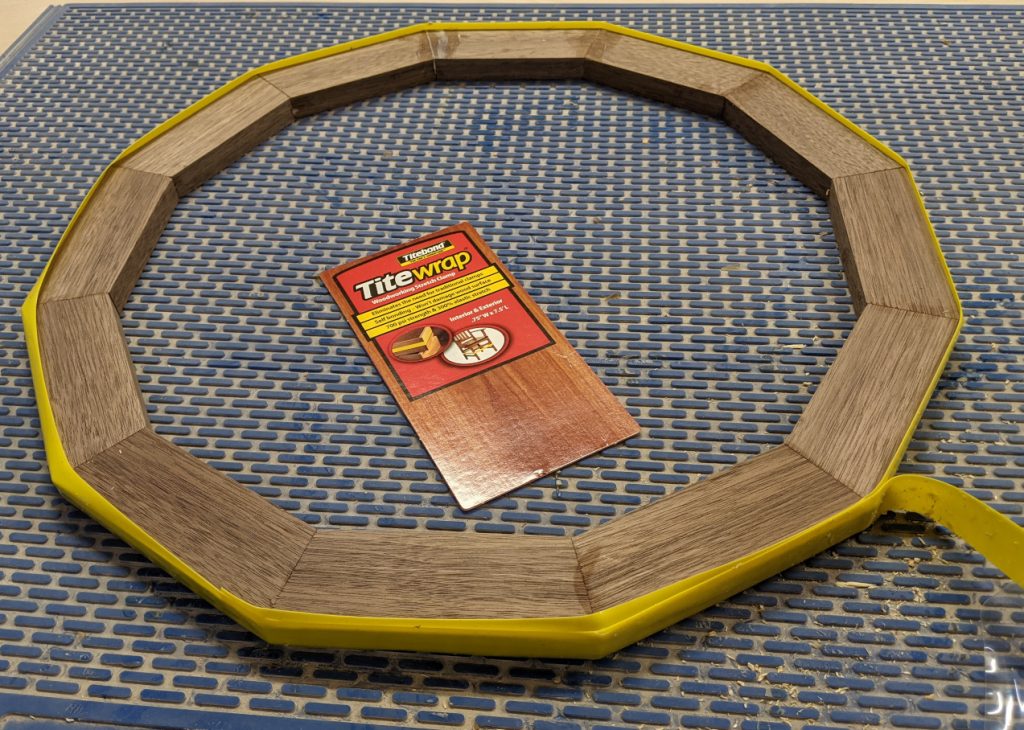
The yellow tape was very handy, as I don’t have any clamps that would accommodate 12 corners. I let that one cure while I cut out the outer ring pieces, then glued those together too.
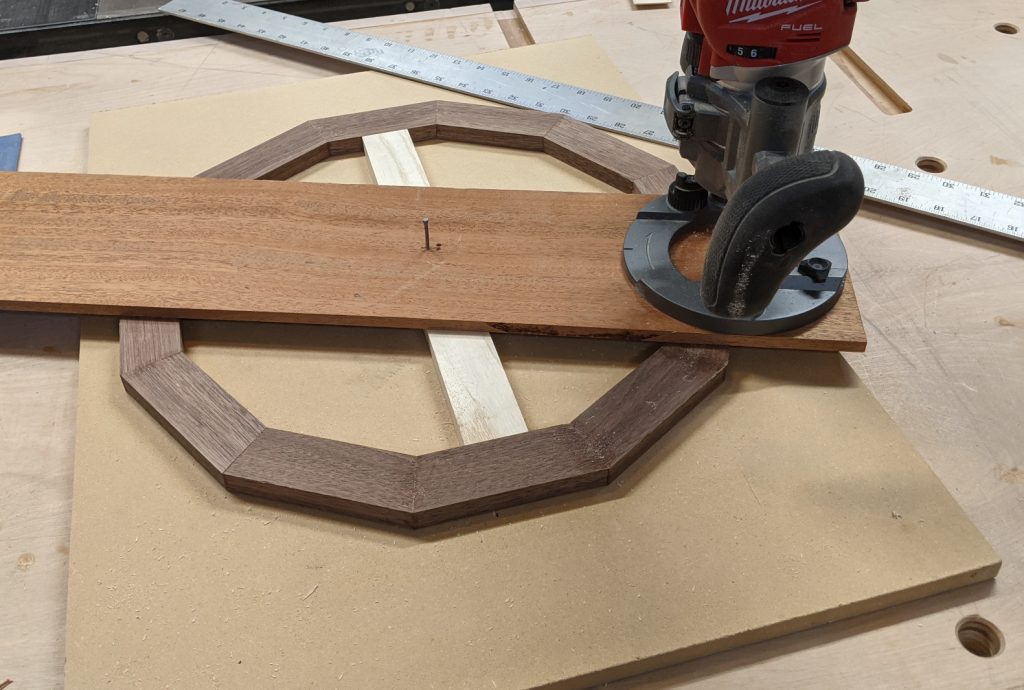
I did a preliminary sanding on those parts, not too much, and then set about turning them into circles. The easiest thing was to start with the outer frame, so I inserted a piece in the center for the trammel jig to anchor on and double-stick-taped the assembly to a piece of MDF so it wouldn’t move. The router did the rest.
With an 8″ diameter circle cut on the inside of the outermost piece, I made a snap decision to wait on cutting the outside. Instead I set up the trammel on the walnut piece, where I needed to cut the 8″ outside diameter and a 7-1/2″ inside diameter (creating a ring 1/2″ wide).
This was, as I said, my first attempt at veneering. I have no press, no vacuum bag, just clamps and glue. The veneer had no glue on it, and was about 1/16″ thick. So I cut one plywood circle at 8″ diameter and another plywood piece about the same size to use as a caul. I had a nice fiddleback maple veneer, sequenced, so I arranged it to make a wide line of fiddleback figuring through the center of the circle and laid it down over glue, then applied wax paper and the caul over it and clamped the life out of it. I used my hollow chisel mortise machine to weigh down the middle; it’s portable and heavy. And I didn’t touch it for a full 24 hours.
When I took the weight and clamps off, it looked really good. I trimmed the veneer panels to the shape of the circle, did a very light sanding of the surface, and then routed a 1/2″ rabbet around the outside to receive the walnut ring and hold it about 3/16″ proud of the surface. Then I fit all 3 pieces together.
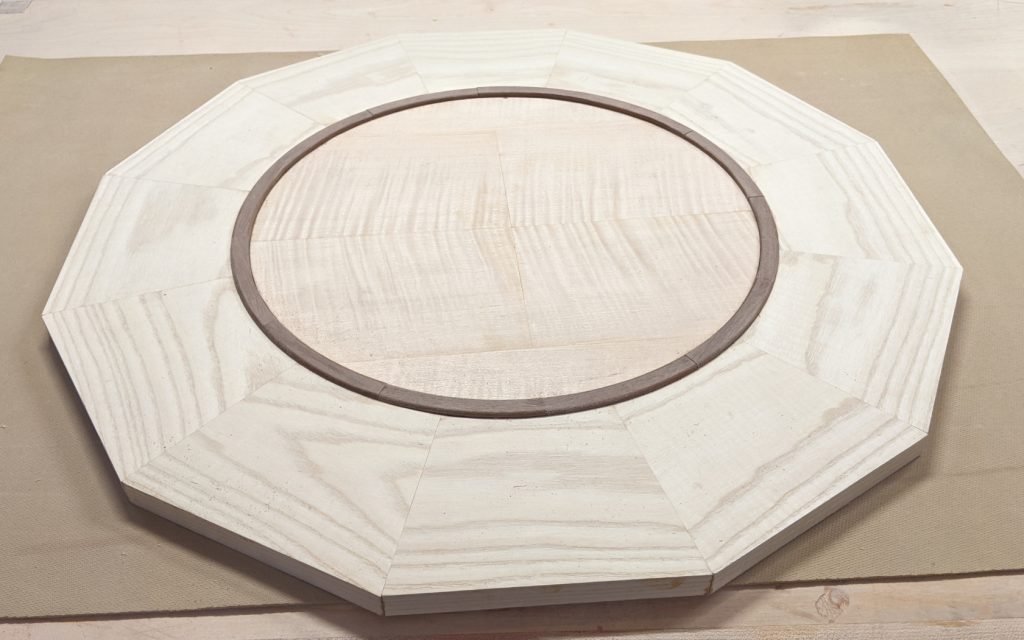
It was at this point that I decided not to make the outside edge round. I liked the dodecagon profile, and I was also afraid of making the edges brittle when I cut out the picture frames. Which came next.
Originally I was going to cut 4×4″ holes for the photos, but I was concerned about leaving too little wood and having a fragile frame. I did some quick consulting with Jenni and Scott, and we decided to make the frames 3×4″ instead of 4×4; that gave me a breathing room I needed. I made a quick jig, referenced against a centerline drawn on each segment, and cut them out with no drama. I also put a 1/4″ roundover on the front and 1/4″ rabbets on the back.
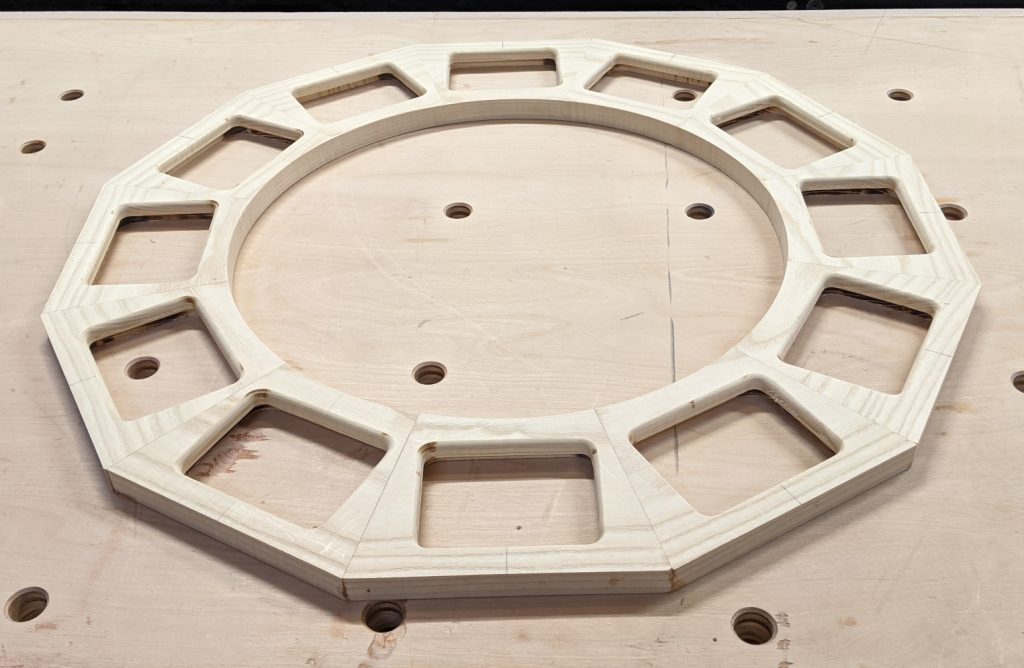
A ton of hand-sanding later (mostly because my rabbeting bit was very, very old and dull), I was ready to assemble the parts for real. I made a cutout for the clock works in the back side of the plywood, which inherently defined where 12 would be because the works was asymmetrical. Then I glued the middle ring to the inner part, and very carefully sanded the outside until it fit tightly into the outer ring. Glue was the only fastener for any of that; one advantage of the segmented shaping was that all the grain faced the same way, so I didn’t have to worry about movement.
I also made a last-second decision to deliberately emphasize the joints in the walnut by cutting right alone the joint lines with a handheld Japanese saw. By aligning those marks with the middle of the outer segments, they were perfectly positioned to provide a visible hash mark, so there would be no question of what time the hands ultimately pointed to.
I finished it off with 3 coats of Arm-R-Seal, and then flipped it over for the final touches. From Home Depot I picked up some 1/8″ Lexan and cut that to fit into the frames. I also picked up 1/8″ hardboard to back up the pictures, and ended up doubling that up. I rounded the corners to match the profile left by the router, and then applied 24 turnbuttons to hold all that in place. As a final touch I installed a heavy-duty hanging wire (probably overkill, admittedly) and fitted the fitting and hands.
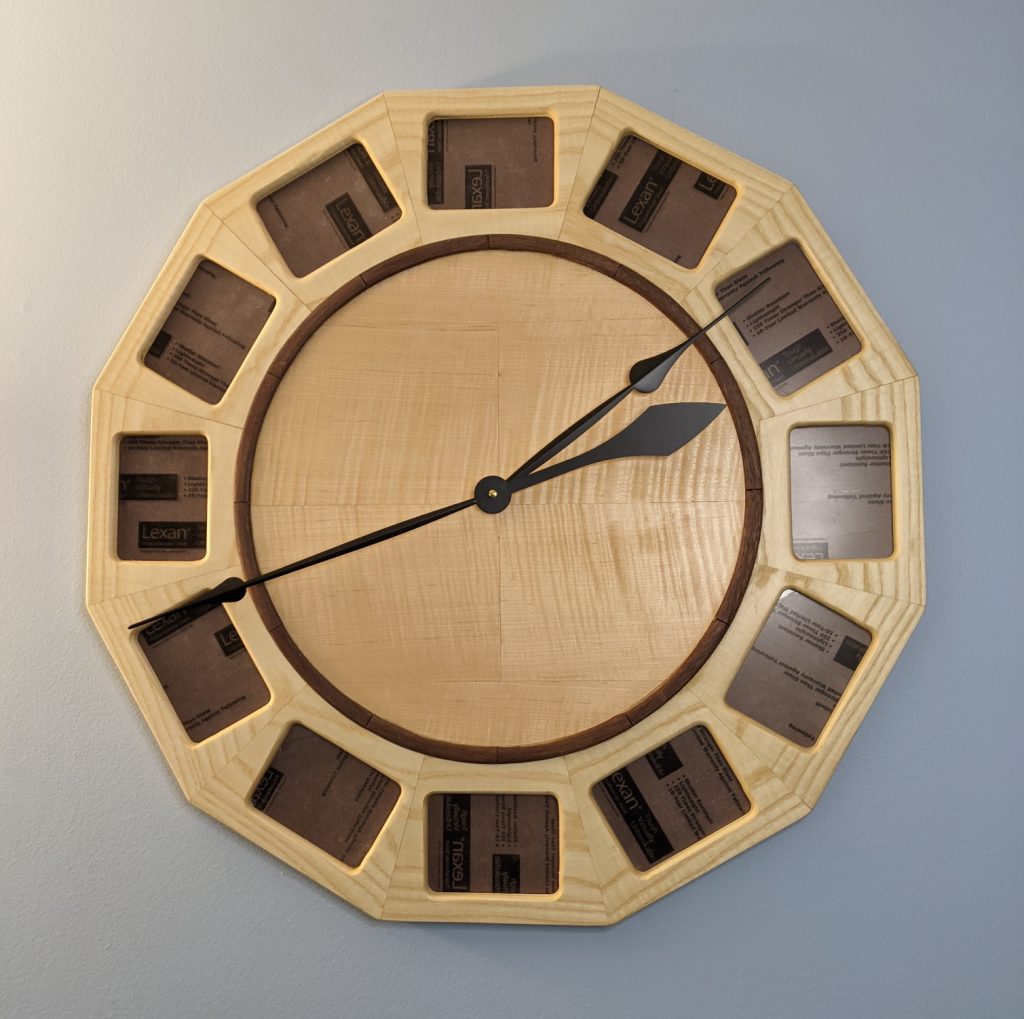
I did take the precaution of letting it run for a day, to make sure the movement worked okay and the hands didn’t catch, before boxing it up and shipping it to its final destination. Truth to tell, I really liked this project and was a little sorry to see it go. Don’t be surprised if I do a couple more clocks in the near future.


Recent Comments