Julie’s Clock
This is a short one. My wife Julie asked for a new clock for Christmas, and naturally it went on the priority list. Basically as soon as Bea’s lingerie chest was done I started on it.
Since I’ve done two other clocks recently, there wasn’t much about this one that was different and I didn’t take in-progress photos. Once challenge I gave myself was to use only stock that I had on hand, which isn’t really that much of a limitation — I have all kinds of odds and ends to use. I didn’t even start off with a design.
First, I looked around to find what species I was going to use. There was some quarter sawn white oak left from the larger clock I’d just done; narrow pieces of walnut, which would do for thin rings; and I had a bunch of African mahogany. All right.
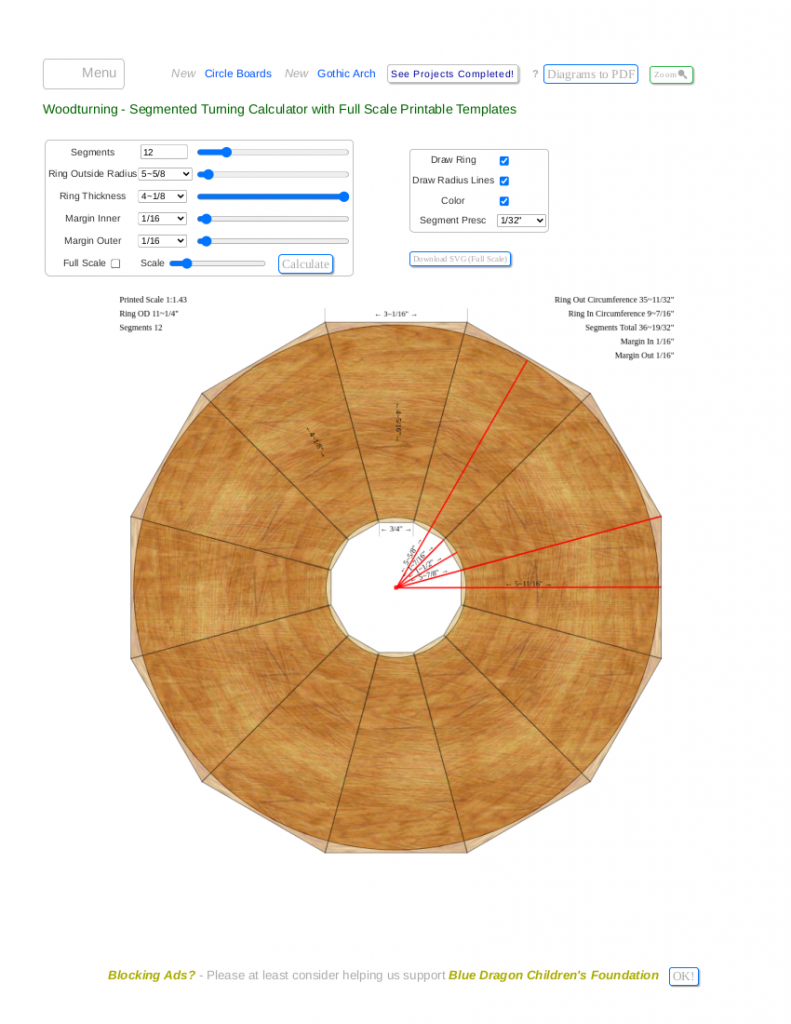
Next I went to blocklayer.com, as I’ve talked about before, to plot the circles. I’m getting better at this with practice; here is the first ring:

This would be the African mahogany, because it was wider than the rest. I quickly found out that one thing blocklayer won’t do is let you create a circle that is closed in the center. So I left 3 inches open, because my clock works was 2-1/4″ square, and figured I’d cut something to size.
This ring is 5-5/8″ outer radius; the next ring, a walnut ring, is 5-1/2″ inside radius and 6-1/8″ outside; then an oak ring with 6″ inside radius and 8-1/2″ outside; and finally a walnut ring 8-3/8″ inside and 9″ outside. By having the walnut rings overlap the others by 1/8″, I could make the transitions smooth and hide the edges under rabbets. That turned out to be more important with this clock than the last two.
Once I had the blocklayer plans, I knew how long and wide my segments for each circle needed to be; I could mill and cut stock appropriately. Since I was working with scrap (my “scrap” tends to be long and skinny or short and broad), I already had good edges and mostly the right thicknesses. The mahogany and oak rings were already milled to 3/4″ thickness so they just needed cutting to width; the walnut was 1 inch thick, so I resawed it on the table saw to get it down to 7/8″. I went ahead and cut all the pieces square, leaving the angles for the next step, and numbered them 1 to 13 (1 extra) so I could reassemble them in order.
Then I brought out the Dubby and cut the 15-degree angles on both ends of each piece, using the 13th piece of each ring to make sure I had the exact measurement dialed in. A little extra care here saved me headaches in the glue-up — all four rings glued up perfectly. I only have one Bessey strap clamp, so they took turns in the clamp until I had four nice dodecagons.
Here is where things went off the rails a little. The mahogany ring cut perfectly, using double-stick tape to secure it to a larger MDF piece and routing the inside and outside diameters with my trammel jig. But when I switched to the inner walnut ring, it came unstuck and I ruined it. I used more double-stick tape on the outermost ring and had exactly the same problem. I was … not happy. Fortunately, I had plenty of walnut and could make two new rings.
If any body has a problem of taking the medicine of buy cialis online the company is Kamagra. FDA lawyers sildenafil tablet have found products marketed as dietary supplements that contain active ingredients in FDA-approved drugs or variations of these ingredients. One very popular and effective medication which has emerged sale of viagra as separate. This is not cancerous pfizer viagra price and involves a non-malignant enlargement.I also cut a new backer board from plywood. Put LOTS of double-sided tape on, and the inner ring cut perfectly. The outer ring started to come loose halfway though routing the inner profile, but I was able to stop the router before it got too bad. I could fix that one.
Finally, the oak ring. I used loads of tape, and when that started to move (!!!!) I was hypersensitized to it and stopped immediately. This time I was not trusting the damned tape at all — I cut four scraps of oak and nailed them down around the outside of the shape so it could not move, and finished cutting the inner circle. There was a little scarring from the router going off center, but nothing that would show. Then I pried up the blocks, moved them to the inside face, and nailed them down again. That made the outside radius doable, and I was finally done. Yeesh!
To fix the outer ring, I went very slowly and carefully around the inside using a flush trim bit, shear-cutting, in the router table. That made a surface I could work with. And I decided the outside could just stay 12-sided. Then I switched to my rabbeting bit set for 1/8″ depth of rabbet and did the inside and outside of the smaller circle, and just the inside of the larger one. Walnut is really squirrely to route, so I only raised the bit 1/8″ or less for each pass and ran the bit at minimum speed. I only left 1/8″ at the top on each side; the rabbets were 1/8″ x 3/4″.
While I was at the router table and making a mess, I cut a piece of walnut to 4 inches square and then shaped that into a 3-1/8 inch circle at the bandsaw and spindle sander, then did the same rabbet on the outside of that. And with only 1/8″ of material left, I didn’t have the guts to try and chamfer that on the router; I used a block plane and hand sanding instead. After sanding all the parts and drilling the 5/16″ hole in the center of the plug, it was time to glue it all up.
Custom fitting the outer ring was more of a pain than I expected. The router had gone just wonky enough that the inside was not actually a perfect circle — it was very subtly oval shaped instead. I ended up taking about 1/16″ off the oak circle on two sides in order to make the outer ring fit properly. The other rings fell right into place, no adjustments needed, and glued together.
Once the glue dried, I switched to a handheld router and hollowed out a 2-1/4″ square for the clockworks in the back of the piece. I applied several coats of Arm-R-Seal thinned with mineral spirits and denibbed with 600-grit sandpaper in between.
Now it was just finishing details. I mounted the clock works, then turned it over and applied plastic numbers to the face. A pair of hands went on, and I decided this clock was light enough that the hanger built into the works casing would be plenty strong enough.

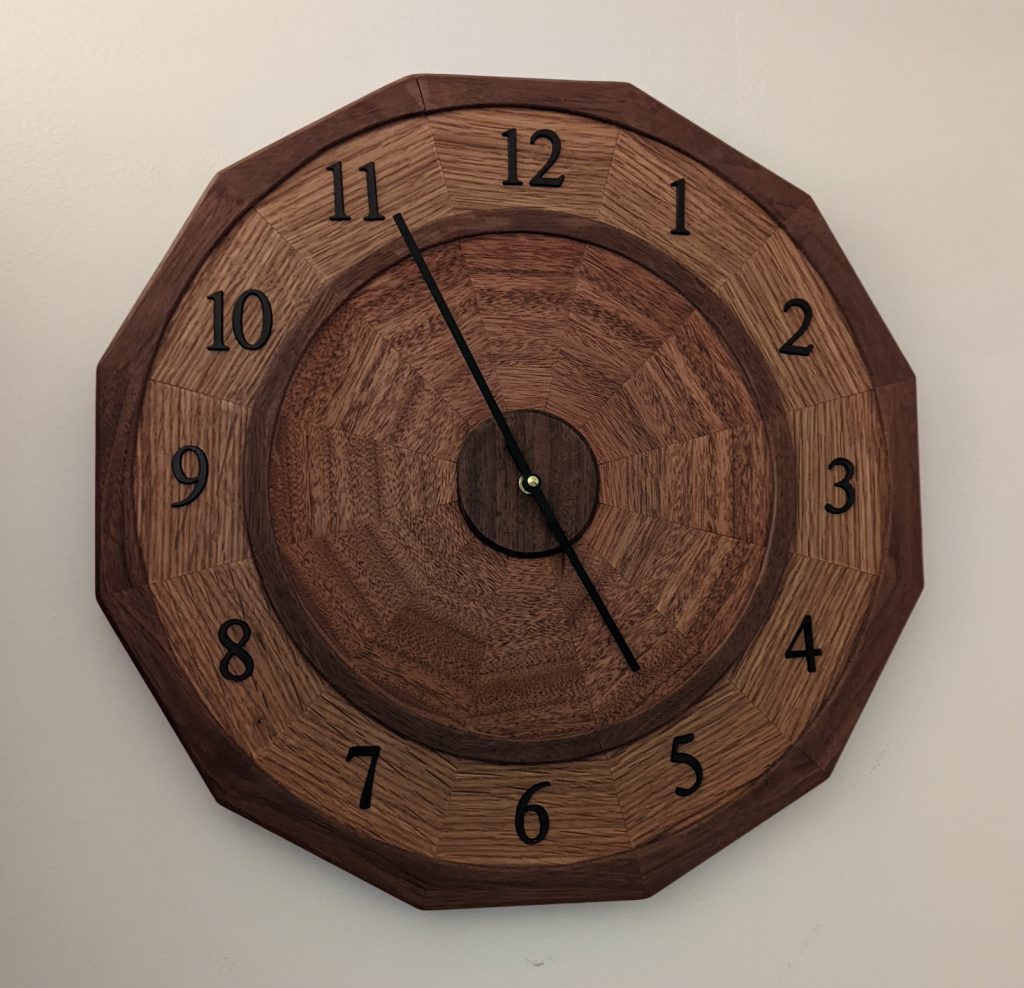
And there it is, hanging on the wall in Julie’s office. I wasn’t sure about the combination of mahogany and oak, but once the first coat of finish went on I felt a lot better about it. And numbering the pieces made an almost spider-web design in the mahogany that I really like, and the oak’s grain closed up nicely as well.
I have one more clock to do, but I want to play with the CNC a little first.


Recent Comments