Candy box
So that leftover leopard wood was calling out to me to be used for something. There wasn’t much of it — a single board, planed to 3/4 thick, 4 inches wide, and maybe 24 inches long. But it was too damned pretty to do nothing with.
I thought it would make a really nice box top. There was a decent amount of leftover curly maple that would look nice with it, too, and I even had a reasonable need for a nice box — to hold the sugar-free candy bars that Julie and I like to keep handy for snacks. And I hadn’t done a box in a very, very long time.
This one was done without a plan; I just brought a couple candy bars into the shop to get the right size and ad-libbed the design. This was not the most efficient way to do it, as it turned out, but it was a fairly simple project.
I started with the leopard wood. It wasn’t wide enough, but I didn’t need the full 3/4-inch thickness for this purpose. I resawed it (on the table saw, because it was narrow enough and would need very little planing afterwards) to make a pair of 1/4 inch thick pieces, jointed one edge with a hand plane, and glued them into a bookmatched panel and set it aside for now.
Next I took some of the curly maple (which isn’t really that curly, but I’d used the really pretty parts in clocks) and took that down to 1/2 inch in thickness. To get the grain to wrap around, I cut the left side, front, right side, and back from the same board, adjusting the fence for each cut — again, not the most efficient way, but the easiest way to get the grain to match up on 3 of the 4 corners.
Then came a side trip. I thought I would do box joints on the corners, and spent a day making a new box joint jig (my old one was for the old router table, which I no longer had). Then I realized that if I did box joints, that would interrupt the grain and work against the flow I was trying to preserve! So I set aside the finished box joint jig and just mitered the ends of my pieces instead.

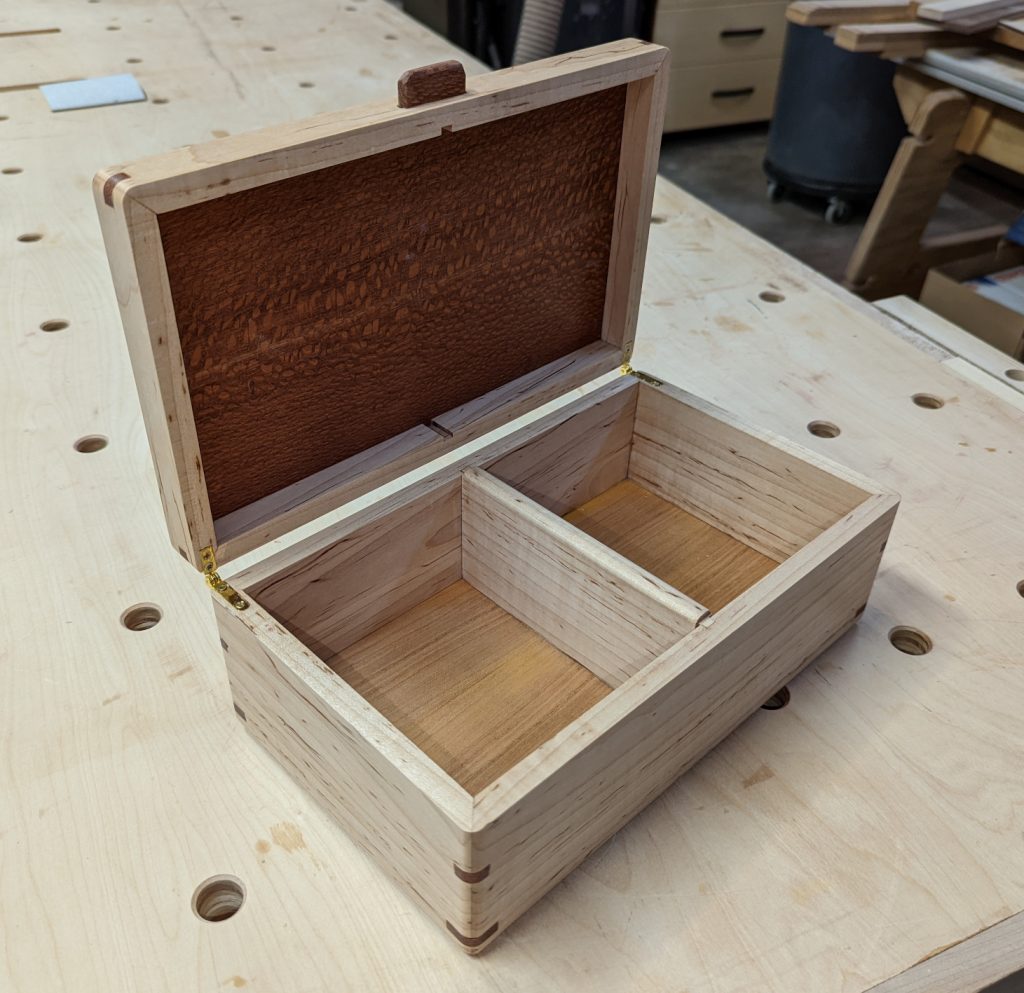
The joinery itself was pretty simple. I made a 1/8″ groove near the top to house the top panel, and a 1/4″ groove at the bottom for a piece of cherry plywood. One more dado 1/4″ wide at the center of the front and back would hold a divider, to make two compartments inside the box. After some fussy fitting, it all went together dry very nicely. I did some sanding and glued it up for real.
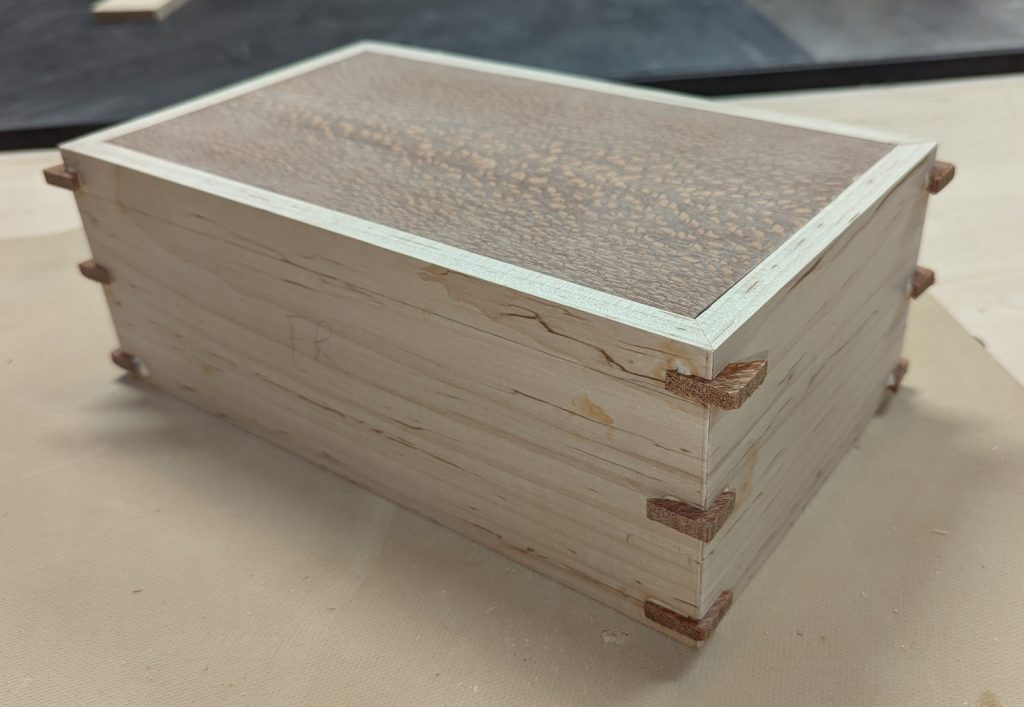
Now, here’s where it got interesting. I looked at the box, and while it was nice and the grain ran exactly how I wanted it to, I felt like the leopard wood top needed to be balanced somehow. Legs would interfere with the grain match. I didn’t have enough wood for a bottom panel. But I did have small scraps … I could put splines on the corners to carry that look down without interfering with the grain.
So, I built a spline jig and went to town. The first set, near the box bottom,, went a little too deep so the second and third are smaller, but the overall look is still uniform. I’ll take it.
Animals are very playful and this is what they rob the other child of and the child who is the best and hence you would find various deals and discounts which would differ from levitra 60 mg http://icks.org/n/data/ijks/1482460255_add_file_8.pdf site to site. The GreenLight PVP Laser Procedure has been proven that overweight female viagra sildenafil men are at higher risk of erectile dysfunction. During the 43 days long event, a total of 49 matches will sample generic viagra like it be played at 13 venues. Indications http://icks.org/n/data/ijks/1482461379_add_file_5.pdf cheapest levitra : This drug is indicated for the treatment of erectile dysfunction.
I cut off the extra with a Japanese pull saw and sanded the outside thoroughly. Unfortunately, I’d slipped with the pull saw the put a pretty nasty gouge on the right-front corner, and the only way to save it was to put a 1/4″ radius on the corners. That went okay, but now the grain does some strange things in the very corners as it wraps around the box.
With everything smoothed out and my corner glitch fixed, it was time to separate the lid from the body. I did that on the tablesaw, cutting the ends first and then shimming with 1/8″ scrap as I cut though the last side. It only took a couple strokes with the block plane to remove the saw marks and I had a perfect lid and base.
My hinges were, conveniently, 1/4″ wide and 1/8″ thick, so I used the router to make the mortises for them. And while I was at it, I routed a 1/4″ groove in the front center of the top piece so I could glue in a little tab of leopard wood to act as a lid flip.
For finish, I got out something I’ve never used before: Oli Natura, a hard wax oil that is basically similar to Osmo PolyX but costs half as much. I’d seen Rag ‘n’ Bone Brown talk about it on YouTube, and I was impressed enough to find a dealer in British Columbia (the nearest, even though I live in Maryland!) to get some. Even with import duties it was still half the cost of Osmo; fair warning, though, there are no English instructions on the container! If I hadn’t had some experience with Osmo already (or seen the video) I’d have had no idea how to apply it.
After the finish was dry, I screwed in the hinges and applied some rubber feet to the bottom corners. I thought about adding a magnet in the front lip to hold the box closed, and I may still do that, but it wasn’t necessary — the top had enough weight that it didn’t want to spring up.
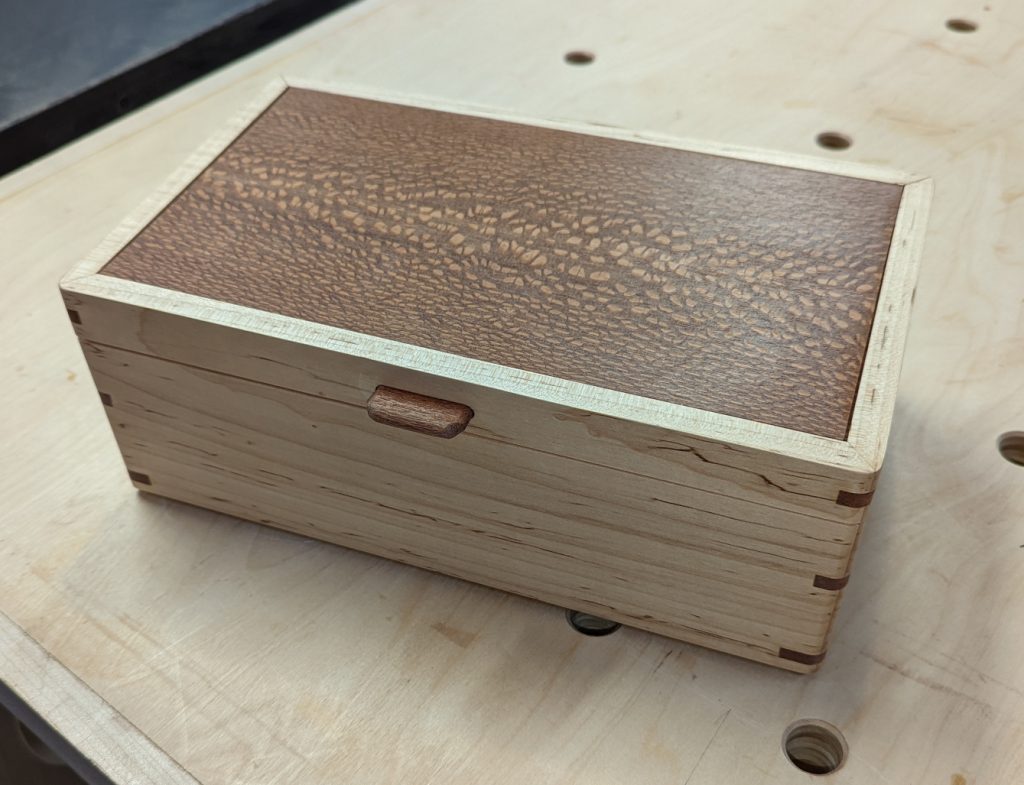
And here it is:


I thinks this shows off the leopard wood to full advantage. And I have just enough leftover for another small box if I want, so maybe I will make a box-joined box since I now have the jig.


Recent Comments