
Sarah’s Easel
It all started simply enough: my daughter Sarah asked if I could make an easel. Sure, I figured — a tripod with a ledge, how difficult could that be? Then she showed me some photos on a website of what she wanted.
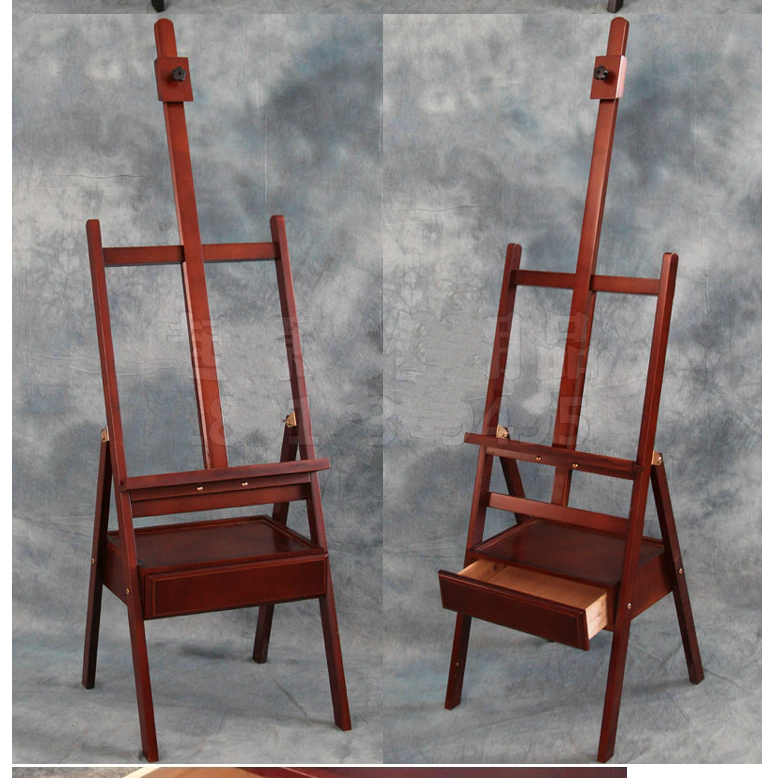
The drawer in particular was important, and she liked the idea of a shelf. It needed to be adjustable for sitting or standing. Okay, it still didn’t look that hard. No problem.
(Foreshadowing: it was, in fact, much more difficult than it looked. This was a definite challenge, and several parts were made more than once.)
My design was similar to the above, but I complicated things a bit (though I didn’t realize it at the time) by making two frames: the basic stand, and then a second frame that slid up and down to adjust for height. I guessed at the basic dimensions based on some on the website, and I built a back frame prototype out of poplar I had on hand to check myself.
Then, when I figured I had the dimensions worked out, I went to Woodcraft and picked up some really nice black walnut. I’ve used it as an accent wood a lot, but this project would be made principally out of that. The drawer box would be walnut ply, and the drawer would be plain Baltic birch. The supporting frame I planed to 1 inch, and the parts for the sliding frame I took down to 3/4 inch. Cut all my parts to rough length and final width, and got started with assembly.
The first problem cropped up right away: the back legs were joined to the front legs in the online model by a three-sided bracket, a bolt and a wingnut. Seemed like a weird way to connect legs, and I initially figured I’d use hinges instead. Then I realized why it was done that way — because of the drawer box, the unit would not fold unless you could easily undo that top joint. So back to the search.
I couldn’t find that bracket for love or money — partly because I didn’t know what to call it, but it turns out the name isn’t that much of a help. It’s called, alternatively, a U bracket or U channel, both of which terms will get you a whole lot of things that aren’t that at all. In the end, the closest I could find was this. It’s not as pretty as the one pictured up top, but it would do for my needs. Once I had them in hand, I could start laying out where the legs would meet.
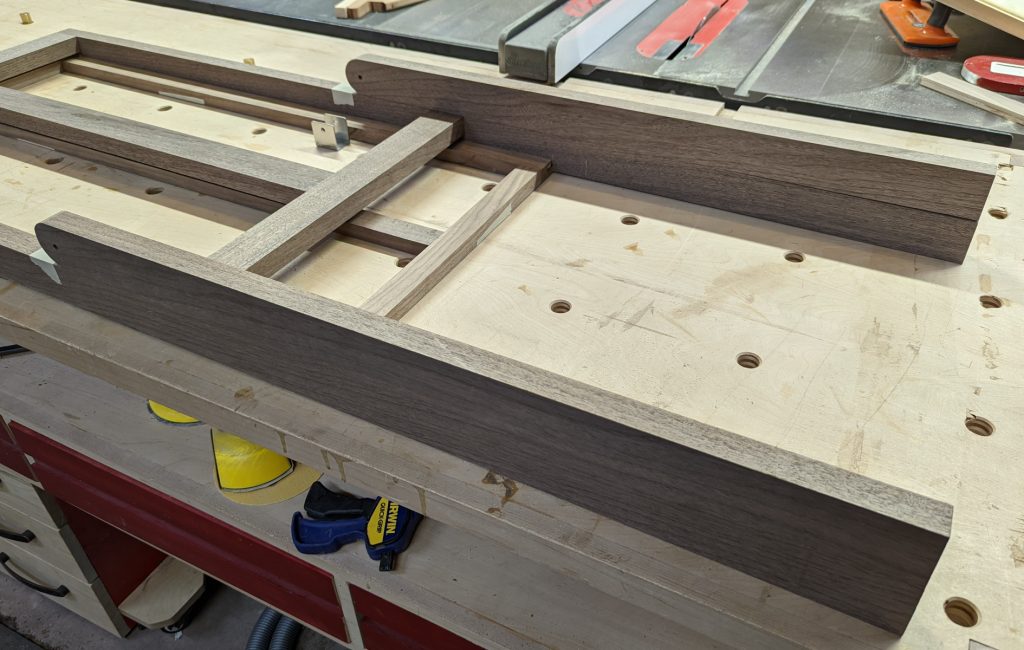
With the front angled back at 15 degrees and the legs at 30 degrees, it was nice and stable (once I cut the bottoms off at 15 degrees, of course). The top was held together with 5×40 dominoes, and the legs would be fixed in place by the drawer box, which was held by screws so it could pivot when folding the easel up.
Next came the floating frame. I made those parts a little less wide than the main one, and grooved the frame on both outside edges. I grooved the outer frame in the same spots and glued in a 1/2×36 inch strip of mahogany (it was handy scrap) to form a track on which the frame would slide up and down. To lock it in place, I drilled a series of holes in the right side of the frame and got a spring-loaded bolt that will fit the holes.
Once I glued the floating frame together and verified the fit one last time, I had to address the upper block that acts as a clamp and hold the canvas down. That seemed easy; I would just route a T-shaped groove and use a T-bolt to hold a small wooden piece in place. What could go wrong?
Well, for starters, one might set up to route that groove and accidentally set it up as a climb cut. And then, theoretically, one might decide that it would be okay if one simply held the router tighter. Which lead inevitably to a very not-straight groove, resulting in the “opportunity” to make the floating frame again. Oops. On the second time I routed the groove correctly but assembled the frame wrong — the holes were on the left when I’d already drilled for the bolt on the right — which meant carefully sawing it apart and re-assembling the right way. Not one of my shining moments.
That gave me a little time to contemplate, and I realized my design was very functional but not much to look at. It needed some curves. So I scratched my head and decided to add a crest rail to the top of the fixed frame.
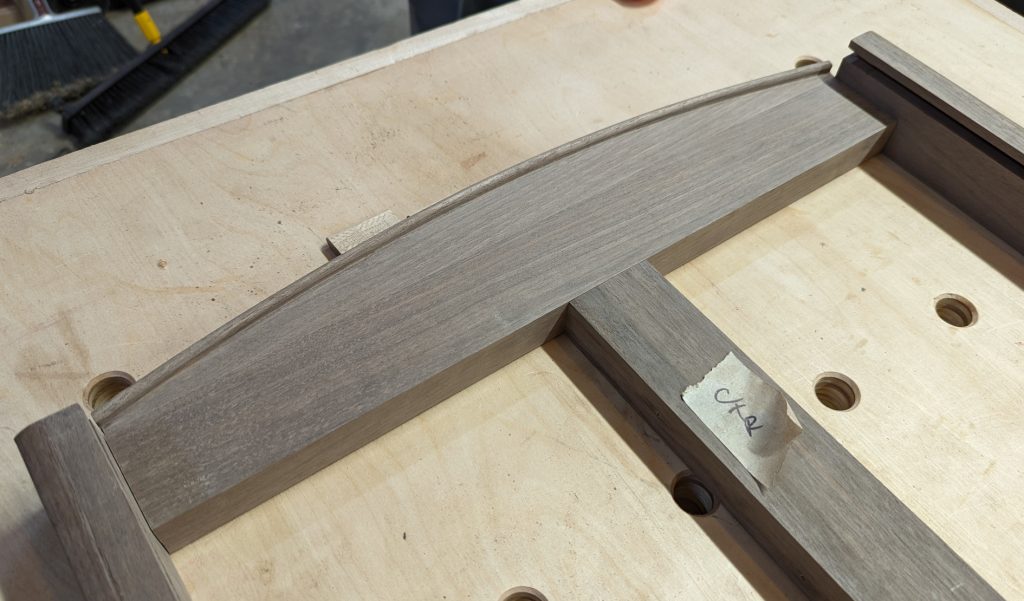
And since I needed a tray in the front to hold brushes, etc. I curved the front edge of that and used the same bead molding as a functional lip:
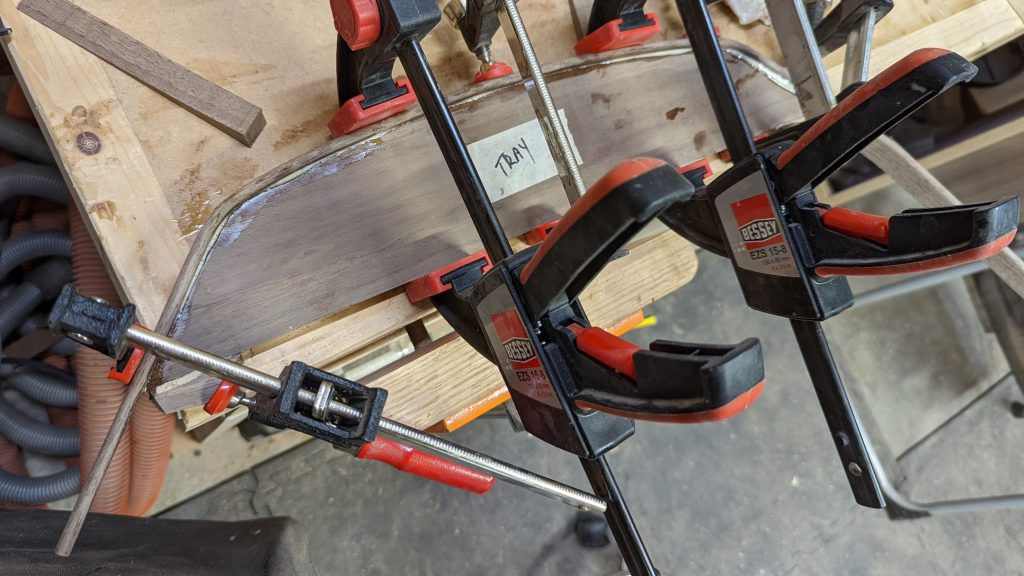
Both of these operations involved bending the walnut I’d milled as a straight bead molding, which is something I’d never done before. I soaked the pieces in the bathtub for an hour to make them a bit more pliable and on the tray I used a heat gun as I slowly tightened the clamps to get around the tight bend. I also used polyurethane glue to take advantage of the wet wood (though I was surprised how fast it dried out under the heat gun).
That worked out so well I continued with the tray piece. My plan was to have the tray fit closely into the frame and tighten it from the back with knobs. And that mostly worked, but the knobs looked really big so I substituted smaller, ratchet-style levers instead.
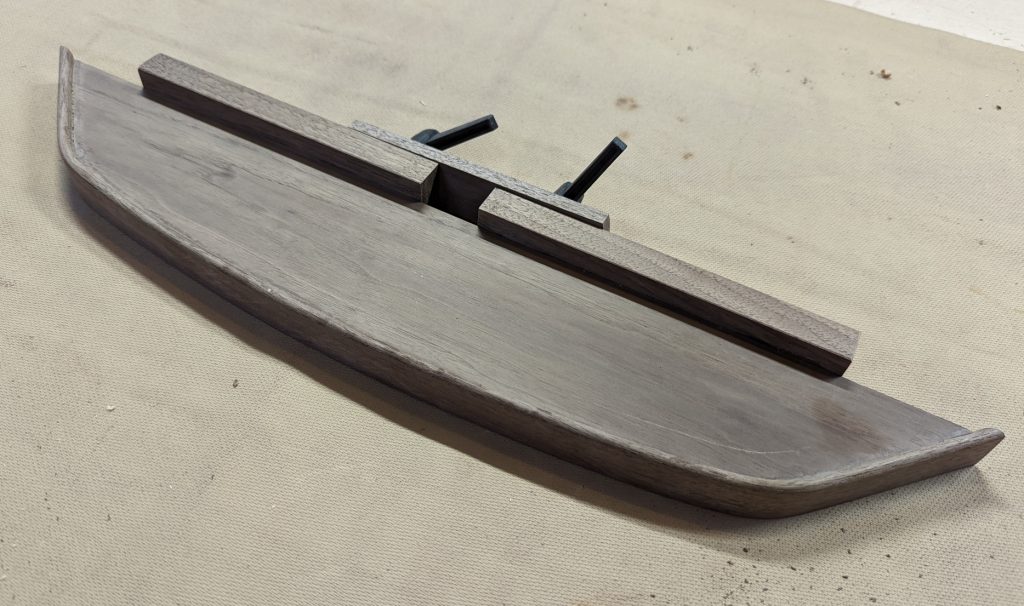
This would prove to be smart, because I placed the threaded inserts for them a touch too close together — I had to chamfer the back of the middle strut on the fixed frame to accommodate them, and the original knobs would have had left no room to grip them. The back of the tray fits in the gap between the fixed and floating frames and clamps only to the latter, so the easel height can be adjusted without having to loosen the canvas. I figured that would make sitting to standing transitions, or the reverse, easier.
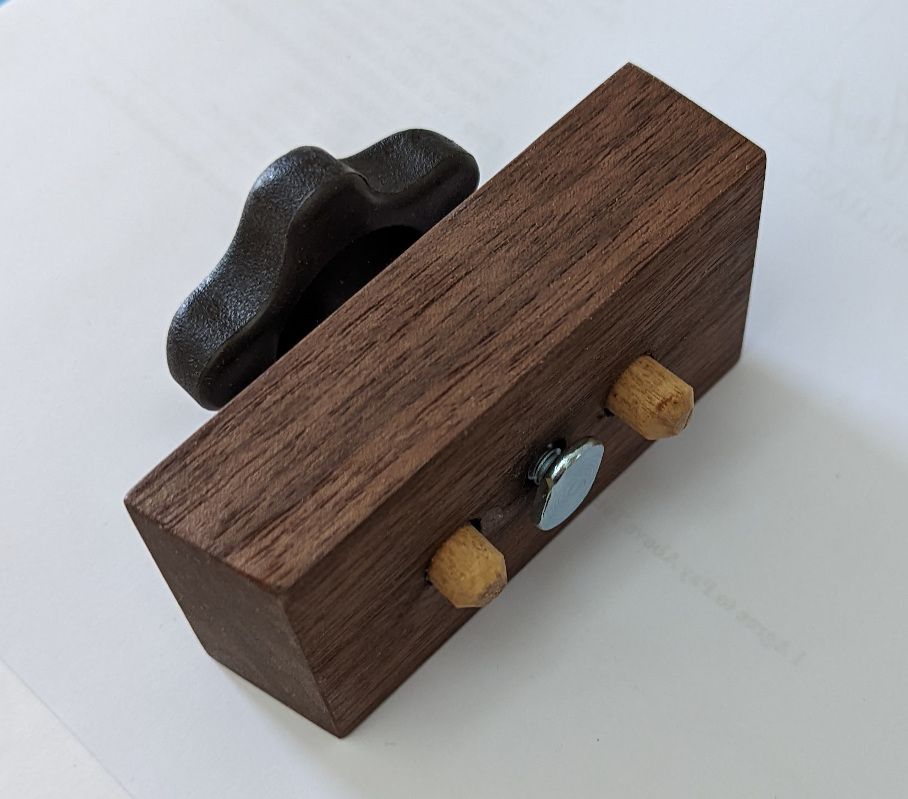
For the upper clamp, I did stay pretty simple: just a block of walnut, with one side beveled at 5 degrees, and two dowels to keep it straight in the track. It tightens with a simple knob.
The drawer box is made of walnut-veneered plywood. I wanted 3/4, but the only stock they had at Woodcraft was 1/2 inch. I wrapped the grain around the top and sides, and added an extra piece on each short end to make the thickness I would need for mounting it.
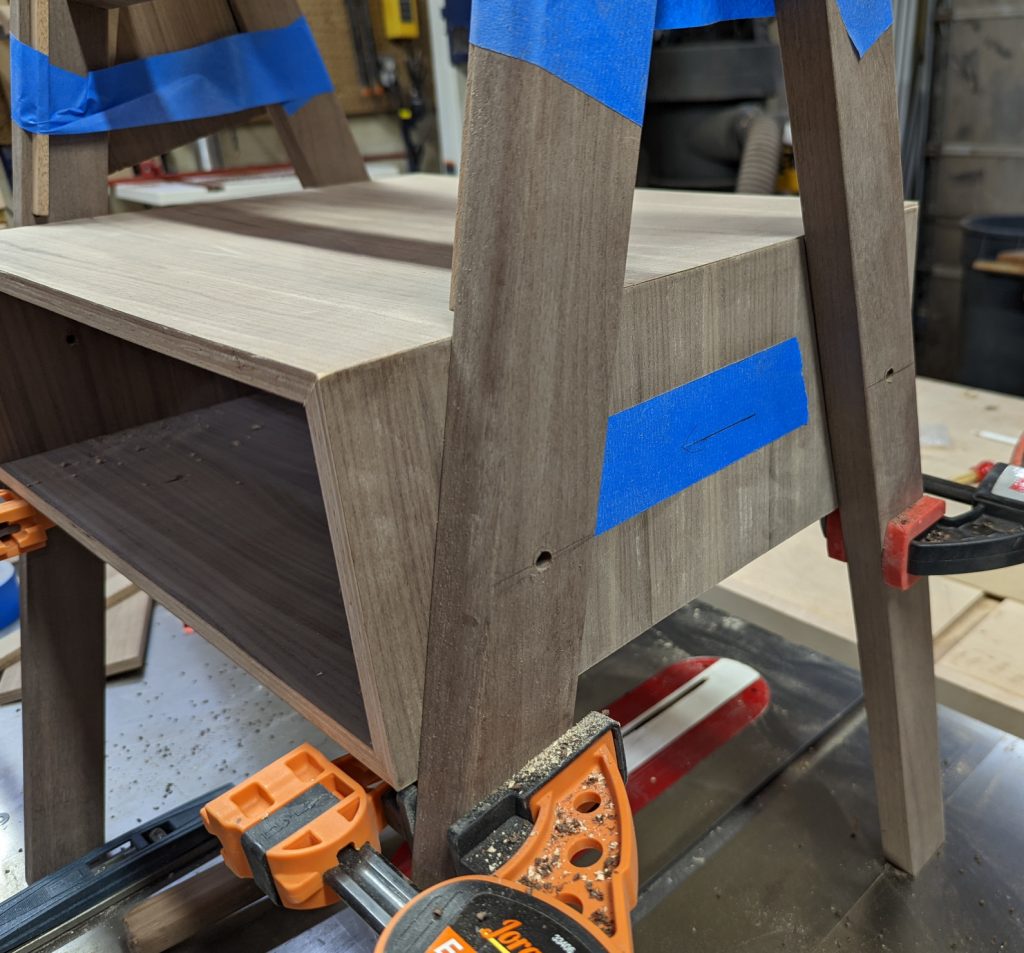
Mounting it was fairly easy. I set the legs with the 30-degree total splay enforced by clamping angled blocks between the front and rear legs. A little blue tape kept that all in place. Then I placed the box between the legs, held it level with clamps, and drilled 1/4″ starter holes through the legs and sides at the same time. Then I used a 3/8″ drill bit to enlarge the holes in the box to accept threaded inserts.
The drawer itself was mostly simple — a plywood box. But it had a full overlay front, and it would need a lock so that the drawer wouldn’t come open when the easel was folded up or moved. The first lock I chose wouldn’t work — it sat right at the edge of the plywood. I got another with more setback and drilled the false front for it. Then I had to route a big void in the actual drawer front to accommodate the lock and its swing.
Which left the question of what the lock would swing into. I needed to make a slot in the middle of the plywood, 3/8″ back from the front edge. And that was a bit of a quandary, because the box was not tall enough for the router, biscuit joiner, or domino. Running the router on edge, with a slotting bit, felt really awkward, so that was a no-go. I finally ended up using an oscillating multitool to chew out the material until the lock closed and held the drawer tightly.
Now that I had it all together, I took it all apart again and removed all the hardware so I could apply a finish. I’ve been experimenting lately with hard wax oils, and I’m a big fan of Oli Natura. It’s half the cost of Osmo or Rubio; the only problem is it’s made in the Netherlands (I think) and doesn’t have English instructions on the can.
It seems to apply like any other hard wax oil, though. I poured a little out at a time into a paper bowl and applied it with a white Scotch-bright pad, wiping off the excess with an old T-shirt. After that was good and dry, and looking really nice, I re-assembled everything and it was done.

It’s not perfect, but it looks nice and Sarah was impressed. And it was a nice break from clocks and boxes. I hadn’t made anything from walnut in a long time and it’s easy to forget how well it works and how great it looks.


Recent Comments