Julie’s Bow-front Chest, part 2
With the case finished for now, I wanted to turn my attention to the tricky part of this build — making the curved drawer fronts.
There are 12 total drawers, each with a drawer box front of 1/2″ poplar and a false front of 3/4″ ash. So that meant 24 curved parts. But, since the drawers would have grain that flowed across the visible parts, what I really needed was only one form, 42 inches across. to bend the parts over.
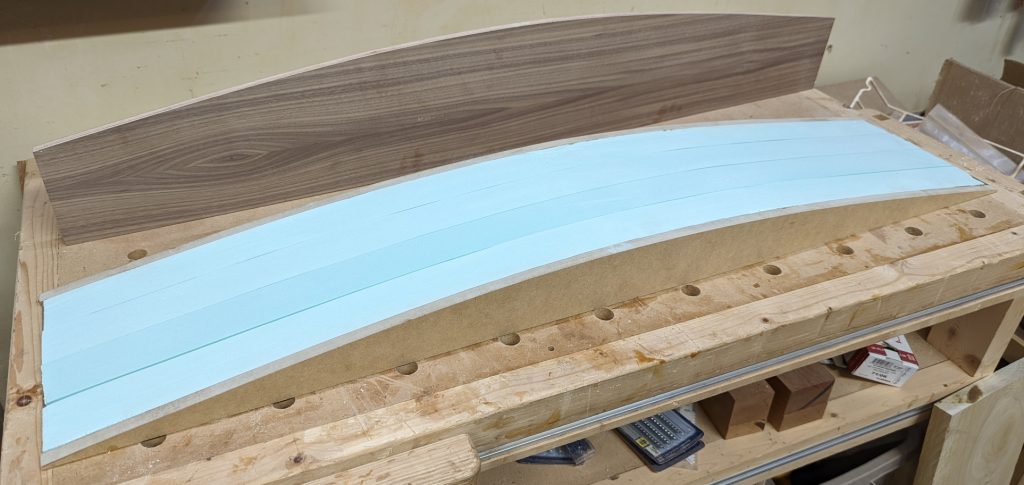
I started with my master curve, and a 4×8 sheet of 2-inch rigid foam insulation, and made a bending form:

I cut two solid sides from MDF and filled the rest with the foam. A long scrap of 3/4″ plywood with PSA 120-grit sandpaper on it shaped the foam down to be level with the MDF on either side. It is a total of 9 inches wide and 42 inches long, which is actually 2 inches longer than I need to allow for trimming at the edges.
Now I needed to get my ash and poplar down to thicknesses that would bend. This isn’t that serious a bend, so I figured a quarter inch would be thin enough. I installed a resawing blade (3/4″ wide, 3tpi) in the bandsaw and set up the planer. It also made sense to run the boards through my table saw to get smooth, parallel edges. One board had a definite arch, so I cut one side straight with the tracksaw and then cut the other side parallel on the table saw.
I started by planing the wood just until all the sawmarks were gone from both sides — I needed to keep as much thickness as I could. I started with 4/4 pieces, which in hindsight was cutting it very close. Using 5/4 would have provided a bit of breathing space.
Once the pieces were flat, I went to the bandsaw and cut a 1/4″ thick slice from one face of each piece. Those got set aside, and then I planed the other side again to get it back to flat. Then back to the bandsaw to cut another 1/4″ thick slice. At that point I had less than a quarter inch of material remaining, so I stacked those up too.
Then I ran the rough side of the resawn pieces through the planer. I used a sled made up of 1/4″ plywood to raise the wood up a little, and set the planer to its slower speed to minimize tearing. It worked well on the 1/4″ pieces, and I ended up with 7/32″ of usable wood. I also ran the remainders through, since they were flat on one side, and wound up with pieces 9/64″ thick. Which was good, because I ended up needing some of those to make up drawer fronts for one level of drawers — fortunately three of those equaled, at least closely enough for my purposes, two of the thicker pieces.
I trimmed the pieces at the table saw to get them all to 42″ long and uniform widths. They are still overwide, but that’s by design; they will get trimmed again later.
Now came the interesting part. I was going to try vacuum pressing for the first time to clamp the parts down while the glue dried. To do this I bought a kit from RoarRockit consisting of a 20×70″ vacuum bag, netting, seals, and a hand pump to create the vacuum. A mechanical vacuum pump would be $400 and I wasn’t going to spend that until I was sure this would work for me, so the hand pump was essential. So was some Titebond cold press veneer glue, which has a longer open time than regular wood glue.
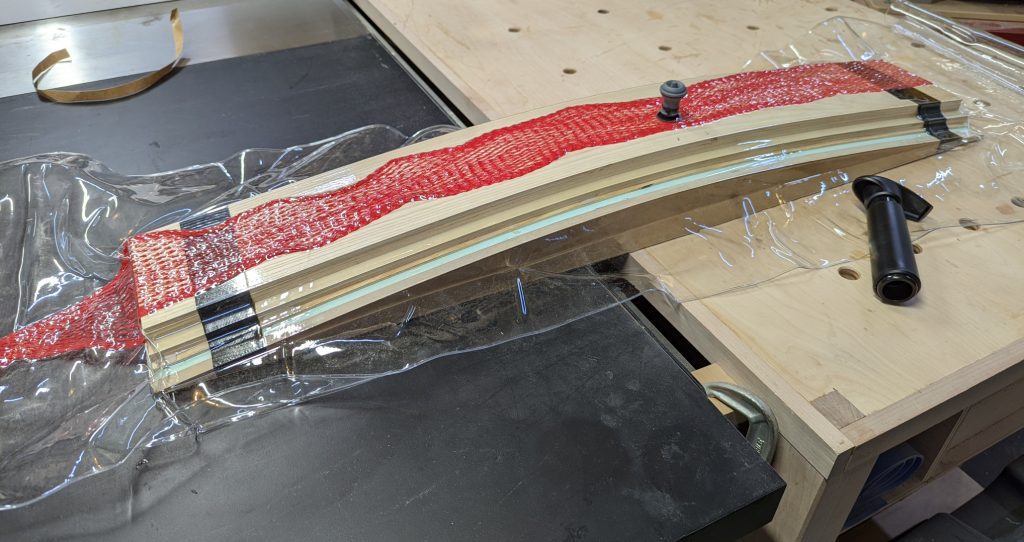
First I did a dry run, without glue. I put two pieces of poplar (total 1/2″), and then tree pieces of ash (total 3/4″) onto the form and used duct tape to secure it. Then I slid that assembly into the bag, put the mesh on top, and sealed it with the provided tape. I put the hand pump on and started pumping … and pumping … and pumping.
Okay, it wasn’t really that bad. It took about 120 pumps to completely evacuate the air from the bag, and once done the seals and the valve held perfectly. I left it alone for half an hour and there was no sign at all of vacuum loss, so I opened the valve and unsealed the bag. Test successful.
Now for the real thing. I applied veneer glue to the first piece of poplar, and pressed on the second piece and placed it on the form. Then I glued the first and second pieces of ash and stacked on the third. I carefully aligned the boards to minimize the amount of trimming later and clamped them down, then applied duct tape to hold it at each end because the clamps couldn’t go in the vacuum bag. Then that whole assembly slipped back into the bag, the mesh on top, and I sealed it again and pumped out the air.

This time I left it for about 4 hours. When I removed it from the bag, it was permanently curved, just as intended. So I did it three more times to get all my drawer front pieces.
By putting the poplar and ash pieces in a stack, with the poplar at bottom, I was able to get them to glue together in exactly the way they will be positioned in the finished piece — the poplar pieces at a slightly smaller radius than the ash. This should help a lot when it comes time to divide these large pieces into smaller ones, and to fit the false fronts to the drawers.
The other 3 sides of the drawers were straightforward. In order to make sure the 1/4″ groove was in exactly the same place on the fronts as the sides, I used a slot-cutting router bit on all of the pieces even though it was only necessary on the curved fronts.
Now came the next challenge: rabbeting the fronts around the sides. I saw how Tamar did it on 3×3 Custom, and that looked reasonable, so I did basically the same thing. I made another set of jigs out of my master curve, but that to the final dimensions of my drawer fronts, and then laid the pieces down and ran them through the table saw to rabbet each end. The jig got cut on the first piece, of course, but that was intentional.
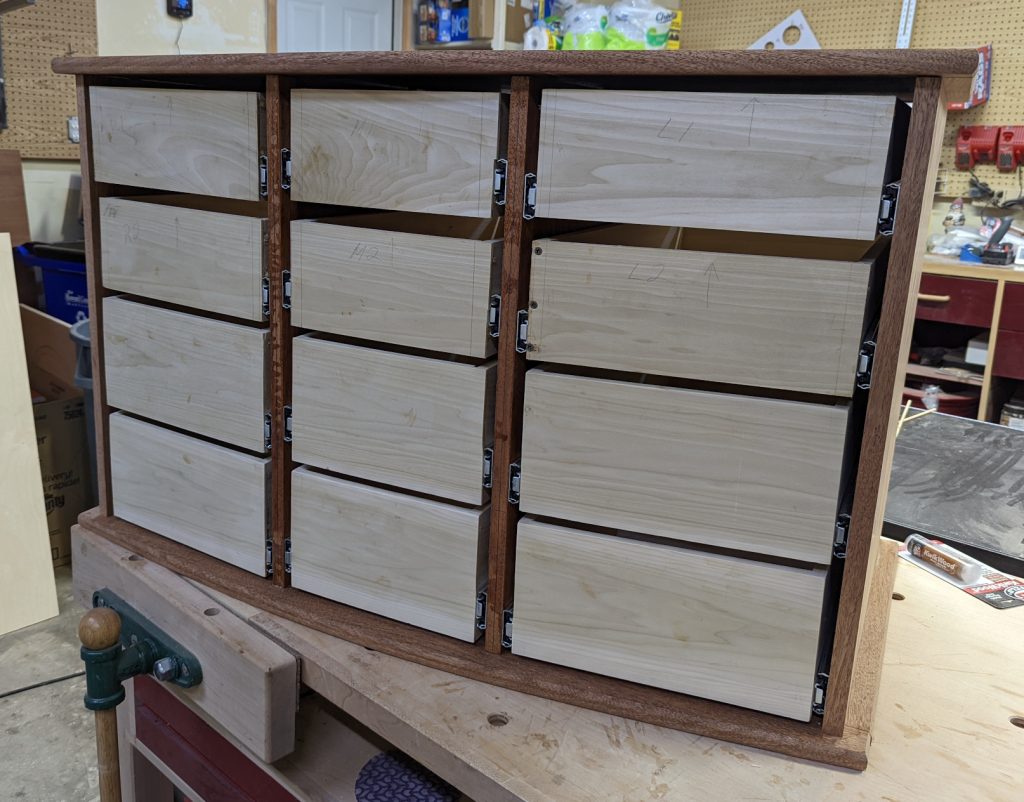
Truthfully, I didn’t have great results. My rabbets were too big in some places and out of plane in a couple. If I were doing this for someone else, I would have had to start over and bend new pieces, but I really didn’t want to spend money on more wood. Instead, I decided to epoxy those front joints (it’s gap-filling, after all) and fill in the spaces when it dried with Kwik Wood epoxy putty. A lot of extra work, but not as much as redoing the clamping form and front parts. If won’t be visible once the drawer fronts are attached.
I also decided to insert dowels in those front joints to provide resistance against pulling force. This may not have been strictly necessary, but it took very little time and helps to overcome the dodgy joinery.
In the end, they look … okay. I’m not going to be bragging on this, but you also aren’t going to see them once I put the fronts on.


Recent Comments