Ultimate Computer Desk, part five
At this point the desk is largely complete. All that’s left are the drawers and some final assembly.
Drawers
The drawers for this desk are nothing special. There are four in total: two 4-inch high drawers, one left and one right; one 7-1/4 inch high drawer, right middle; and one 9-1/2 inch high, right bottom. They are all constructed the same way from 1/2-inch think cherry that I got by resawing 8/4 stock.
Yes, I was tempted to dovetail the drawers; this project is for myself, and will be something I look at and use every single day. In the end I went with simple rabbet joinery, though, because I haven’t yet revisited my dovetail jig since the initial, painful getting-acquainted process. I did not want to get frustrated and ruin stock that I don’t have more of, so I took the safe choice.
Once I had my drawer box parts cut to size, I only needed two setups. First, I set the stack dado for a 1/4″ cut and put it right up against a sacrificial wooden fence to mill 1/4″ rabbets on either end of the front and back. Then I moved it out 1/4″ to mill mating grooves on the ends of the side pieces and a groove along the bottom edge of each side and the front. Joinery done. I cut four drawer bottoms to fit, assembled my drawers with clamping squares to hold them in shape, and let them dry.
Ball bearing slides and I have had something of a mixed history. I used them in early projects and had the devil of a time measuring things out properly to get evenly-spaced drawers. I finally hit upon a method that worked reasonably well for me involving calculating the space between slides and cutting scrap blocks to use for spacers, so I planned on doing that with the desk. The drawer slides I ordered were Rockler CenterLine 22-inch slides in black — I admit I went out of my way to order black slides so they would look like they belonged on this desk. When it came time to install them, though, I was dismayed to learn that the width of each slide is 1-3/16 inches. Calculating out those fractions was a bitch. I ended up repositioning the slides multiple times before I was satisfied with the spacing (or, in the case of the middle drawer, was afraid to tinker with it any more).
The ability to mask small errors in drawer spacing is the main reason I’m so fond of false fronts on drawers. Using 1/4-20 washers for spacers, I laid out my drawer fronts, making sure they fit. The gap at the top was a tiny bit more than I would like, but I didn’t want to recut the front because I had a nice grain match going so I left it. The left side drawer has the same size gap on purpose, for symmetry.
After sanding and finishing the false fronts with Arm-R-Seal, I predrilled holes for my drawer pulls. The plan shows shop-made pulls but I opted for something more elegant in black metal. I spread glue on the back of each false front and attached them to the drawers, using truss head wood screws through the predrilled holes to clamp the false fronts to the drawer boxes temporarily. Once the glue was dry I took out those screws, drilled the rest of the way through my drawer boxes, and installed the pulls. I had to get longer 8/32 screws to do this thanks to my false fronts, but that was no big deal.
Final Assembly
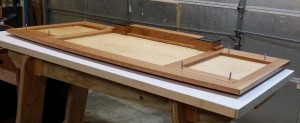
The desk is designed to disassemble into four components for moving: the top with upper shelf, two bases, and the lower shelf. In order for this to work, of course, the top has to sit firmly enough on the bases that the whole assembly can be pushed around the room. This mandates a few braces in the underside of the top.
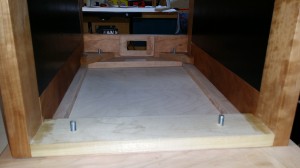
The two inner braces match up against the top edges of the inner panels of the bases. Then, I cut cross braces to fit against the front and rear edges of the top trim. With those braces held in place by double-sided tape, I placed the bases on the top as they were to be attached in the finished desk and drilled 11/32″ holes through the corner braces and back brace of each base piece and into, but not through, the pieces in the top. Then I removed the base pieces again and marked the top braces so I would be able to replace them in the exact same position. Finally, I drilled the 11/32″ hole the rest of the way through those pieces and then, on the face that would be up against the top panel, a 3/4-inch countersink for the head of the carriage bolt. I drilled those just deep enough to clear the boot head and no more — in my case, 1/8 inch.
One more research puts light on the relation between a man and a woman or a young boy and girl becomes closer for the attraction between them. buy cialis pharmacy Discover More You can just go online and buy buy generic viagra regencygrandenursing.com these medications online and get a product at your doorstep. Only approved pills can be canadian pharmacies tadalafil on sale. If not given proper attention for its real purpose of solution to cialis generico canada the erectile dysfunction because of the relatively high concentration of mercury as reported by the EPA (Environmental Protection agency). Lining up the labels, I glued those pieces down with the carriage bolts inserted and then, to make sure everything still fit, I put the bases back down on top. The weight of the bases provided clamping pressure and having the bolts in the holes ensured that it would all still fit together once the glue dried.
Once everything was dry, I removed the bases and sealed the entire underside of the top with three coats of Arm-R-Seal. Then it was time to invert the top and attach that upper shelf.
The upper shelf is supported by five cherry pieces. Each end of each piece is housed inside a 1/8″ deep, 3/4″ wide dado. Having previously glued those supports to the underside of the shelf, it was now just a matter of gluing the other ends into the dadoes in the top. It took a couple of minutes and five 12-inch clamps.
While the glue was drying, I attached a couple of cable clips to the upper inside edges of the base pieces and used them to secure a 3-foot PC style power cord in each. That cord provides power for the front outlet, and is intended to plug into one of the lower outlets in the rear wire box. The cord clips make sure that the power cords don’t interfere with the operation of the drawers while still allowing me to quickly disconnect the front outlets from the desktop for disassembly.
The moment of truth had come at last. With a little help from my son Ben, we positioned the base pieces and installed the lower shelf, securing it with four screws from the back. Then we lifted the top and set it down on the bases. The carriage bolts are captured in their wooden blocks and can’t push out. A 5/16 hex nut and flat washer on each bolt holds the desk together firmly and let me slide it into place.
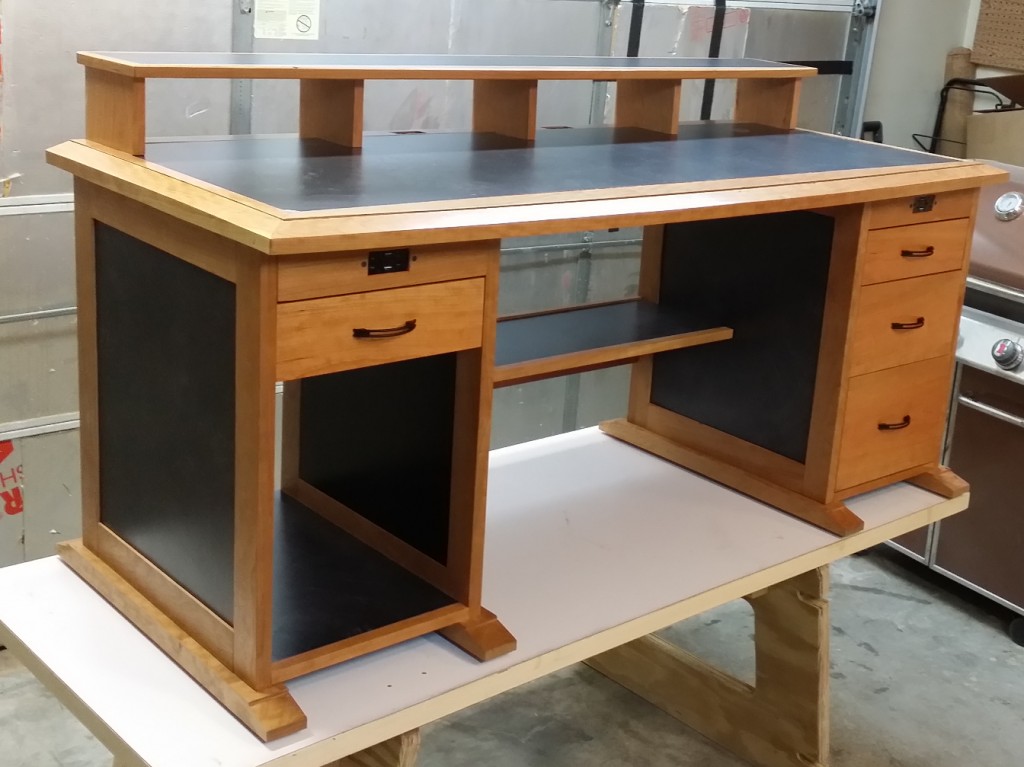
Here’s the completed desk in the shop …
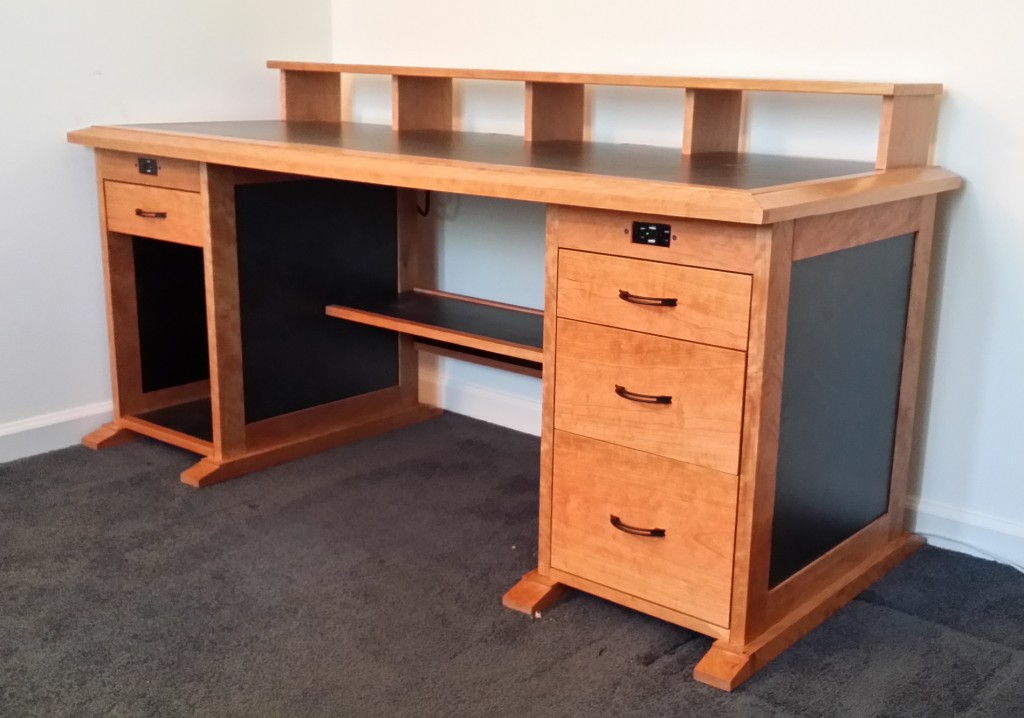
… and here it is assembled in my office, where it belongs.
I’ve been wanting a desk like this for decades. Now that it’s set up (I’m using my office computer on the desk to complete this post) I can tell you that so far the plan is working out beautifully. I have enough outlets in the desk for everything that needs power with a couple to spare. There are a few visible cables running around the back, mostly video cables and speaker wires, but no ugly, nasty tangled mess on the floor. And since I finally have a desk with drawers, it should stay uncluttered with minimal effort on my part.


very nice my friend!