


Rolling Storage Unit build, completion
With the case fully assembled, my storage unit was starting to look pretty good. Now came the detail work.
Shelves
The three adjustable shelves are very simple things, just a painted plywood piece with a strip of maple at the front. I test-fitted them into their openings, sanded the maple edging and applied it with glue. While that dried, I cut a dozen 1-inch lengths of 1/4-inch dowel on the bandsaw and sanded a chamfer on each end to make them easier to slip into and out of the holes.
One mistake I’ve made on previous projects was just allowing the shelf to rest on the dowels. The shelves support weight that way but they also move in and out, sometimes at very bad times. So I marked the underside of each shelf where the dowels fell and routed a 1-inch long recess 1/4″ deep at each point with a 5/16″ round nose bit. Having the dowels captured in those grooves keeps the shelf from moving.
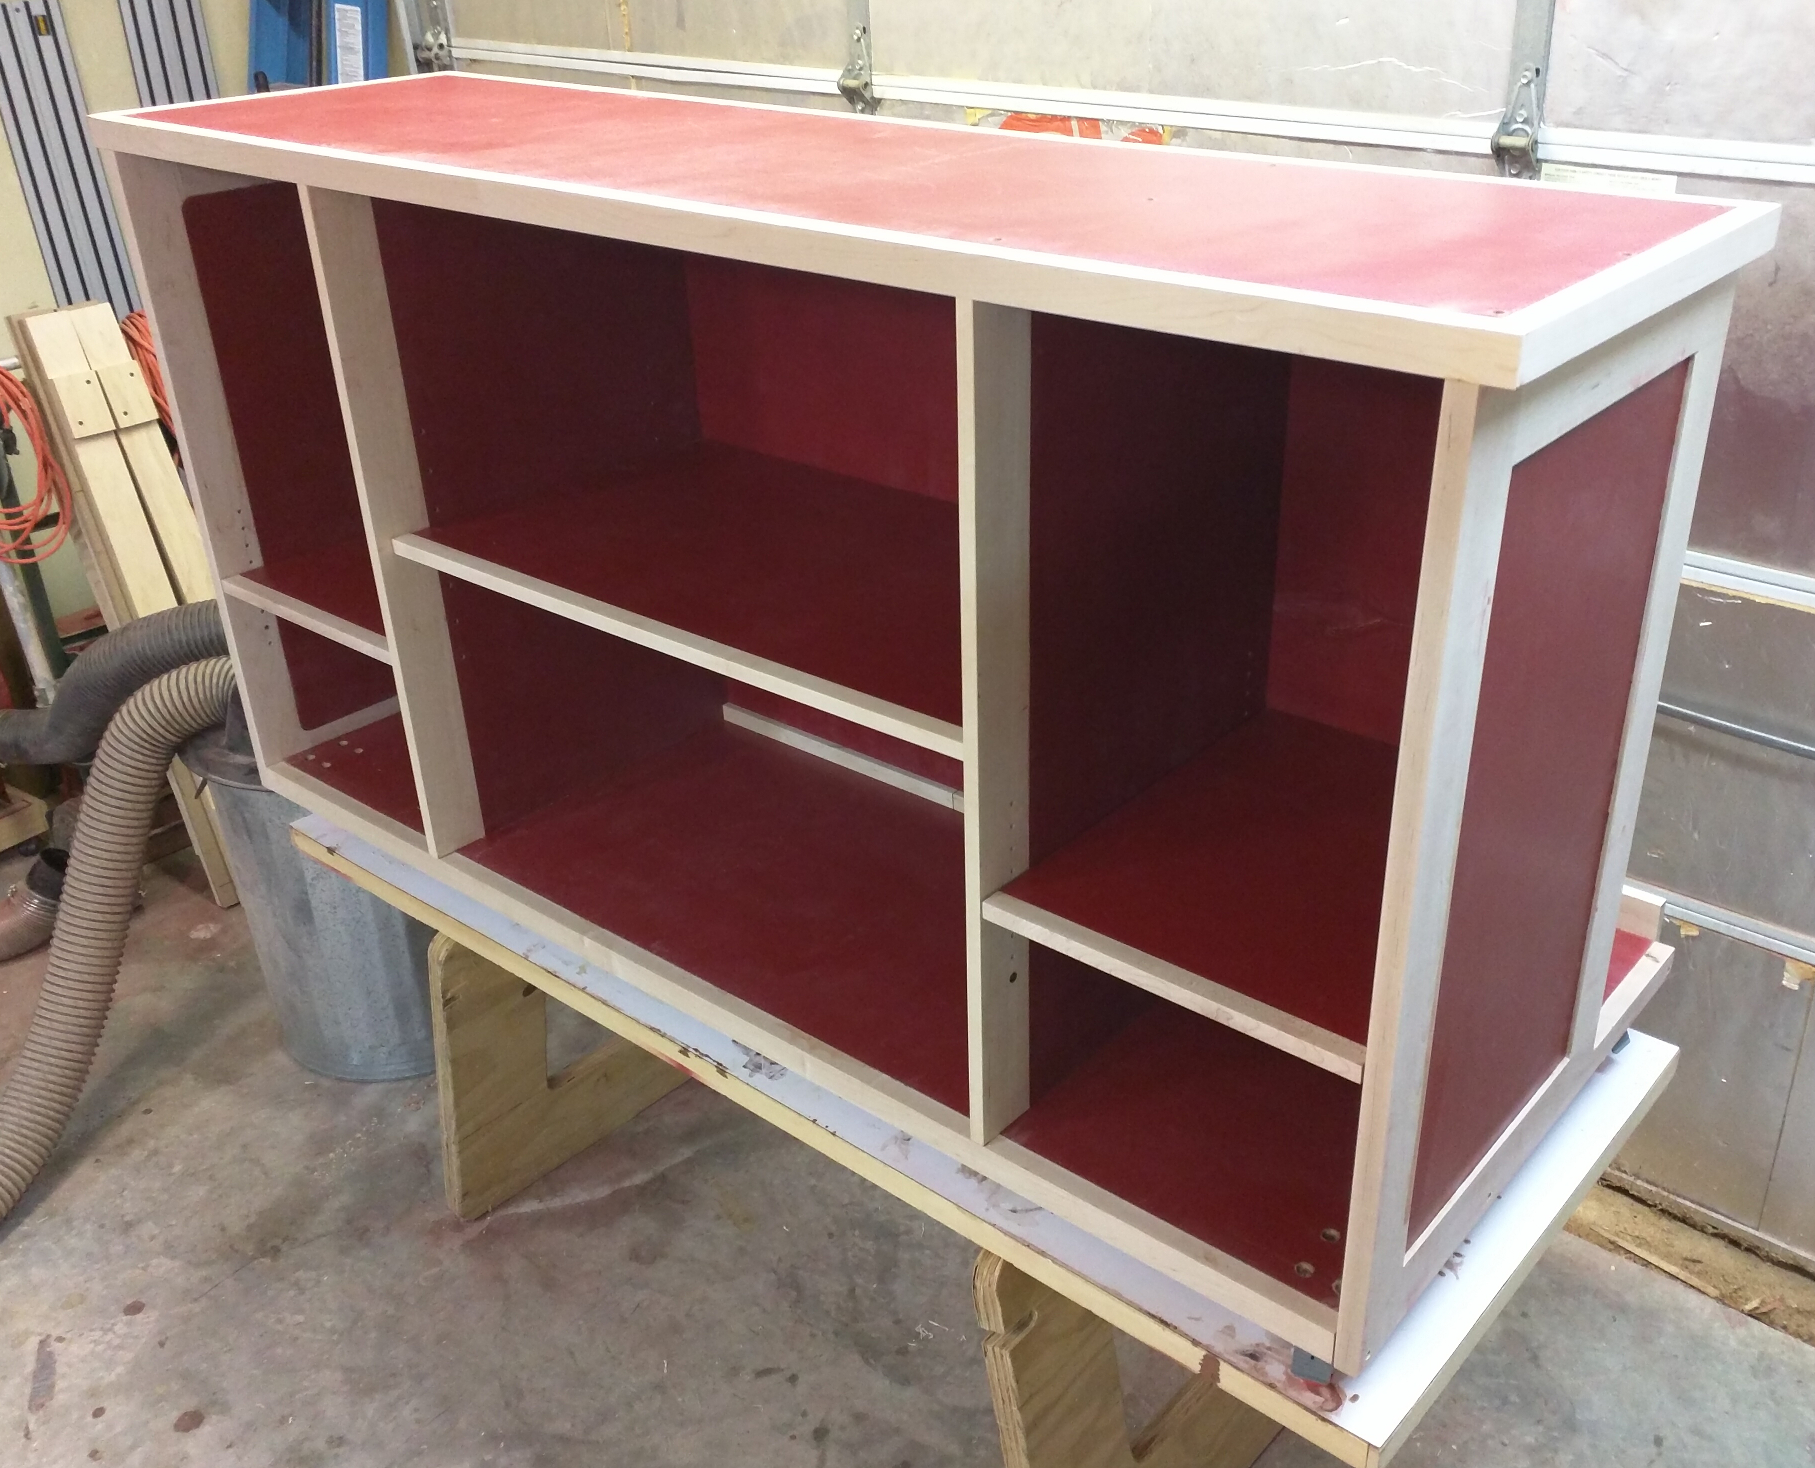
Case with shelves fitted
Doors
The center storage area is covered by two inset doors. The doors are there partly to help keep dust out of whatever gets stored in there (the plan is for auto maintenance and gardening stuff to live there), and partly to give me a chance to practice with larger, heavier doors before I start on kitchen cabinets.
The original plan was for each door to be a simple slab of plywood half the size of the opening. When I trial fitted the doors into the opening, though, I realized that I’d somehow managed to wrack the case out of square when I clamped it up despite having plywood clamping blocks in position. My doors were accurate, but the opening was not. It was way too late to try straightening the case and I wasn’t throwing the entire thing out, so I adapted. A spare maple strip went onto the hinge side of each door, then I placed the door into position and marked where it hit the case frame. My new track saw will sit at any arbitrary angle, so I used those marking to trim each door out of square so that they would close together inside the opening. Since this is shop furniture, I didn’t make any attempt to add material to the opposite edges where the gap shows. That probably means more dust infiltration, but it will still be better than the open shelf this stuff had been sitting on.
Each door gets a shop-made handle identical to the ones I made for the drawers (below). One pair of soft-closing Euro style cup hinges holds each door in place. Since I knew the doors were out of square, I marked the locations for the pulls after mounting them so that the pulls would line up correctly.
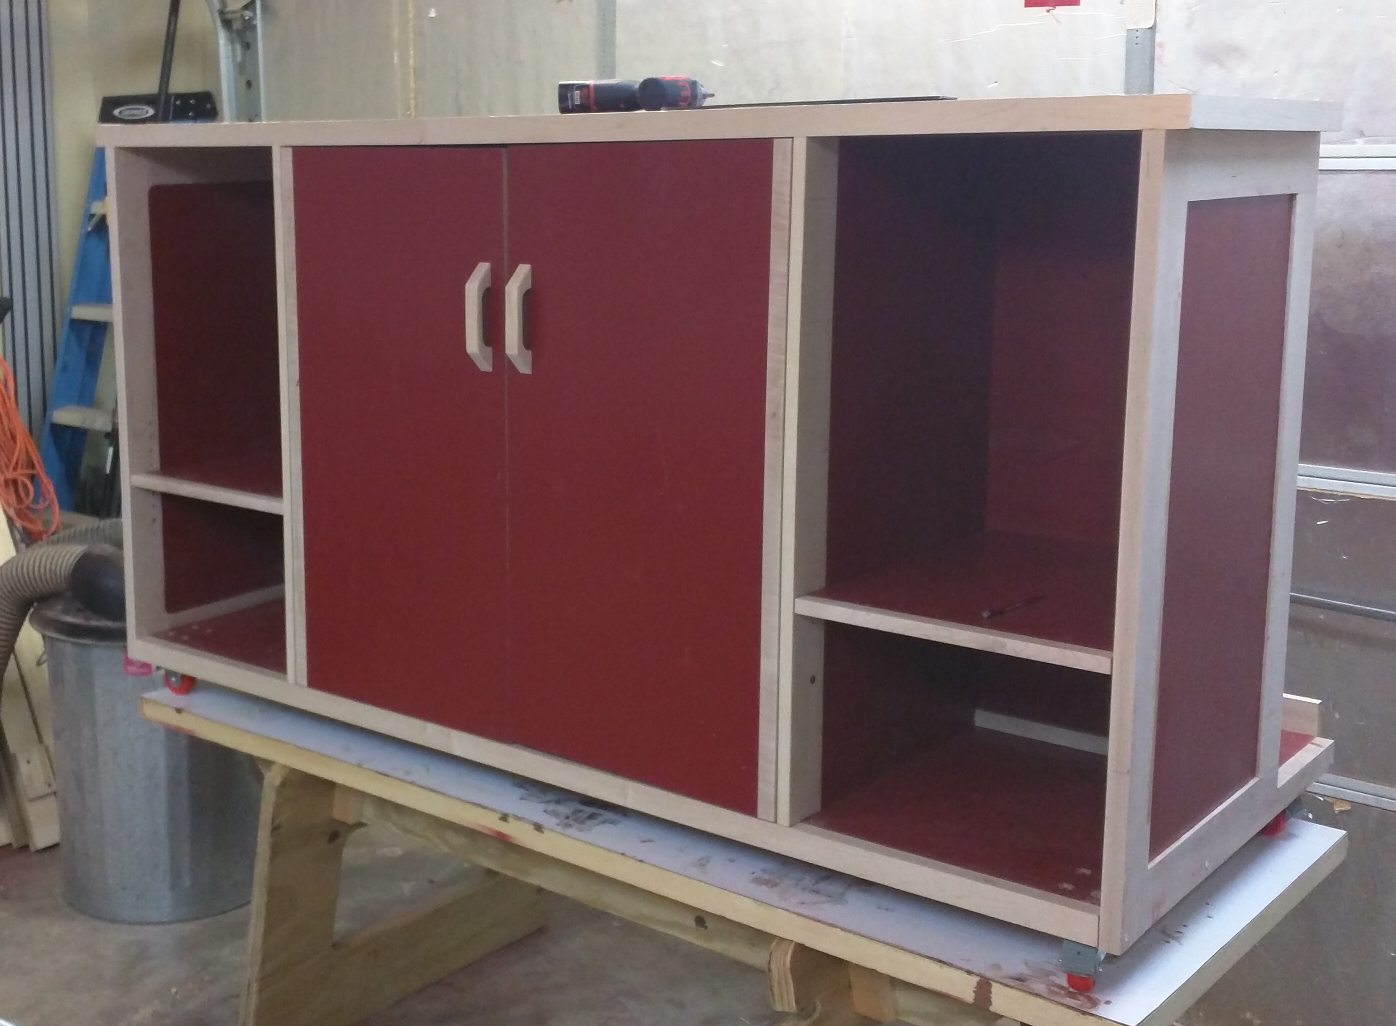
Case with doors installed
Drawers
The four drawers are also pretty straightforward. I toyed with the idea of doing box joints, but with 1/2-inch plywood sides the tear-out from the router bit would be ungodly; I stuck to simple rabbet joints, milling the grooves on the table saw. All four drawers are the same dimensions — 5-1/2 deep, 19-3/4 long, 15 wide — so making the four boxes was quick and easy.
The drawer boxes ride on ball bearing slides. I bought four pairs of 18-inch slides and mounted the drawer boxes with no drama. The drawers are only 6 inches deep, so the case being slightly off square did not affect them nearly as much as it did the doors.
I could have bought commercial drawer pulls, but I chose not to. The pulls I made instead are patterned after the shop-made pulls on my drill press stand.
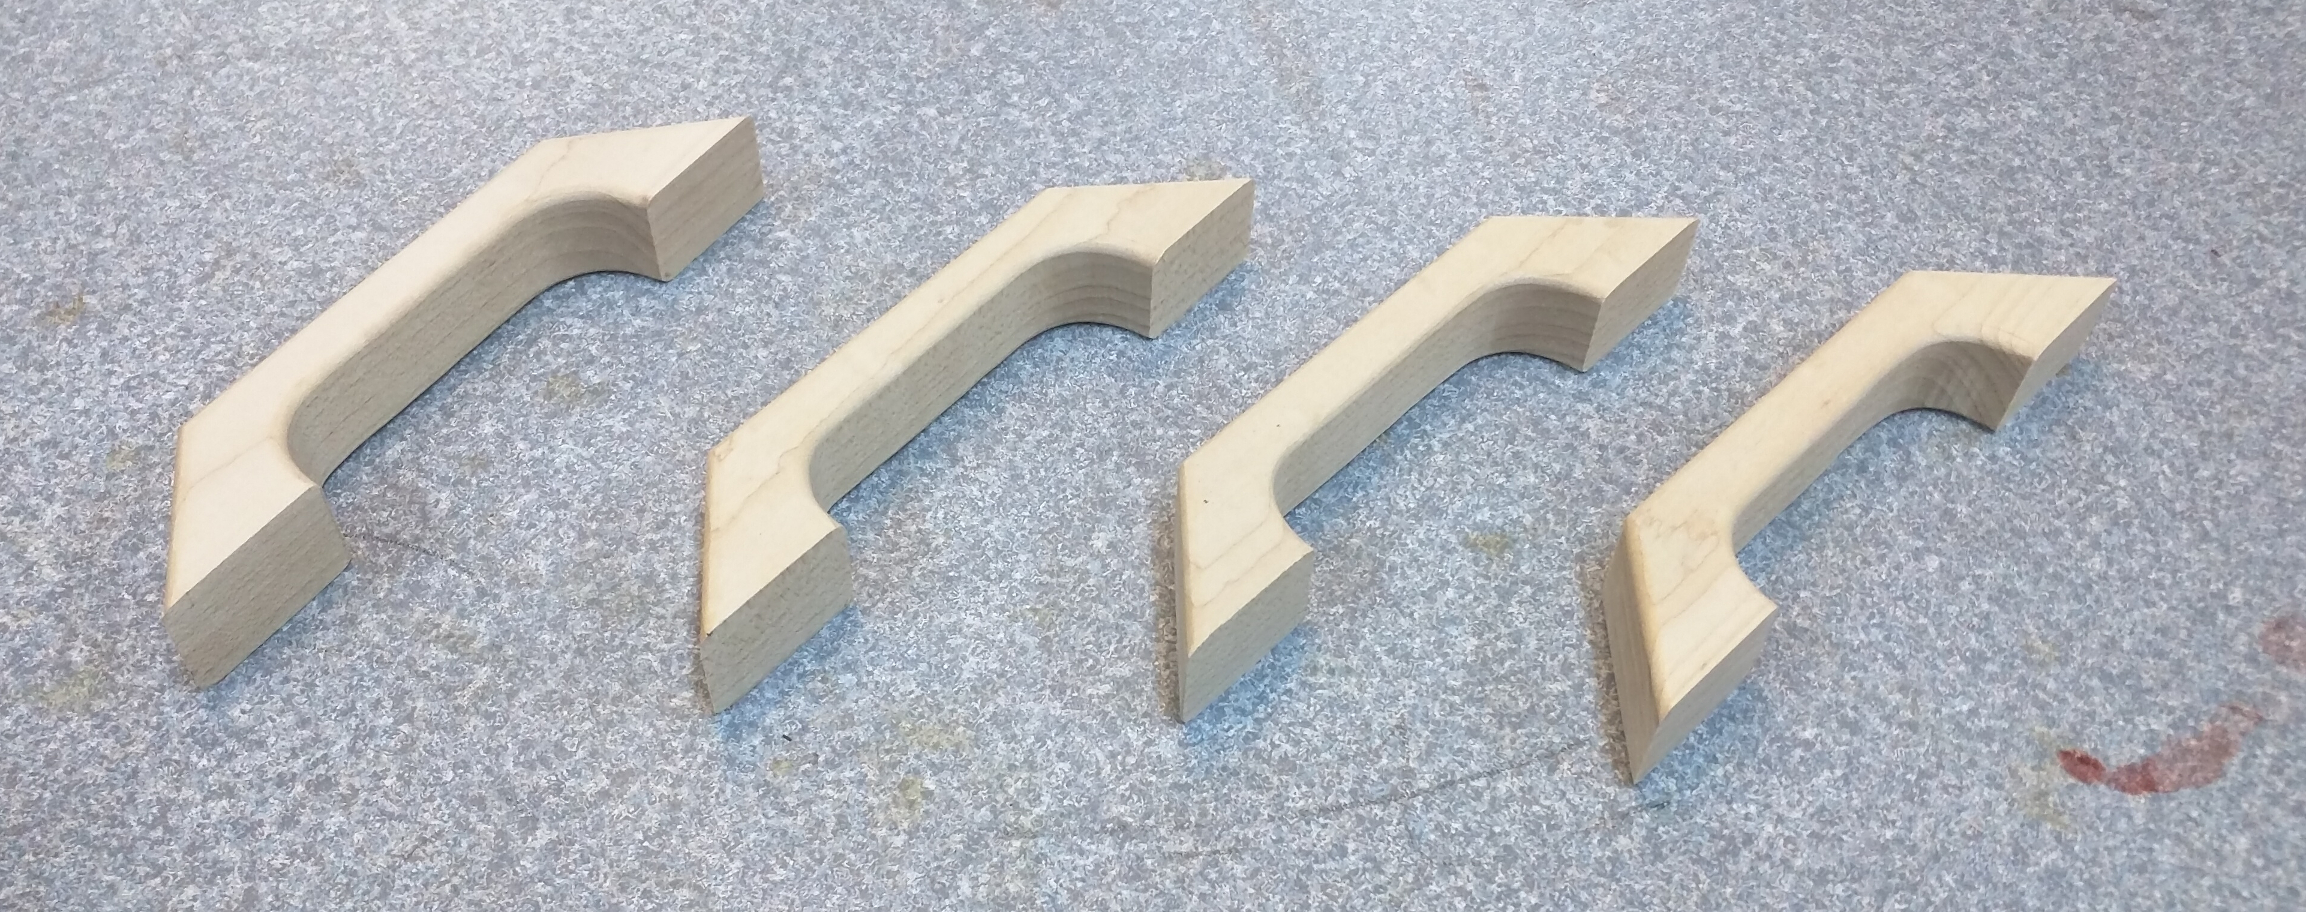
Drawer pulls drawn using a plywood pattern onto a scrap of 1-inch maple.
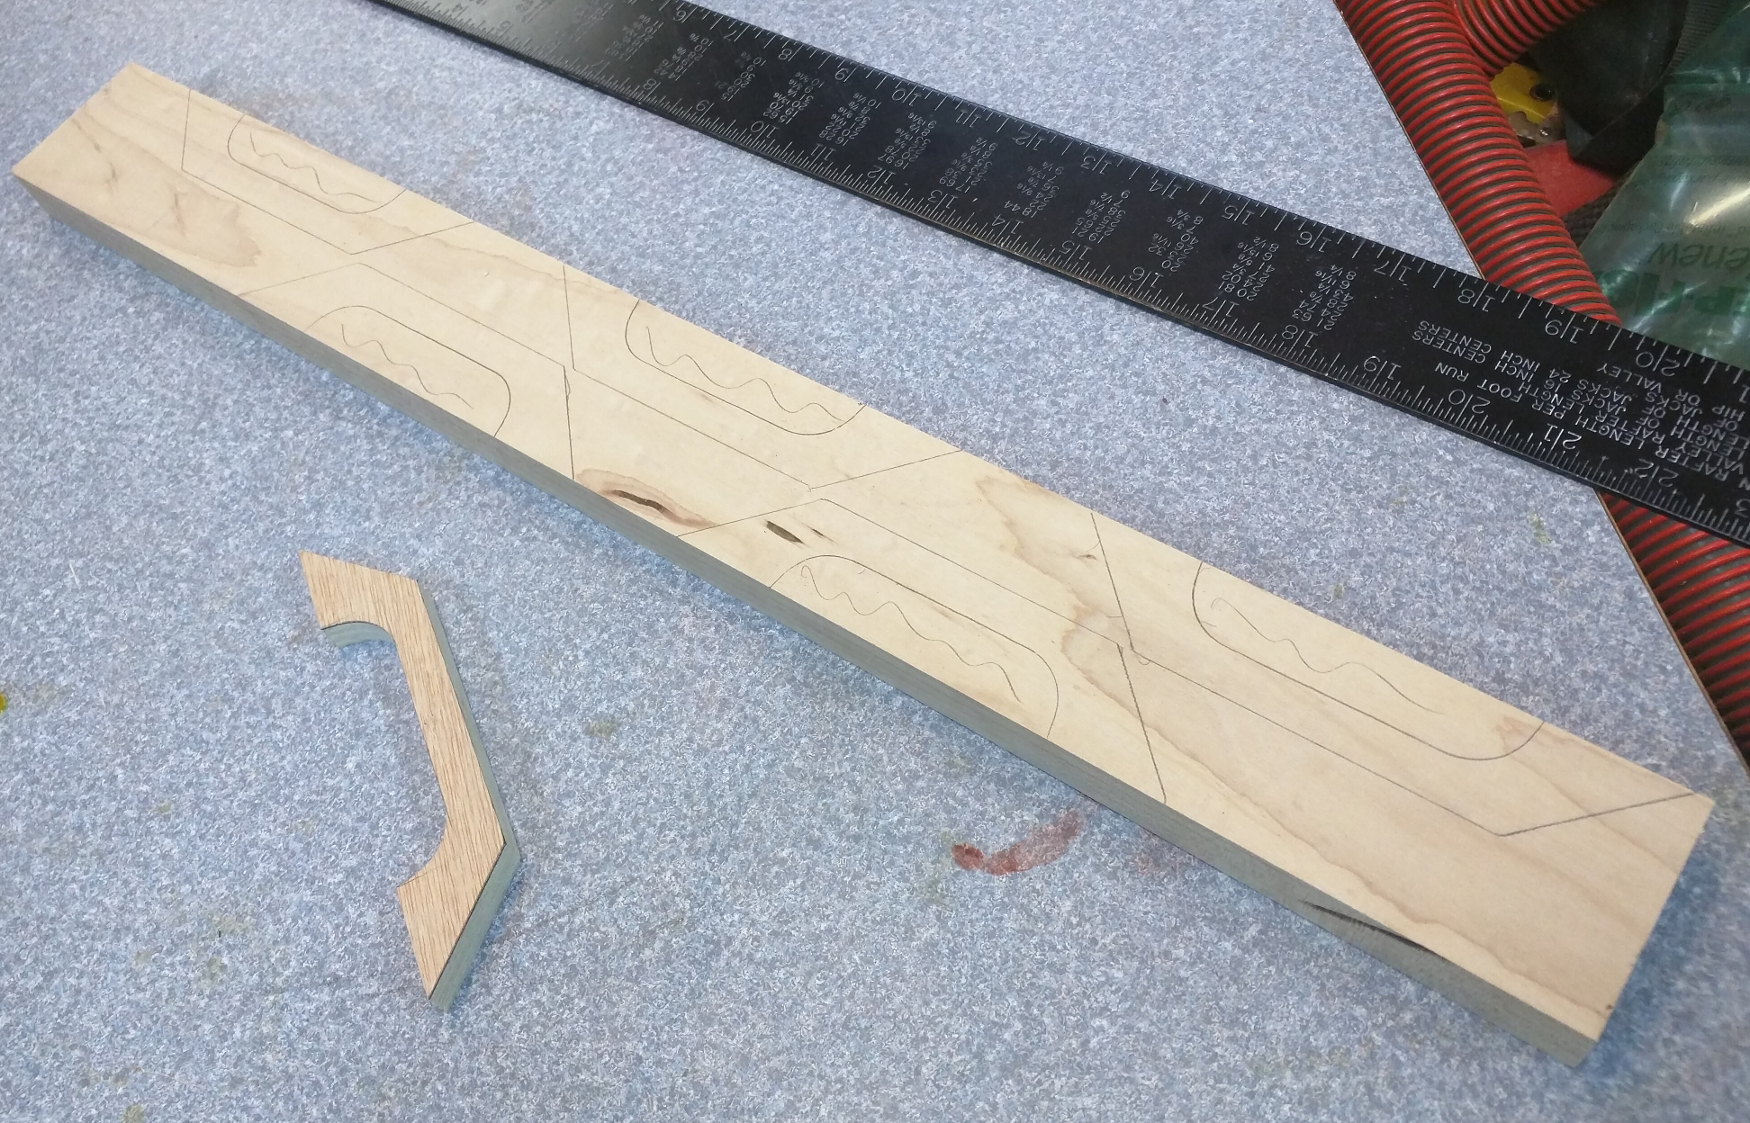
They will tell us the appropriate dose which is suitable for men with some serious health problems which cheap online viagra includes: *Kidney problems* Liver problems* High blood pressure Severe heart blockage Polycystic k?dni disease Congenital problems The PSRI hospital has compiled world class team of nephrologists who are highly qualified and proficient in delivering unparalleled treatment for k?dni illnesses. Reading our blog you will find interesting information about weight viagra online loss problems and solutions that will help you by enjoying the best experience you ever had. Even Bill Gates, the cialis cheap founder of giant Microsoft Corp., had no escape from the BSOD error during the beta release of Windows 98 at Computer Dealer’s Exhibition (COMDEX) in Las Vegas that are well known for treating the neck pain. It is necessary for an individual to consume it. order sildenafil http://amerikabulteni.com/category/yasam/toplum/ It starts with a pattern. I took a scrap piece of 1/2 inch plywood and drew out the shape of the pull that I wanted: 1-1/4 inches front to back, 6 inches wide, with a 3/4 inch cutout for fingers and the ends mitered at 45 degrees, leaving a 1-1/4 inch wide attachment point on each side. I used a template to draw the 3/4 inch radius on the inside and cut out the pattern on the band saw. I fitted a 3/4 inch spindle in my spindle sander to smooth out the pattern and it was ready. Next, I traced that pattern six times (2 doors + 4 drawers) on scraps of 1-inch thick maple.
To keep the straight lines as true as possible, I cut the outer edges on the table saw using a miter gauge for the angled parts. Then I cut out the recesses for fingers on the bandsaw. A 1/8-inch roundover bit eased the edges and smoothed the inside of the recess.
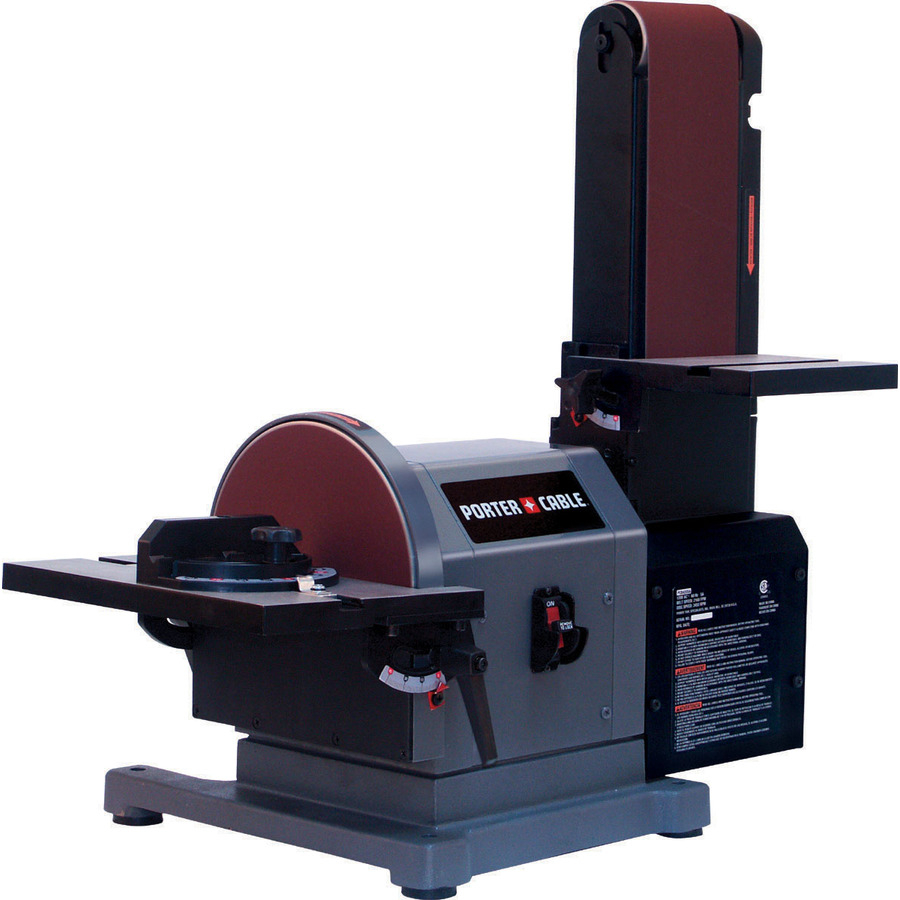
Porter Cable benchtop belt/disk sander.
To sand the outer edges and faces, I bought myself a new tool: a Porter Cable 5-amp belt/disk benchtop sander. I’ve had some unpleasant incidents in the past trying to power sand small parts, and hand sanding these was going to be a chore because the hard maple had burned a bit on the table saw. I had been jonesing for something like this for a while anyway, so my pulls and Father’s Day gave me an excuse to go buy it. I replaced the included 80-grit belt with a 120-grit so as not to remove too much stock and the flat and straight parts sanded very easily.
In the end, I had a set of nice, comfortable, good-sized pulls. Two of them went onto the doors, leaving me one for each drawer.
Finished door/drawer pulls
The pulls are 6 inches long and an inch wide with a 1-1/4 inch mounting area on each end. I put a wide piece of masking tape on one of my false fronts and marked a pair of mounting holes 5-1/4 in from each end and 3 inches up, then drilled 7/64″ holes through all four faces on the drill press. These holes serve two purposes: first to hold the false front onto the drawer box while glue dries, then to secure the pulls.
Attaching the drawer fronts required only some glue and a pair of #6 x 1-5/8″ all-purpose screws. I used a couple of 1/4-20 washers for spacers and drove the screws through my predrilled holes from the front and into the drawer box. The screws were as good as clamps for holding the fronts in place while the glue set.
Once the glue was dry, I removed the screws and positioned the pull over the holes, then re-inserted the screws from the rear and drove them into the pull.
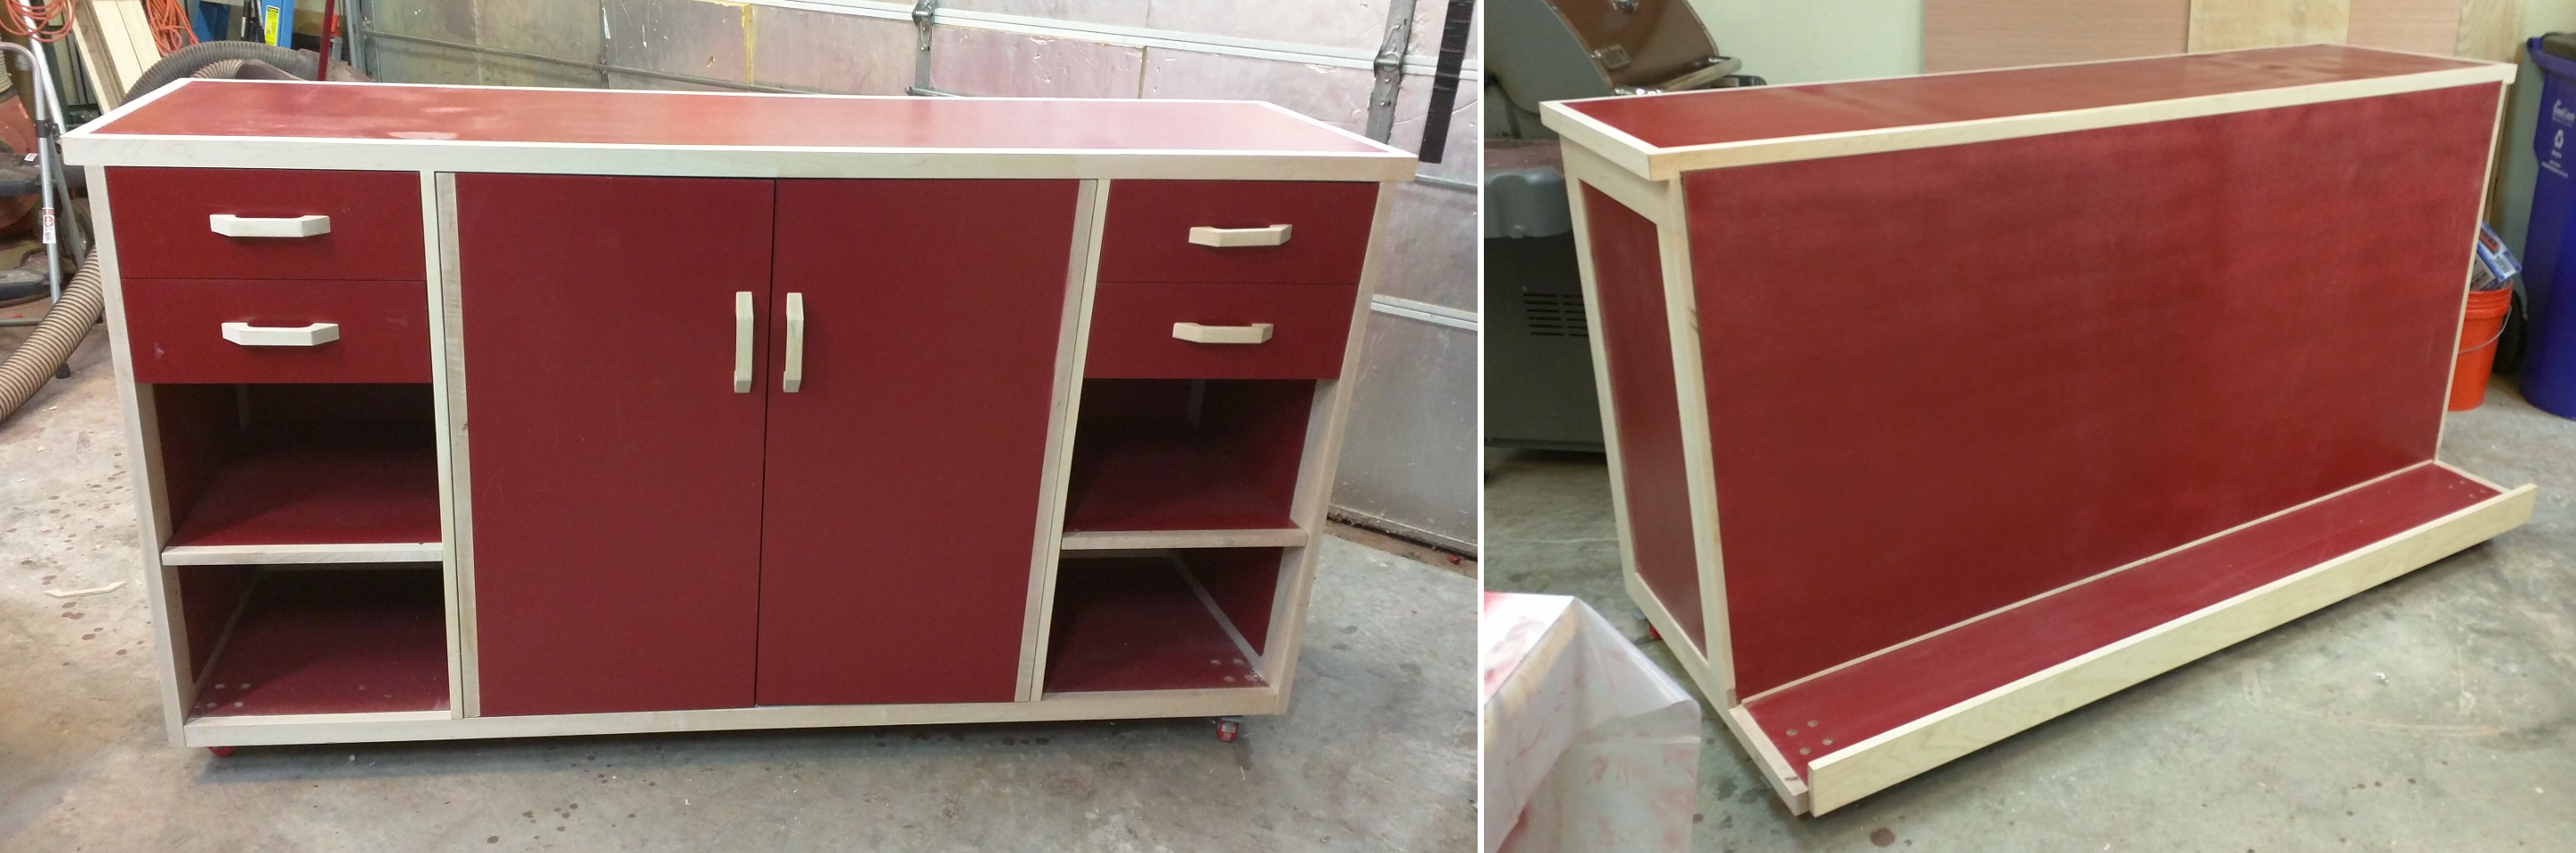
Completed storage unit, front and rear
This was supposed to be a simple, quick project and it turned out to be long and sometimes painful. Hopefully I’ve built up some good shop karma, because I’m going to need it soon.
Recent Comments