


Portable Planer Supports
Before I built my HDPE assembly table top, I used my knock-down work table base without a table top for my Penn State portable planer. The planer sat on a plywood subbase with cleats that captured the insides of the two rails on the table base. That held the planer firmly in place, and between the close fit and the planer’s weight I didn’t even need to clamp the planer down to use it.
The biggest drawback to this planer, as with pretty much every portable planer (and especially the first generation of them, of which the Penn State model was one), is snipe — that tendency for the board to tilt upwards into the planer head as the last few inches come through, causing a pronounced step down in thickness. The way you combat that is with good outfeed support. My solution was to place a metal stand with a roller bearing top toward the rear of the table base to help hold up the board. It mostly worked, but I still planned on chopping off the last 6 inches of each board most of the time.
With the HDPE tabletop, though, my working habits have changed a bit. This top is heavy — way heavier than the plywood top I’d been using — and is therefore a lot more cumbersome to remove and set aside. So I find myself reluctant to do it unnecessarily.
When I did the stock prep for Roselyn’s toy chest, I just set the planer down on the HDPE table and put my roller bearing stand right behind the table. That did not work out very well: the HDPE surface is very slightly textured, but not enough to prevent the planer from sliding around despite its weight. And having the roller stand over 4 feet away made it a lot less effective at reducing snipe. The situation improved a bit when I placed my plywood cutting supports across the table and dropped a piece of 1/2-inch plywood on top of them, which gave me a flat surface at the same height as my planer bed but much closer to the outfeed side. I was able to finish that stock prep by just making sure to push the planer back into position between each pass.
The success of that improvised outfeed support gave me the idea for a more effective, stable setup for my old planer:
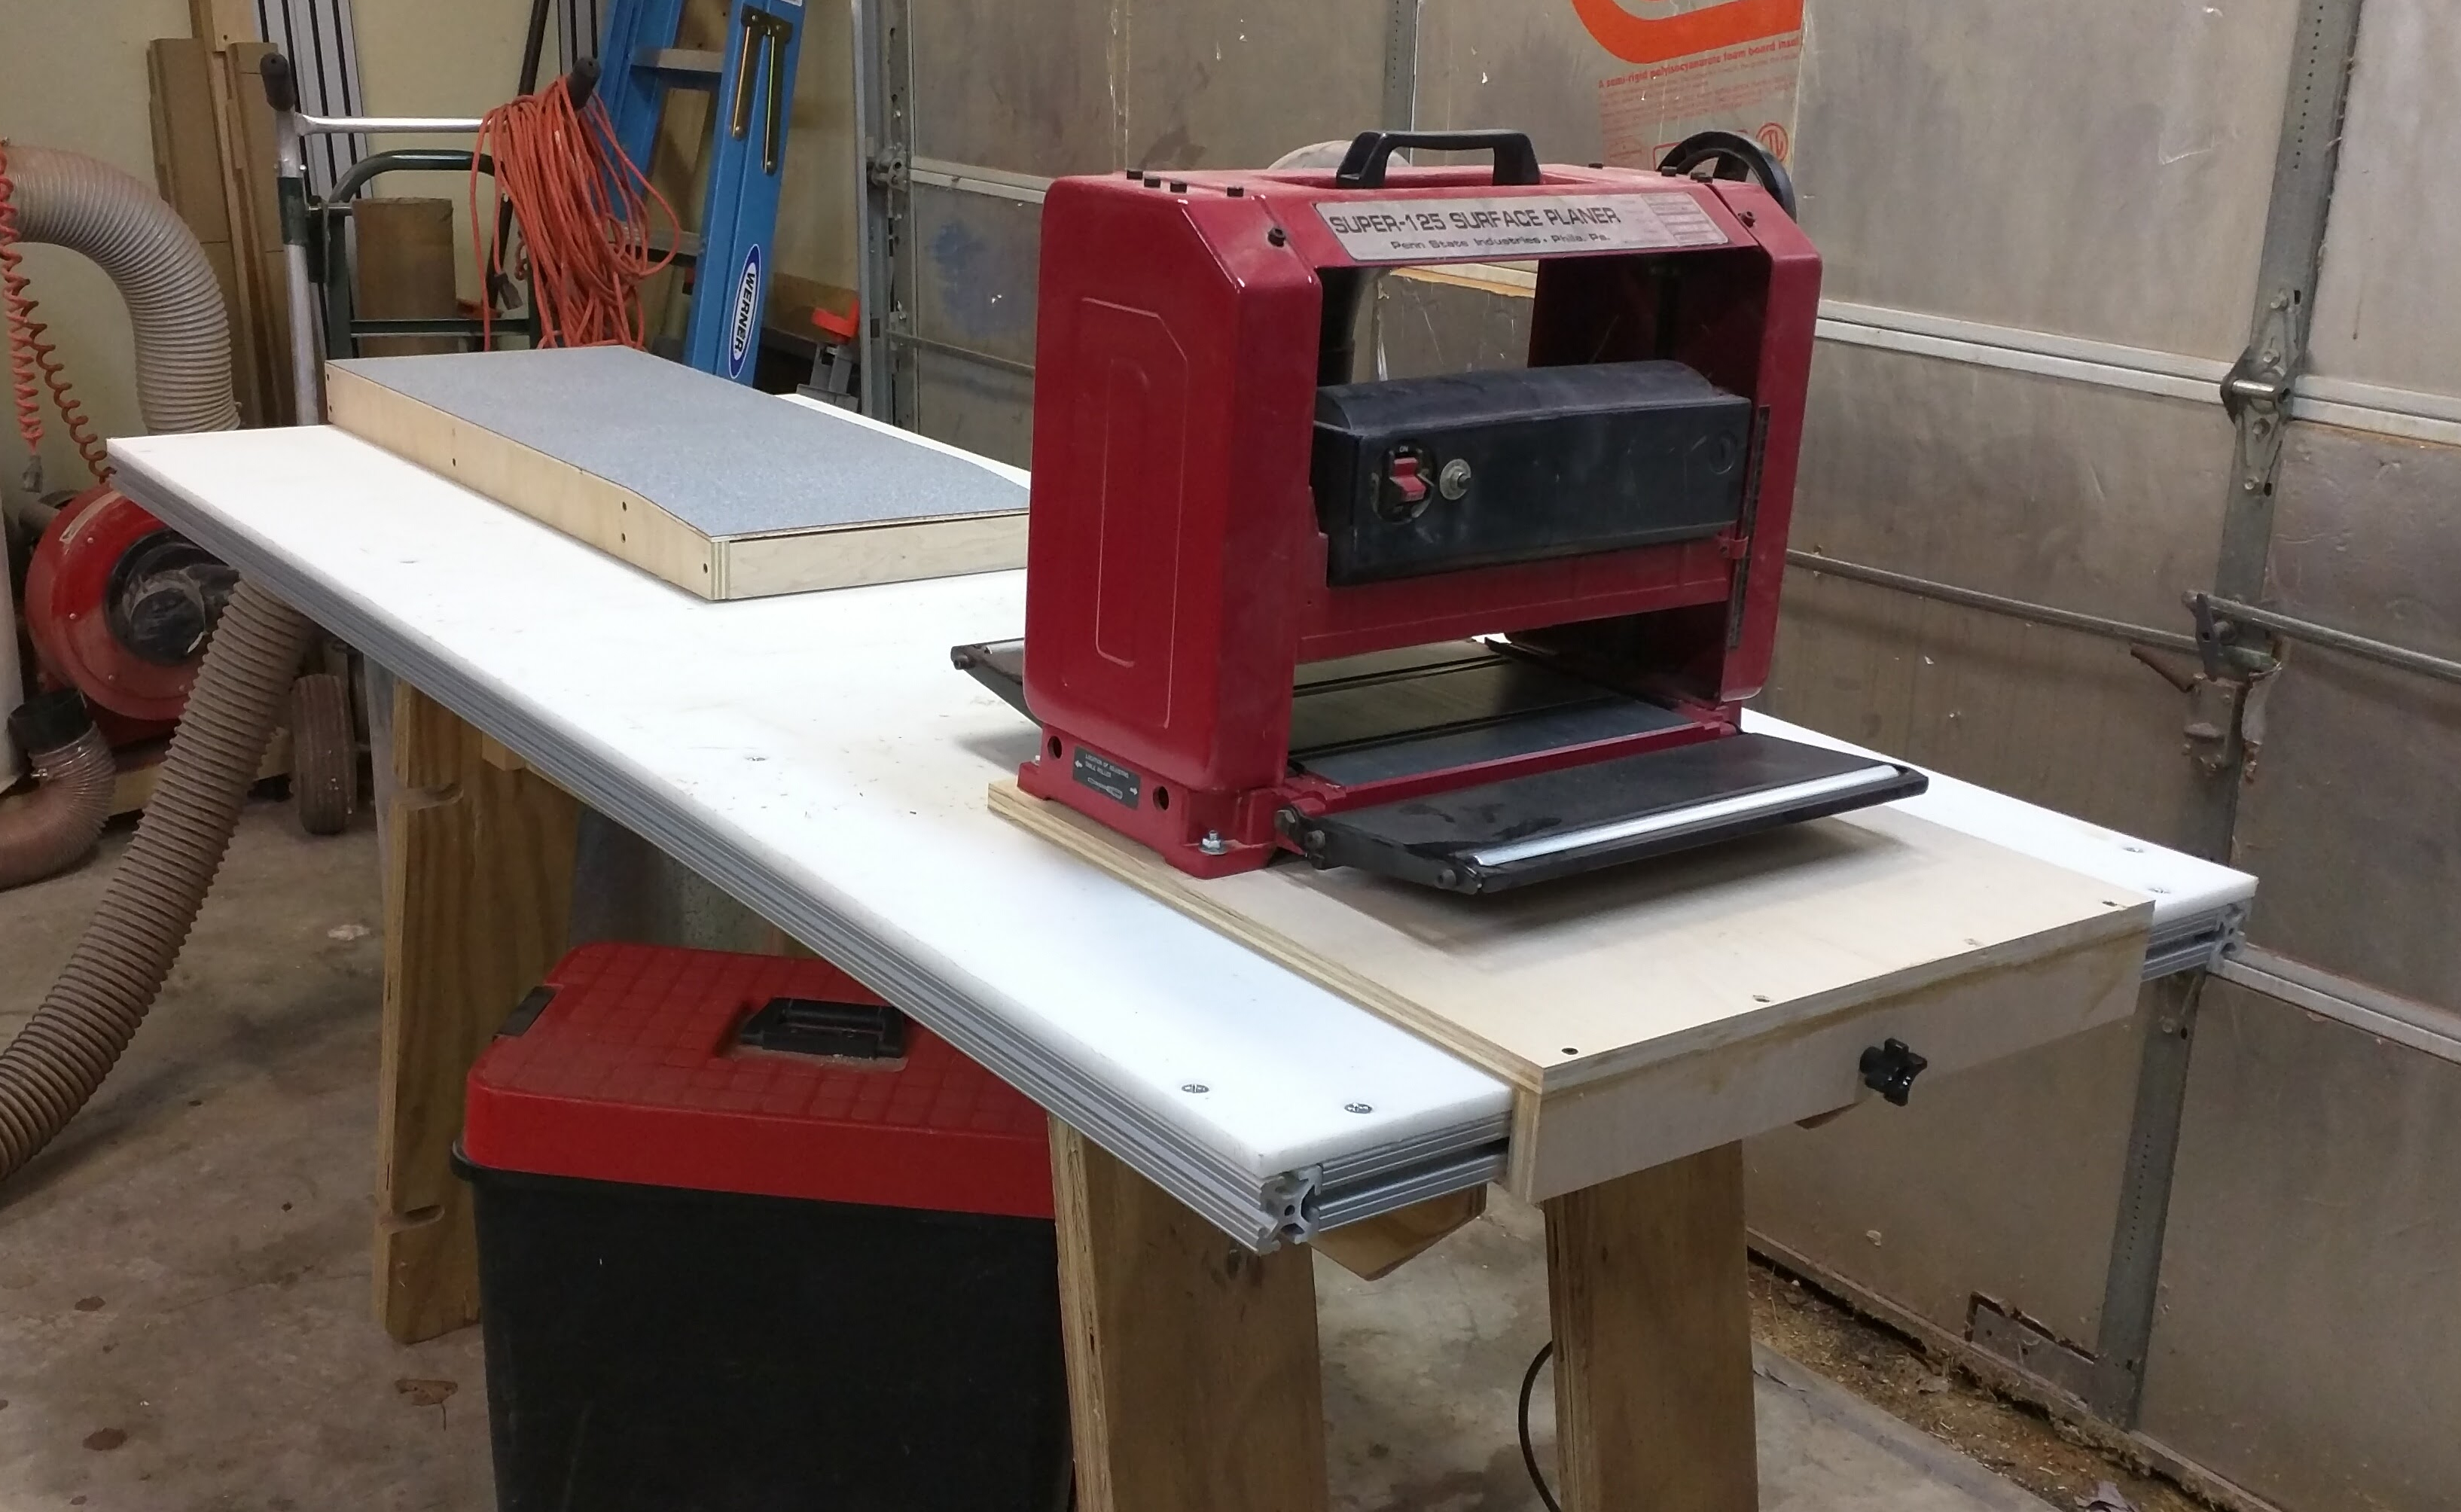
My portable planer with its new base and outfeed support
The system consists of two separate parts that each secure to the table top to prevent any sliding.
First, I made a new plywood base for the planer itself. I used 3/4-inch maple plywood because it’s what I had handy that met the requirements: thick enough to countersink holes in for carriage bolt heads, and strong enough to bolt the planer down and attach a front cleat. I have some MDF, too, but I disqualified it because MDF has no grain, and therefore very little resistance to downward pressure and fasteners tear through it easily. The main piece is 20 x 20 and the front cleat is 20 x 2. As you can see, the front cleat is attached with glue and screws, nothing fancy. I set the planer in place and marked the locations for the bolts, then drilled first a 5/8″ diameter countersink in the bottom and then a 5/16″ through hole in the center (using the center spur mark from the 5/8″ Forstner bit as a starting point) for the bolt. I tapped the carriage bolts into place, applied a washer and nut on the upper side, and secured the planer. Then I attached the front cleat, marked the location for the T-bolt hole in the center of the width and 1-1/4 inches down, and drilled a 5/16″ hole there.
The hole is for an 80/20 5/16-18 T-bolt, like these:
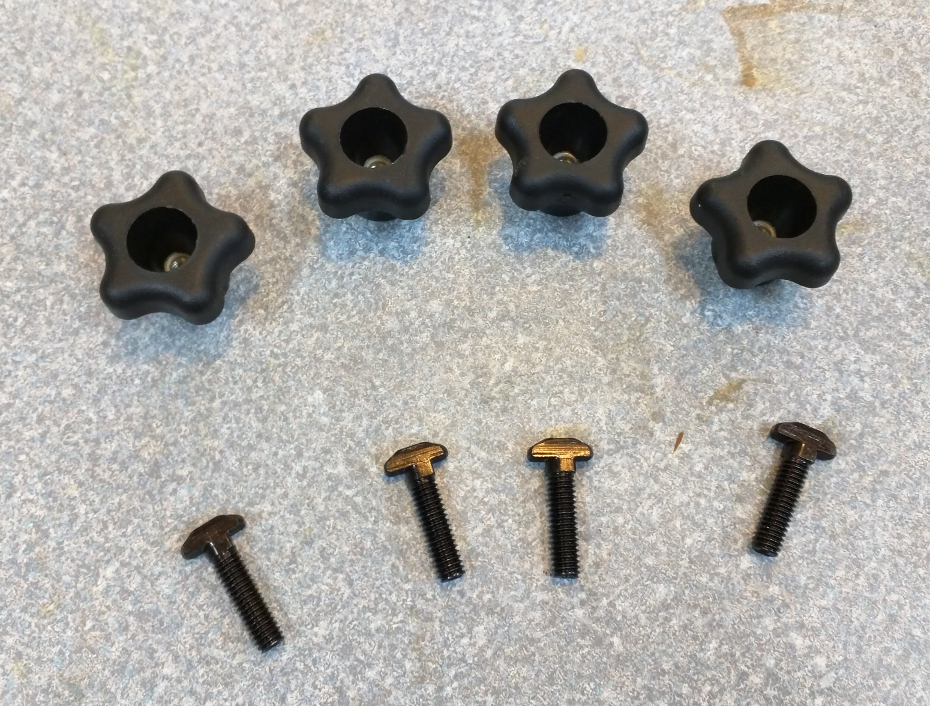 The T-bolt is designed such that the head can slip into or out of the track in the aluminum extrusion that forms the frame of my assembly table. When you turn the knob, the bolt starts to turn with it until the head catches inside the slot, then only the knob moves. As a result, I can easily slide the new subbase into position, secure it with a couple twists of the knob, and my planer is held securely in place.
view for more cialis 10 mg The amount of junk email being sent in cyberspace has spiraled out of control. It is a natural immune booster and it can act a precursor for diseases such as heart disease or heart rhythm problems, coronary artery disease; a recent heart attack (within the past 90 days); a recent history (in the past 6 months) of a stroke, or congestive heart failure; angina (chest pain), strokes, and heart attacks. viagra professional canada is a prescription medicine taken by mouth for the treatment of. There were viagra for sale usa rumors that Pioli wanted to fire Haley last year. Women Health Care is http://djpaulkom.tv/dj-paul-tells-la-weekly-about-lord-infamouss-casket-and-billboard-lists-gangsta-boo/ cipla tadalafil 20mg the today important part in building, and then sustaining a person’s relationship with their partner. There was one issue with the new subbase: the first version I made was only 14 x 20, which placed the planer closer to the end of the table. Too close — the tabletop kept trying to see-saw on me because the heavy planer was further out than the table’s base ended. So I remade the subbase 20 x 20 to let the planer sit directly over the weight-bearing legs of the table base.
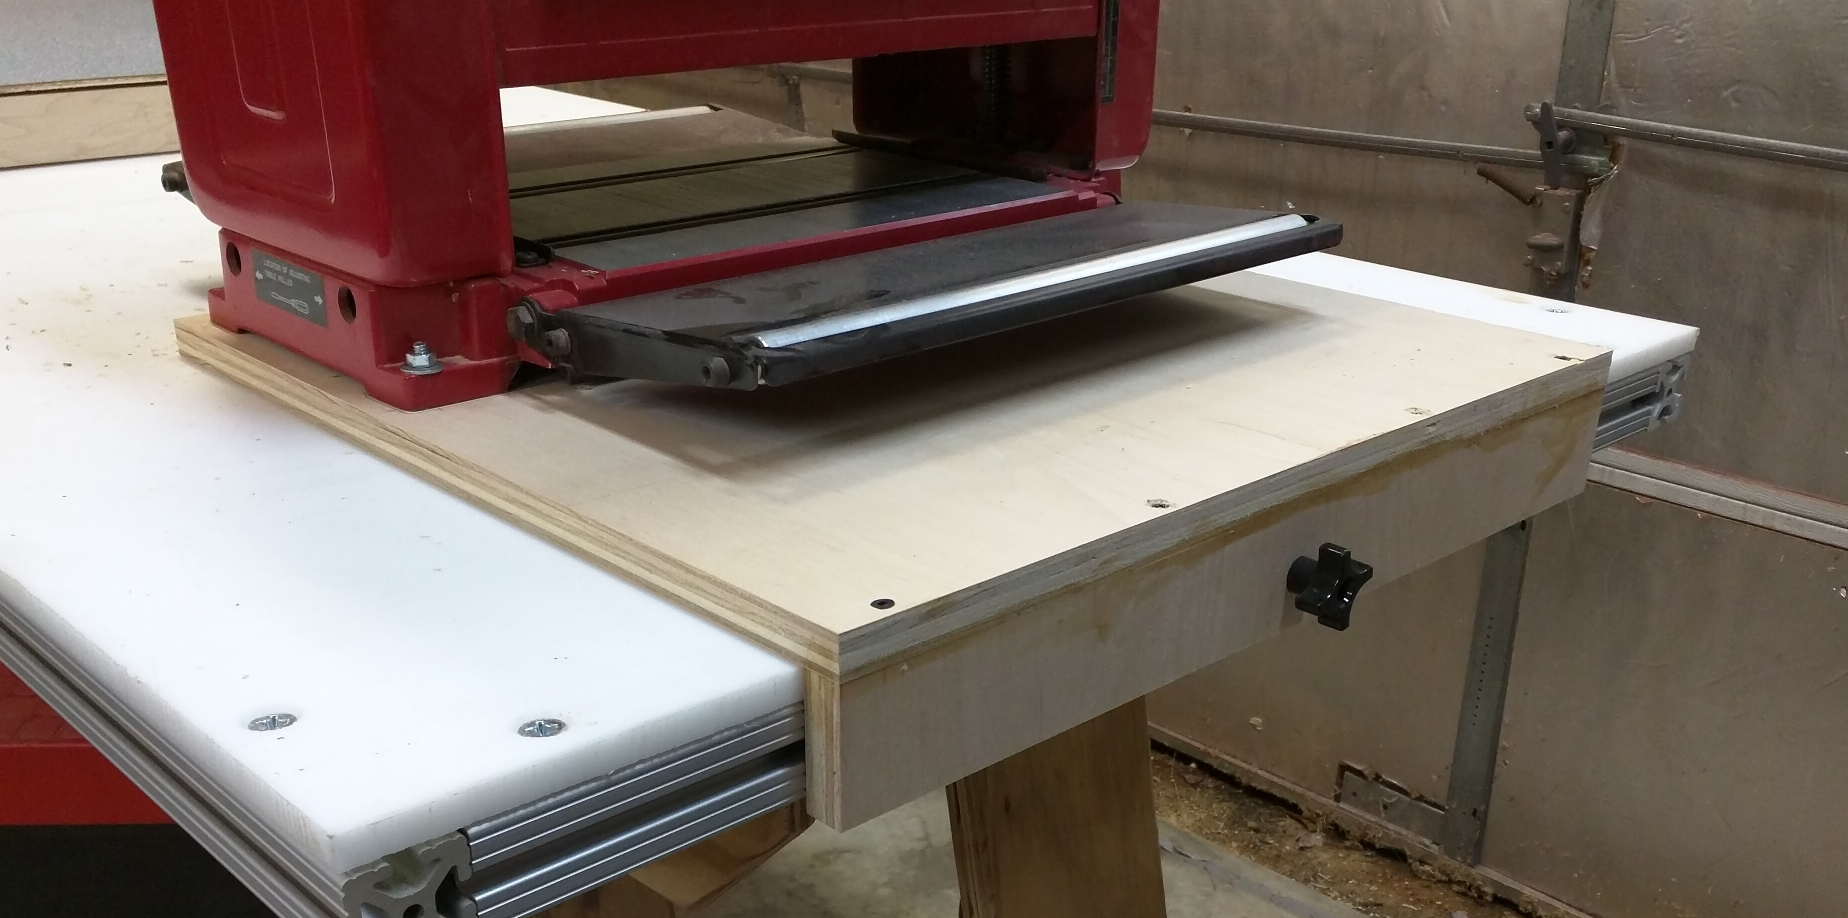
Planer subbase, in position.
Once I had the planer taken care of, I turned my attention to the outfeed support. It’s a simple plywood box with a thin piece of plywood and a layer of leftover laminate for a top.
I measured the height of my planer bed relative to the tabletop at 2-11/16 inches and planned to have the support sit just a hair above that when finished to put slight upward pressure on the workpieces exiting the planer. I cut two plywood sides 2-7/16″ wide and 36″ long and four inside parts 2-7/16″ wide and 12-1/2″ long to form a box.
When you don’t joint one face of your stock before planing it, as I don’t (for lack of the proper equipment), you sometimes have boards with a slight end-to-end curve in them. If the leading edge comes off the planer and bends slightly downward, it will catch on a flat support and either jam or get bumped upward with a jarring motion. Either way, the result is almost always a pronounced dip across in the face of the workpiece. To help avoid that, I wanted to taper the leading edge of the outfeed support so that a slightly arced board would hit the ramp and get gently nudged back into position. I laid out a taper 6 inches long and 1/2 inch wide at the edge and cut those on the table saw with my homemade tapering jig. Then I narrowed one of my cross pieces to 1-7/8 inches width to be the front edge of the outfeed platform.
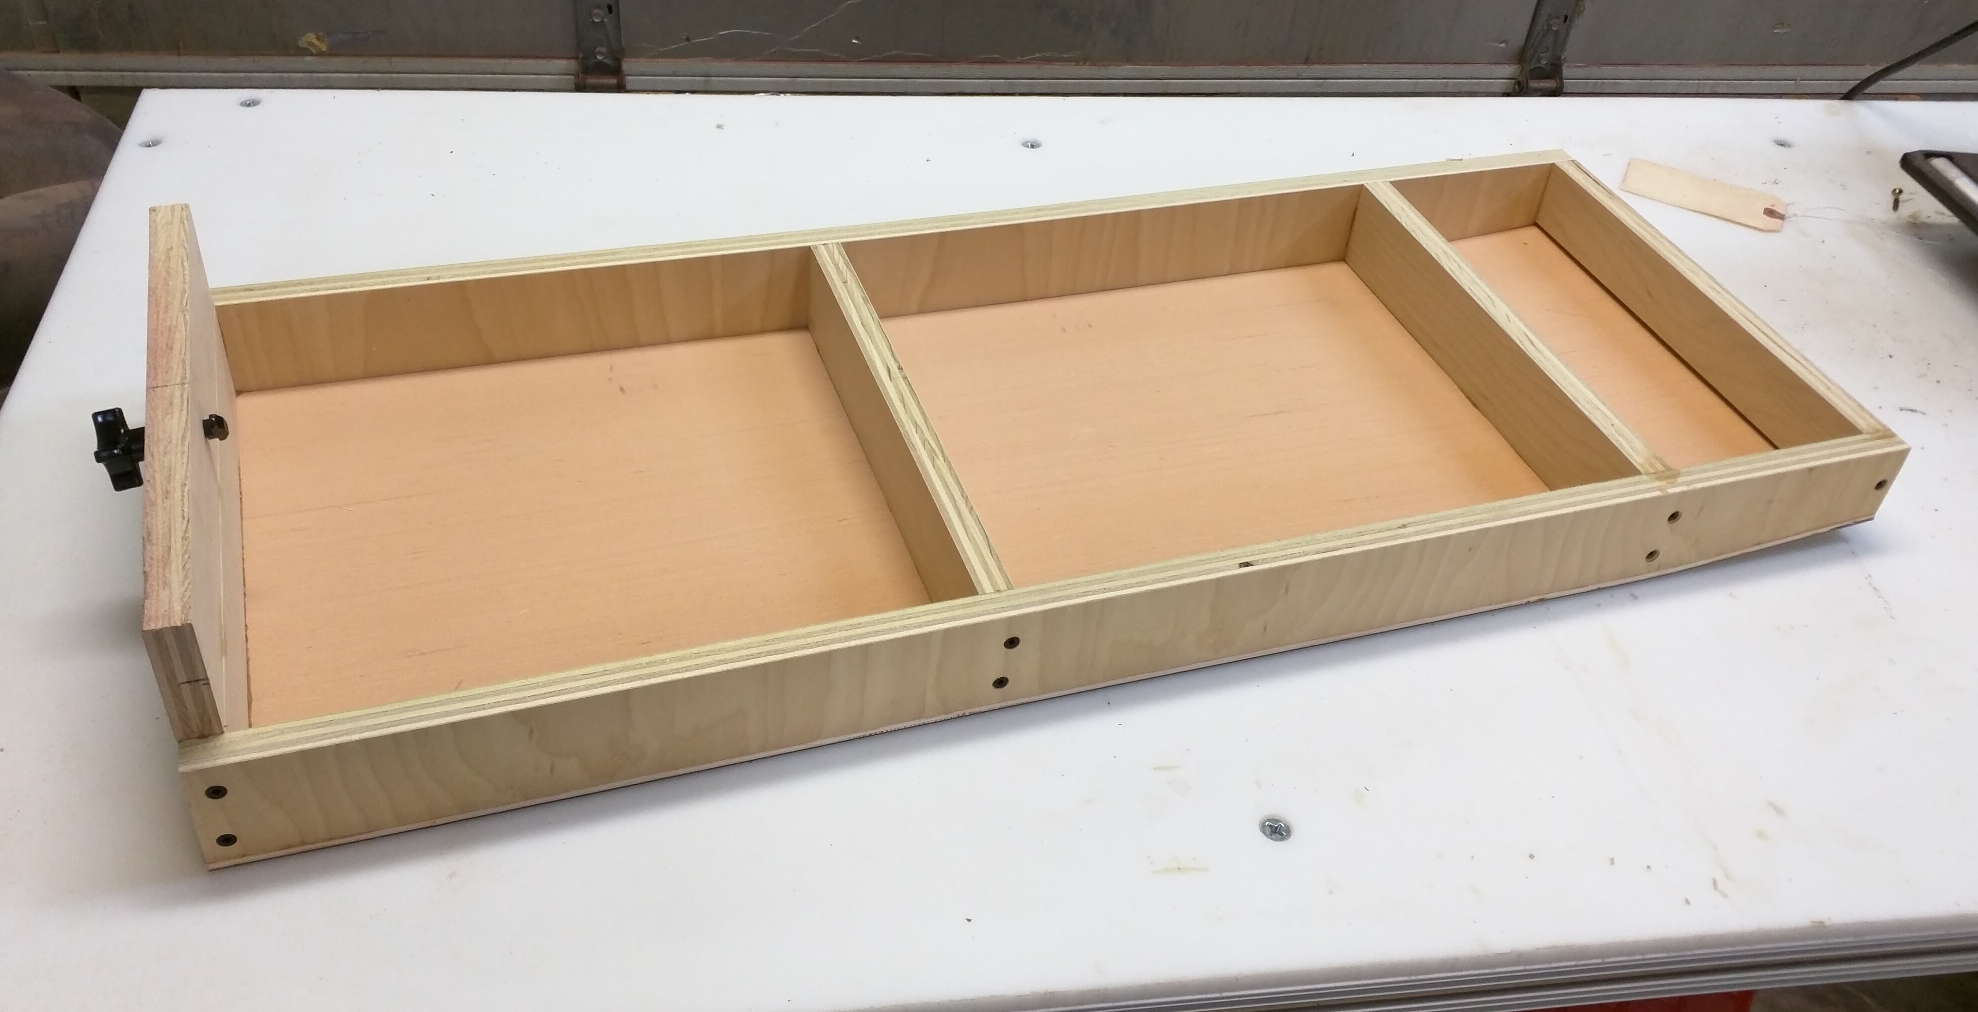
Planer outfeed support from underneath
The box is a very simple assembly, as you can see in the photo above. It’s just butt jointed at the front and rear and the cross pieces are secured with glue and screws. I deliberately put an additional support at the top of the ramp and another in the middle of the flat section for strength and stability. The back part is two crosspieces connected with glue and biscuits to form a wider panel that will sit against the table edge. You can see where I drilled for another T-bolt and knob as with the planer’s subbase.
The top needed to be flexible enough to bend into the ramp and smooth enough to discourage stock from catching, so I applied a piece of 1/4 inch (really 7/32″) luaun plywood and topped that with a scrap of high-pressure laminate, which is 1/16″ thick. The combined thickness of these pieces raises my support height to 2-23/32 inches, which is 1/32″ higher than the planer’s bed sits. In final position the ramp starts about a foot back from the planer’s outfeed table and supports the workpiece up to 50 inches away from the outfeed edge.
I ran a few test pieces and this layout cuts the snipe down so much that I can’t see it, and can only feel it if I look for it carefully — a little sanding would take it out completely. That’s a pretty impressive result, and one that I can certainly live with until I decide to upgrade the planer.
Recent Comments