
Adam’s Coffee Table
I’ve been making furniture for a very long time — a little over 30 years, as I was reminded recently. But one person I hadn’t made anything for yet was my oldest son Adam. So when he mentioned needing a coffee table for his new house, I jumped at it.
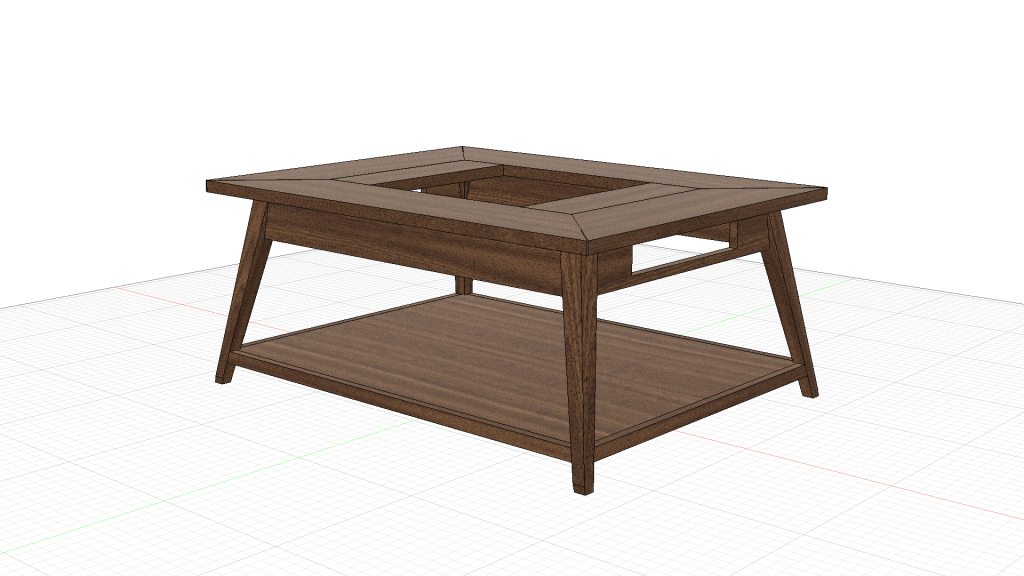
I wanted to pull out all the stops on this, because Adam had never asked for anything before. In my original drawing (above) I wanted to include two drawers, one on each short end, and a display case built into the middle of the table with a glass lid. The lower shelf was a request, and I also planned early to make a cork insert all around the perimeter of the top — built-in coasters, because I’d noticed that his fiancee was big on using those.
For wood, I chose sapele because it’s a really pretty hardwood and, frankly, when I bought the lumber for this it was around $10/bf where walnut was double that, if you could get it at all. I was able to order it in plywood from Woodcraft to make the large lower shelf, too.
The first thing I did was cut and shape the legs, because I needed to get the angle off them directly — I did not want to measure and get it wrong. I wanted some drama in this piece, so I angled the legs 10 degrees in both directions and tapered them on the inside. This would make my life more difficult in several ways, but it was worth it.
Next I cut the four boards for the perimeter. This table is 42 inches on the long side and 36 on the short sides, and I deliberately cut the rails to 42 and 36 inches, knowing that would be long. Once I had them cut, I used a sliding bevel gauge to copy each actual angle of the inside leg and transfer that to the rails so that the rails would be vertical even though the legs were tapered.
Then I took the short end rails to the bandsaw. I wanted to have a drawer in each end, and the original plan was to cut the drawer fronts out of the actual rails, so the grain would flow through them. So I sliced 3/4″ off the top and bottom of each rail, and cut a drawer opening 14″ wide out of the center. Then I glued the rails back together.
The inside of the base came next. I needed it to (A) define the bounds of the display case, but also (B) provide support for the drawers. I devised a simple design of four intersecting boards that I half-lapped together like a torsion box, and then joined to the rails with dominoes.
This photo was actually taken later, after the top was partially done, but it illustrates this well:
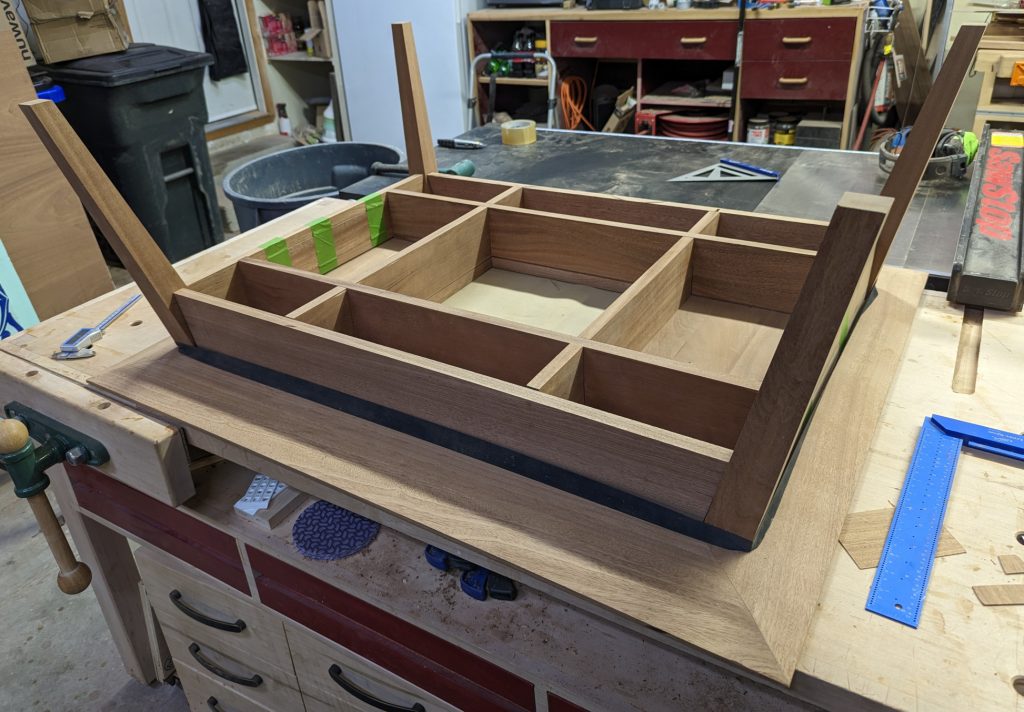
The display case would be about 15 inches square, and the drawers 9.5 inches deep and 13 wide. It was a compromise, but it seemed to work.
It was about this time that I found out I would be having surgery in a few weeks. So I hurried up, trying to finish this before the surgery date in February. (Spoiler alert: I didn’t finish.)
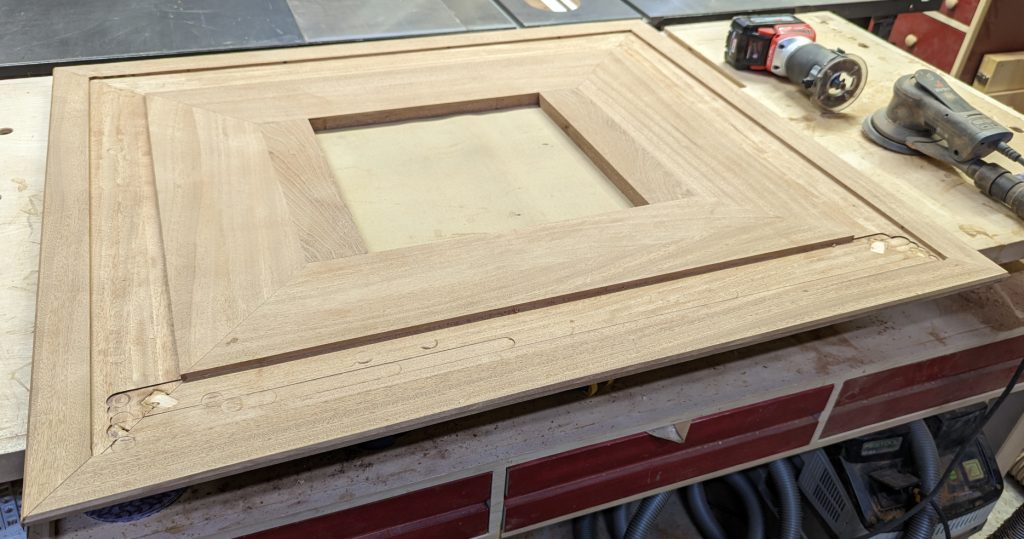
Next major piece was the top. I wanted to do miters at the corners, but the widest boards I had were not actually enough by themselves to make the entire top. They were thicker than I needed, so I resawed 1/4″ off of them to leave just under an inch once I’d planed them, and I ended up gluing that veneer to other boards in order to have a grain match wide enough to do the miters. (The total width was 7-1/2 inches … quite the long miter.)
I do not have a miter saw, which would have been ideal here; I had to cut these miters on the table saw. Fortunately I do have a Dubby mitering sled, which is large and hyper-accurate, so I was able to do these large parts by going slow, making sure they were tight against the fence, and double- and triple-checking as I went.
And then surgery day came. For six weeks I wasn’t allowed to handle more than 10lbs, so woodworking was off the table. The biggest thing, other than the time delay, was that I didn’t think to stack and sticker my stock. As a result, when I got back to the project in late March, a lot of the wood had moved and several of my pieces were no longer straight, and I didn’t have enough to remill/recut them. Sticker your stock, people. Really.
When I was allowed back in the shop, I started by finishing assembly of the table top. I put a large reverse bevel on the underside and then assembled the pieces, and I had to add in a block on either short side to make up the difference so the sides would all come out to the display case.
Next it was time for the first assembly. I’d ordered a tube of Totalboat’s Thixo epoxy because I anticipated needing a lot of open time, and I wasn’t wrong. The base internals had to go together first, then the legs and rails fit around that, and with the funky angles at the corners I needed to make cauls to get my clamps to hold. And since the base internals were not straight anymore in a couple of cases, there was lot of persuasion that had to be applied. I gave everything a couple of days to set.
Once that glue-up was done, I fitted the top to the base temporarily and flush-trimmed the top with the display case sides. Then I made a 3/8″ deep rabbet 3/8″ wide around that to hold the glass, and another on the underside to hold the display case bottom. The way I built the structure meant I couldn’t slide it into dadoes, so it’s screwed in from below (and therefore removable if necessary).
With the top all shaped, I took it to a local glass shop (Laurel Glass and Mirror) to have a custom panel made to fit the rabbet. In the meantime, I needed to provide a nice area for the display, so I lined the interior compartment sides and bottom with red felt. The glass was ready a couple of days later.
For the drawers, I had a slight change in direction. Originally I was going to use the cutout from the rails as the drawer fronts, but the more I looked at it the more it felt like a wasted opportunity. I actually built the drawers, but then made a second set slightly deeper which sat in front of the rails instead of inset with them. I liked the look of that much better.
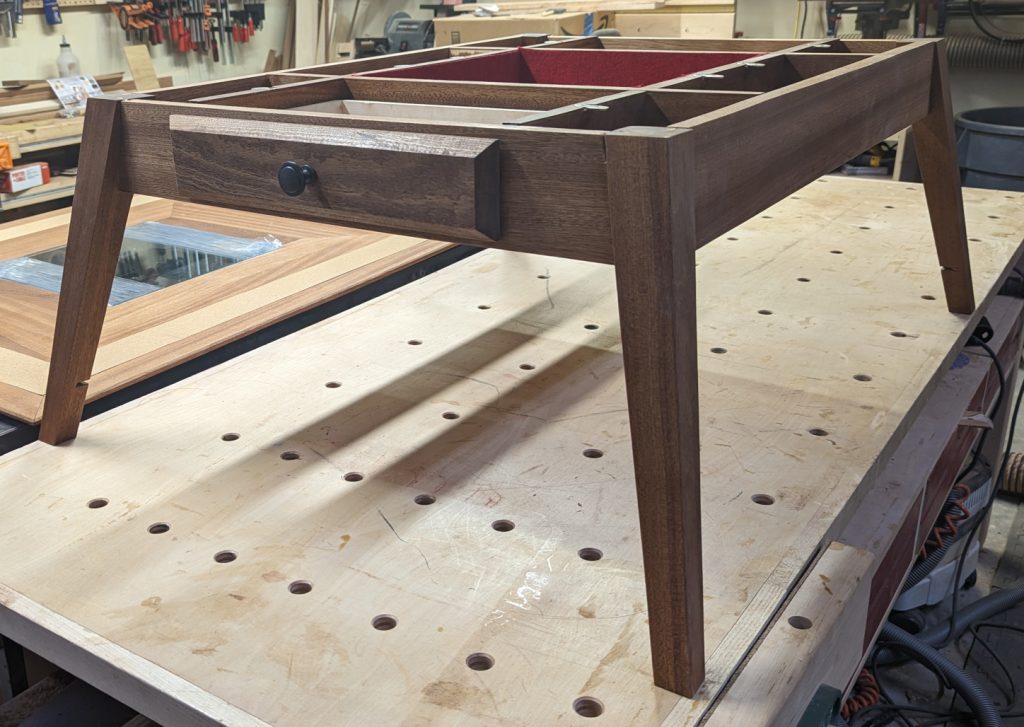
I still needed to do the lower shelf. As with the rails, I cut pieces from solid sapele that were way longer than I needed so I could hold them up to the actual legs and cut them to fit. But first I added a 3/16″ groove along the inside to hold the bottom shelf, and a decorative chamfer on the inside and outside upper edges. The shelf is a piece of 1/4″ sapele plywood. The plan was to notch the legs so that the shelf could be glued in place and the trim added around it.
Before doing the final glue-up, I prefinished all the pieces with Oli Natura and glued in the cork on the top. Then, using the second dispenser tip on my Thixo, I attached the bottom shelf and its trim pieces. The 1/4″ shelf still had some wobble in it, so I made a lattice of half-lapped sapele and attached that to the bottom; the extra thickness gave the shelf rigidity and only added a little bit to the weight.
With the whole piece together, I did another coat of Oli Natura and set it temporarily in my dining room for a couple of photos.
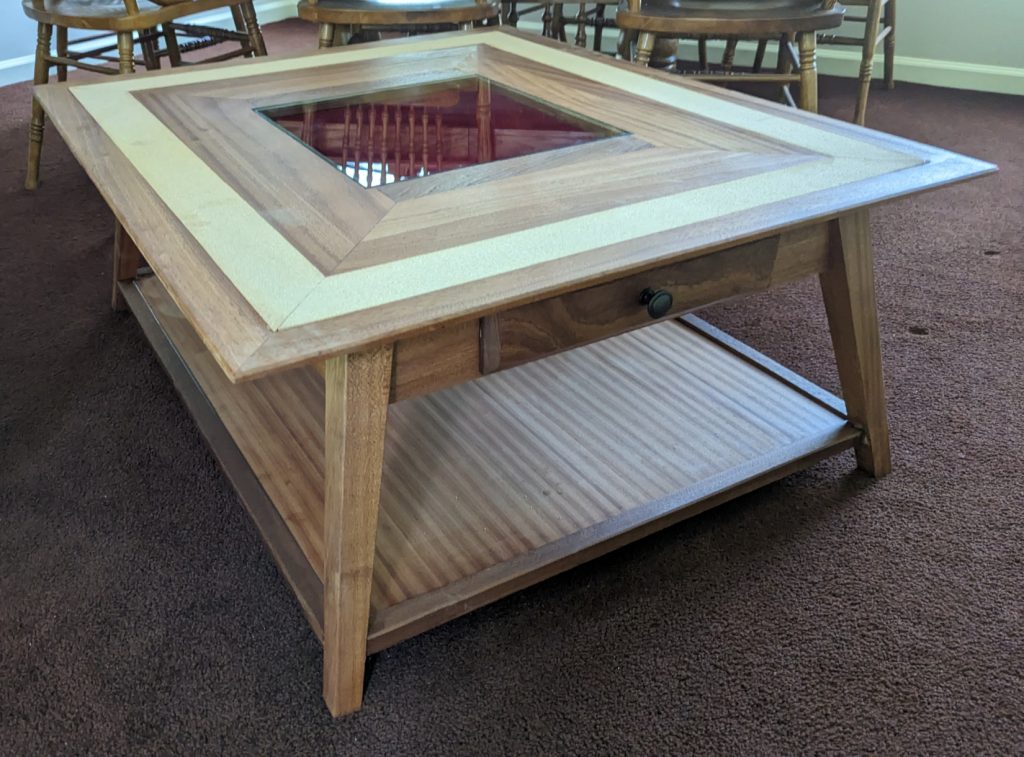
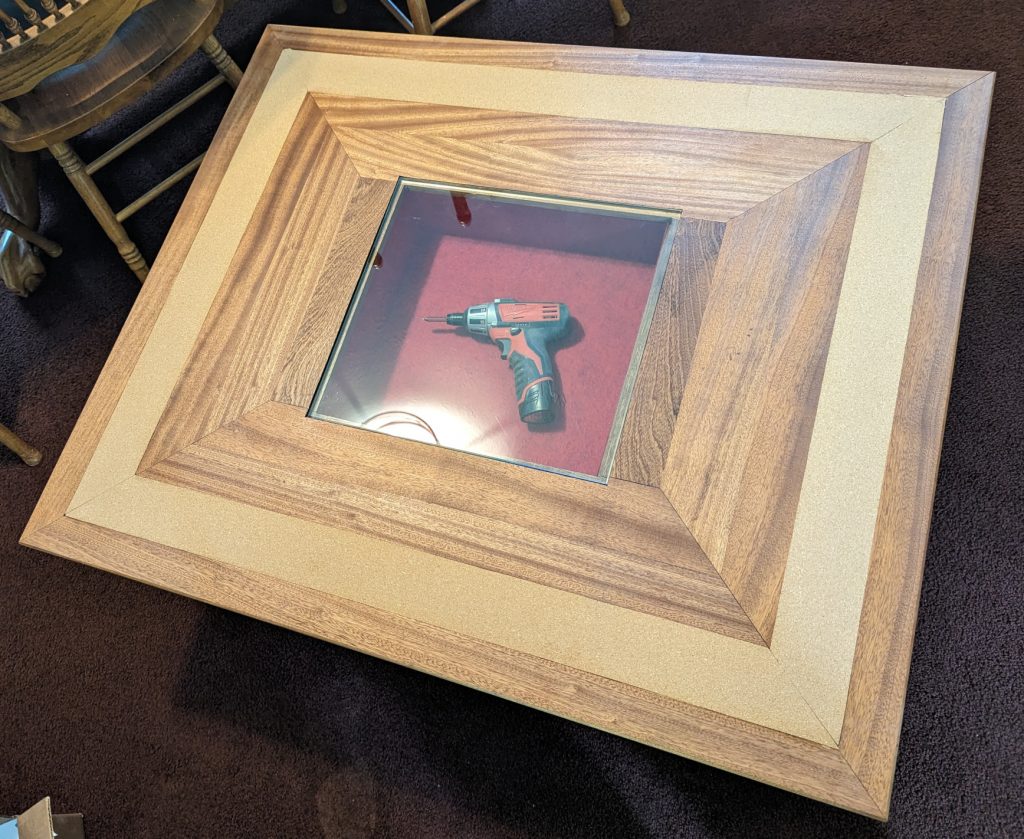
Next up, a pair of end tables to go with this coffee table. We’ll see if I can get that done in less than 5 months!


Recent Comments