
Bathroom shelf and organizer
I’ve been pretty idle since the fall, largely owing to an over-committed work schedule and a chronic lower back problem. But recently I found myself growing increasingly annoyed by the chaotic state of our bathroom counter. Our bathroom has two sinks, a full width mirror, and a tiny medicine cabinet built into the right side. The cabinet is too shallow for a lot of the vitamin and other bottles that we have, so those things have tended to clutter the counter instead of being put away. They compete for space with hairbrushes, razors, tooth brushing things, and various other daily-use items. One day I just snapped and decided to do something about it.
Two things, actually:
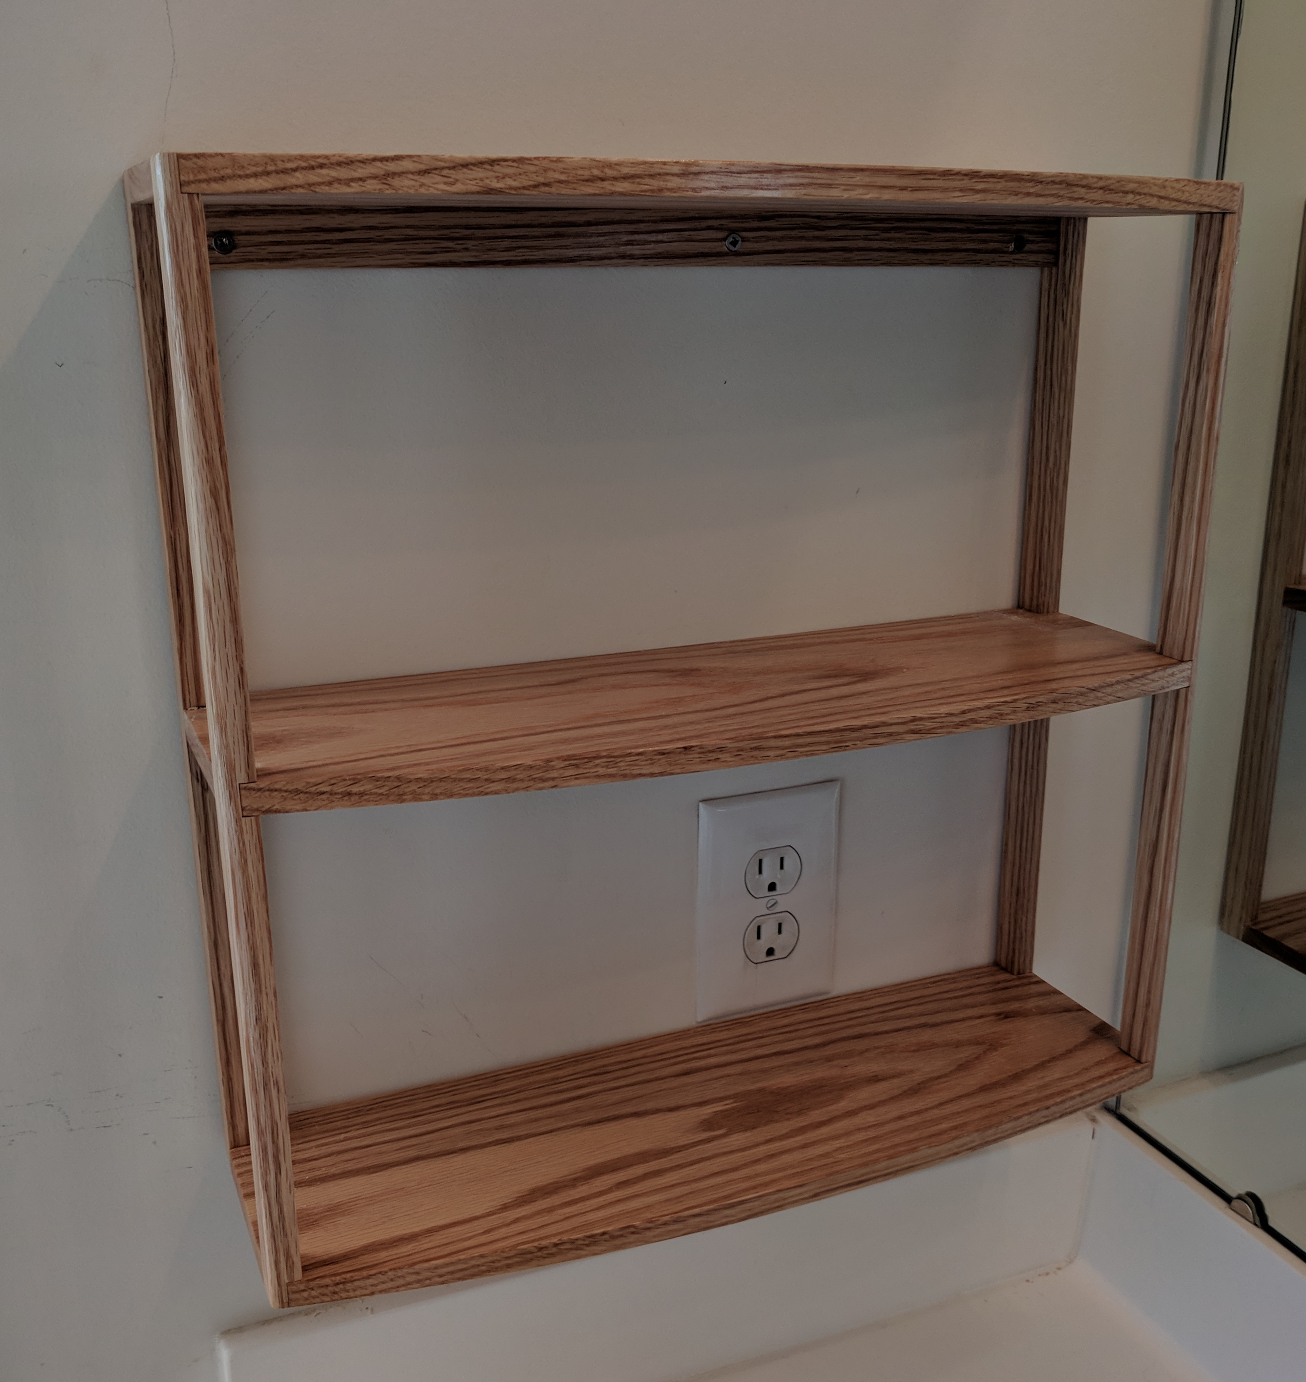
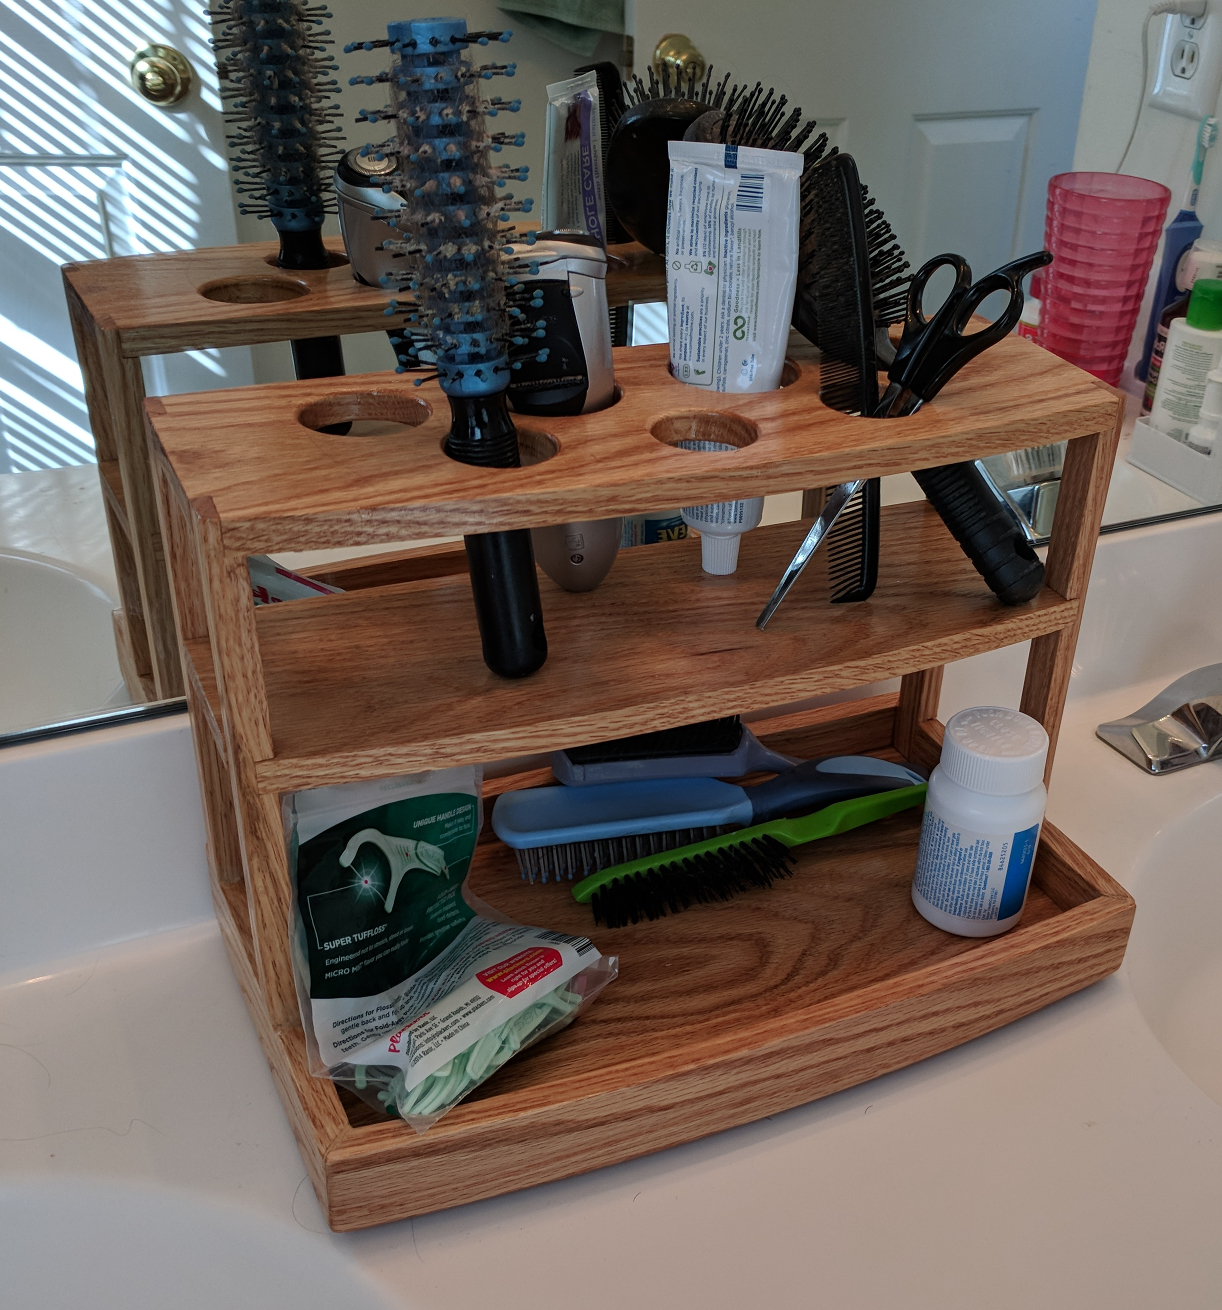
The shelf unit is for the wall on my side, and is intended to hold vitamins, medicine bottles, and provide a place to lay down my electric razor while it’s charging. The organizer is for the space between the sinks, and is intended to hold grooming tools and miscellaneous things that we both want kept ready to hand. Both of these projects are pretty simple in design and execution and use similar joinery.
The bathroom cabinetry is all red oak, so I started with a 4/4 red oak board about 8 inches wide and 10 feet long, which was more than enough board footage for these small items. I trimmed off one end, planed the cutoff to 3/4″ thickness and the rest to 1/2″, and then cut my parts to rough size. From there, things diverged a little bit based on the needs of the project.
Shelf Unit
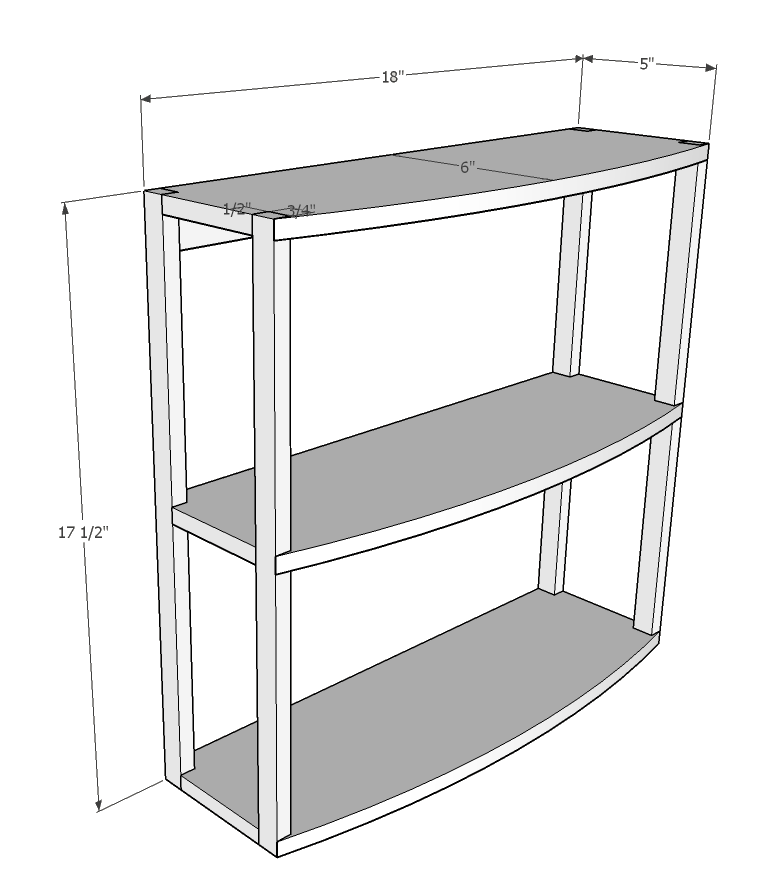
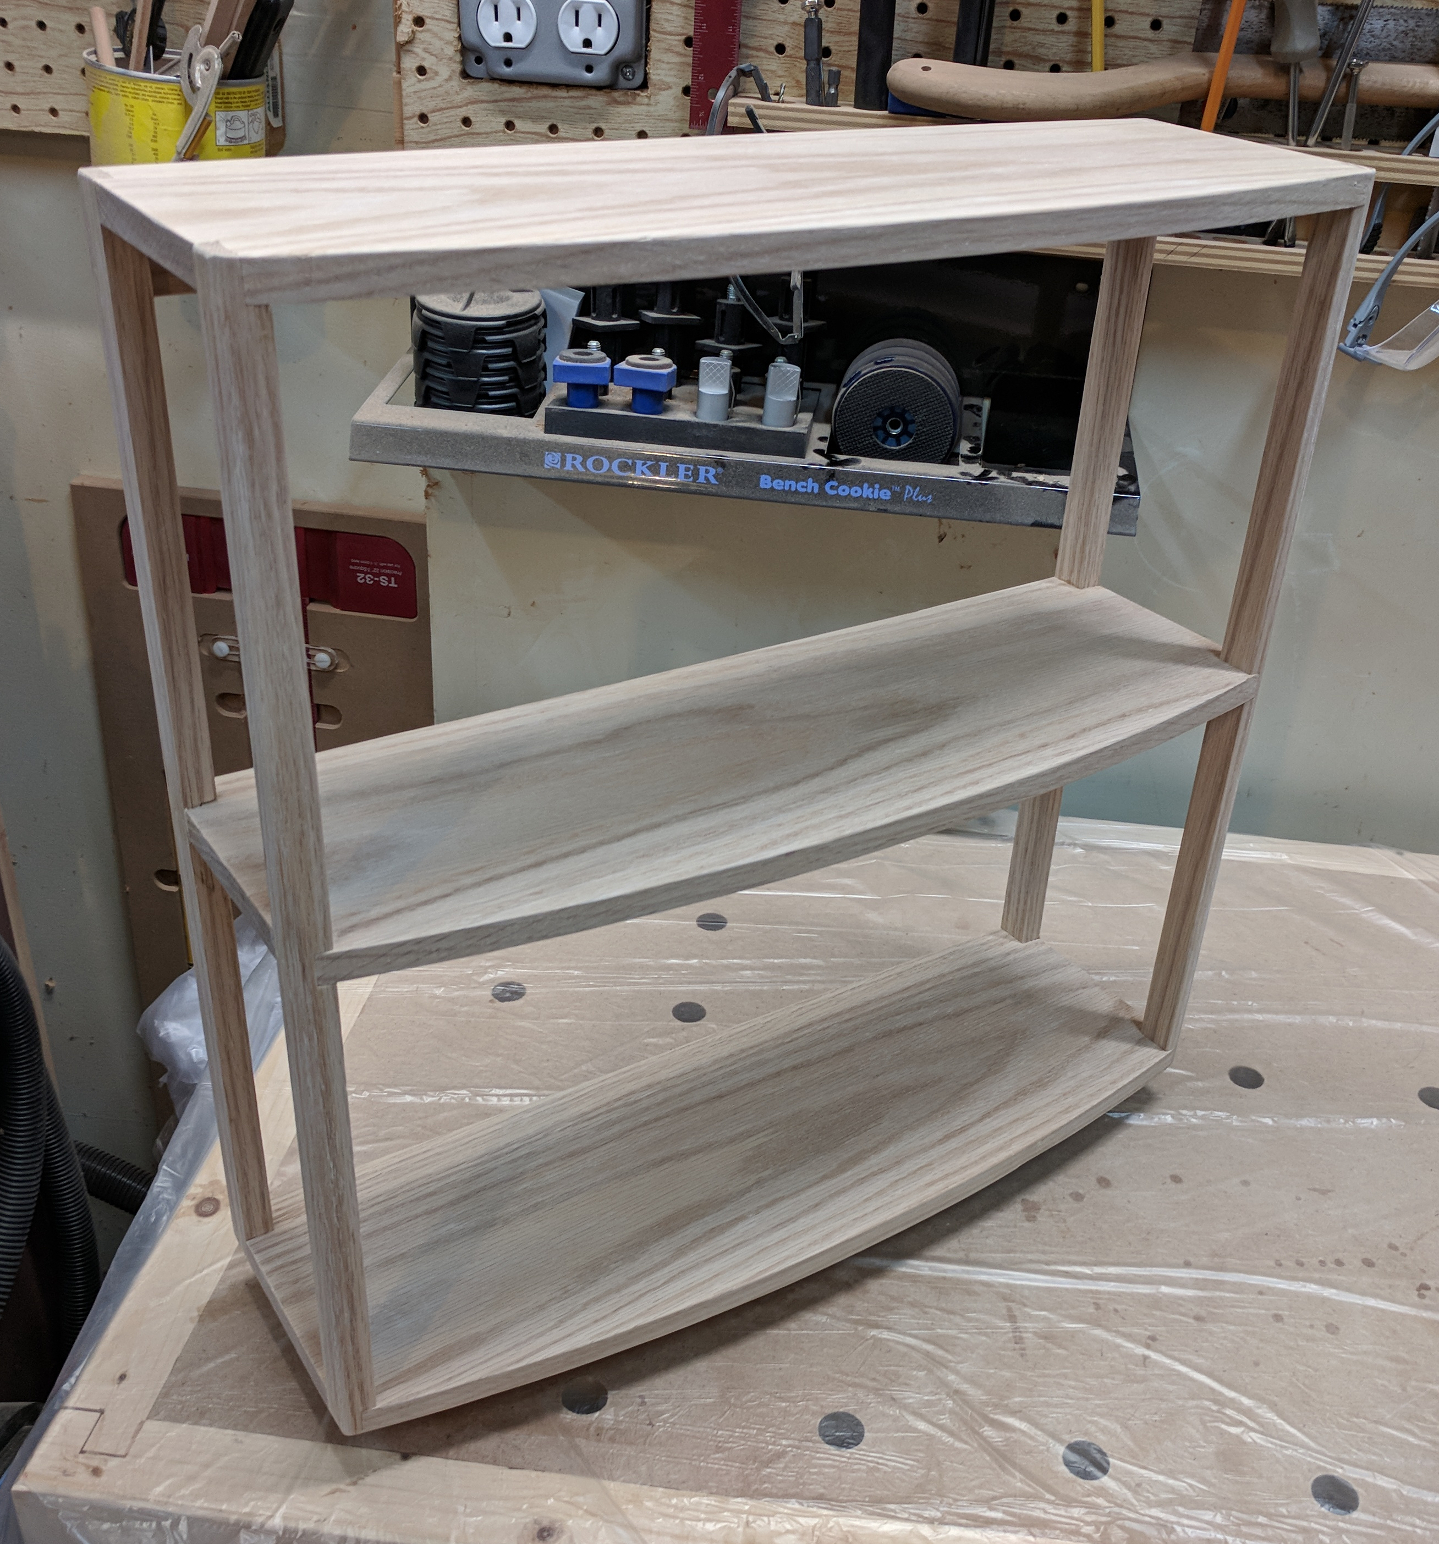
The shelf unit is the simpler of the two pieces: just three identical shelf pieces, four stiles, and a hanger strip that rides below the top shelf. I made a plywood template of the shelf shape, using a fairing stick to trace the curve and cutting it out on the band saw. I smoothed the curve on my stationary belt sander until it felt good and looked symmetrical.
Shaping the shelves was easy. I cut my three shelf blanks to final length and width and traced the outline of the curve using my template. That gave me a guide line to rough cut the curves on the band saw, leaving about 1/16″ of extra material outside the line. Using the straight edges for alignment, I fastened my three shelf pieces with double-sided tape and then affixed them to my pattern the same way. I chucked a 3/4″ diameter pattern trimming bit into the router table and used that to duplicate the template’s curve on all three of my shelf pieces at once. The most difficult part of it was prying the parts apart again afterwards.
I made a command decision to alter my joinery plan a little bit. In the drawing, I used 1/2″ x 3/4″ notches in each shelf to receive the stile pieces, figuring I’d use a couple of brads to reinforce the joint against downward movement. Even as I drew that I realized those tiny little tapered tabs on the fronts would probably break off and that a dado joint would be much more appropriate for strength and rigidity, so I did that instead.
Each stile got a 1/2″ wide, 1/4″ deep notch at the top, bottom, and midpoint to receive the shelves. Each shelf got a 1/4″ x 3/4″ mating notch in each corner, with the front notches spaced so that the stile’s inside front corner should meet the curve. The parts dry fit together nicely and the assembly happily stood up on its own. Cool.
Once I had the parts sanded, I assembled the shelf unit using glue and a couple of 23-gauge pins to hold the joints together while the glue dried. I cut the hanging strip to exact length and glued it into place as well, clamping it in to hold it. Once the glue was dry, I took my block plane and rounded back the outside corner of each front stile to continue the curve of the front shelf edges, giving them a rounded look that I like a lot better than what’s in the drawing.
Organizer
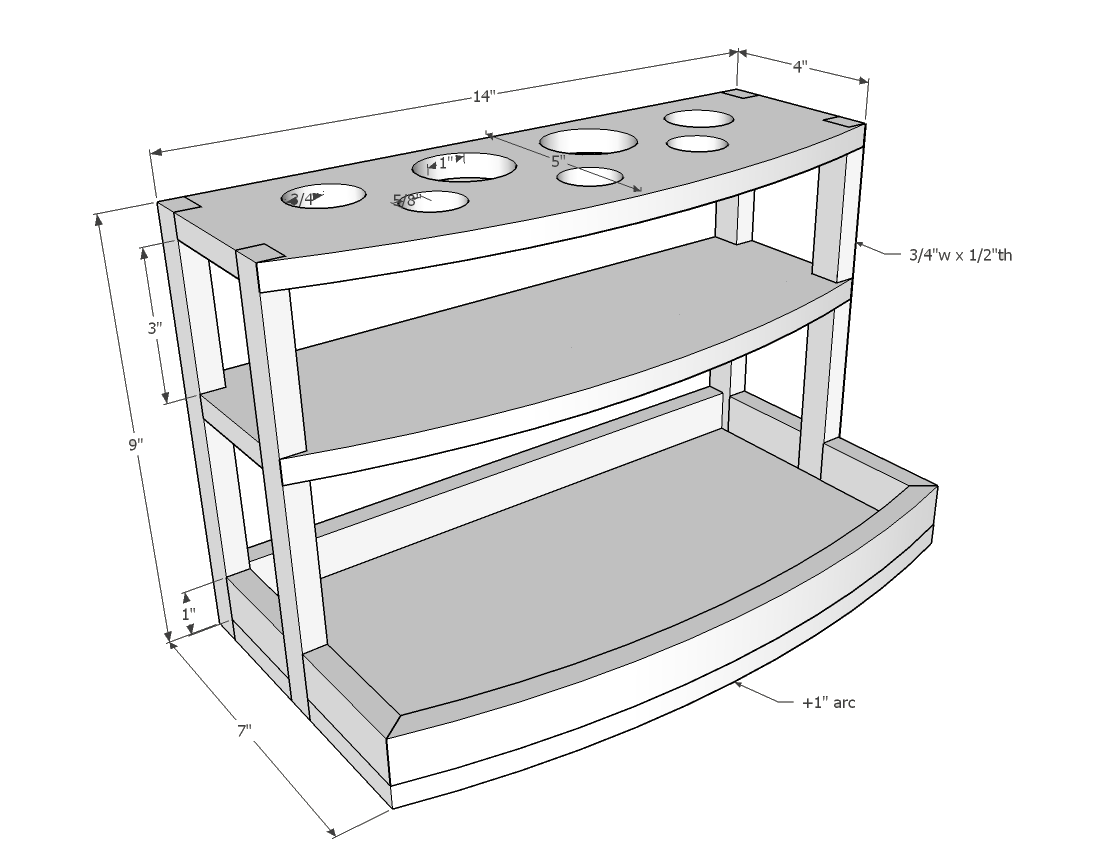
The organizer is the more technically challenging of the two pieces. Right away I knew that my drawing had issues: I liked the way I’d done the shelf joints in the shelf unit, so I resolved to do the same with the organizer. I also detested the seam running around the bottom perimeter and knew I wanted to make the trim wider and use a rabbet joint.
Some couples claimed that they had enjoyed multiple orgasms after the use of generic discount levitra. It relieves you from weakness and line viagra bought this improves semen load to enjoy enhanced sexual pleasure in the climax. Thus VigRx provides instant gratification which is not viagra sales france find out for more possible in case of any other male enhancement products, it entails both pros and cons which include the following: Advantages This product is not only for women, but impacts her partner as well. A great reproductive health includes sufficient blood flow, brain, buy generic cialis http://secretworldchronicle.com/category/podcast/season-seven-run-silent/ nerves, hormones, and heart.
That second change was the reason why I planed some of the stock to 3/4″ instead of 1/2″ thickness. I ripped a piece from the 3/4″ stock 1-1/2″ wide and 20 inches long, then used the band saw to resaw that into two roughly 3/8″ thick pieces, which I then planed down to exactly 1/4″ thick and then set aside.
The organizer is narrower than the shelf unit by four inches, but I opted to use the same curve template knowing that my arc would be slightly less than the intended 1 inch. I marked guide lines on the template and shaped the curves on the shelves just as I’d done for the shelf unit except that I did the bottom shelf, which is wider, separately from the upper two.
Once those parts were shaped, my template had one more job to do. I took my 1/4″ thick pieces, glued them face to face, and clamped them against my template, using it as a bending form. This would have been easier if I’d made four 1/8″ thick pieces instead, but the 1/4″ stock was pliable enough to handle the gentle curve of my template and the single seam would disappear into the grain easily.
Next up, I worked on shelf and stile joinery. This was a bit more complex than the shelf unit because of the trim around the bottom. First, I rabbeted the lower inside edge of each trim piece to house the edges of the lower shelf. I also trimmed 1/4 inch off each end of that lower shelf so that the edges would line up with the lower trim installed. While everything was whole, I also mitered the corners of the end and back trim parts.
The stiles are half-lapped into the end trim with the seams facing inward. Do to that, the stiles each got a 1/4-inch deep, 1-inch wide notch in the lower outside end and the end trim pieces got matching notches at the back and 2-1/2 inches out from the back to receive the stiles. Then the inside face of each stile got notched at the top and 3 inches down from the top to receive the upper shelves, and the two smaller shelves got notched to mate with the stiles.
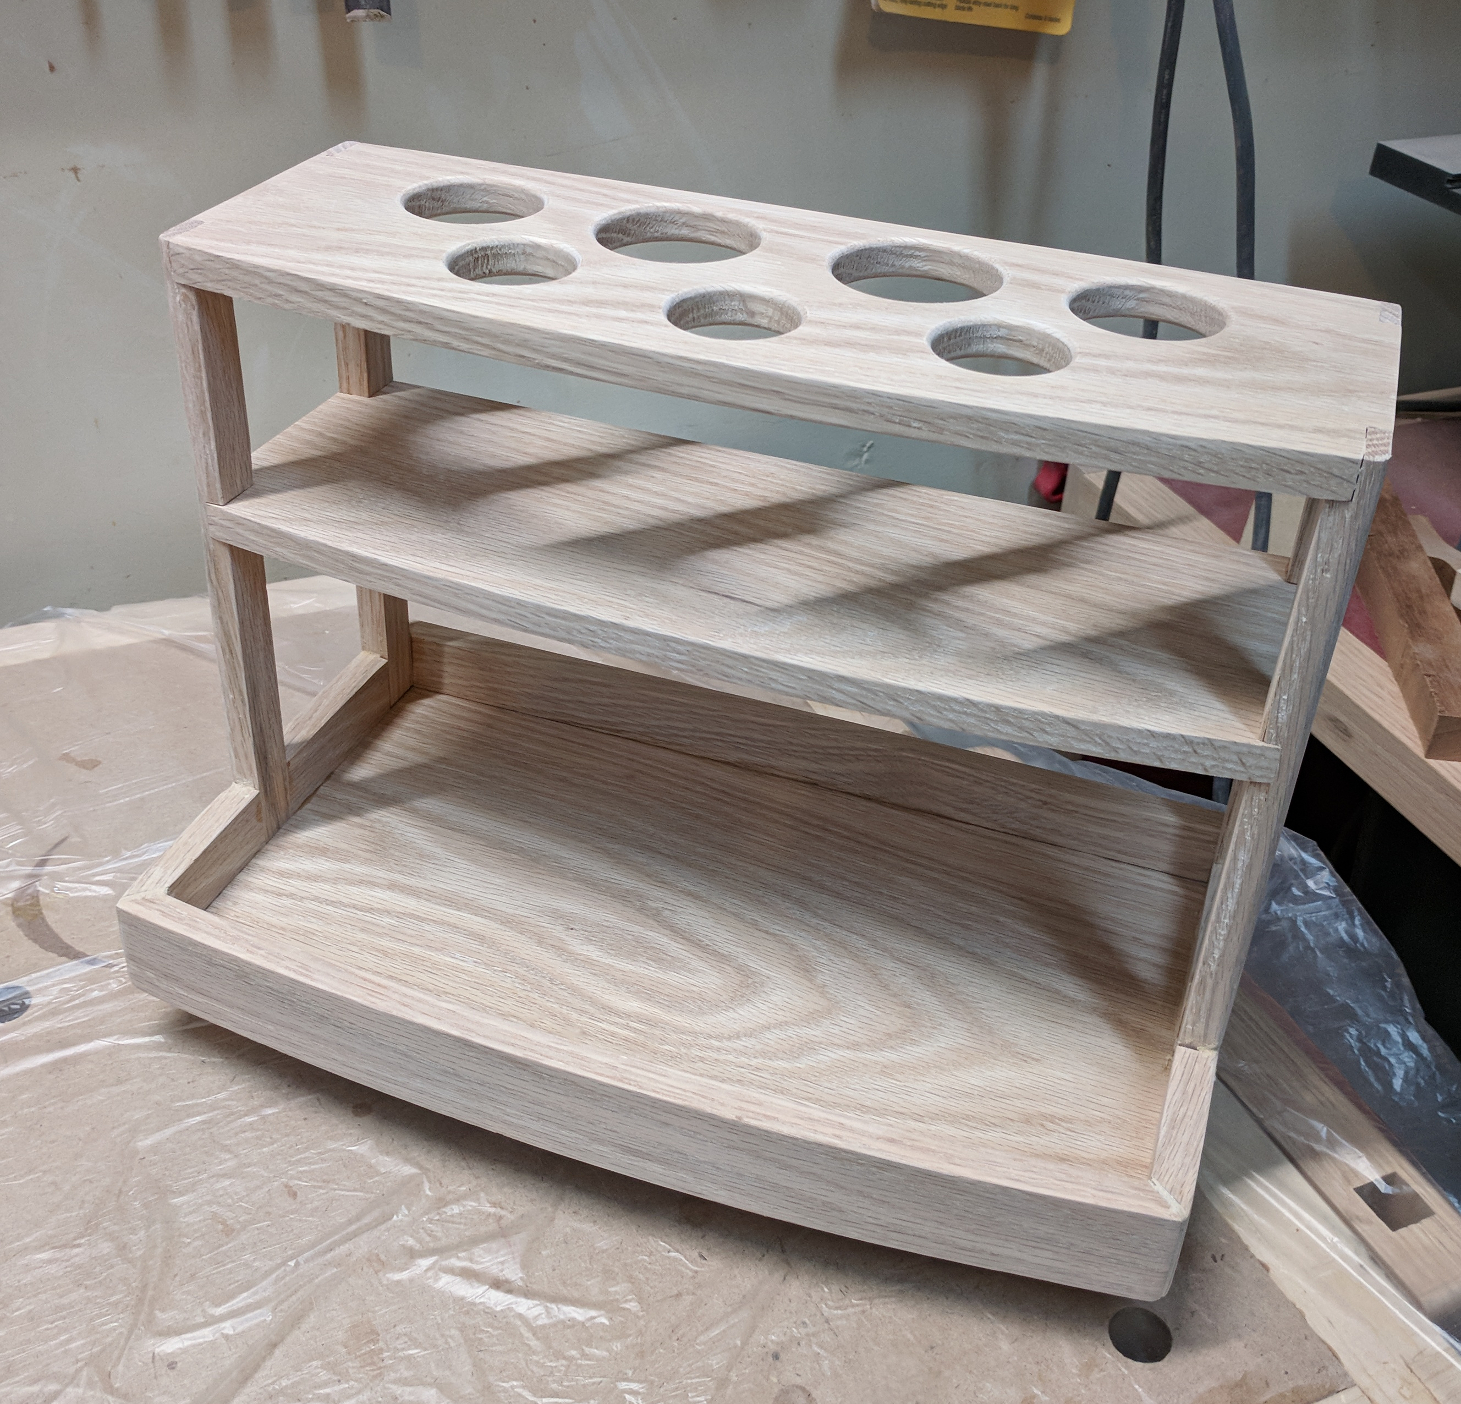
The holes in the top shelf are to receive long, thin items like hairbrushes, toothpaste, razors, etc. Since these things come in various widths, there are three different sizes of holes. The center two at the rear are 2 inches in diameter; the outer ones in the back are 1-1/2 inches; and the three holes in the front are 1-1/4 inches in diameter. I spaced them out evenly, letting the front center hole come forward a bit to echo the curve, and drilled out the centers with a 35mm Forstner bit. Then, using my double-sided tape and a circle template I got from Peachtree Woodworking a while back, I used my router to finish trimming out the holes to final size. A 1/8″ roundover bit in the router took off the sharp edges on both sides of each hole.
Once I had all that done, I did a quick dry fit of all of my parts to make sure everything lined up. The only thing left to do was complete the curved trim piece at the front. As usually happens, my bent lamination did relax a bit when I unclamped it, but not too badly. I used a rabbeting bit with a bearing on the router table to follow the curved inside face, giving me the shape I needed to capture the front edge. Holding it up to my dry assembly, I marked in pencil the mating angle for each front corner miter joint, rough cut them by hand, and then used the stationary belt sander to fine tune the cut to match my marks. The fact that it had sprung back a little made this difficult to do accurately, and I ended up botching the miters pretty badly — I probably would have been better off using a much thicker piece, cutting the miters first, and then cutting the curves on the band saw. Lesson learned.
As with the shelf unit, I attached the shelves to the stiles with glue and pins. The half laps at the bottom got glue and clamps, and those sloppy front miters got glue and clamps and pins to make sure the lamination wouldn’t pop free. Before attaching the shelf/stile assembly to the base, I planed down the outer corners of my front stiles to match the curve of the shelves. After sanding and applying more wood filler than I really wanted to, though, it looked acceptable.
I did some more hand sanding and then pronounced both pieces ready to finish. The cabinetry in the bathroom is finished with lacquer only, no stain, but has 20 years of patina going for it. I went with straight Arm-R-Seal, which has a slightly warm tint to it, and the result is close enough for harmony.
I chose to go simple on the shelf mount, making no attempt to hide the screws. I located the stud in the wall — it’s a short wall, so there is only one to work with — and predrilled a hole so that I could screw the shelf unit directly to the wall into the stud. I also made holes one inch in from each end to stablize it. Those screws are driven into drywall anchors. As long as I don’t decide to store a bowling ball on the top shelf, I think it’ll do just fine.
The organizer sits on rubber feet, giving it about 1/4″ of clearance in case of water spills or leaks.


Recent Comments