
Bathroom Vanity, part 1
Every year we try to do something nice for our house. Last year it was replacing the furnace, upgrading all the insulation, and adding the mini-split to the garage. Other years it’s been a new bedroom set (detail in King Bed in Cherry and Walnut, design and more), or replacing carpets with wood floors. This year, we want to get rid of the aged, builder cheap, double sink and vanity in our bathroom and upgrade to a new, nicer walnut vanity with a granite top.
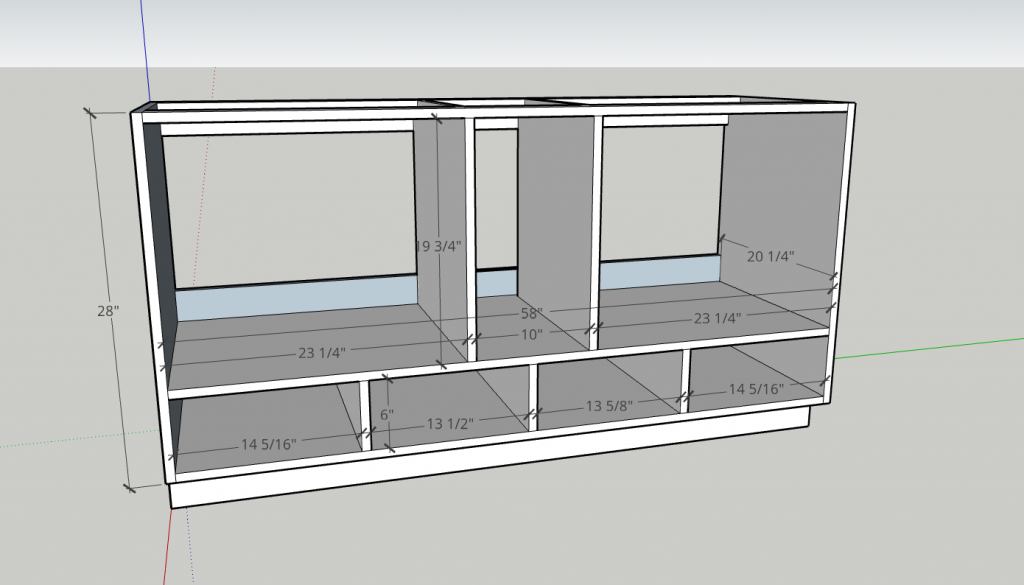
I browsed a lot of pictures on Google before designing this. We need more storage in the bathroom, and we both prefer drawers to cabinets, so this vanity will feature a row of drawers at the bottom (made shallower than the cavity to allow for pipes) and a column of four drawers in the middle. The larger openings will have cabinet doors to allow maximum room for the sinks, and storage for larger objects like toilet paper and soap refills.
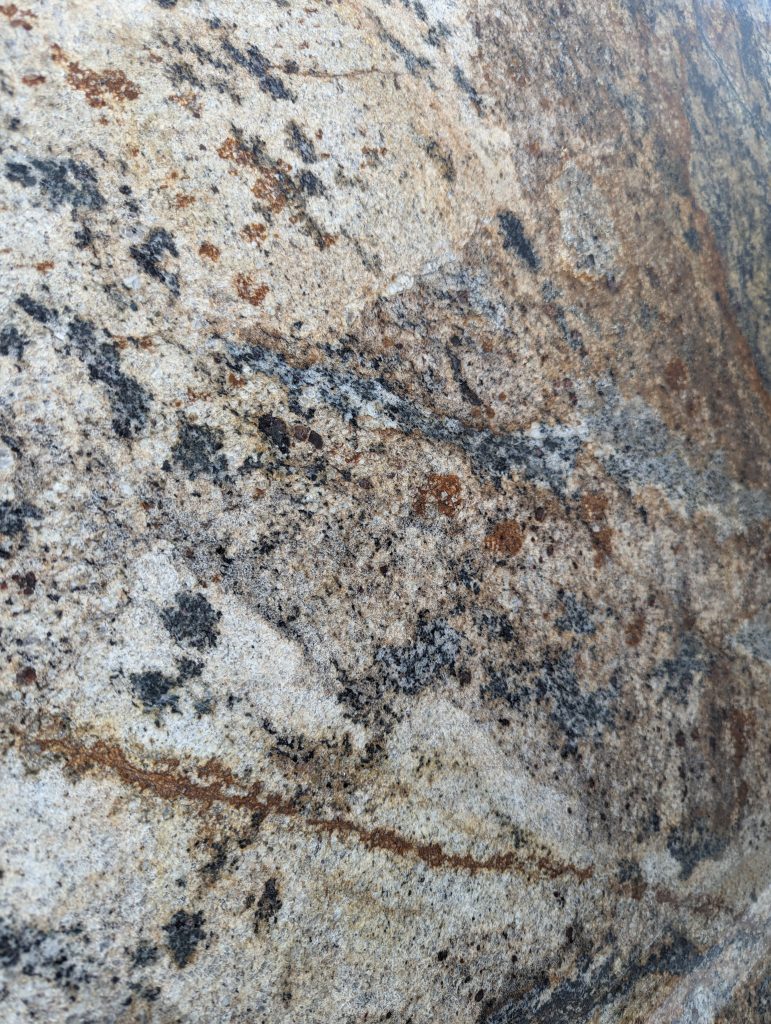
It is a fairly involved build, but I have the luxury of farming out two aspects of this. The granite top will, of course, be manufactured for us. We’ve already picked out the piece of granite for the top:
The other thing I’m farming out is the drawer boxes. This is purely a luxury for me, as I have made lots of drawers in my day and there’s really no fun in it anymore. So the eight drawers will be made of solid maple, assembled and finished and show up on my doorstep ready to install. That means I can focus on the carcass, the doors, and the drawer fronts.
I haven’t actually made a built-in before, so this was a new challenge. This will fit between two walls, so only the front and the inside will be visible. I ordered 3/4″ walnut plywood from Woodcraft for most of it, and bought solid walnut from Woodworker’s Source because Woodcraft’s stock was over half sapwood. It would be fine for a furniture project, but since a lot of the case was going to be plywood it really wouldn’t look right to have a lot of sapwood in the door, drawers, and edging but nowhere else.
Walnut is expensive! I’ve been afraid to total it up, but I spent $500 on plywood and $900 on solid walnut. Then add in the Blum undermount drawer slides (another first for me), a sheet of walnut veneer (to cover a major Oops! moment on the plywood), the granite top ($1200, I want to say), and this project is easily the most expensive thing I’ve ever built. And I’m going to see it, and see every flaw, for the rest of my days. No pressure!
So I started simple, making a separate toe kick for underneath the main cabinet. I’ve seen it done this way, and with integrated toekicks, and I figured with both sides covered I could get away with this. So the toekick is put together from birch plywood, because I had it on hand already and nobody will ever see it. It’s just screwed and glued together, like a mini framing structure.
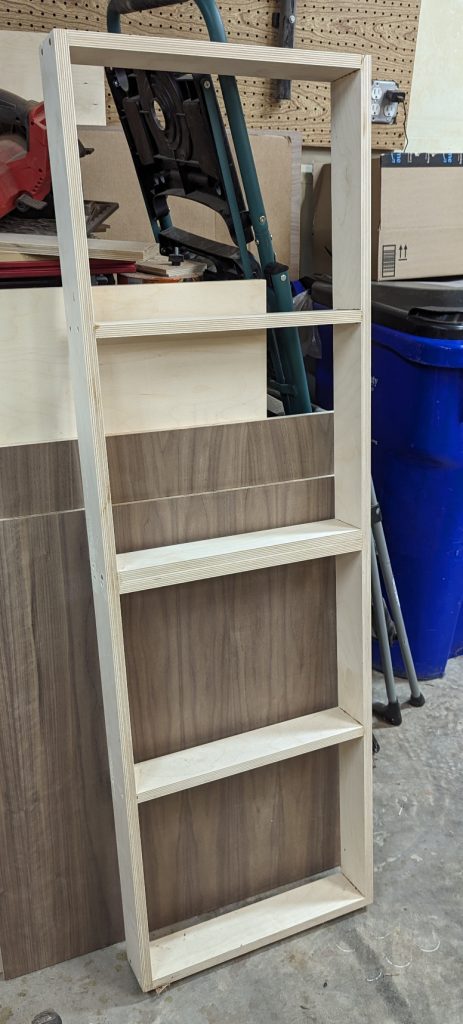
The major benefit of a separate toe kick is that I can make my cabinet and not have to knock out the front corner of every piece to accommodate it — it just sits below the cabinet and is 2-3/4 inches shorter.
Now I could start on the main cabinet carcass. I cut down my plywood into two large pieces, 3 small dividers, 2 outer sides and 2 inner sides. Each of these pieces got inspected to decide which side would be inside and which edge would be front, then the front edges got 1/4″ of solid walnut edge banding glued onto it. Since I was trying new things, I used Titebond Dark for this and was pleasantly surprised at how the glue color-matches the walnut. I still scraped it away, of course, but it was nice.
I also tried using the 6-in-one router jig I got a while ago from Tamar Hannah in edge trimming configuration, with a bowl-cutting bit. This also surprised me at how well it worked and how easily I was able to trim the edge banding without having to hold a death grip on the router lest it tip and without any tearout. This will be my go-to from now on.
I also, while I was in that mode, cut four long strips of plywood and edge-banded those, too. They will make the nailer strips at the back and top front of the cabinet, for attaching the cabinet to the wall and the granite top to the cabinet.
Now, I thought about joinery here, and came up with a bit of a mixed bag. Some things I could just screw in because the walls would hide the screws. That could also apply to the inner dividers, because you would have to take out a drawer to see the screws, but the lower dividers, between the low row of drawers, don’t line up with the upper dividers — if I screw those in, you’ll see the screws. This was unacceptable, so I decided that all the inside joints would be done with the Domino and the outside joints would be screwed and glued.
This did make the cabinet really easy to glue together. I started with the bottom panel, putting on the lower dividers and then the shelf. Then I glued on the outer side panels and made sure everything was square.
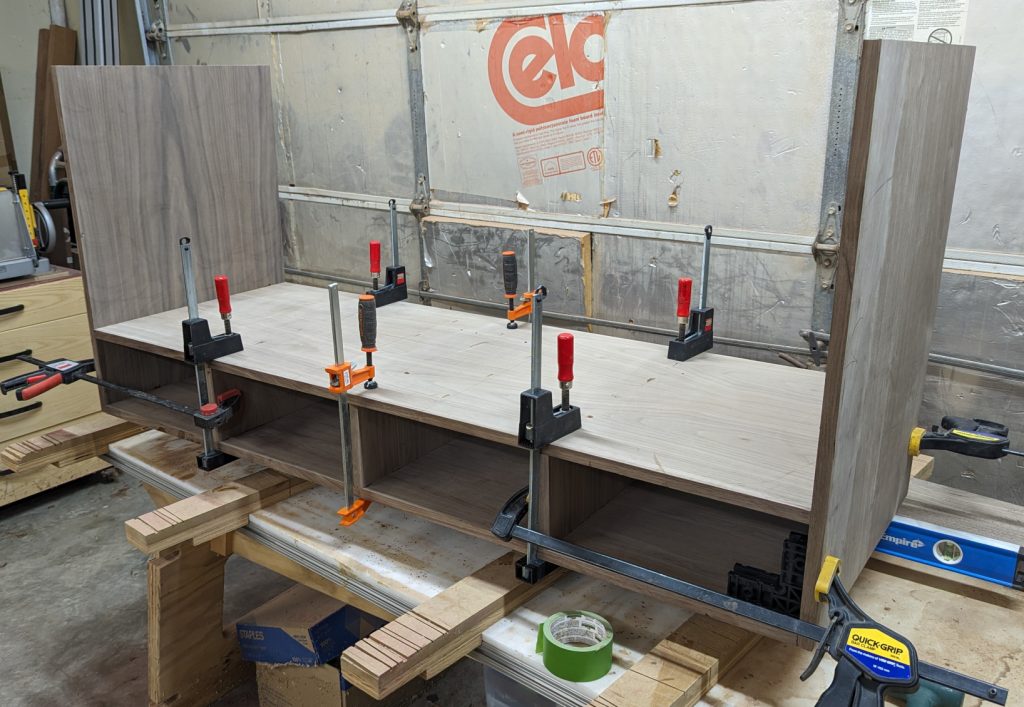
Then I did a quick sanding, and ran into my first major snag. My Dominos did not get seated correctly in the holes, apparently, and made little bumps in the plywood where they were. In sanding, I went through the face veneer in those places and before I realized what was happening I’d ruined the face of my plywood in multiple places.
I didn’t have enough plywood to start over. After trying to think of any way to cover them that wouldn’t just trade one eyesore for another, I settled on veneering over the entire panel. I bought a 2’x8′ sheet of veneer ($120) and used about half of it to lay down a new walnut “floor” on top the shelf where it would show. I opted not to cover the blemishes in the middle, since there would be drawers there.
So I learned another new skill — cutting and applying veneer with no adhesive on the back. I don’t have a veneer saw, but fortunately I could cut it pretty well with a new blade in my utility knife, and I had a supply of cold-press veneer glue left over from the bow-front chest project. It came out pretty well, and took away only 1/16″ at the bottom. Okay.
I added the inner dividers, and the crosspieces at the corners (which had to be notched out from the inner dividers). Gave the whole thing a careful sanding (using a regular random orbit sander instead of the 3M sander, which is hellishly aggressive for plywood), and applied 2 coats of Arm-R-Seal to seal it and make it easier to dust off. More coats will be added later, once I’m done constructing in it.
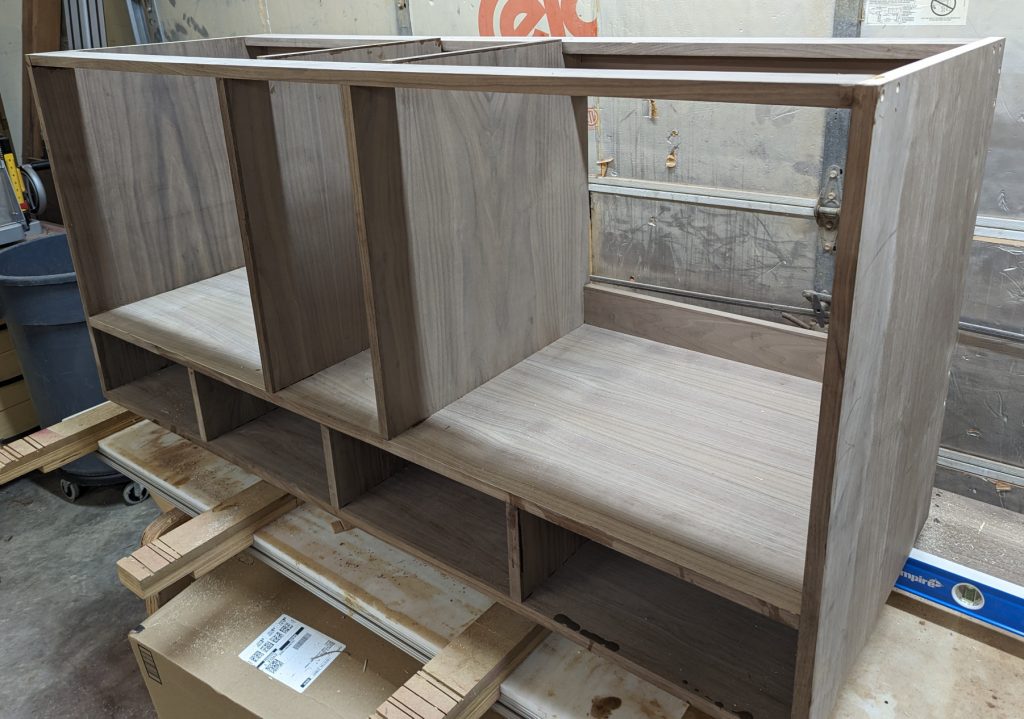
I also took the time to level the top, because granite is heavy and I wanted it well supported. Having a 6-foot level came in very handy for this. I actually had to put edging on top of the middle pieces because they were about 1/8″ shy, so I used some quarter inch edging that I had left over and planed it down until my level could sit across the whole thing without revealing gaps or high spots.
Then, it was on to the doors and drawer fronts.


Recent Comments