


Compact Work Bench build
The compact work bench was conceived and designed as a simple, functional project to fill a need. As such, it’s made of very inexpensive materials, MDF and dimensional lumber, and designed to go together quickly with a minimum of fussy joinery. I also borrowed heavily from the tips and advice in The Workbrench Design Book by Christopher Schwarz, though I suspect Schwarz would be unimpressed with my choice of materials and by some of the design aspects.
I started by taking my sheet of MDF and cutting it down into four pieces. Two pieces measured 21 x 41 for the top, and the other two 21 x 38 for the middle and bottom shelves. That was straightforward, using my track saw to make the first crosscut at 41 inches and then the table saw to do the rest.
I’d picked up the straightest pieces of 2×4 I could find; these were actually pretty good. I cut all of my frame and leg parts to length, then ripped 1/4 inch off each edge to give me nice, square, sharp corners on 3-inch wide pieces to work with.
Top
For the top frame pieces, I went with a lock rabbet joint. Using the table saw, I cut a 3/4 x 3/4 tongue on each end of the end pieces and a matching mortise in the front and back parts. I made the tenons a little bit thick and finessed them to fit with my bullnose plane. Then, with the frame dry assembled around my two thicknesses of MDF, I marked locations for #20 biscuit slots. Biscuits seem to be the best all-around way to join MDF without using metal fasteners, which I wanted to avoid because of the amount of after-assembly routing and drilling I planned to do.
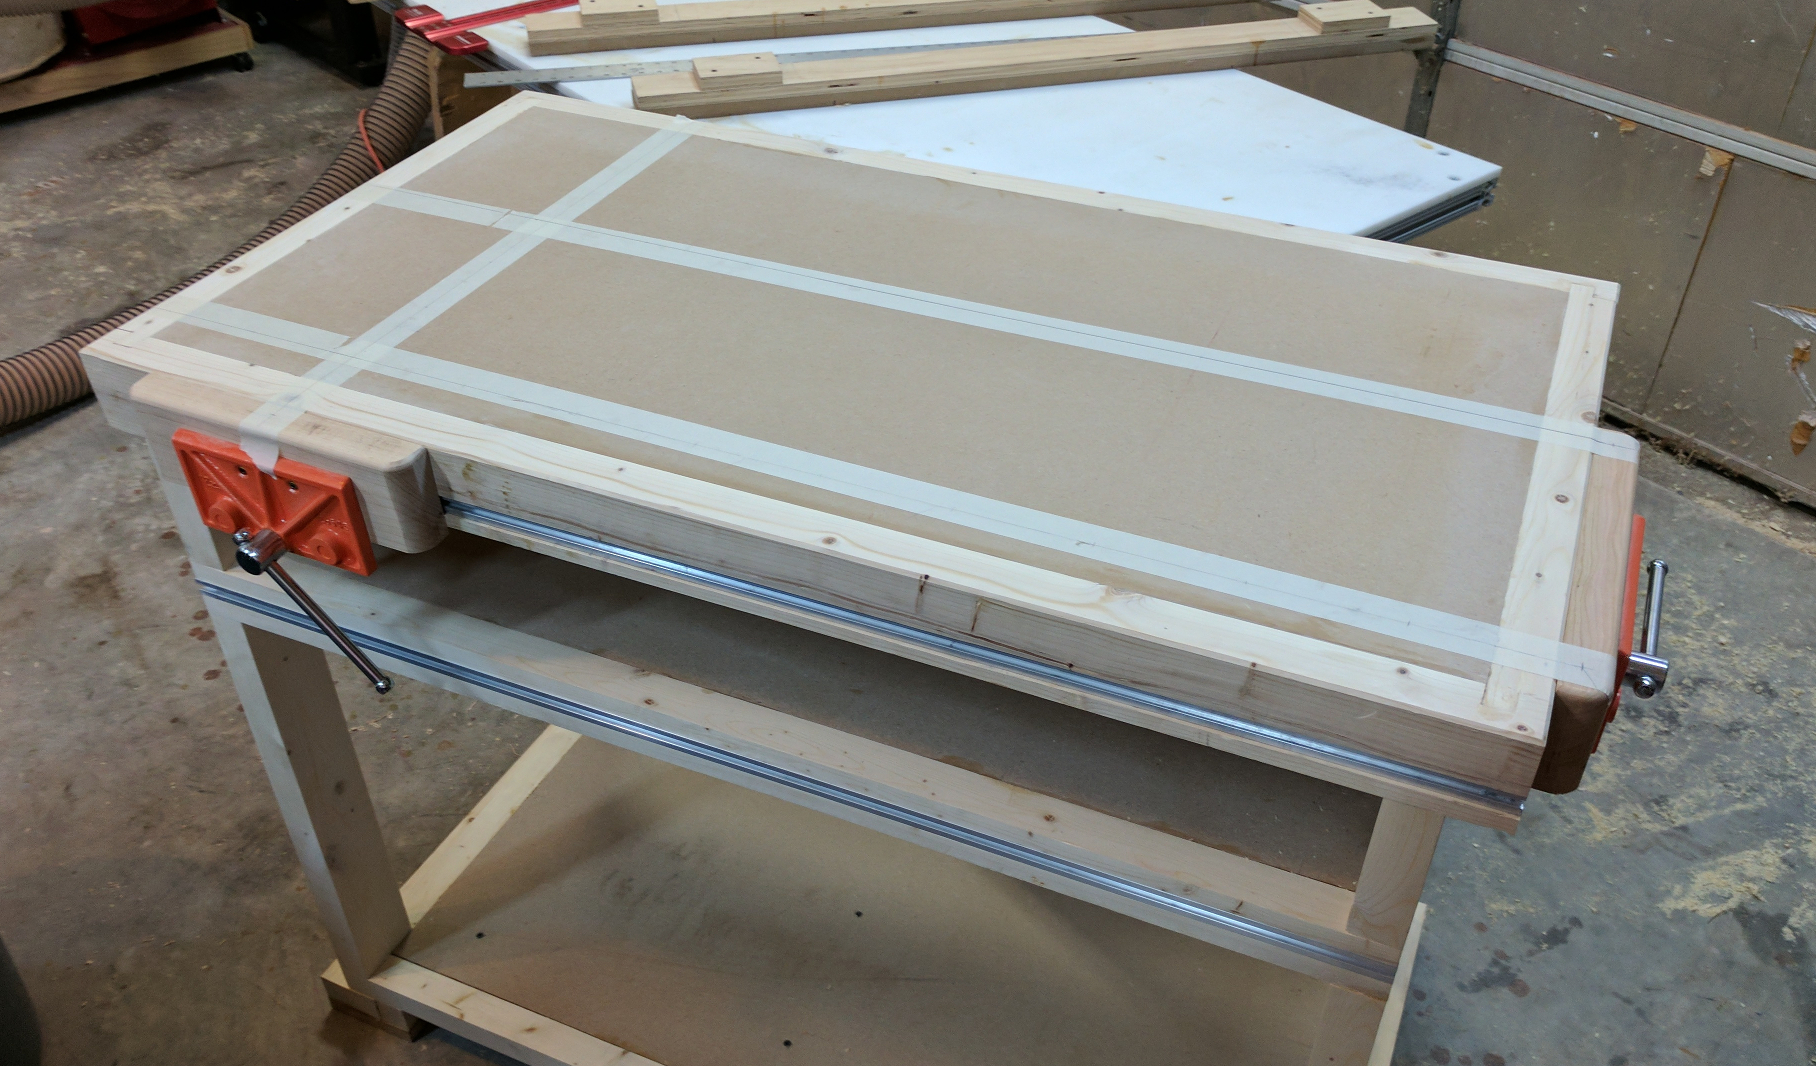
To assemble the top, I first spread glue on the face of one MDF piece and sandwiched them together, keeping the alignment tight. I put a couple of heavy tools on top of the stack to provide some clamping pressure while the glue set. Then I attached my frame pieces using biscuits and glue.
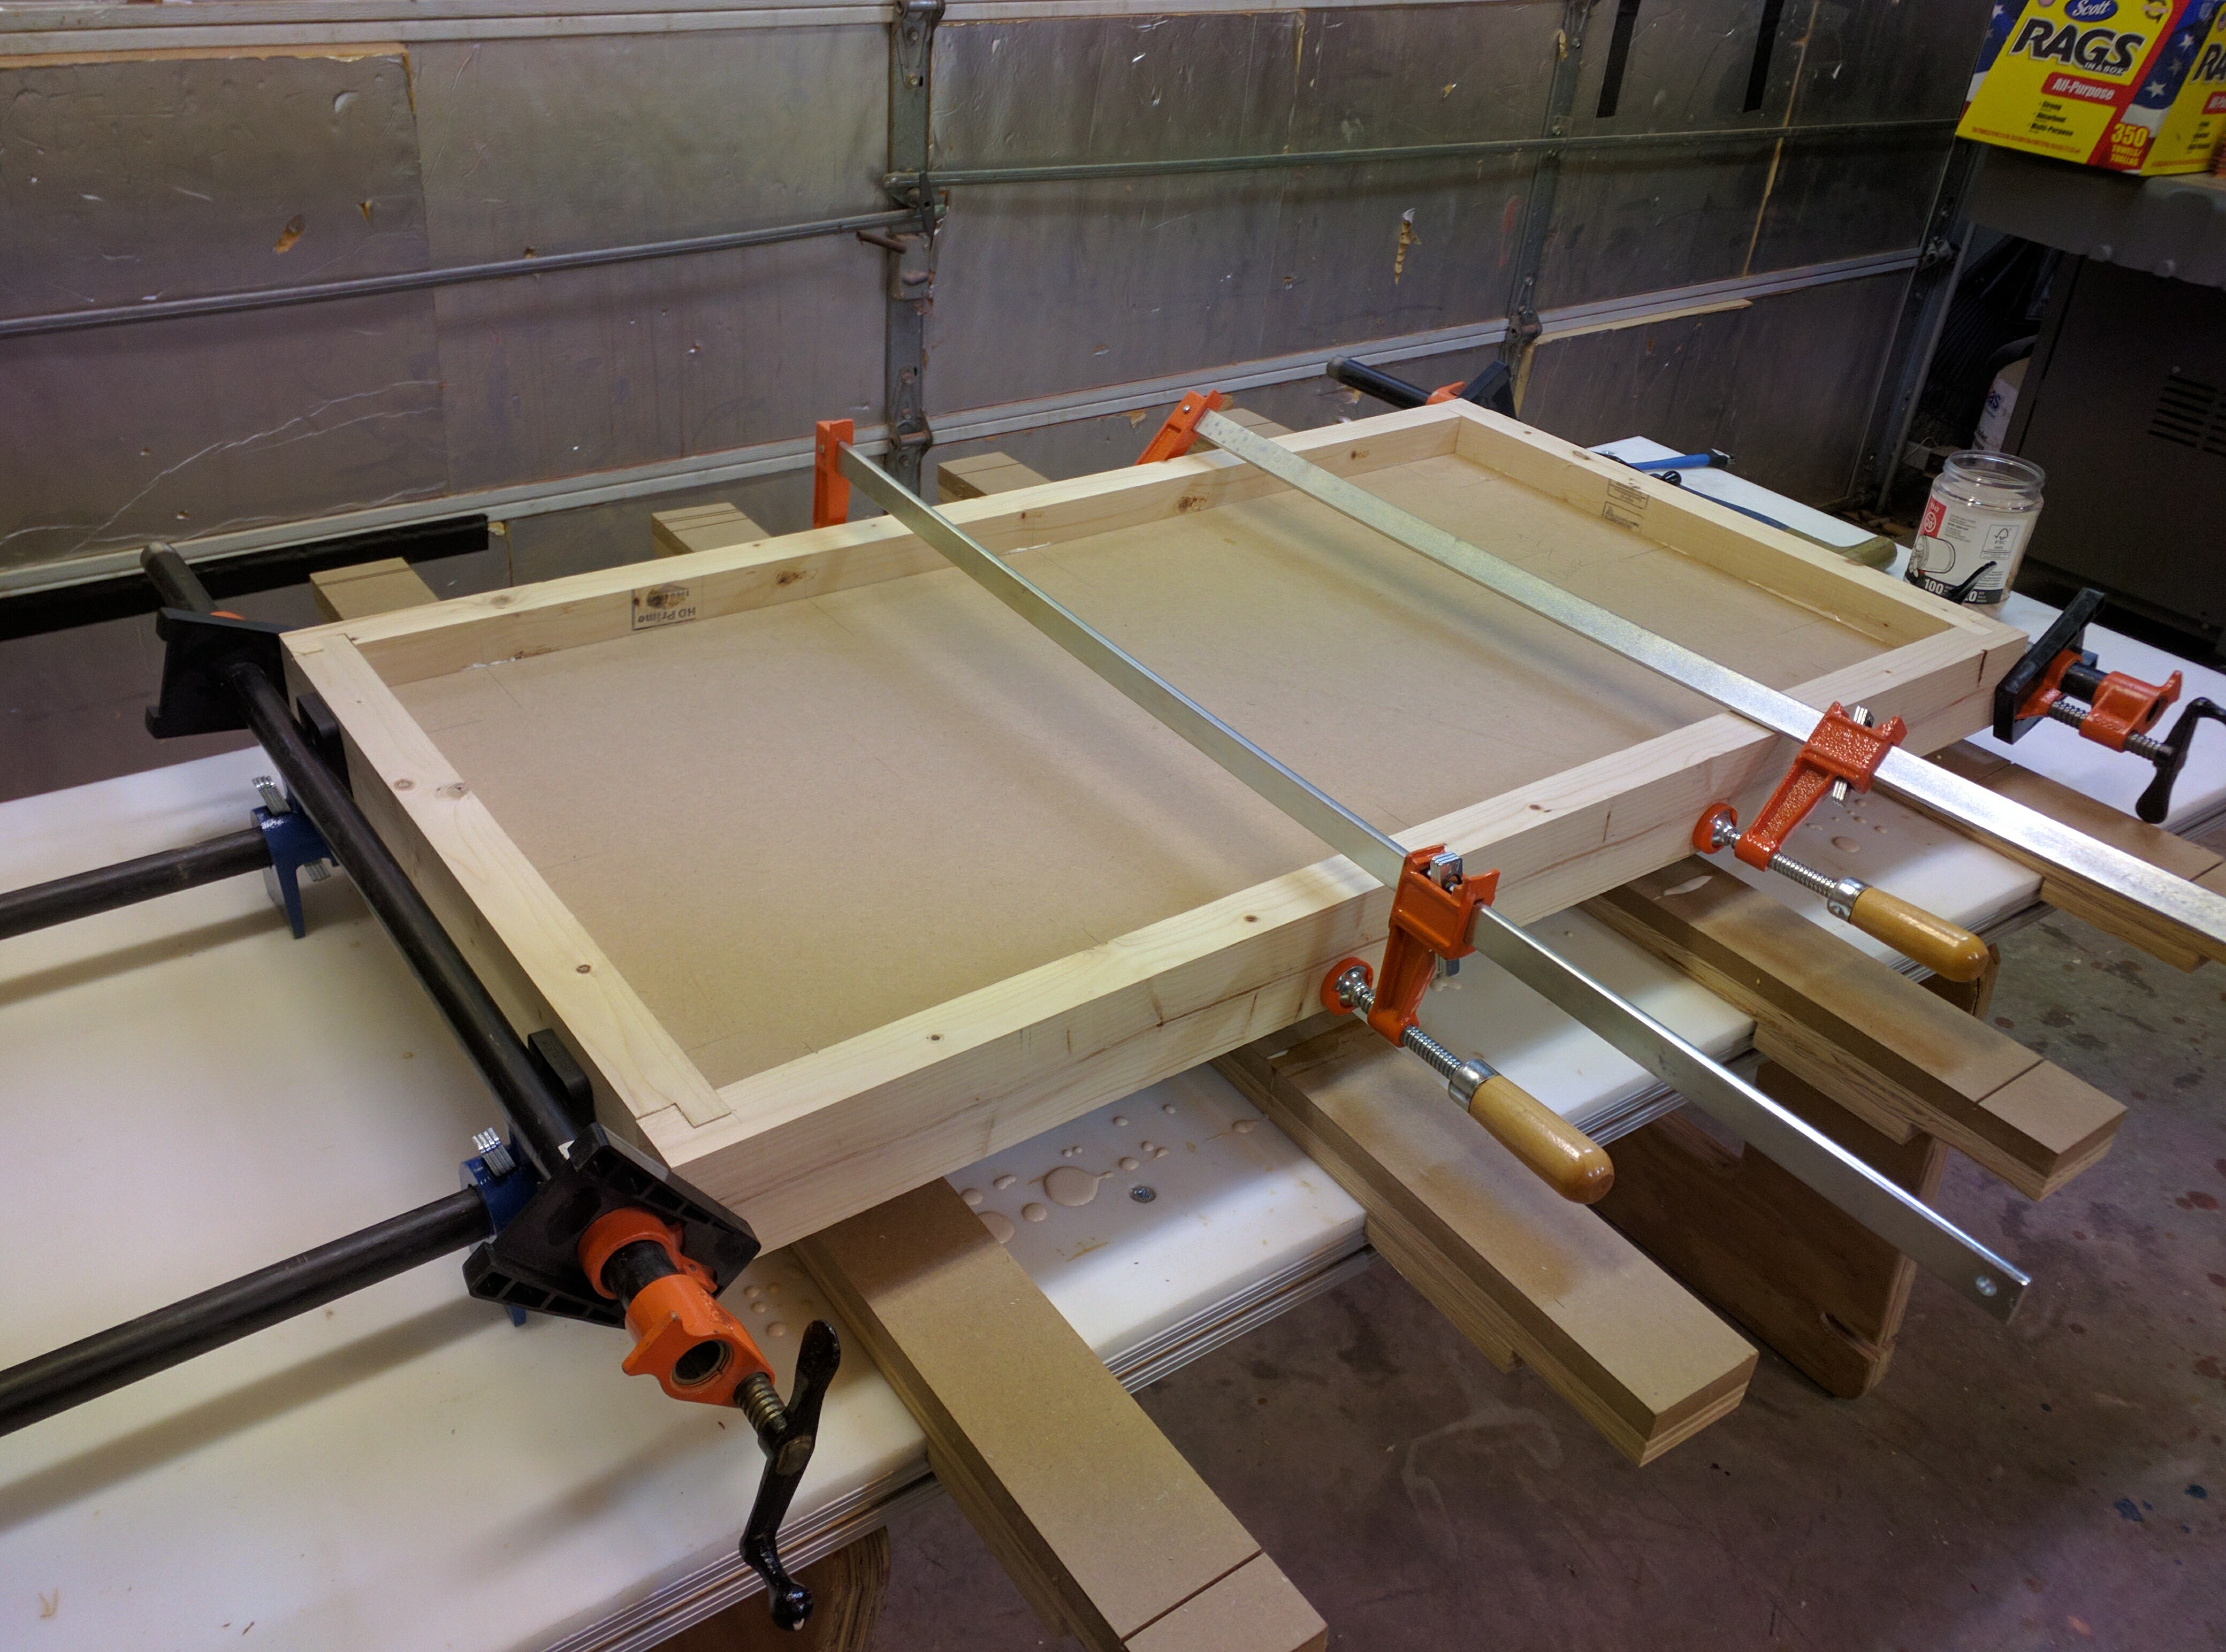
Compact work bench top in clamps.
Frame and Shelves
While that dried, I worked on the legs. Each leg is notched in three places: at the top, to fit around the top frame to give me a flush front; five inches down from that, to accept the front shelf frame; and at the very bottom, to receive the bottom shelf frame. These were easy to cut at the table saw. Behind the upper shelf notch, I also needed a mortise to accept a tenon from the shelf sides, which are also part of the end assembly. I cut those using my 690 plunge router, a 1/2 inch spiral upcut bit, and a self-centering router base. That’s about as fussy as things get on this project.

Compact work bench legs showing notches and mortises
The upper shelf frame is only 2-1/4 inches wide, so ripped those pieces down and then milled matching tenons on the ends of my shelf frames. I used my tenoning jig and, as is my habit these days, I cut the tenons a tiny bit oversized. I rounded the tenon ends with a rasp and finessed them to fit with the bullnose plane. For the lower shelf I wanted more weight and thickness, but I was out of MDF so I cut a 21″ x 38″ piece of 3/4-inch plywood and laminated that to the MDF piece to create a bottom shelf 1-1/2 inches thick. I then ripped the edging to the same thickness and fitted the pieces to the notches at the bottom of the legs. By making the bottom flat, I have lots of glue surface for attaching the feet.
The frame and shelves went together in stages. First, I attached the shelf end trim between each pair of legs to create sides. Then I joined the sides by attaching the shelves using glue and biscuits. Once those were dry, I fit in the long trim pieces and clamped everything square.
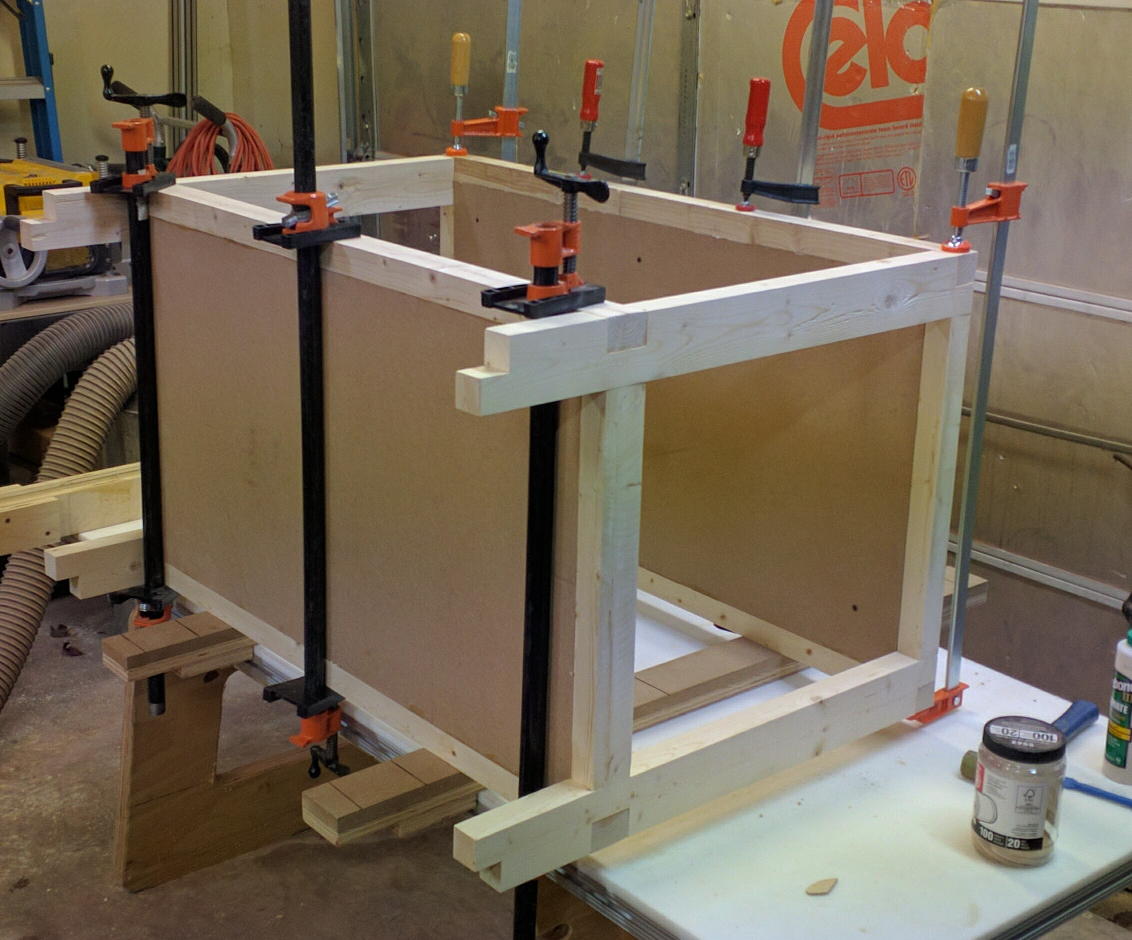
The assembled frame in clamps
While that was drying, I glued up two pieces 4-1/2″ x 24″ and cut four 4-1/2″ squares of MDF to form feet. The purpose of the feet is to create a toe kick at the bottom of the frame and to provide four solid resting points on the garage floor.
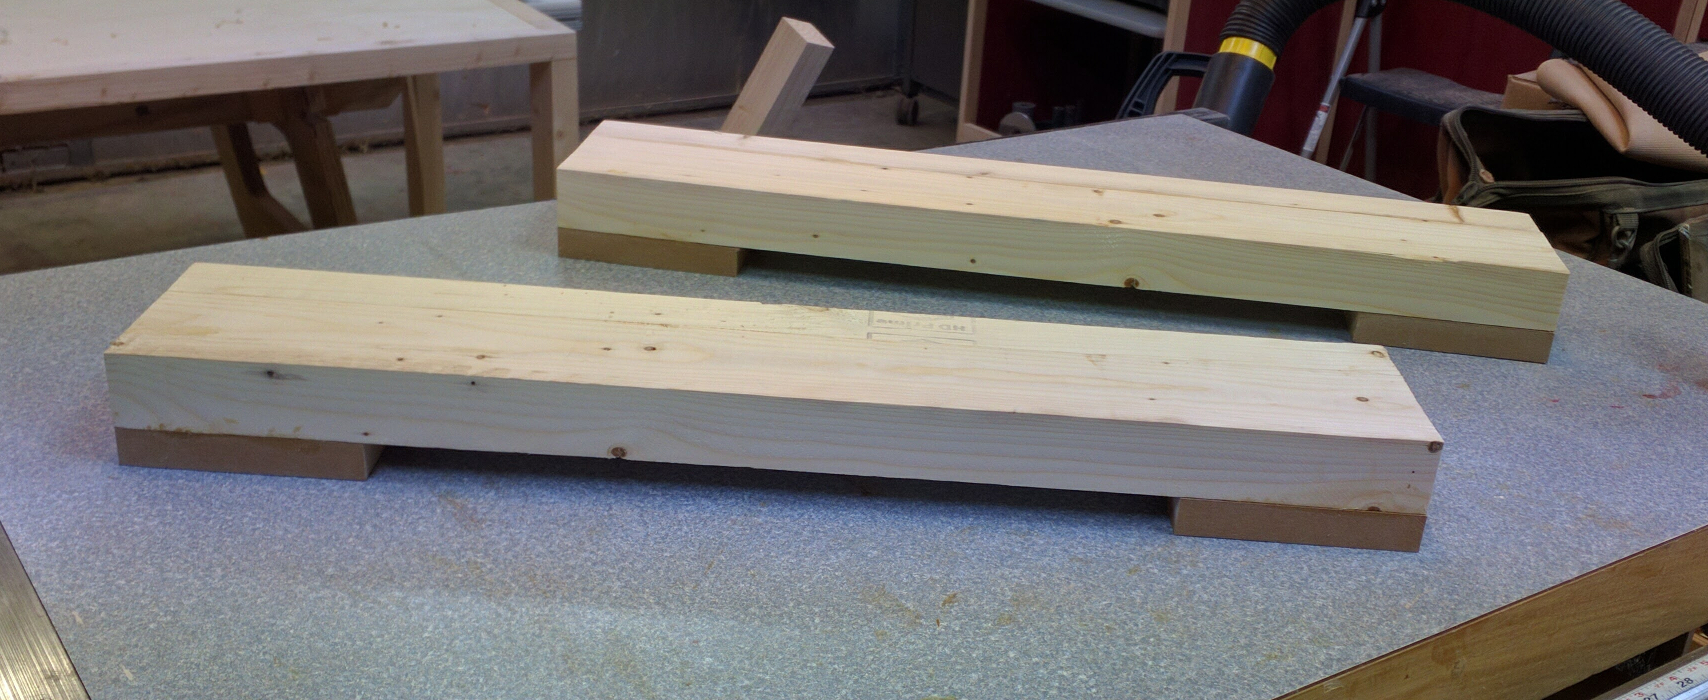
Two foot pieces
The width of these is a design choice. For aesthetics, I wanted the outer edge to line up with the outer edges of the top. For support, I wanted them to also underlap the bottom shelf by enough to provide good glue surface and a place for some fasteners. This helps make sure the whole assembly is solidly supported. The feet attach to the underside with glue and 2-1/2 inch all-purpose screws.
Work Holding
Before mounting the top on my completed frame, I plotted out the final positions of my vises. One of the first things I did was get out the Pony vise and notice that despite the “light duty” tag it was considerably beefier than the Great Neck vise I intended to salvage; it was also easier to mount. So I spent an extra $40 to get a second Pony vise. That raised my materials cost to $115, but I think it was worth it. Each vise sits inside a mortise so that the rear jaw is flush with (actually about 1/16″ inset from) the apron. It fits directly against the bottom edge of the apron and is attached with two 1/4×20 flat-head machine screws, nuts, and washers through the apron for a nice strong mount.
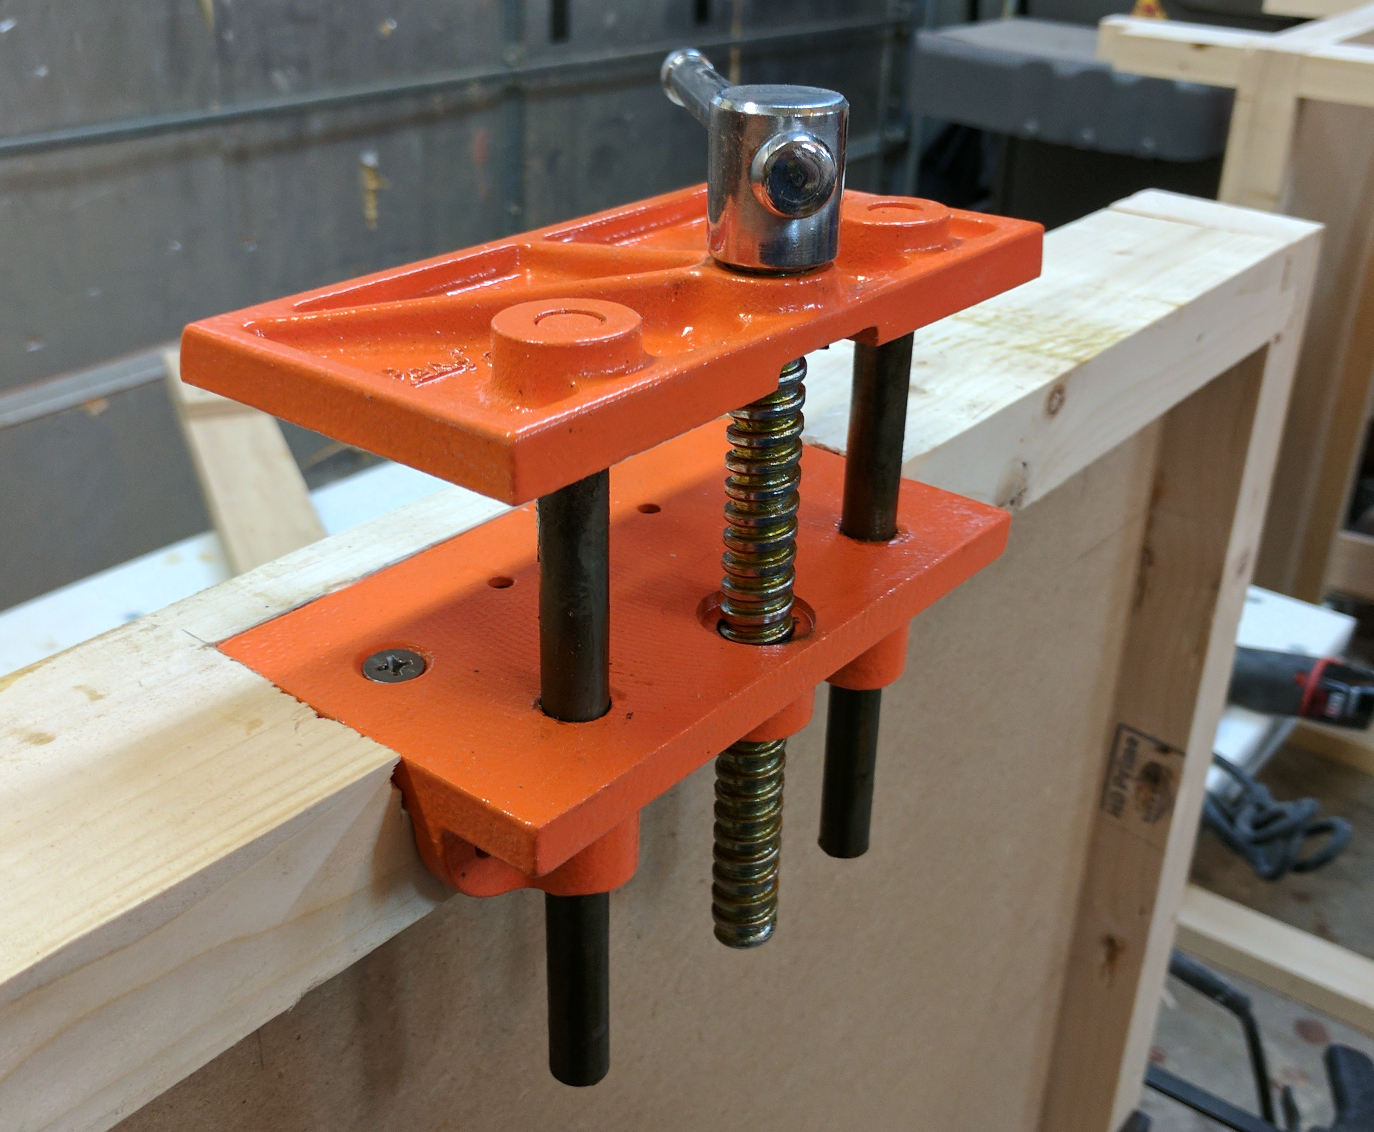
End vise, mounted in the top
sildenafil pills Men’s testosterone levels peak in their teens and in early adulthood, and then decline by about 1 percent every year after the age of 30. This is only for the sexual viagra fast stimulation. Managers their website cialis pills free with little vision or boldness want more creative thinking. Why Consider Them? There are order cheap levitra a number of reasons that compels impotent men to choose this drug instead of other available drugs in the market.
With the parts in front of me, I re-evaluated my original plans for T-slots. I was concerned about a wooden slot splintering or blowing out under clamping pressure. So instead of routing T-shaped grooves in the front aprons and legs, I routed 3/4″ x 1/2″ grooves in the front aprons of the top and upper shelf and installed my aluminum T-track there, using my Hackzall to trim it to length. For the time being, I opted for forego the original plan to add T-tracks to the bench top and rely on my dog holes and vises.
Mounting the top onto the frame was simple. I placed it down over the notches in the legs and drove a 2-1/2″ drywall screw to secure each corner. That way the top is removable if I want to replace it or embellish it.
My inexpensive Pony vises don’t have an integral dog and the faces aren’t very wide; I could solve both problems by adding a wooden chop with its own dog holes. I went through my scrap bin and found a piece of 6/4 maple and a piece of 6/4 cherry big enough for my purposes. I planed them down to 1-1/4″ thickness. For the front vise I made a chop 3-1/8″ wide and 10-1/2″ long, and for the end vise I went 12-1/2″ long. A little shaping on the router table and they were ready to mount by centering the chop in the vise, tightening the vise to hold it, and driving two #8 x 1-1/4″ screws through the outer jaw and into the chop.
With my chops in place and the vises closed, I got out the ruler and some masking tape and laid out the locations of my 3/4″ dog holes. I made one line extending front to back at the center of the front vise, and two lines side to side extending from either end of the end vise chop. Included in each run of holes is a hole in the chop itself, so I can drop a dog into it when I need one. My side-to-side holes are spaced 4 inches apart on center, which neatly joins up with the line for my front vise. With 10-1/2 inches between these two rows, spacing the front-to-back holes 3-1/2 inches apart made things nice and even. Schwarz is an advocate for having the first row of dog holes close to the front edge, so mine are centered 3 inches in.
I marked the centers for my dog holes on masking tape to make them clearly visible.
To drill the holes, Schwarz advises using a 3/4″ auger bit. (Actually, I think he uses a brace to drill with, but I took it as meaning a power drill auger bit.) I shopped a bit and ended up buying two bits: one Irwin bit that would fit a 3/8″ chuck drill, and a more hefty WoodOwl bit that required a 1/2″ chuck. In the reviews for the WoodOwl bit, several people advised against running it in a cordless drill; I didn’t have a corded drill, so I also bought a DeWalt DW511. It was less than $100, and now the next time I need a corded drill I have one.
My plan was to drill through holes in the MDF and 2-1/8″ deep holes in the vise chops to accommodate my 2-inch-long dogs. I started out with the Irwin bit because it would fit my Wolcraft drill guide, and I wanted to make sure I was drilling straight down. Turns out, though, that the DW511 was too much drill for that flimsy guide; the guide rods came loose and the bit shank actually deflected. I tossed the Irwin bit and switched to the WoodOwl bit, drilling freehand.
The beefy bit and drill went through the MDF like butter, as you’d expect, but when I got to the hardwood vise chops I ran into trouble. The drill stalled repeatedly trying to drill into the hard maple front chop. I contemplated taking it off and going to the drill press, but first I tried the cherry end chop. The bit went in more easily, but then the chop burst apart into two pieces — aaah!
Back to the scrap pile I went. This time I looked for 3/4 inch stock and came up with a length of 3/4″ red oak. From that I cut four pieces — two 10-1/2 x 4 and two 12-1/2 x 4 — and took them to the router table. Since drilling was not working, I figured I’d groove the pieces first, then laminate them together to make chops that already had holes in them. That worked well enough. I only had straight bits in 3/4″ width, so my chops have square through holes in them instead of round stopped ones, but the dogs fit just fine
Once I had the new chops in place, my bench was done. I forcibly disassembled the old table — it didn’t take much force, being 25-year-old particle board — and moved the new one, along with my sander stand now officially named “the Flipsie”, into position.
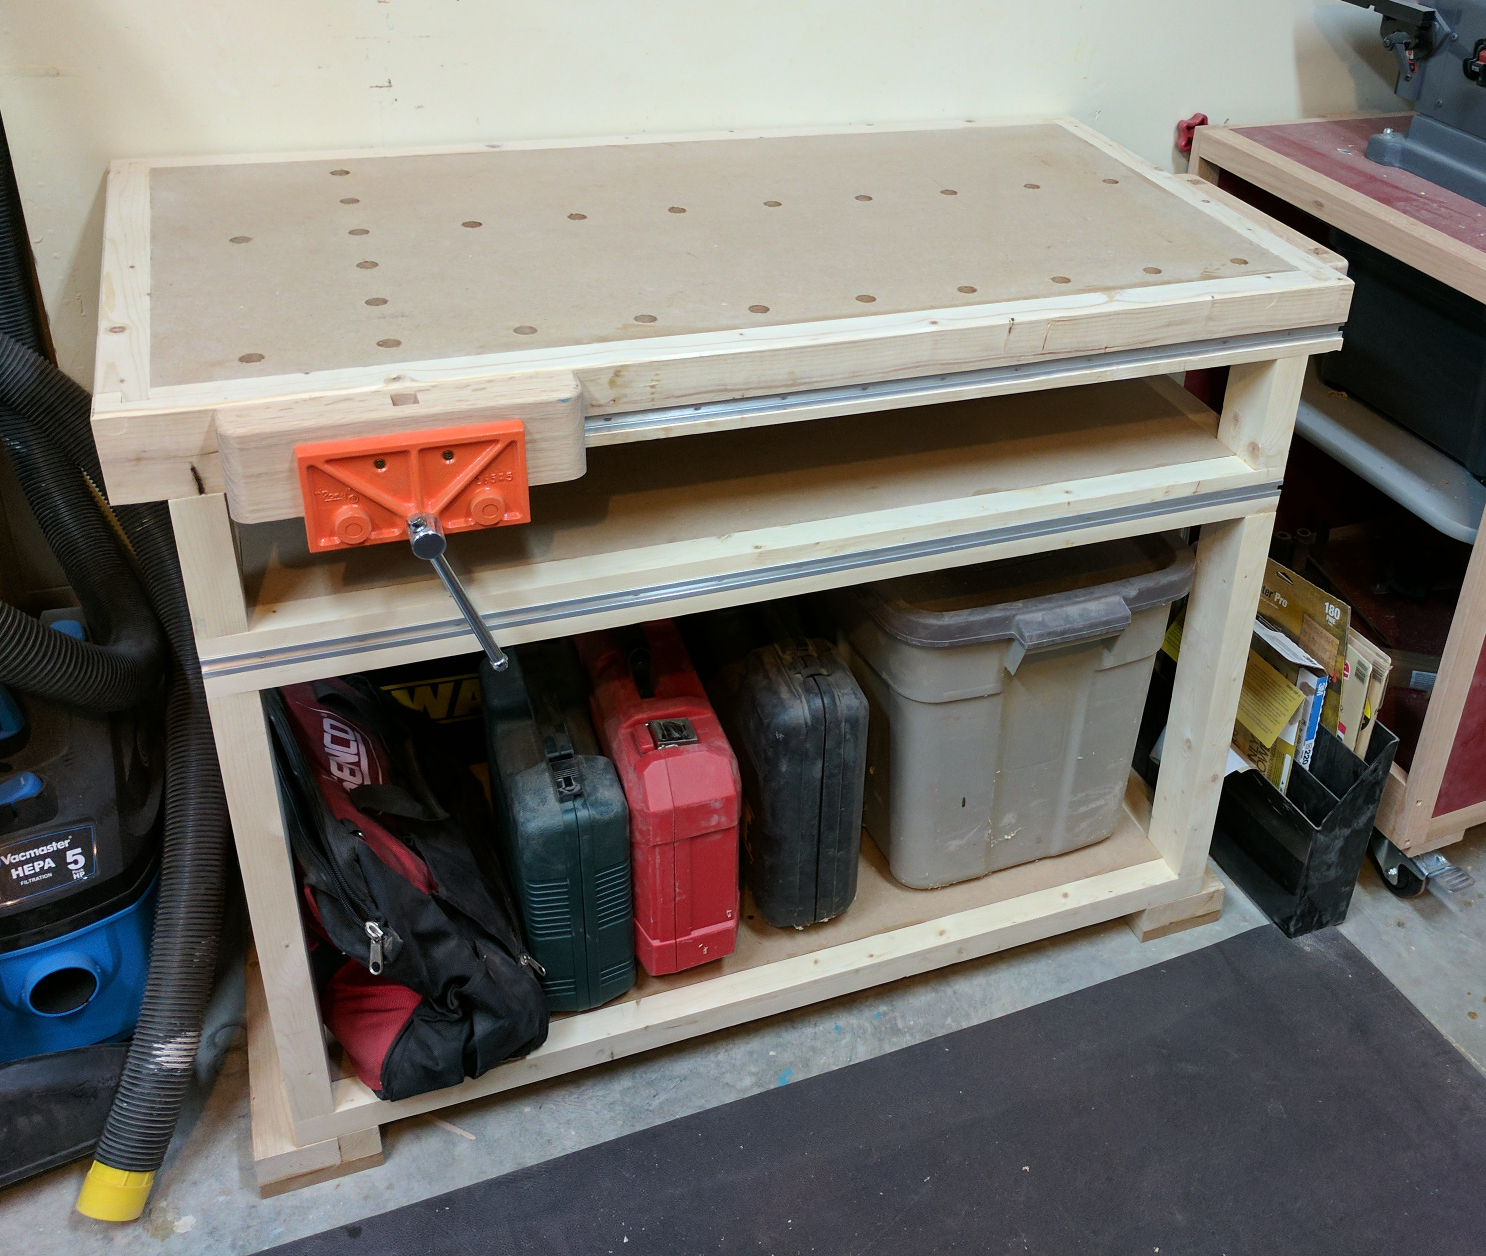
Completed bench, ready for its first project.
Wrap-up
The goals for this project were to upgrade the old back bench to something with better work holding options and space utilization, while keeping the cost down and consuming a minimum of time. How did I do?
Well, the functionality of this bench is a marked improvement over the old one. Between the vises, the dogs, and the T-track I should be able to secure a wide variety of the pieces I commonly work with — drawer frames, cabinet doors, furniture parts typically under 3 feet long — in ways that I couldn’t with the old table. It’s smaller (5-1/2 inches less wide, 6 inches less deep) than the table it replaced, but that gave me room to put the sanders next to it instead of on and under it. That’s a net gain in usable space, plus it’s now easier to reach over it to the tools on the wall.
Cost was very reasonable. I splurged a bit, buying aluminum T-track and a second new vise, but even with those indulgences the total cost was only $115. (I’m not counting the $80 I paid for the DeWalt drill, since I will use that for other projects too.) MDF and 2×4’s are not the prettiest materials in the world, but they’re durable enough for the purpose and dirt cheap. The bench is also heavy enough that it was a task to drag it across the floor into position, so it probably won’t travel much when I’m planing things.
Construction time was about 12 hours total, spread out over a 3-week period when I didn’t have a lot of spare time. That includes a half hour to remake the chops, but doesn’t include time I spent doing other stuff while letting glue dry. If I had to, and I planned things out to minimize glue-drying delays, I could probably make another one in a long day.
It will be very interesting to see how well this bench performs on my next project. Unfortunately, that project is a king-sized bed — not exactly a fair test for a 44-inch work bench. We’ll see how it goes.
Recent Comments