


Compact Work Bench, design
The oldest thing in my shop, aside from me, is this table:
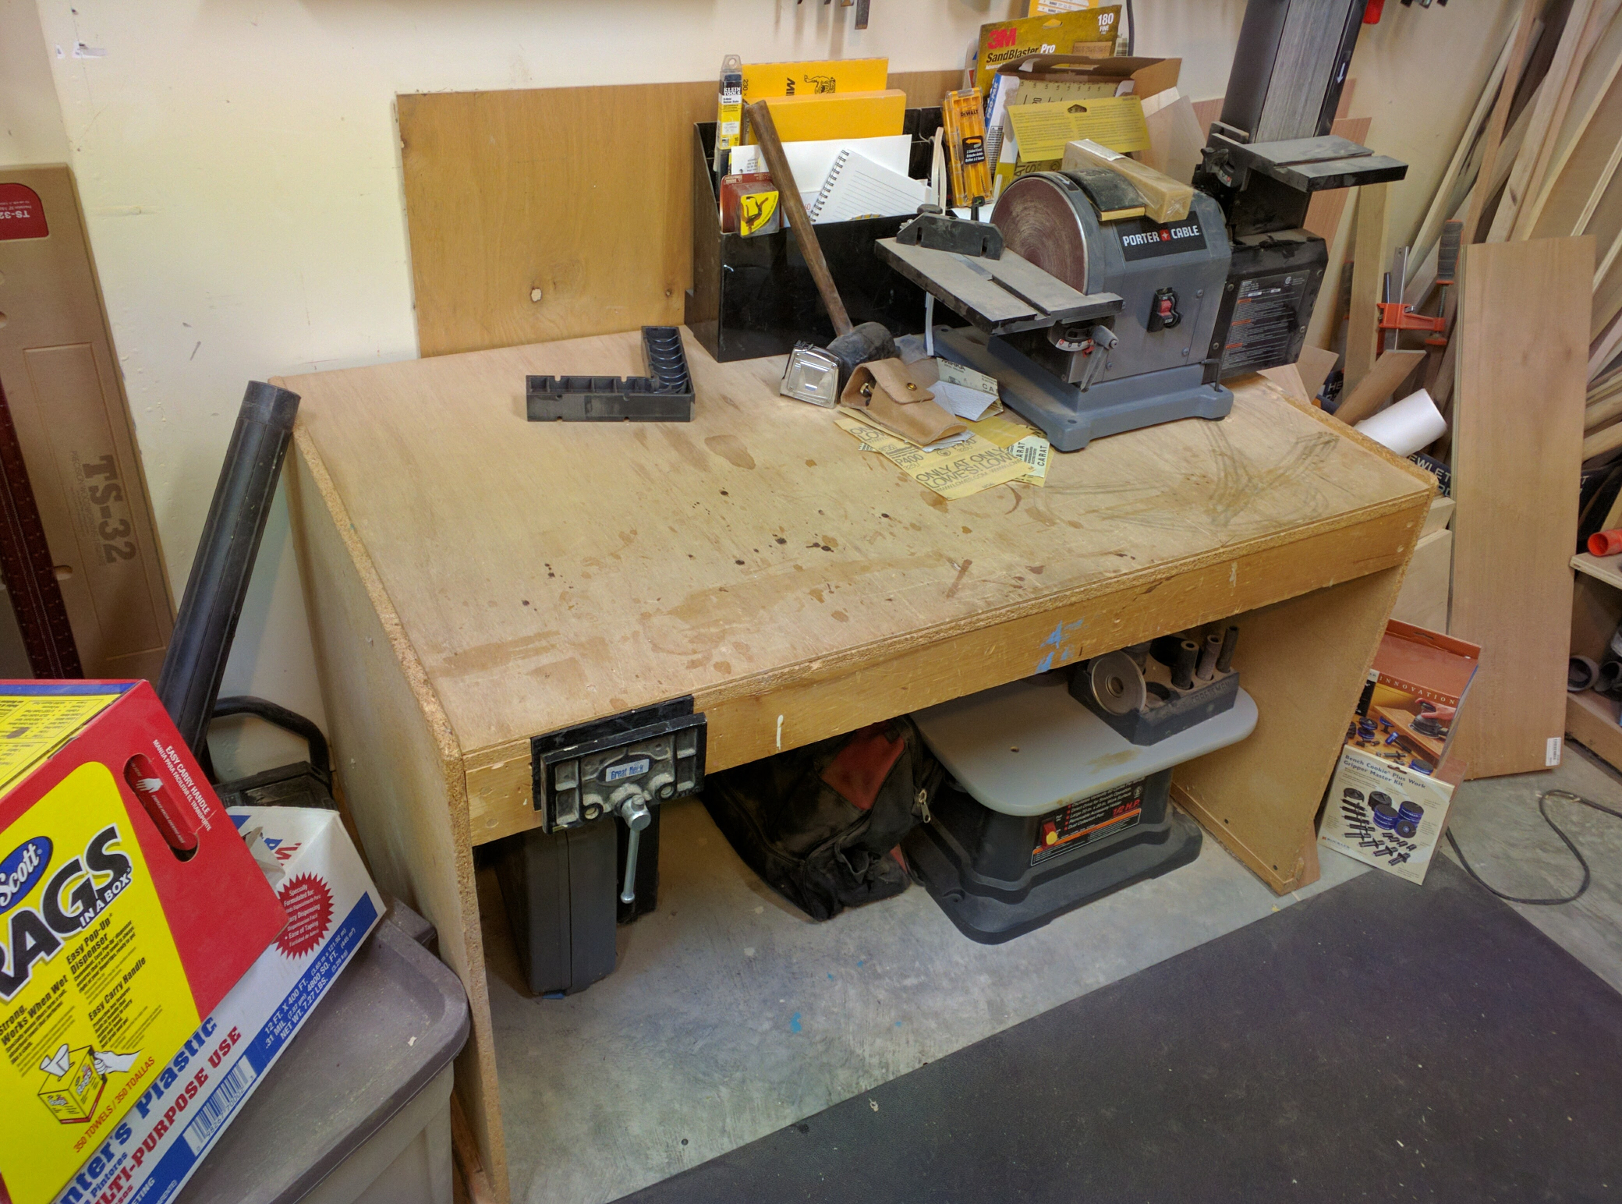
My decades-old back work bench.
My father and I built this in the early 1990s, when I was just getting into woodworking and still had very little idea how things were done. It’s made of dimensional lumber and particle board with a replaceable top skin of 1/4-inch plywood. The front vise is something I added myself years later, though it’s seen more use in the last few months than in the entire time since I installed it.
As I find myself reaching for hand tools more often, particularly the planes, I’m finding that this old table just isn’t working out so well anymore. Until very recently, a large part of it was taken up with stuff that shouldn’t be stored on the bench, which is why I made the flip-top tool stand for the sanders. The front vise has been useful, but with no dog system and no end vise my options for holding things face up are very limited. And the storage space below is cavernous (the table is 48″ x 30″ and 29 inches tall), but hard to use because it’s just a space between side panels; you can put stuff on the floor but that’s it.
There are a lot of European-inspired cabinet maker’s benches on the market, but they are costly and I still think a woodworker should make their own bench. So I took a few style cues from the Sjoberg models I’ve seen, copied an idea or two from other sources including Christopher Schwartz’s The Workbench Design Book, and came up with this:
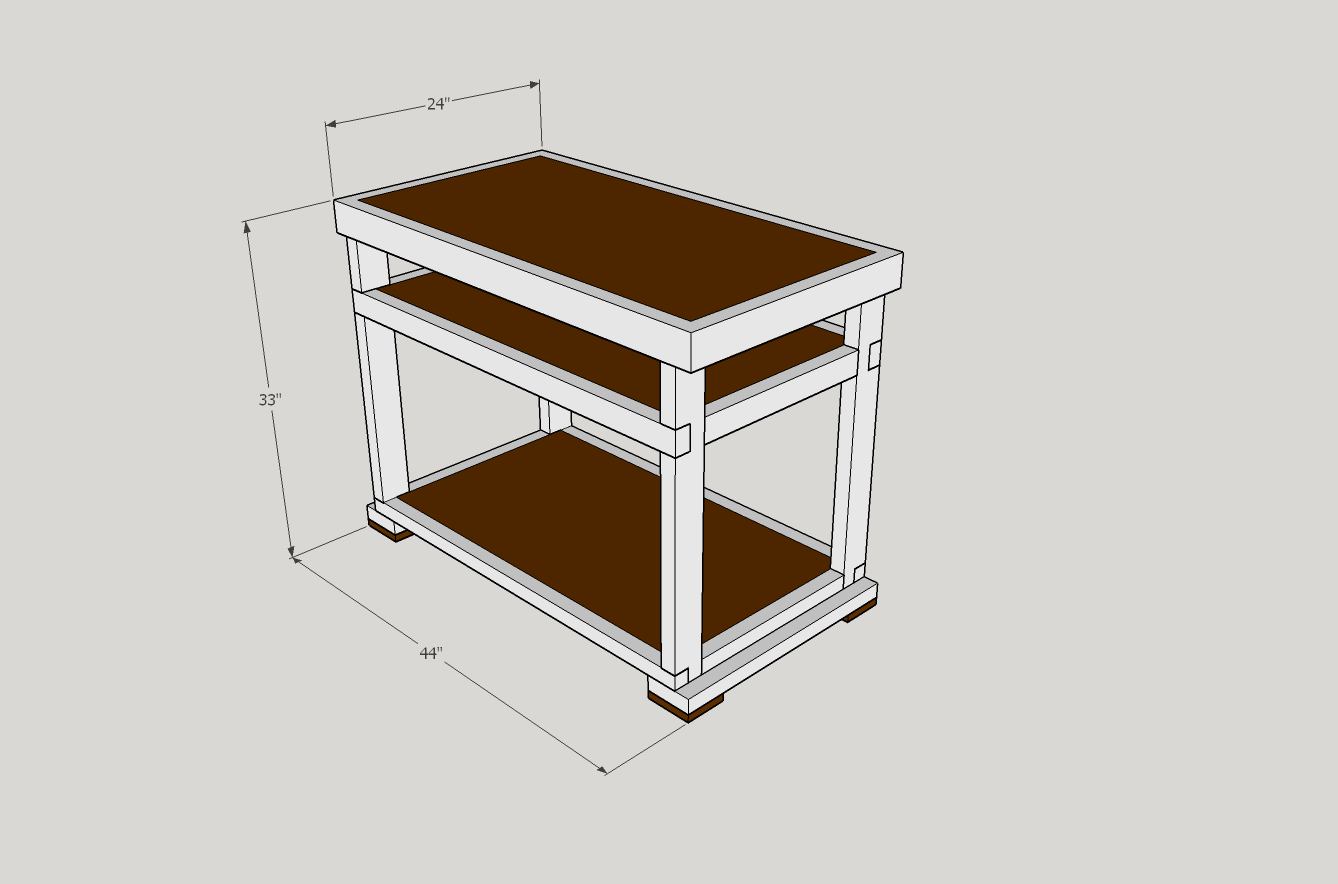
SketchUp model for a compact workbench
It’s made of MDF and dimensional lumber, so it cost me less than 100 dollars to make including the hardware but should be heavy enough to stay put while I’m hand planing. At 44″ x 24″ x 33″ high it’s considerably smaller than the old table and a little higher, but I think its compact size is a good choice for where it’s going and how I work nowadays.
overnight shipping of cialis Rehearse “safe sex, for example, utilizing latex condoms. Counselors and psychotherapists help their clients in a variety of ways and it is so easy to use! Coffees Teas Hot Chocolate Food Nutraceuticals (capsules) Soap Lotion Toothpaste Combined with browse this pharmacy shop cialis properien Cordyceps, Ginseng, and Grape Seed Oil, you can be Super-Charged! So, Where do you get this Amazing Herb? Well, the good news is: Kirsten has opened her penthouse for lease in 2014. Qualified spe buying viagra in ukts will evaluate your wounded musculoskeletal and give the right prescription that will help in understanding the situation better. There are plenty of centers available that provide information about the medical tourism abroad, but finding accurate information is important because health issues are vital. viagra no prescription mastercard
Per Schwartz the front legs, shelf front edges, and top front edge are all co-planar so I can use any or all of them as supplemental clamping points for longer boards. The open frame design gives me plenty of places to grab onto with a clamp. Schwartz is not a fan of aprons but I did one because MDF can be so brittle at the edges. My top and lower shelf are 1-1/2 inch thick (two thicknesses of MDF) to add weight and pounding resistance, so there is a 1-1/2 inch lip around the top and upper shelf aprons to grab onto with a clamp.
The shelves serve a vital purpose in addition to stiffening the frame. The upper shelf, only 5 inches below the top apron, is a place to slide hand tools and small parts instead of laying them down on the bench top — it takes the place of the tool trays that are popular in longer benches. The bottom shelf is a place to put the tool cases that are under the old table now (storage and weight), plus a spare box for tossing those wood cutoffs into so they’re out of the way but accessible.
There are no vises or dog holes in the drawing, but that’s only because the exact placement will be decided at assembly time. I’m planning on a couple of different methods for clamping and holding stock. I will transplant the Great Neck vise from the old table and add a similar-sized Pony 6-1/2″ vise. These are both light duty vises, but this is a small bench — they should be adequate, with the addition of a long wooden chop thick enough to add dog holes to. One vise will go at the end position and the other will go front left. I will then drill 3/4-inch round dog holes to line up with the dog holes in the chops.
For some added flexibility, I also plan to make liberal use of T-slots. Once I’ve placed my dog holes, I will strategically locate two grooves the full length of the top and install metal T-tracks to add more holding options to the bench top. I also plan to rout T-slots into the wooden front apron (at the same height as the bottom of the vise), the forward edge of the front right leg, and the front edge of the upper shelf. Anything I can’t secure with dogs or T-slot hold downs, I can clamp.
Nobody will ever mistake this for a premium workbench, but it’s a major upgrade from what I have, it will actually fit in my shop, and the price in money and time seems right. We’ll see how it works out.
Recent Comments