Everything is a Box
I have been doing a lot since May, it’s just not posted yet. I’ll be doing that. But first, let’s talk about boxes.
Recently I took my first-ever professional woodworking course — after 30 years, I know, it’s about time! This was a treat because it was taught by Erik Curtis, of YouTube fame, and the name of the class was “Everything is a Box”. The idea was that people showed up, designed and made a box over a weekend.
It was held at Goggleworks in Reading, PA, which is a great venue and I highly recommend them. Erik was a great instructor/inspirer and the class was kept small (under 10) so everyone got a lot of 1 on 1 time with him.
For my part, I had two goals for my box:
- To make something smaller than I ever have before (even my other boxes have tended to be kinda big)
- As much as possible, to use hand tools to finish and smooth the pieces rather than power sanders
The design was actually inspired by Erik directly. He had recently posted this video about making a custom coffee table with a friend in the UK, and the legs particularly intrigued me. I imagined taking that shape an miniaturizing it to hold a small box inside. Erik liked it too, so that’s what I did.
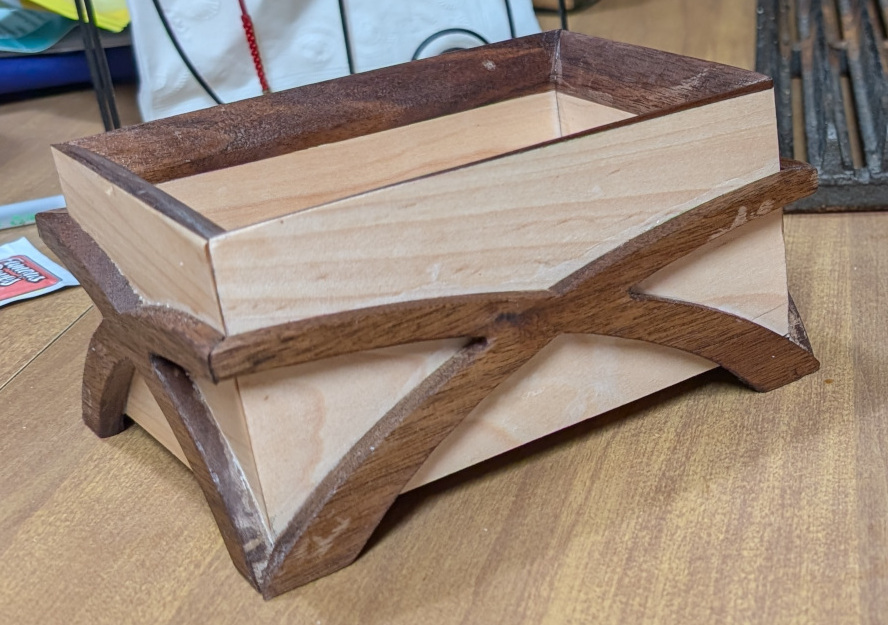
I picked up a starter kit with maple pieces for the box and some spare walnut from the table to make the crossed arcs. Erik and I consulted on the look and my goals, and we decided this box doesn’t really need a lid (or, truthfully, we couldn’t come up with a design for one that didn’t look slapped on), but I put a little walnut around the top edges to the box would have a little color.
I cut out the box parts using normal power tools (table saw, mostly) and used the planer to get my walnut down to 1/4″ thick. True to my goals, I smoothed the box sides and rounded over the top with hand planes after getting a tutorial from Erik on proper sharpening — I really needed to up my game on that.
For the crossed arcs, I got to use Erik’s Shaper Origin, which is a fascinating piece if equipment and I immediately wished I’d spent money on that instead of the CNC I have at home. I may still sell my CNC and put the proceeds toward a Shaper Origin, it was that good an experience. Erik did the design for me and loaded it onto the Shaper, so all I had to do was cut it out, miter the corners, and hand sand it. Which I did, and I finished constructing the box on Sunday. Here it is:

As you can see, it was rushed and not what I really wanted. I was too worried about making the Sunday deadline, and it showed. The uneven nature of the roundovers on the top, the poor-fitting miters on the frame; sure, the sides of the box were smooth as all get-out but it was definitely a substandard performance. It made me unhappy to look at it and it was embarrassing to hold it up next to some of the other students’ boxes. So, when I cleared the other projects out of the garage, I revisited this design.
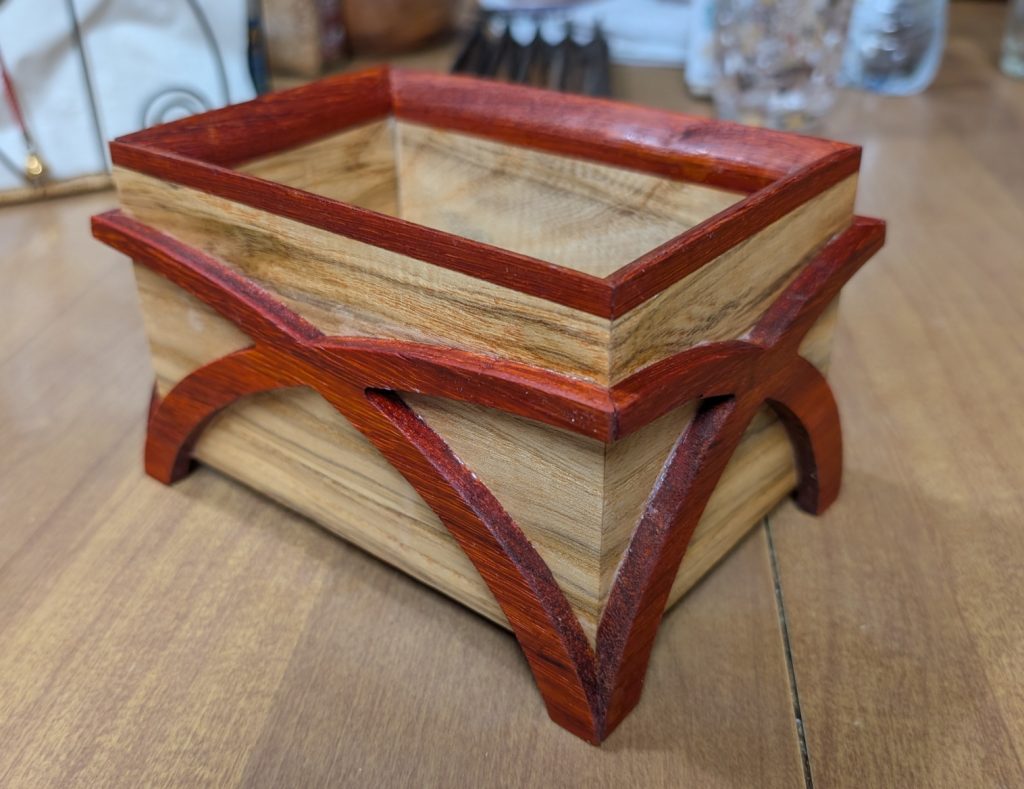
For materials, I had a bunch of spalted hackberry that I’d gotten for my birthday (when I was still rehabbing the shoulder) and not used yet, and I had a couple boards of paduak still, so I used those.
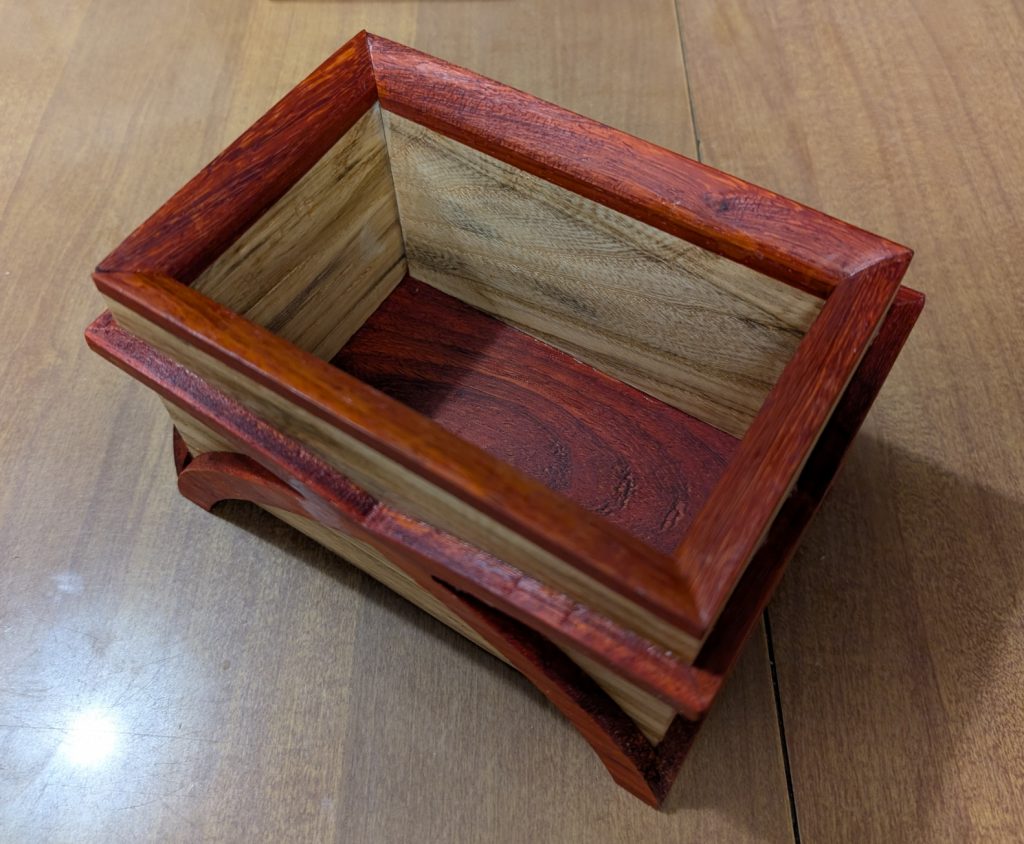
Goggleworks had provided maple that was already planed to 1/2 inch and cut into 12-inch long pieces, but this time I went with a 3-foot length of hackberry about 5 inches wide and took that whole thing down to 1/2 inch thickness. Then I cut it to width, but left the long piece as it was for now. I cut a 30-degree bevel into the top and glued a long strip of 1/4″ paduak to it.
Then I cut my box sides from that one piece. I kept all the dimensions the same except the thickness of the paduak (originally 1/8″, I made it 1/4 instead) and I was able to wrap the grain around and it actually met nicely on the fourth corner. I rabbeted for the bottom and cut miters in the corners, and it fit together nicely. My block plane did a decent job on the wild-grained paduak, but the hackberry wanted to chip and splinter no matter how carefully I handled the smoothing plane, so I smoothed it by sanding instead.
Then it was time to cut the crossed curves. I didn’t have Erik’s drawing but I had seen how he did it, so I made my own and used a 1/8″ compression bit to cut it out on the CNC. It’s not precisely identical to the walnut one, but it’s pretty close — just a little bit taller. The miters fit exceptionally well on the corners, though, so after a good sanding (by hand) I glued them on and carefully made sure the corners all fit together nicely.
Once all the glue was dry, I had a little Arm-R-Seal left over from a recent project so I just used that on both pieces.


I am way happier with the second iteration! It’s not that different from the first, I just took more time and care in the execution. Construction time for this was a total of about 7 hours over two days, so I could have done this during class and I didn’t need to be in as big a hurry as I was.
As Erik himself said, “I’ve found those are the places I’ve learned the most–when I can revisit a thing that pushed me and really digest what worked and what didn’t and apply those lessons to a new iteration. Well done.”
Thanks, Erik!
No Responses to “Everything is a Box”
Trackbacks/Pingbacks
- Shop Tour, 2024 | Diary of a Wood Nerd - […] at selling it, no takers. And I have used it — most recently for the project I showed you…


Leave a Reply