


Fixing a problematic base
This project has been on my to-do list since well before my shoulder surgery. I love my Laguna bandsaw — it works well, adjusts easily, cuts nicely — but it’s a major pain to move around. The integrated mobile base didn’t work very well even when it was brand new, and mine has deteriorated to the point where the bandsaw will not roll straight or even at all easily. It also has no storage, which feels like a waste of space.
But I had a good amount of scrap maple and some walnut plywood left over from the bathroom vanity project, and a desire to lift the saw up a couple of inches. I liked the basic shape, so I designed a new base with swivel casters and storage drawers.
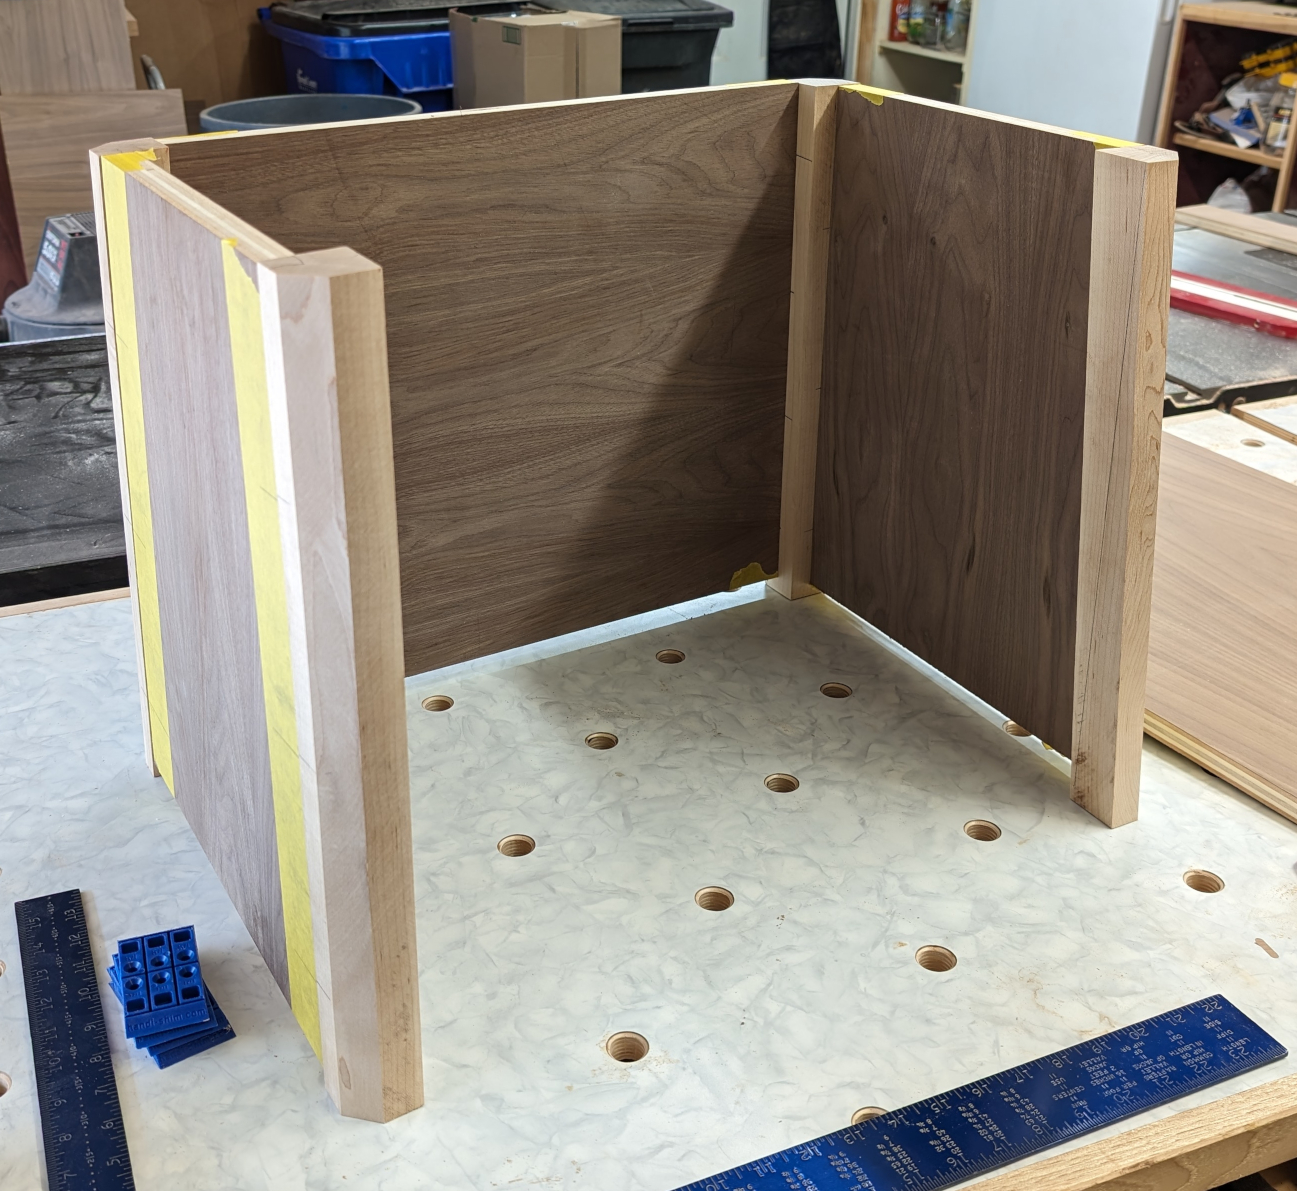
I started out by cutting 1-1/2″ by 1-1/2″ maple into four legs, and tapered and played them 5 degrees each way. The original base had a slightly wider stance, but I thought the reduced angle would make more sense for a wooden structure and it worked better for my planned storage drawers. Then I cut panels out of walnut plywood to make a splayed box.
I admit I had a devilish impulse to decorate the outside with half-round cutout and turn my bandsaw into a Dalek, but opted not to.
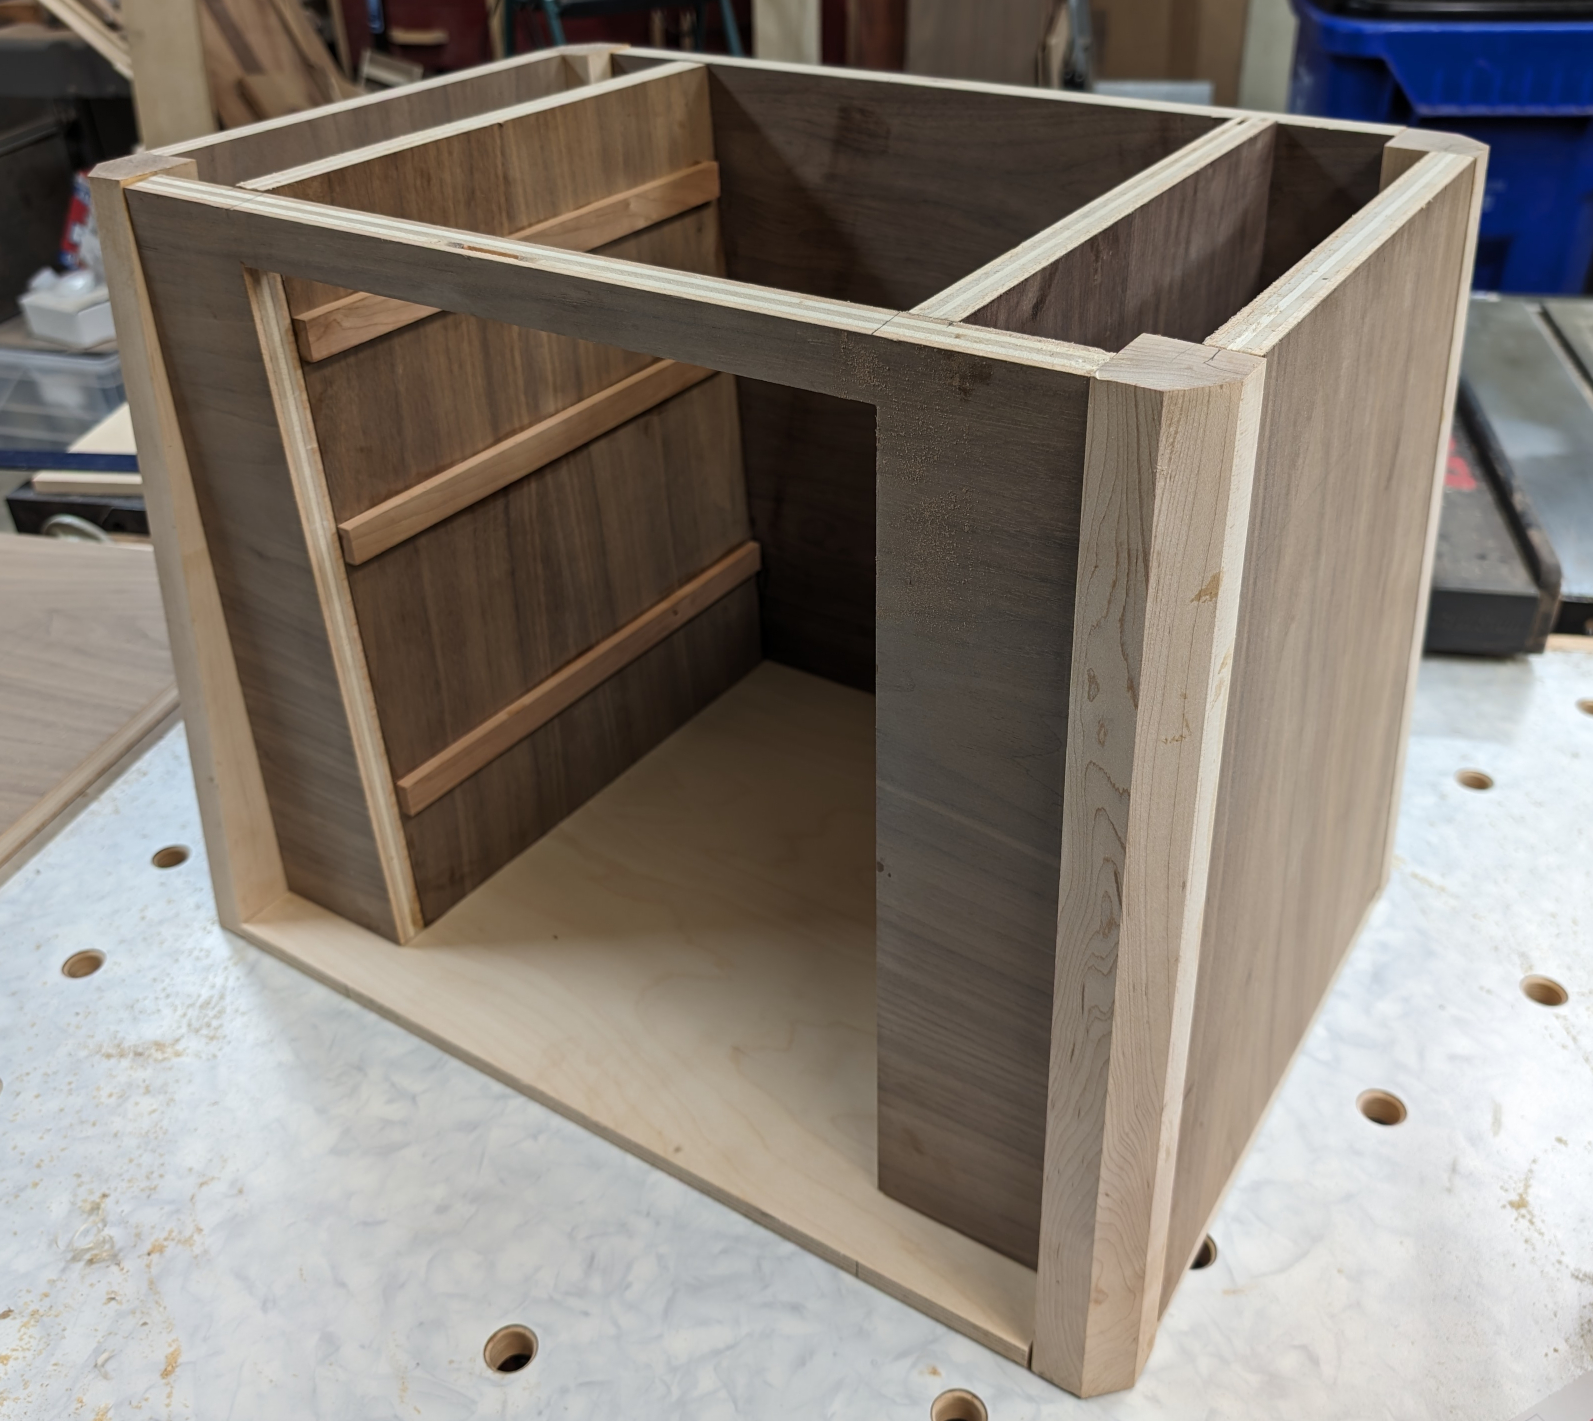
The front (which was really the left side) got a slightly different treatment, because I had no desire to try making slanted drawer fronts. Instead, that panel is kept vertical (another reason for the less severe amount of splay) so I can easily make drawers to fit inside. I closed off the bottom with a plywood panel and added inner supports for drawers.
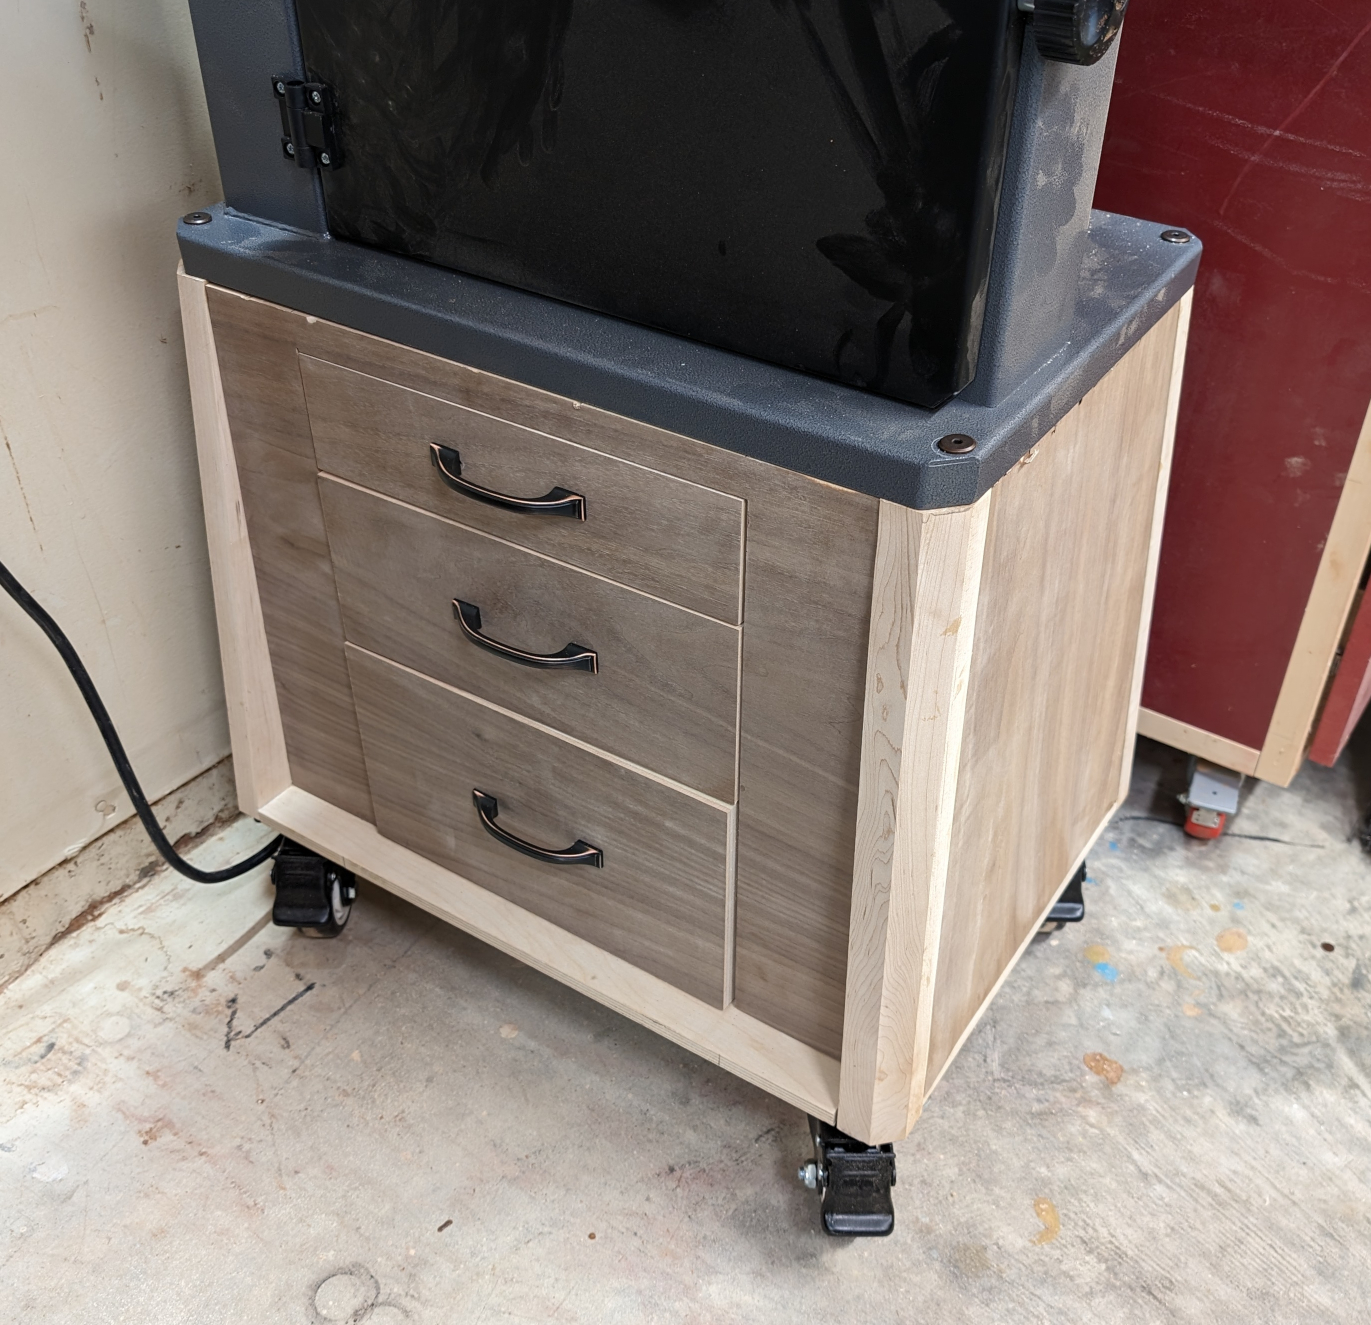
I measured the height of my carcase, and calculated that 3 inch casters would raise it up to just above the level of my router table that sits next to it. This was important because right now I have to move the bandsaw to cut anything over about a foot long because the router table is 40 inches high and the bandsaw was only 38. By putting the bandsaw at 40 inches too, I could cut a good 5 feet before I had to move it (and with better wheels it would be a lot easier to move). So I ordered the casters and made drawers.
The drawers were pretty simple. As you can see from the carcase photo, there are 3 of them — three, five, and seven inches deep — and they are supported by simple runners on either side. Each drawer is grooved on the sides to accept those runners and otherwise constructed using the simple quarter/quarter method. For fronts, I used the plywood I’d carefully cut out of the panel so the grain would run continuously across the drawers. And I threw in some inexpensive Koofusi oil-rubbed bronze pulls (also leftover from the bathroom vanity) to class the piece up a bit.

There is no finish on this; I suppose I could have sprayed some polyurethane, but this is shop furniture at its most utilitarian. It doesn’t need sheen and it doesn’t need protecting. The worst that will happen to it is a constant coating of dust.
Then I called my son Ben and asked him to come help me with the heavy lifting, since I’m still considerably weak in the left arm and this bandsaw is frigging heavy. The two of us were able to lift it — barely — and set it into place. Then I tried something I’ve never done before.
The bandsaw was fastened to its old steel base with bolts and nuts. The new base had nowhere to put nuts, but it did have solid hard maple legs that sat right were the old bolts used to be. So I drilled and tapped 1/4-20 holes directly in the legs. I saw a video recently (https://www.youtube.com/watch?v=S4SnrbGwGpI) in which holes tapped into wood proved more durable than threaded inserts, so it seemed worth a try. I used a simple predrill bit and tap from Irwin in my Milwaukee drill, and it was surprisingly easy to make threaded holes and secure the bandsaw by driving bolts into them. I will remember this trick in the future.
Recent Comments