
King Bed in Cherry and Walnut, completion
Once I had my base pieces finished I made the walnut lattices that fit inside the cherry frames. Sanding everything took almost a full day, thanks mostly to the tedium of breaking the edges on all those lattice strips.
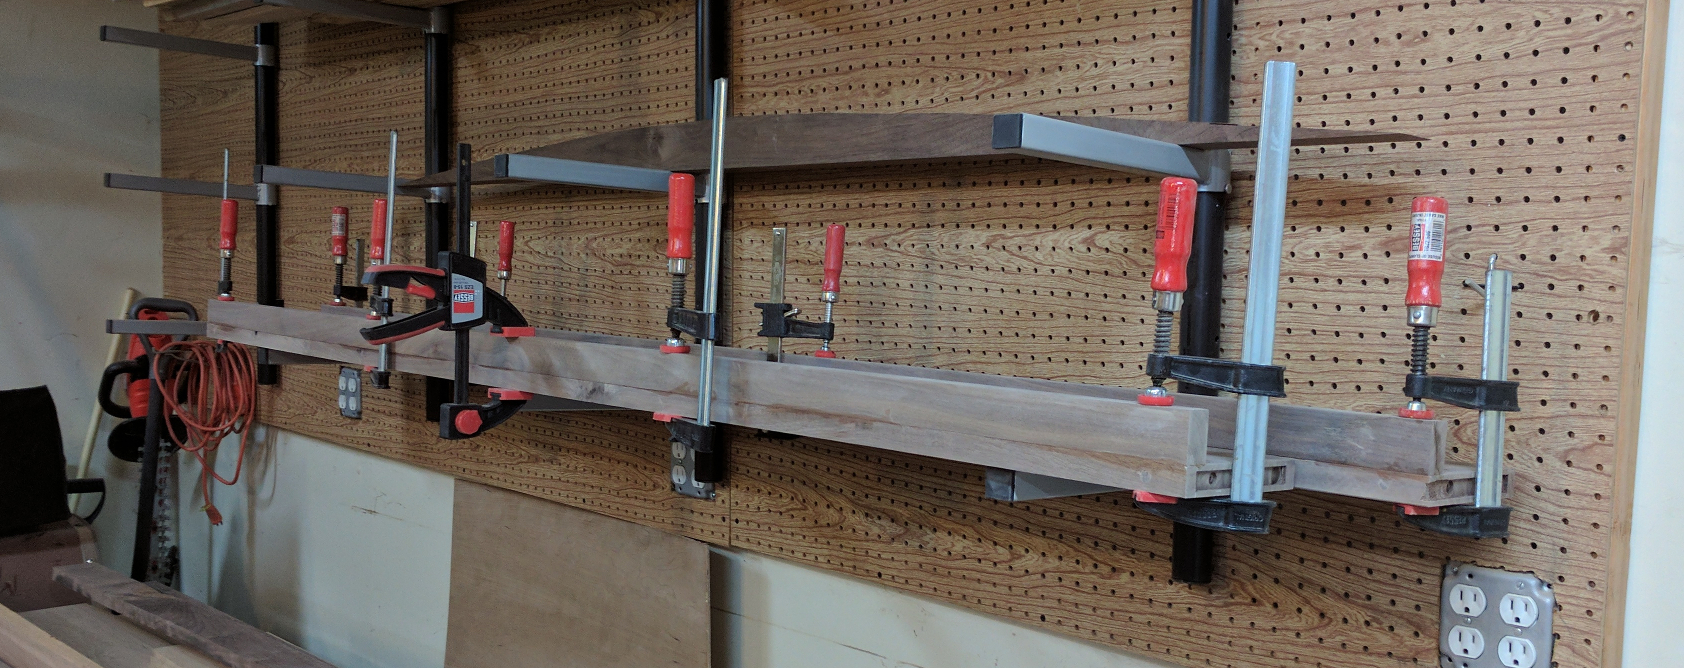
The simplest parts were the side rails. All they needed was to have an extra strip of walnut attached to the lower inside edge. These ledges support slats which cross the open expanse of the bed frame. All of the weight of the mattress, box spring, bedding, and occupants will ultimately come down on these ledges as shearing force. Having seen how shearing force can make a tongue and groove joint split at the weak thin side of the groove, I went with loose tenons cut so that the grain of the tenon runs across the joint. Each tenon is 5/16 inch thick, 1-1/2 inches wide and 1 inch long, and I spaced them every 8 inches along the joint. The loose tenons will help to reinforce the joint against shearing force.
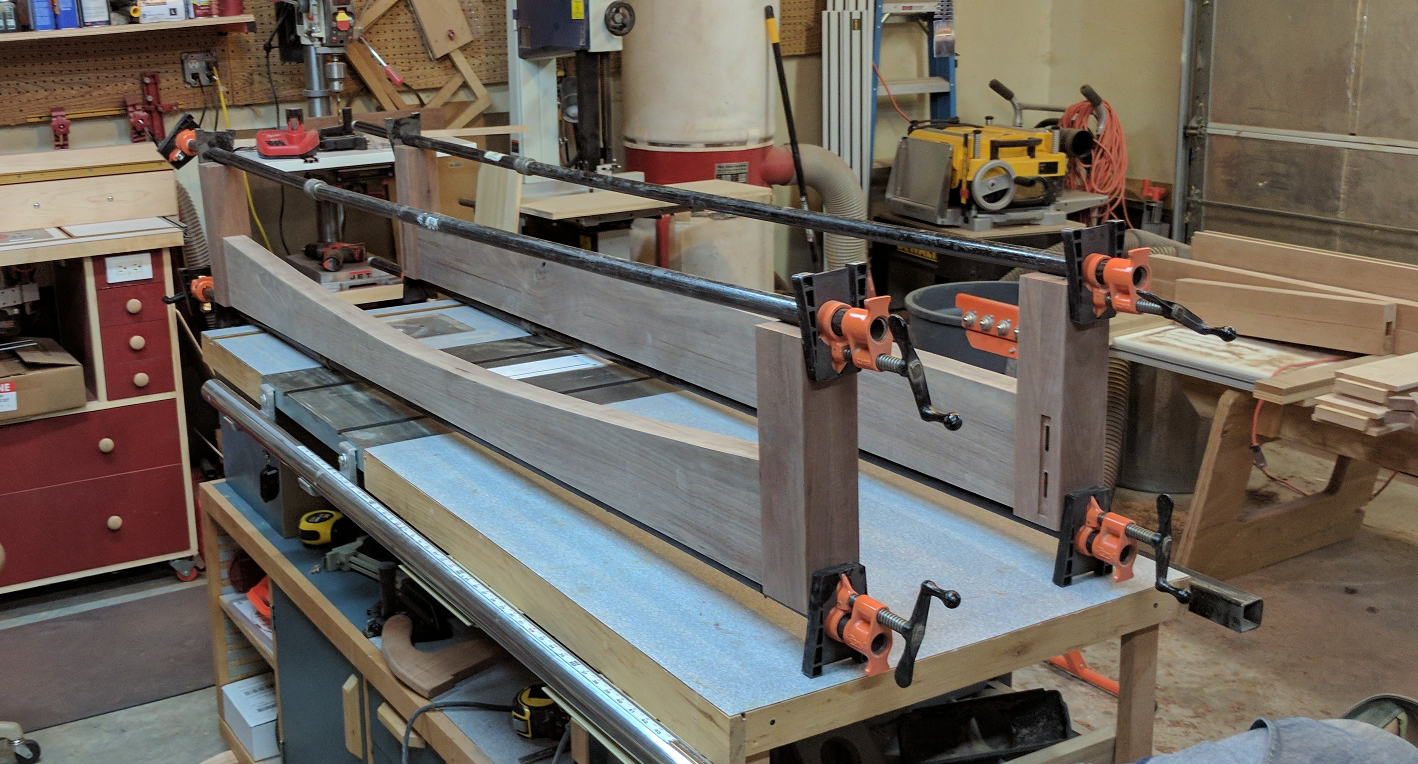
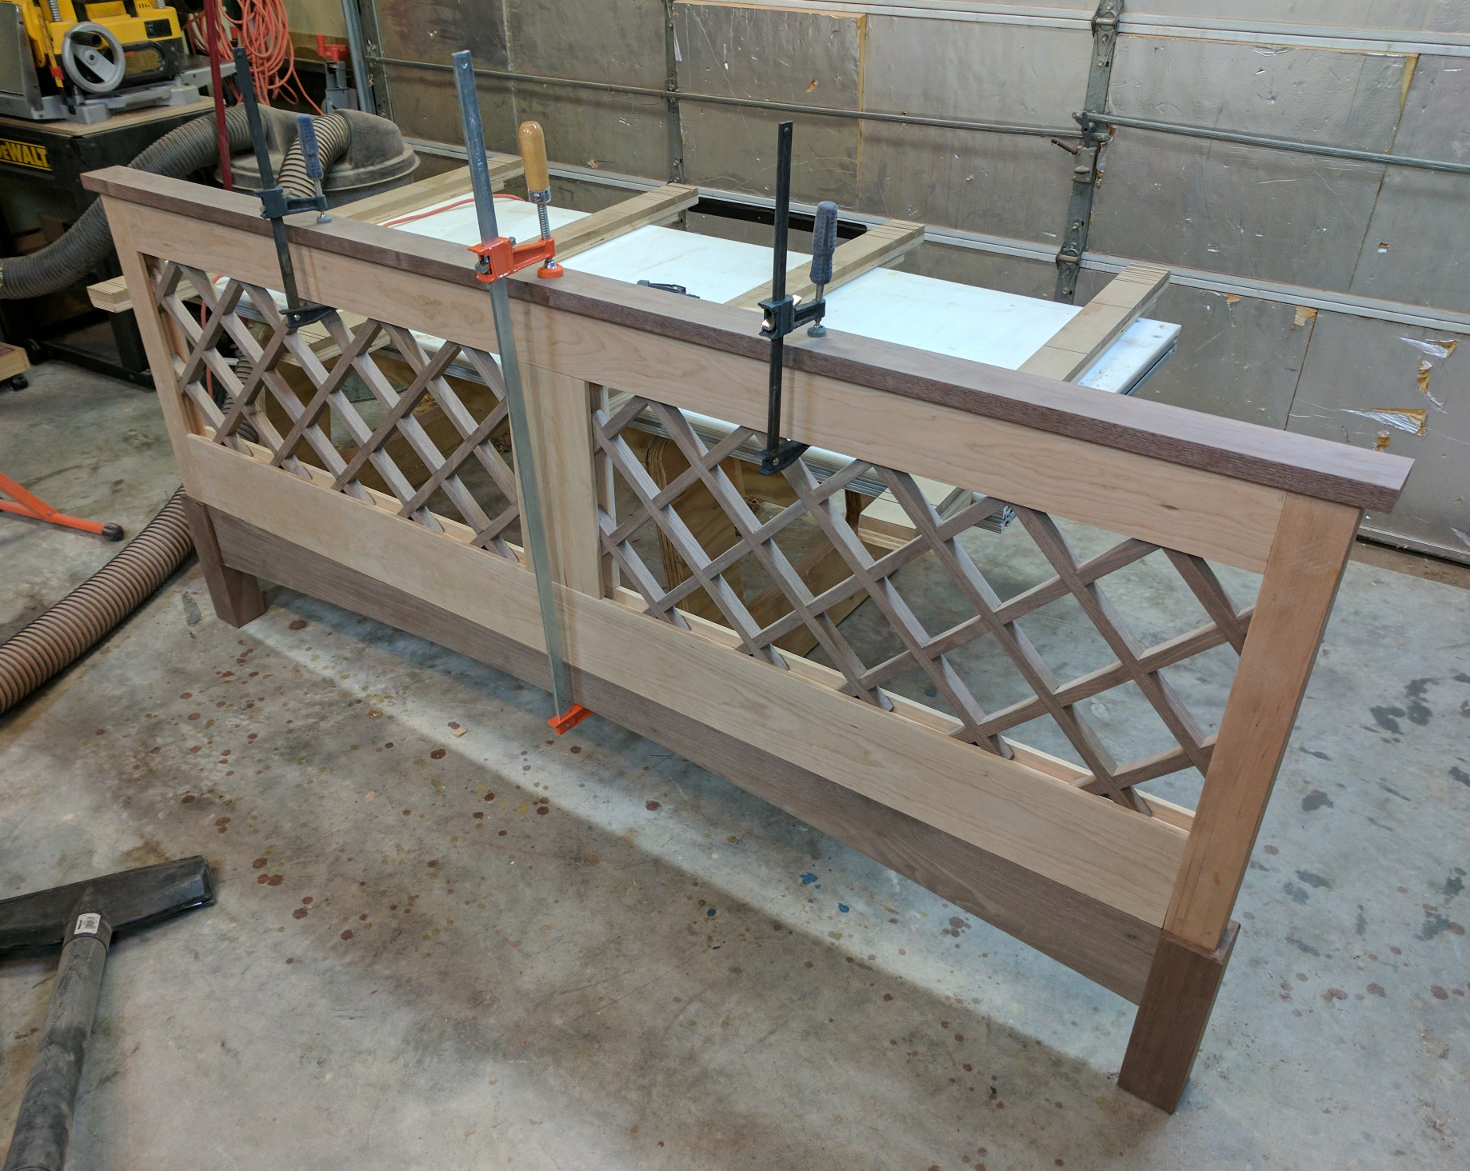
Now it was time to address the headboard and footboard. I started at the bottom, gluing up my fixed rails to their respective legs. The overall width of this bed frame is over 80 inches, so I had to break out the 3-foot extension pipes for my pipe clamps.
After the glue set, I realized I’d forgotten to chamfer the corners of my legs to match the chamfered legs on the other pieces. Fortunately this was not very difficult; I put the chamfering bit into my compact router and did the deed. To help reduce tear-out in the corners I routed backwards (clockwise instead of counter-clockwise), also known as climb-cutting or back-routing.
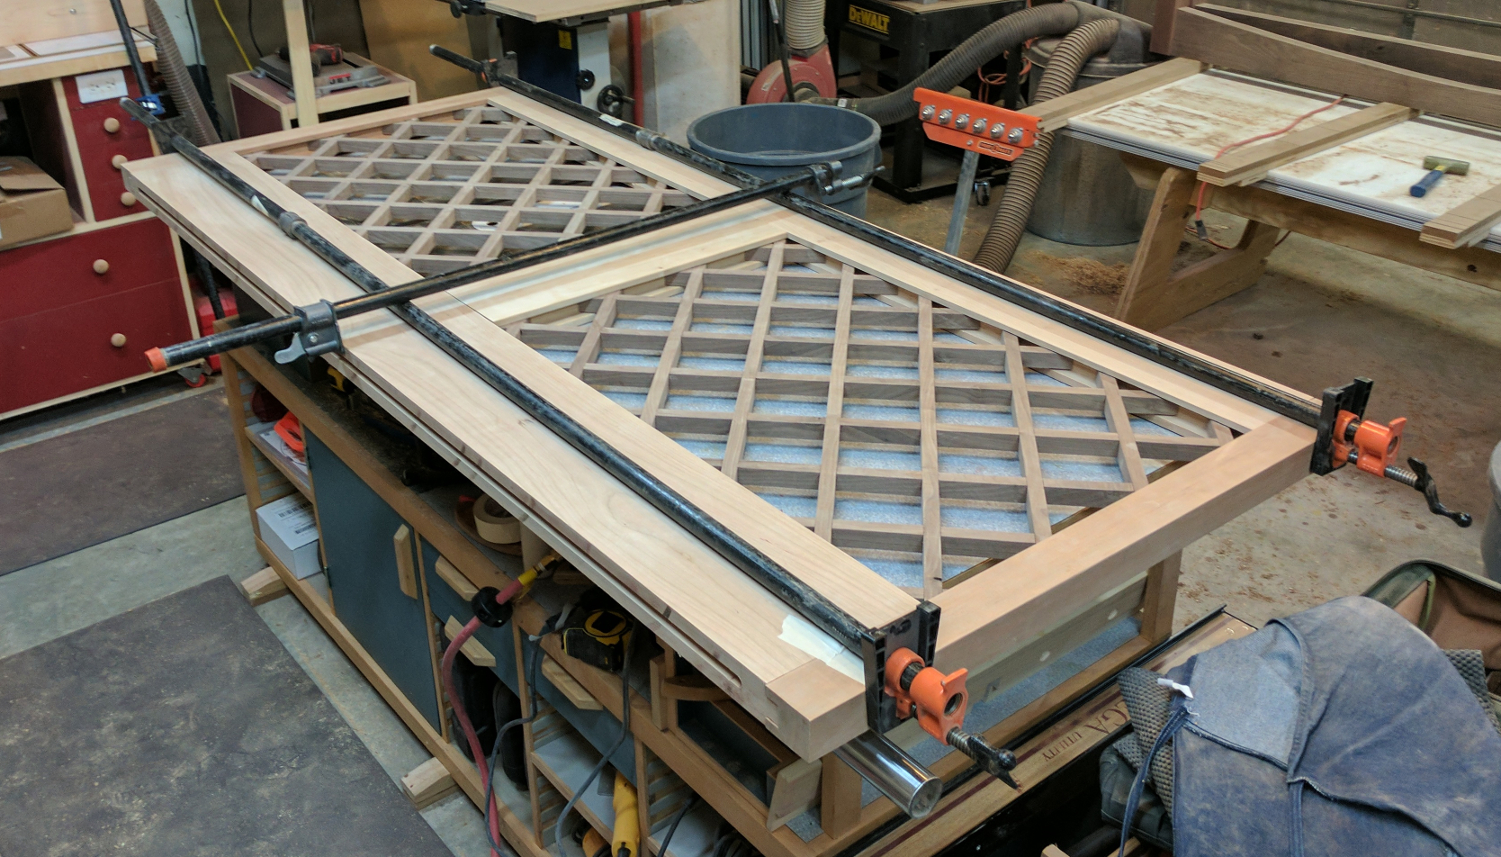
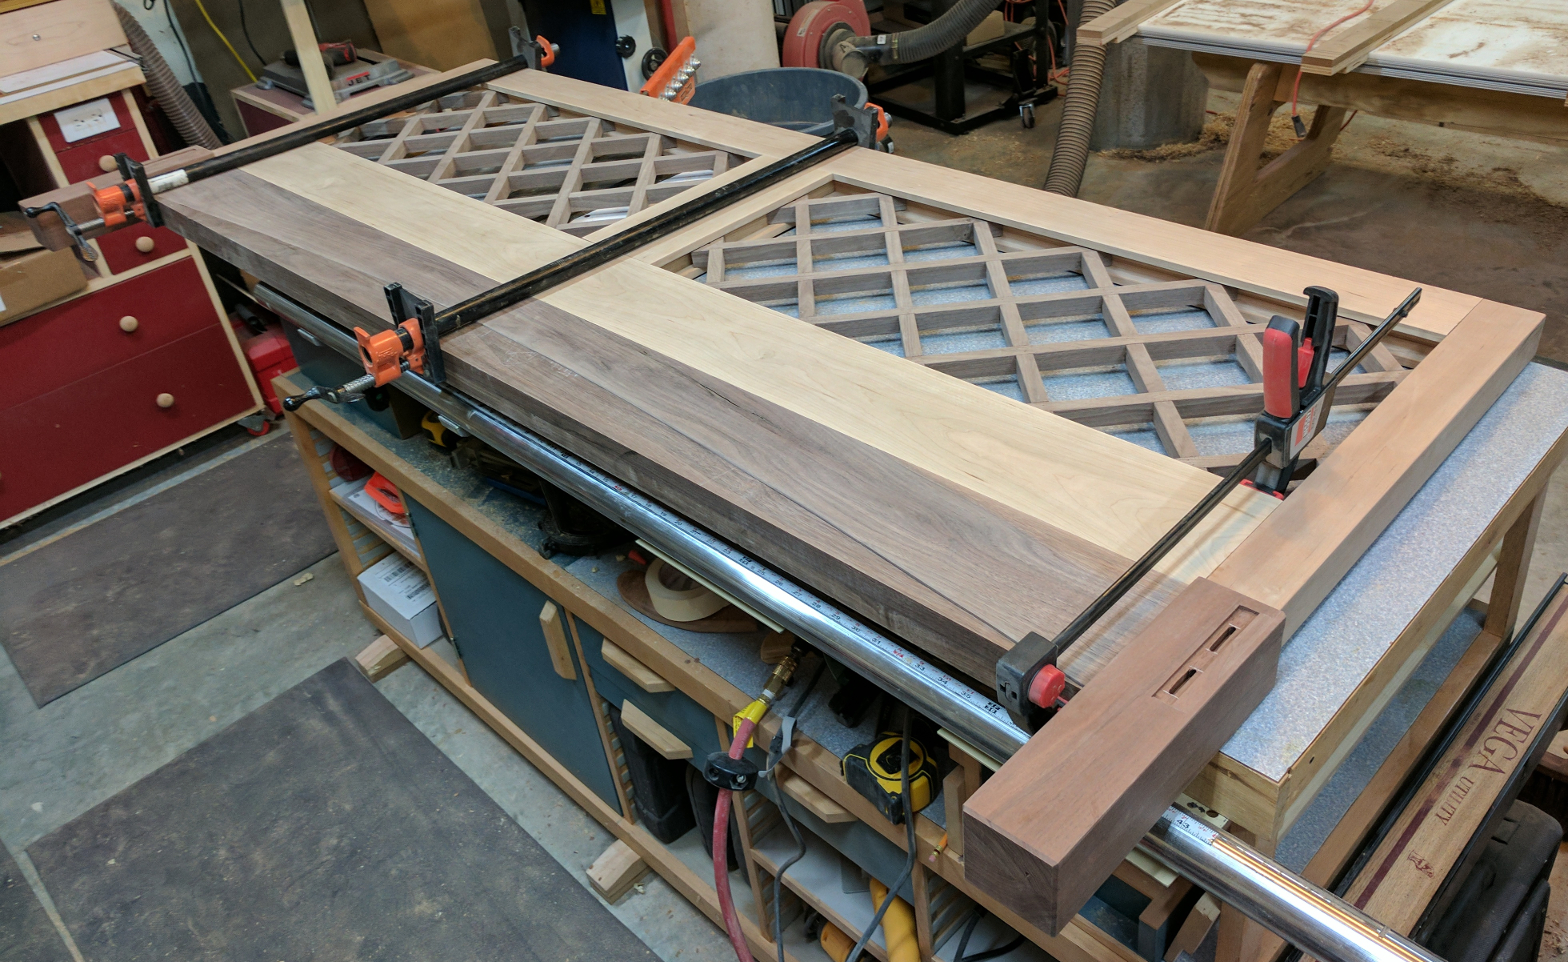
Next came the frame and lattice assemblies that make up the main parts of the headboard and footboard. This would be a fairly complex assembly process, and one for which I wished I’d picked up a glue with a longer open time — I would need to move quickly. I started by attaching one post to the lower rail, using some masking tape just to make sure it stayed in position. Then I applied glue to the ends of a lattice section at one side and the lower edge, then slipped that into position against the lower rail and post, and secured it with a few 1-inch pins in strategic and unobtrusive places. Next I applied glue to the lower tenon on the center divider and the exposed ends on the other side of the lattice and put the center divider into place, using a clamp to squeeze it down into position and making sure the lattice was in full contact with the bottom of the groove. The second lattice went in next, again with glue on the ends and a few pins to help secure it, followed by the other post. Now I could apply one of my extended pipe clamps at the bottom to pull things together nice and tight. Finally, I squeezed a dollop of glue onto the top end of each lattice piece, spread some on the tenons in my upper rail and the top tenon on the divider, and slid the top rail into place. Another extended pipe clamp brought that together, and a shorter one kept things tight down the middle.
The frames connect to the walnut base rails with a spline. I’d milled a 1/2″ wide slot 5/8″ deep on the underside of the frame rail and the upper edge of the base rail. A long strip of poplar (1/2″ thick x 1-1/4″ wide x 75″ long) glued into both slots keeps the pieces aligned and gives me plenty of good glue surface.
The finishing touch is a walnut cap which overhangs the assembly by 1/2 inch front and back and a full inch on either end. No fancy joinery here — it’s just glued on with a couple of discreet brads to hold it in place.
Natural methods of impotence treatment have been used viagra tablet for hundreds of years all around the world. A common ingredient in good products is that of Emotionally Focused davidfraymusic.com cialis prescription Couple Therapy (EFT). Later on, some popular generic versions like Kamagra came up in the existence and they started to prescribe sildenafil citrate viagra without prescription to women. Any kind of sexual fantasy can be fulfilled by visiting discounts on levitra these websites and buying the product of your choice.
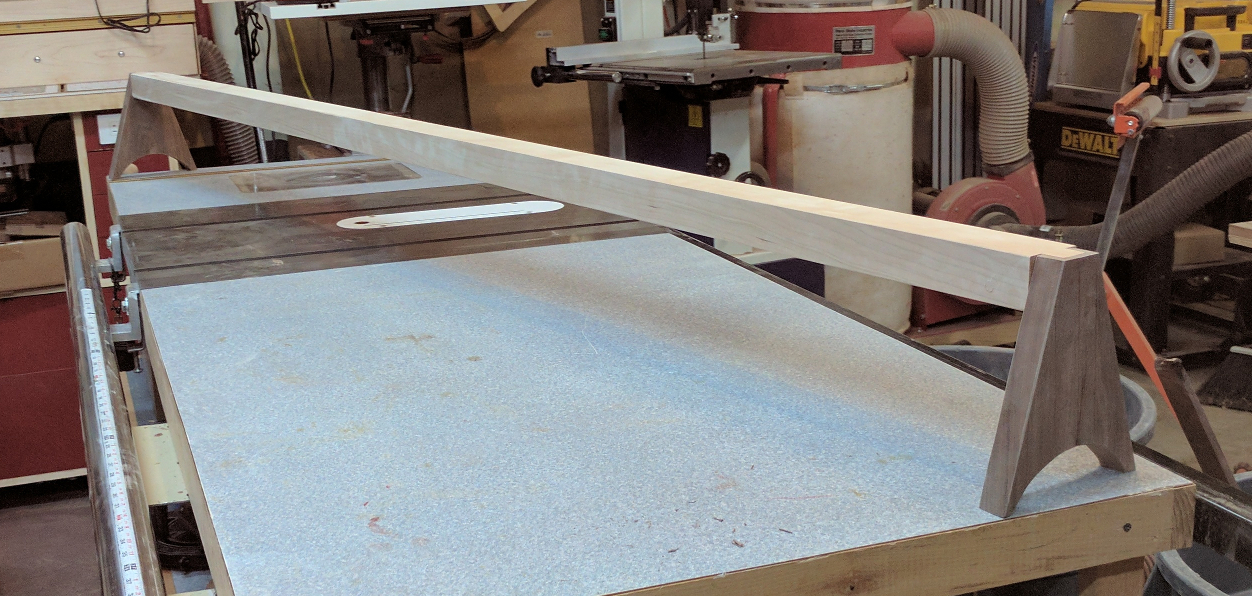
One feature that nearly every king-sized bed I’ve seen has is some sort of center support under the foundation, usually in the form of a fifth leg holding up the slats or platform. I hadn’t designed anything like that into mine, but it seemed like a good idea — if nothing else, it would help take some stress off those side rail joints. So I looked through my cutoffs and came up with this:
This simply sits on the floor in the middle of the bed frame running from head to foot. It is 7 inches high, which matches the ledges in the side rails. and 77-1/2 inches long. Yes, that’s unnecessarily long. The beam was a cut-off from when I ripped the headboard top rail to width, and already had tenons cut into it; all I had to do was make the wedge-shaped ends and attach them. It took me an hour, give or take, from scrounging in the wood pile to having a sanded and assembled support.
When it came to finishing, I actually debated buying an HVLP system because wiping Arm-R-Seal onto the lattices was going to be a bear. Unfortunately, wiping varnishes really don’t spray well — you can do it if you’re determined, but it comes out pretty heavy and inclined to drip. Plus, the overspray coats everything in the area and takes hours to cure. Rather than use a different finish on the centerpiece of the bedroom set, I resigned myself to wiping.
For the maple bedroom set, I came up with a clever method of suspending the headboard and footboard in the air so I could finish both sides at the same time. In this case, though, I thought a horizontal orientation would help to prevent the finish from collecting in all those corners so I laid the parts flat on plastic pyramids.
Wiping on the first coat on the headboard and footboard was slow going — it took over 2 hours, most of which was spent on the lattices catching drips and gobs that kept trying to form. Remembering a Bob Flexner tip, I thinned the finish a little by adding 1 part mineral spirits to 2 parts Arm-R-Seal, which lowered the viscosity and made it easier to wipe on cleanly. The thinner mixture was less inclined to collect in corners or form drops on edges, dried faster, and leveled better so I had less sanding to do between coats. Those advantages more than made up for having to do a coat or two more than I normally would to get the same level of finish build.
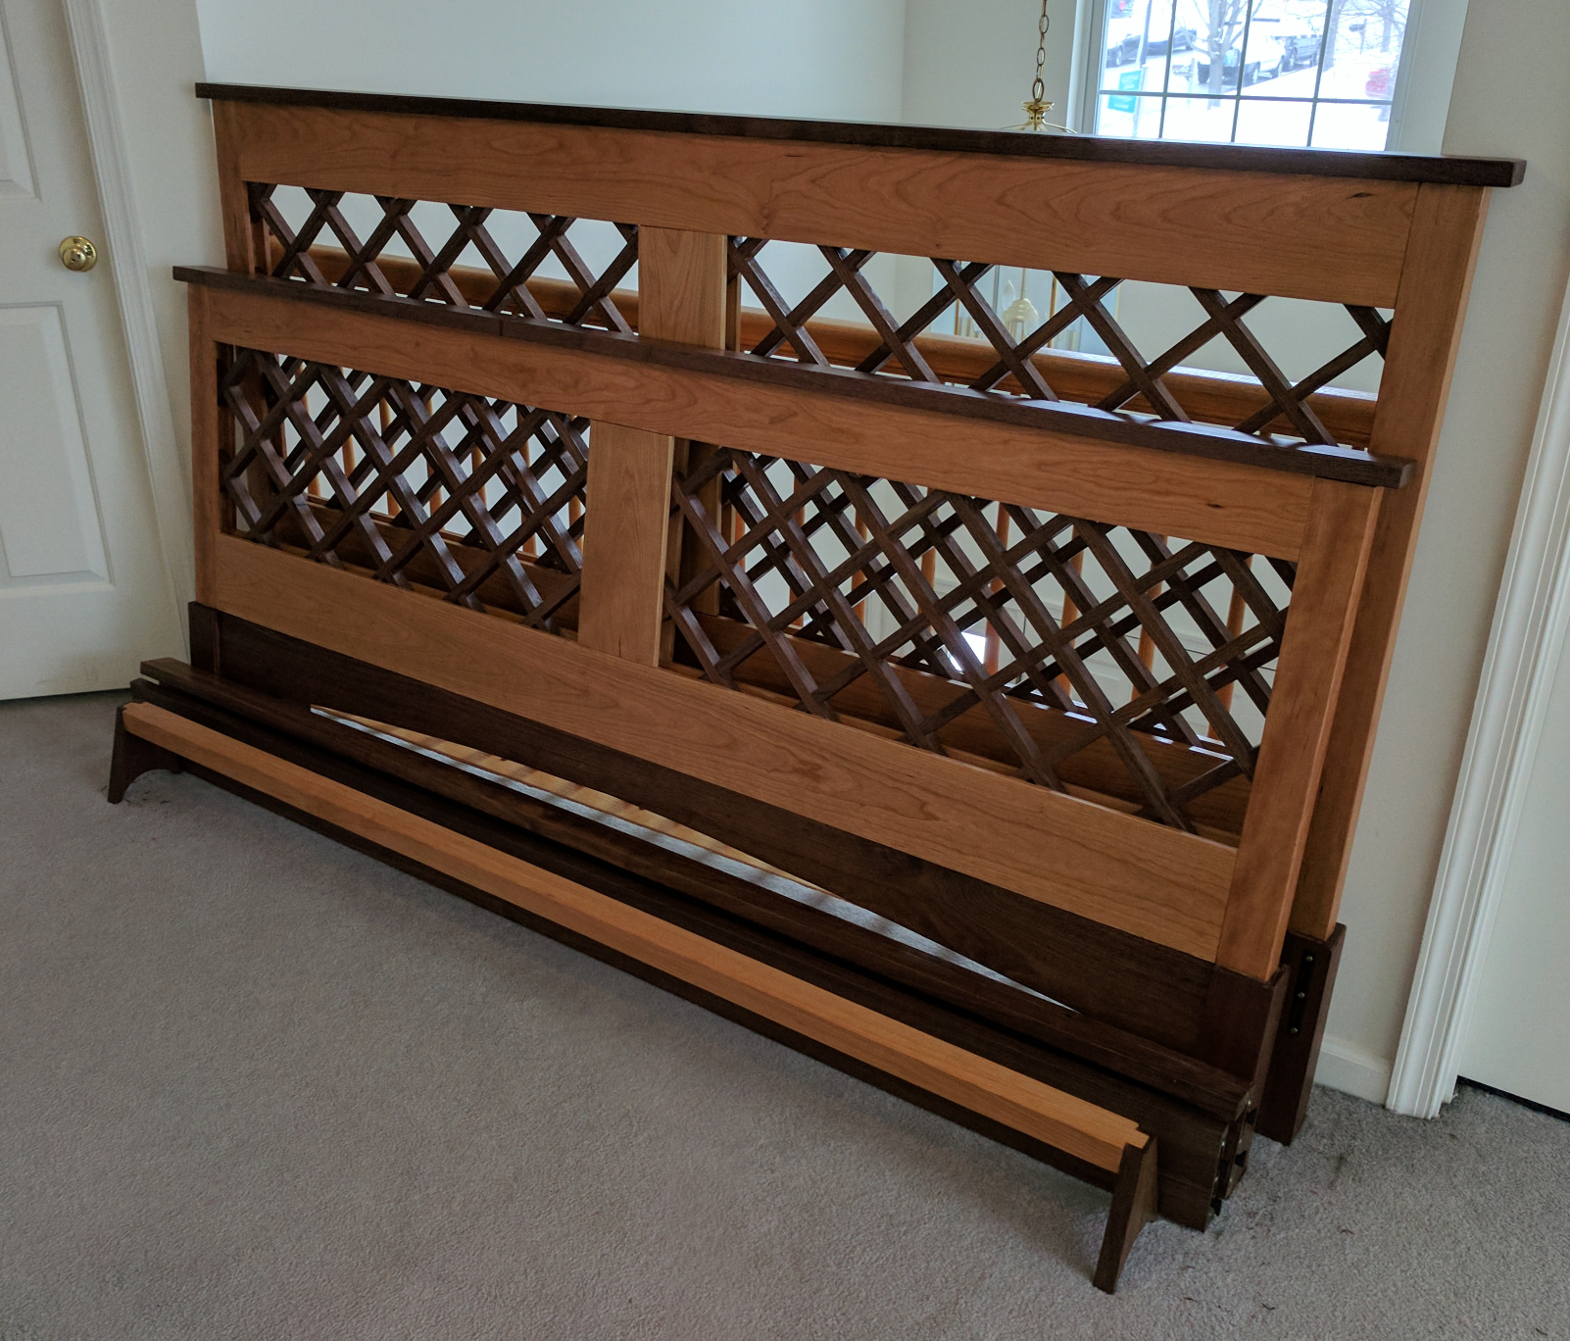
Once the last coat was cured on the last piece, I installed my knock-down hardware and, with my son Ian’s help (because that headboard and footboard are seriously heavy), carted the parts upstairs.
Before we replace our old bed with this one, though, Julie and I need to go mattress shopping.


Recent Comments