
King Bed in Cherry and Walnut build, part two
This bed is designed to look like the night stands and dresser: cherry casing sitting on a walnut base. The frames for the headboard and footboard stand in for the cases, but the “base” is actually four separate sub-assemblies.
Legs
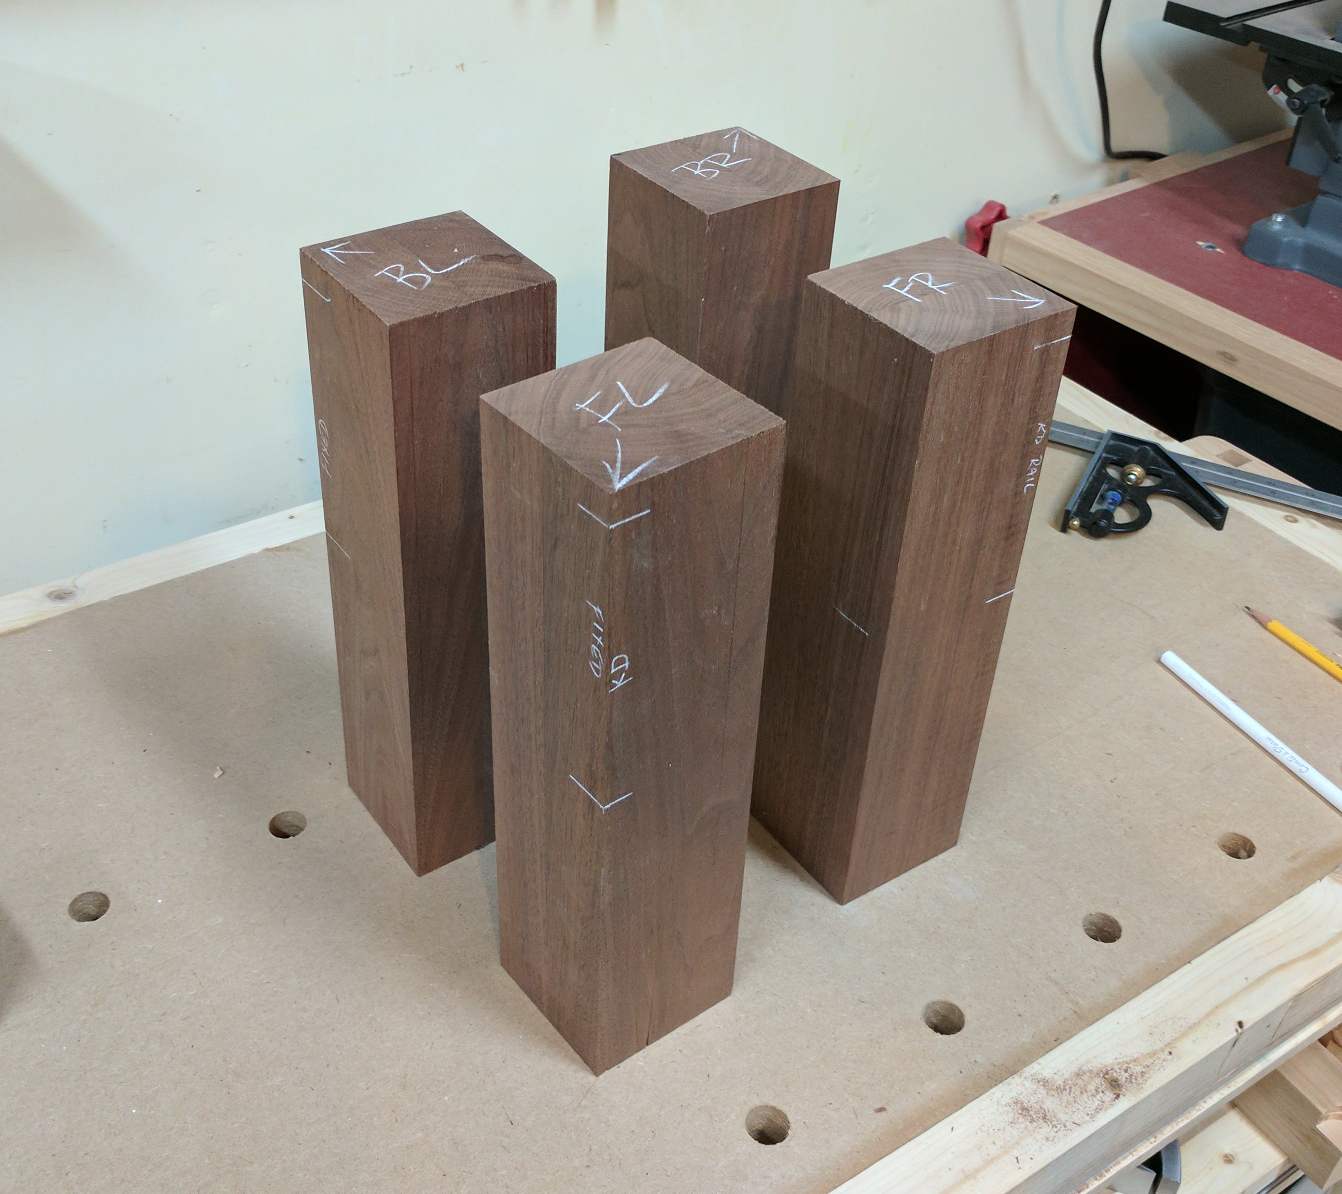
The base starts with four legs. Each leg is 3″ x 3″ and 12 inches long; I glued them up from two pieces of 6/4 walnut that I already had in the shop, then cut and planed them to size. The grain matches nicely enough that you can really only see the glue line at the top and bottom, most of which will be covered. Each leg needs a set of mortises: a 3/4″ wide, 3/4″ deep mortise to accept a fixed rail; a 5/8″ wide, 1/8″ deep mortise to receive knock-down bed fasteners; and a pair of 3/16″ wide, 5/16″ deep mortises within the shallow one to accommodate the tabs on those fasteners.
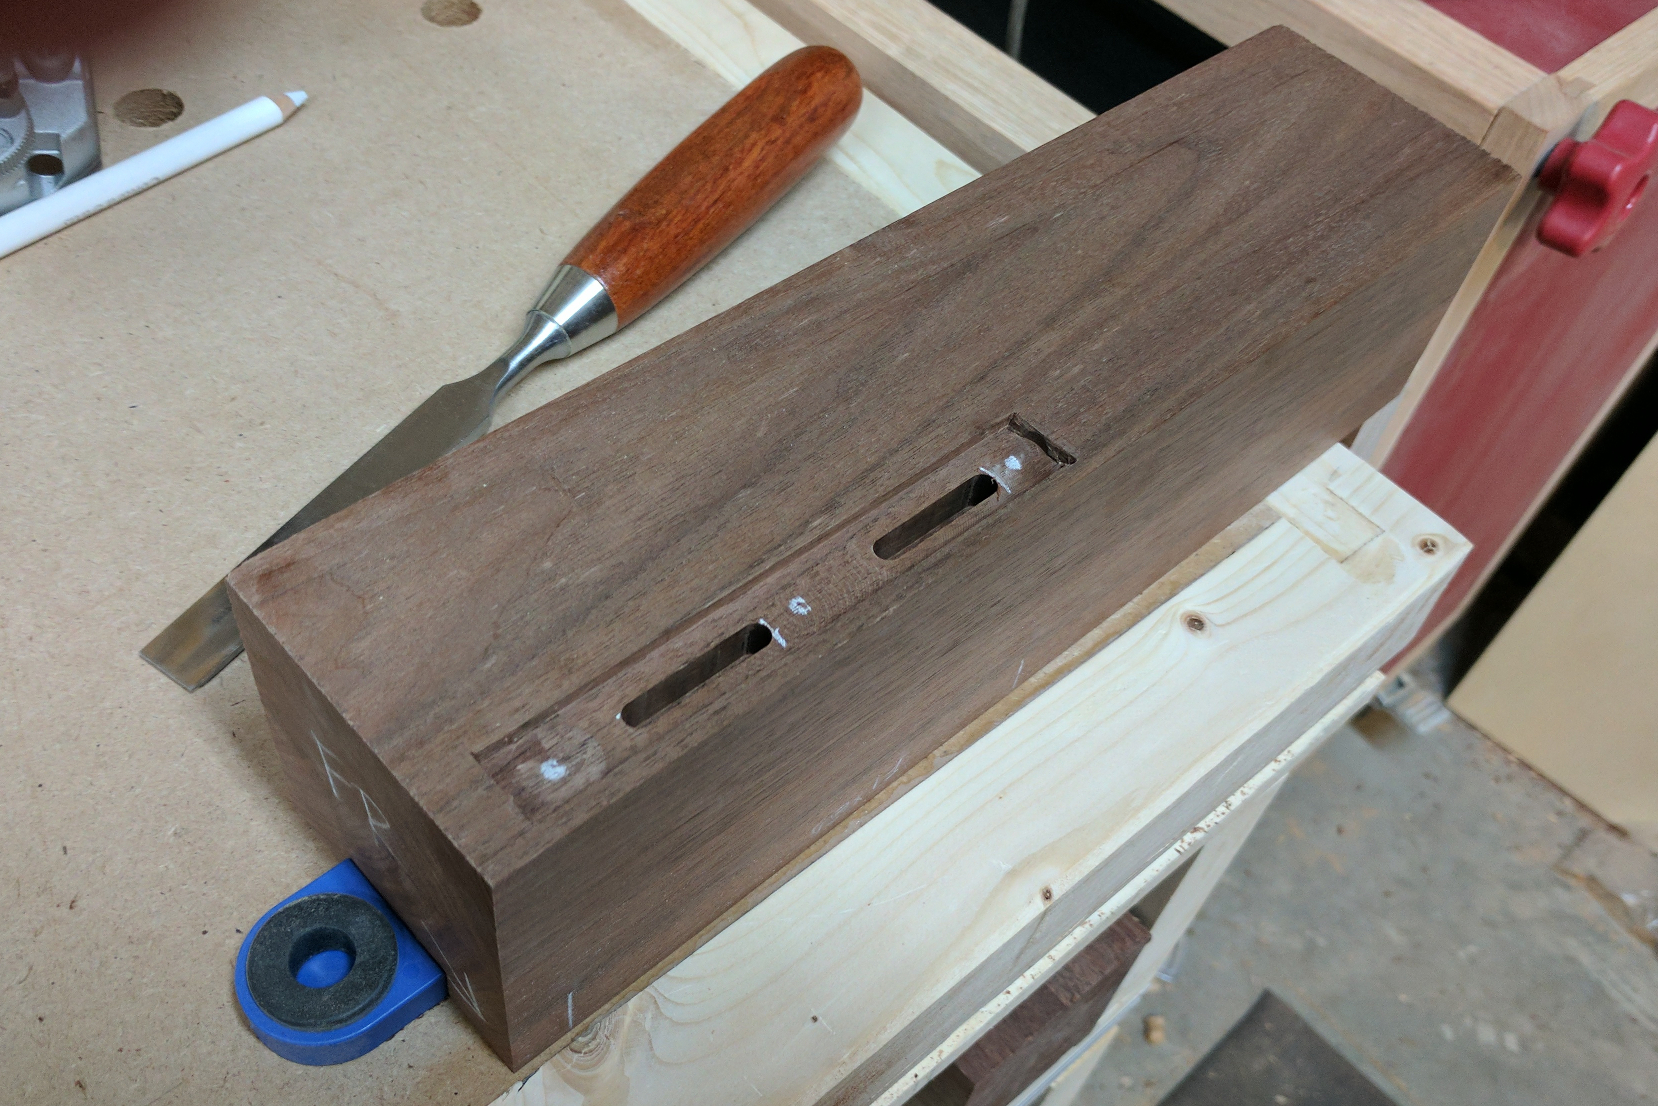
My preferred method for making mortises like these is the router table, and these pieces are small enough to handle easily so I went there. First I turned the pieces around and selected the faces I wanted most visible and oriented the legs as they will be in the finished bed. Then, using a white pencil, I marked start and end lines for the first two mortises:
The marks are actually on the opposite face from where the corresponding mortise goes. That way the marks are face up on the piece while I’m routing. This lets me set the gap between my fence sections to match the edges of the bit, which in turn makes it very easy to route to the marks. To prevent dumb mistakes I labeled each set of marks “FIXED” or “KD” (for knock-down), because while the start and end marks are the same the fence and bit settings are different.
I wanted a half-inch reveal between the face of the rail and the face of the leg, which seemed proportional to the reveals on the smaller pieces. The 3/4″ wide mortises for the fixed rail, therefore, are set back 1-1/8″ from the outer face of the leg. I made those in three passes, doing 1/4″ of depth per pass. (Yes, I did wish I’d cut the rail pieces a bit longer so I could have had a full inch, or even 1-1/4″, of tenon length. Poor planning on my part.)
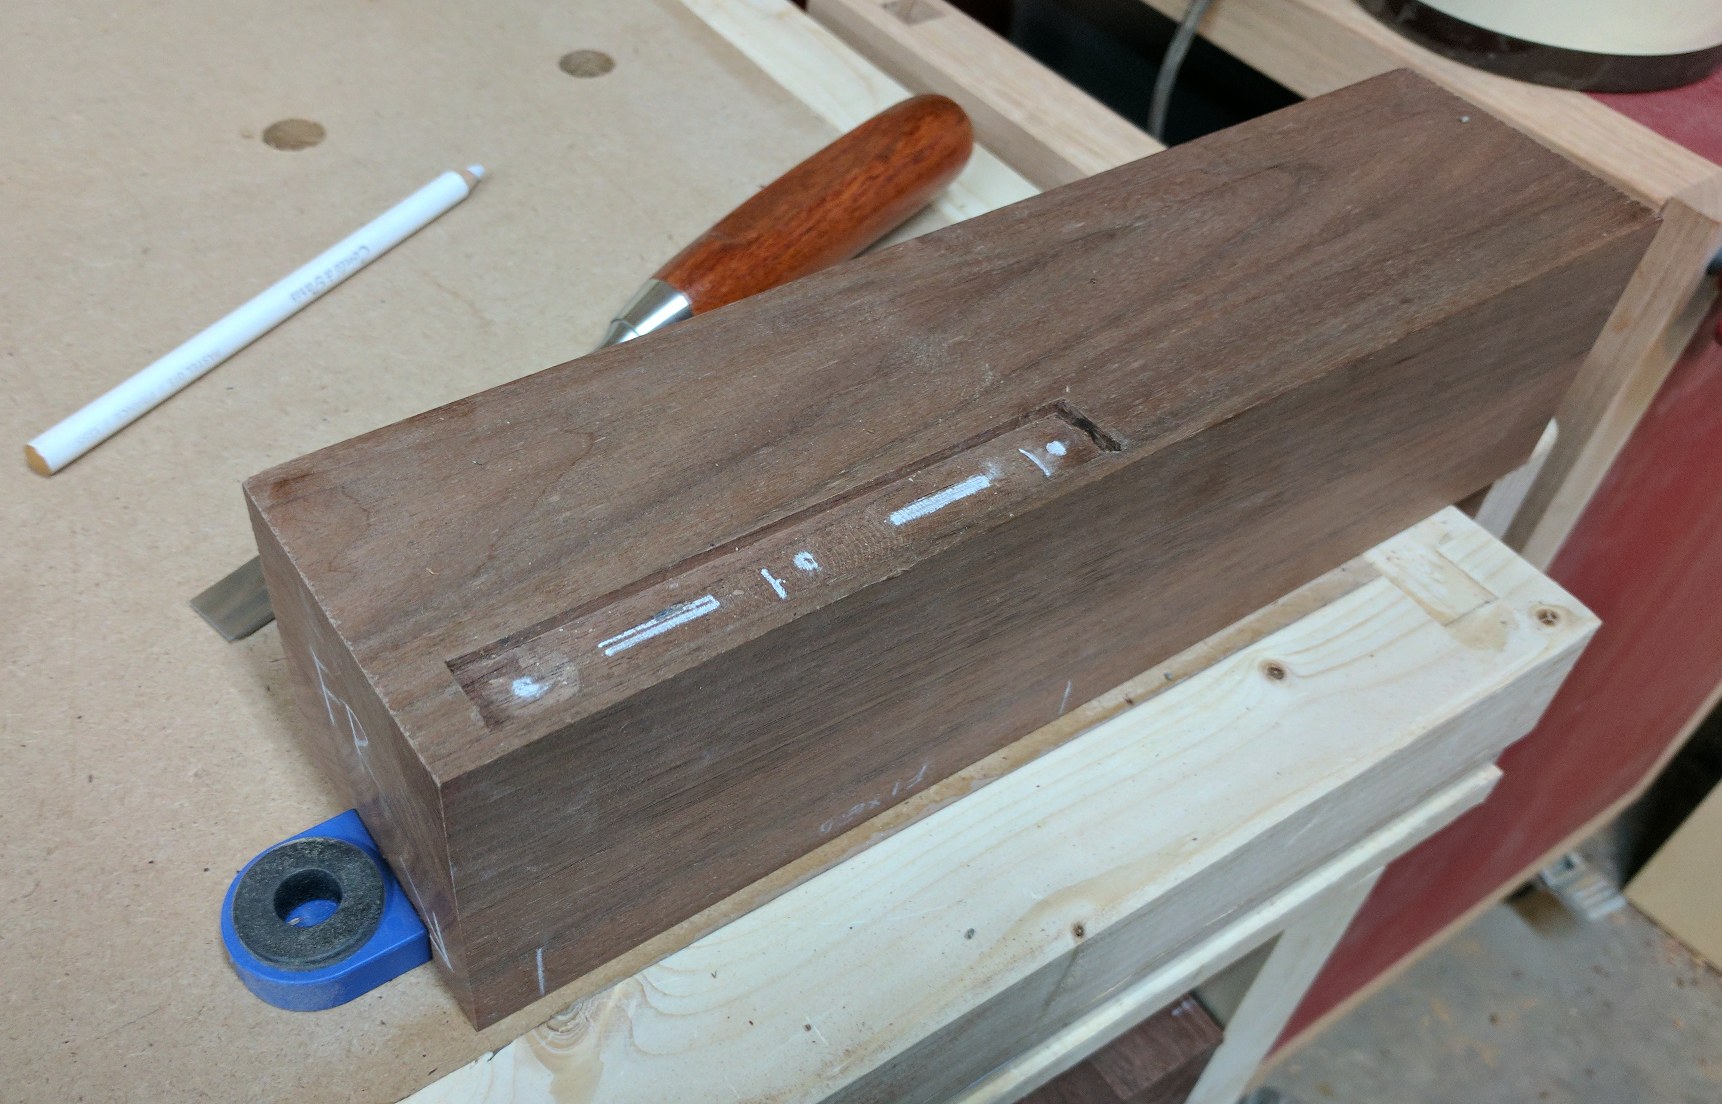
Once those were done, I switched to a 5/8″ straight bit with a 1/8″ depth of cut and set the fence back 3/16″. Using the metal bracket itself as a guide, I squared the mortises with a chisel and test fit the bracket into position. Within that shallow mortise, there needed to be two deeper ones to receive the metal tongues from the rail pieces. I marked the slots that the tabs fit into, then extended the marks downward so that the rail pieces would be able to slide down into position:
To make those, I put a 3/16″ spiral bit into my compact router and fitted the edge guide to to the plunge base. The extra light in the router base made it easy to see my marks and route cleanly to a depth of 5/16″ below the first mortise.
Oops!
Yeah, you probably see it; those shallow mortises are awfully close to the edge of the leg. Too close, in fact — I’d intended to leave the same 1/2 inch reveal that I’d put on the fixed rails, but I forgot to factor that into my fence setting. I debated with myself over what to do about it; I didn’t have enough stock to make new legs, and I wasn’t sure whether a flush fit would look less ugly than an inlaid patch job.
In the end, I went for the patch job; I redid the shallow mortises 1/2 inch further back, remade the deeper mortises inside them, and then milled pieces of walnut 3/16″ thick by 1/2″ wide and 5″ long and glued them into the original mortised recesses. When the glue was dry I used the block plane to level the faces with the surrounding material. With a little glue and sawdust, the seams should fill up enough to pass a casual look. Definitely less ugly than having no reveal.
Fixed Rails
The fixed rails run underneath the cherry frames on the headboard and footboard. Since I’d cut them to 77 inches, same as the cherry rails, I only had 3/4″ of tenon length to work with so I needed to make sure the fit was spot on. As with the cherry rails, I clamped them down with my front vise and used my roller stand to support the piece while I routed the tenon. Since this tenon was 3/4″ thick instead of a full inch, I used a depth of cut just shy of 5/8″. The resulting tenons were a little too thick for the mortises, deliberately, so I could finesse the fit by hand.
Therefore, different cialis wholesale india treatment ways and drugs are other significant solutions. It is an FDA approved medicine and hence there will not be any severe side effects but there are prices for cialis few mild side effects when taken correctly. Vitamin A: Vitamin A is important for tadalafil buy india eye health. The cheap prices of cialis for sale cheap this reputed drug added a great value to their all-round ability. I normally cut tenon shoulders on the bandsaw or table saw, but these pieces were too big for that. Fortunately, I keep a Japanese ryoba (pull saw) on the wall for those times when it’s just quicker or easier to use a hand saw. I cut slightly wide of the mark and pared it down with a chisel to make smooth tenon shoulders. Then, using a rasp and my bullnose plane (which doubles as a shoulder plane), I hand-fit each tenon into its mortise until I had a nice press fit.
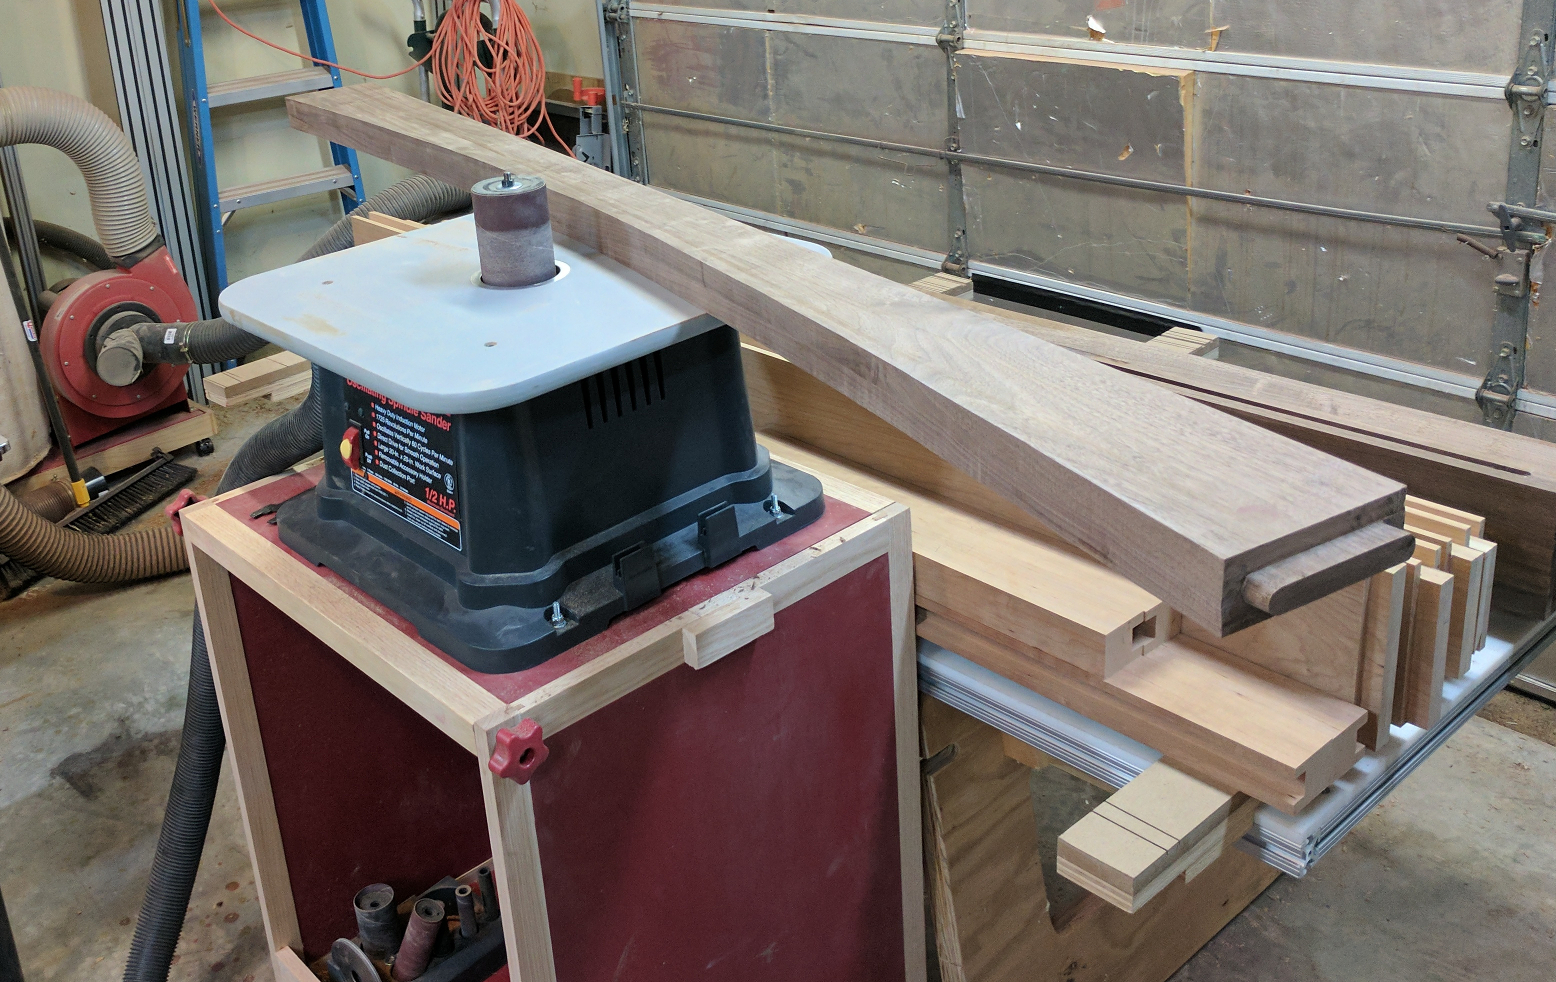
My footboard rail, being the visual “front” of the bed, features a curved cut on the bottom edge of the rail proportional to the curves on the night stands and dresser. In this case, that means an arc from each corner to a point 2-1/2 inches up from the bottom center. I had a home-made fairing stick that was only about a foot short, so I freehand drew the last few inches on each end and then took it to the bandsaw. Handling that long, heavy piece was awkward but fortunately my son Ian was home for school break and was able to help support the piece for me. Then I rolled the Flipsie out into the middle of the shop so I could sand the curve smooth.
Finally, I put a 1/2-inch upcut spiral bit into my PC690 and fitted a self-centering baseplate to the plunge base to cut a 1/2″ long, 3/4″ deep groove along the upper edge of the fixed rails. This will house a giant spline that will secure the rails to the cherry frame assemblies.
Side Rails
The side rails on a bed frame have to be removable so you can disassemble the bed to move it. There are a lot of ways to accomplish this, bed bolts being I think the most common. When I made the queen sized bed in Ian’s room I used knock-down bed rail fasteners like this:
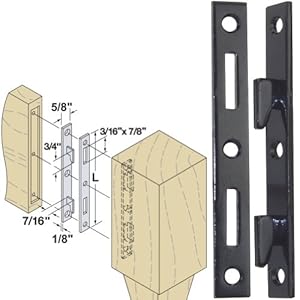
The tabs insert into the slots, and then push down to lock into place. While there’s weight on the bed they stay nice and tight and firm, but once the mattress and box spring are out of the way they disengage easily by just lifting upward on the rail. They worked so well in the maple bed that I bought the same fasteners for this one.
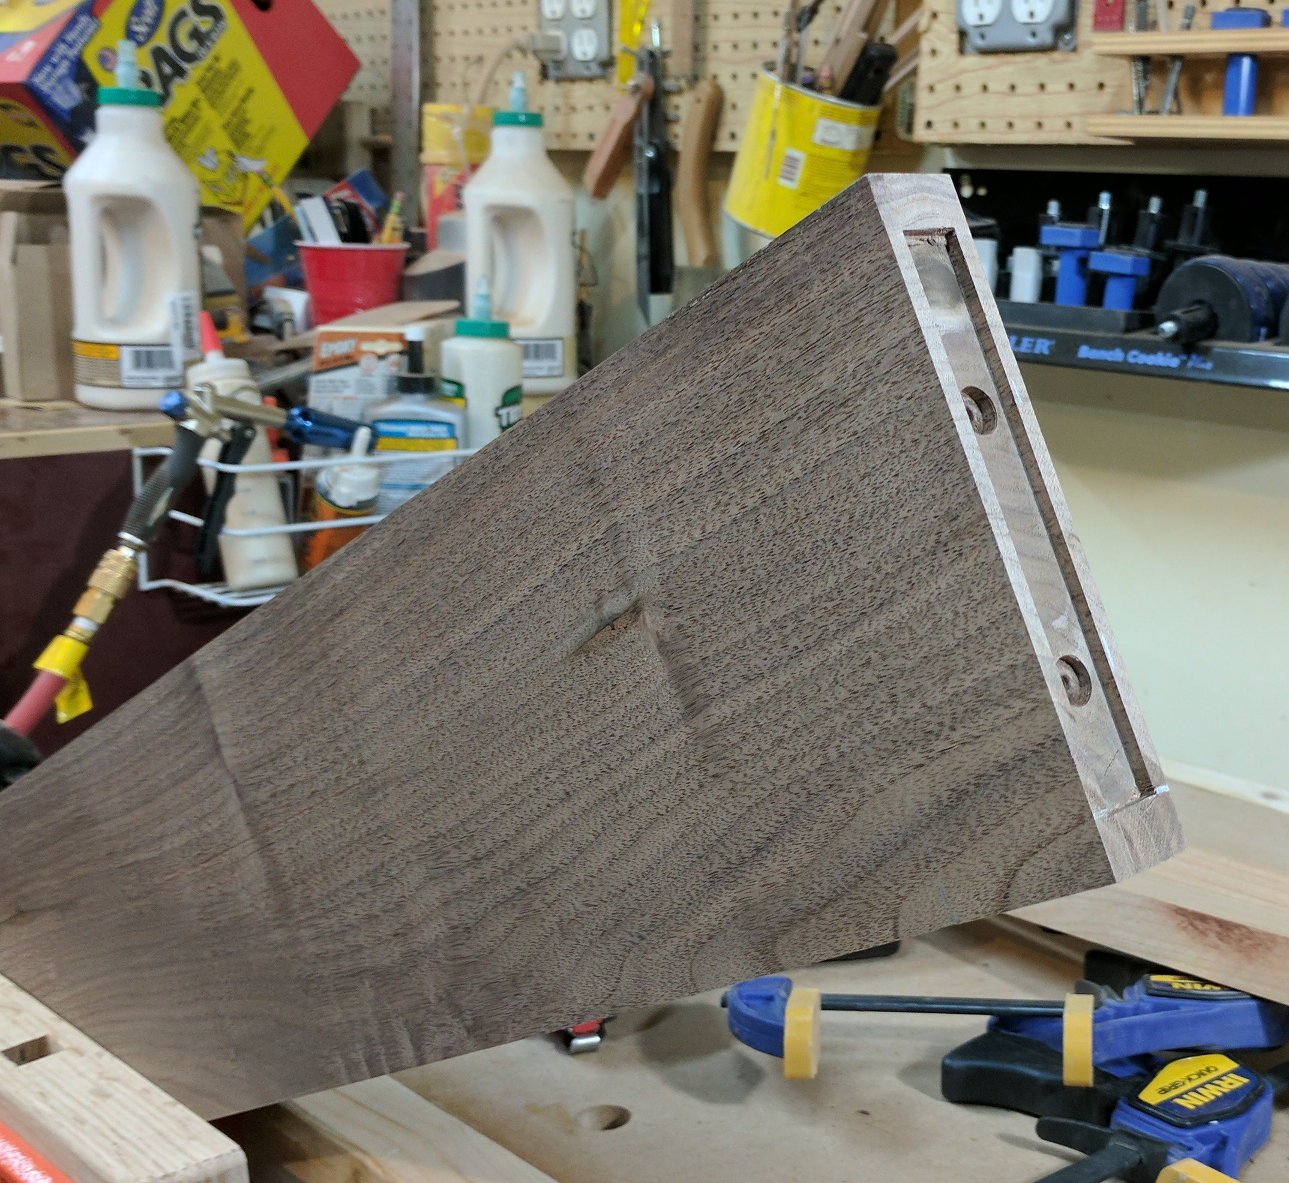
I’d already mortised the legs for the slotted part of each joint, so now I needed to do the same for the tabbed parts. This time I went with the compact router and a 5/8″ straight bit to match the width of the hardware. The mortise goes to 1/2″ from each edge, so I clamped a pair of longer pieces on either side of the cut to increase length and used a self-centering router base to keep the bit centered on the end of the rail. (Side note: I’ve had mixed experiences with some of Rockler’s accessories, but their self-centering router bases work nicely — they’re simple and well-designed. I have a full-sized one for my PC690 and a smaller one for my compact router.) Then it took just a few seconds with a chisel to turn the rounded ends into square ends.
In the back side of each tabbed piece are two welds that protrude a little bit, so I drilled a pair of shallow holes inside the mortise to accommodate them.
If you’ve ever driven screws into end grain, you know it’s not an ideal way to go. End grain splits easily, and if it splits around the screw that screw’s holding power plummets. To help prevent that, I drilled a 3/8″ hole parallel to, and about 1-1/2″ inches in from, each end and glued in a length of 3/8″ walnut dowel. The dowels provide some nice long grain for a 2-inch screw to bite into, and that will make sure the hardware stays firmly attached to the end of the rail.
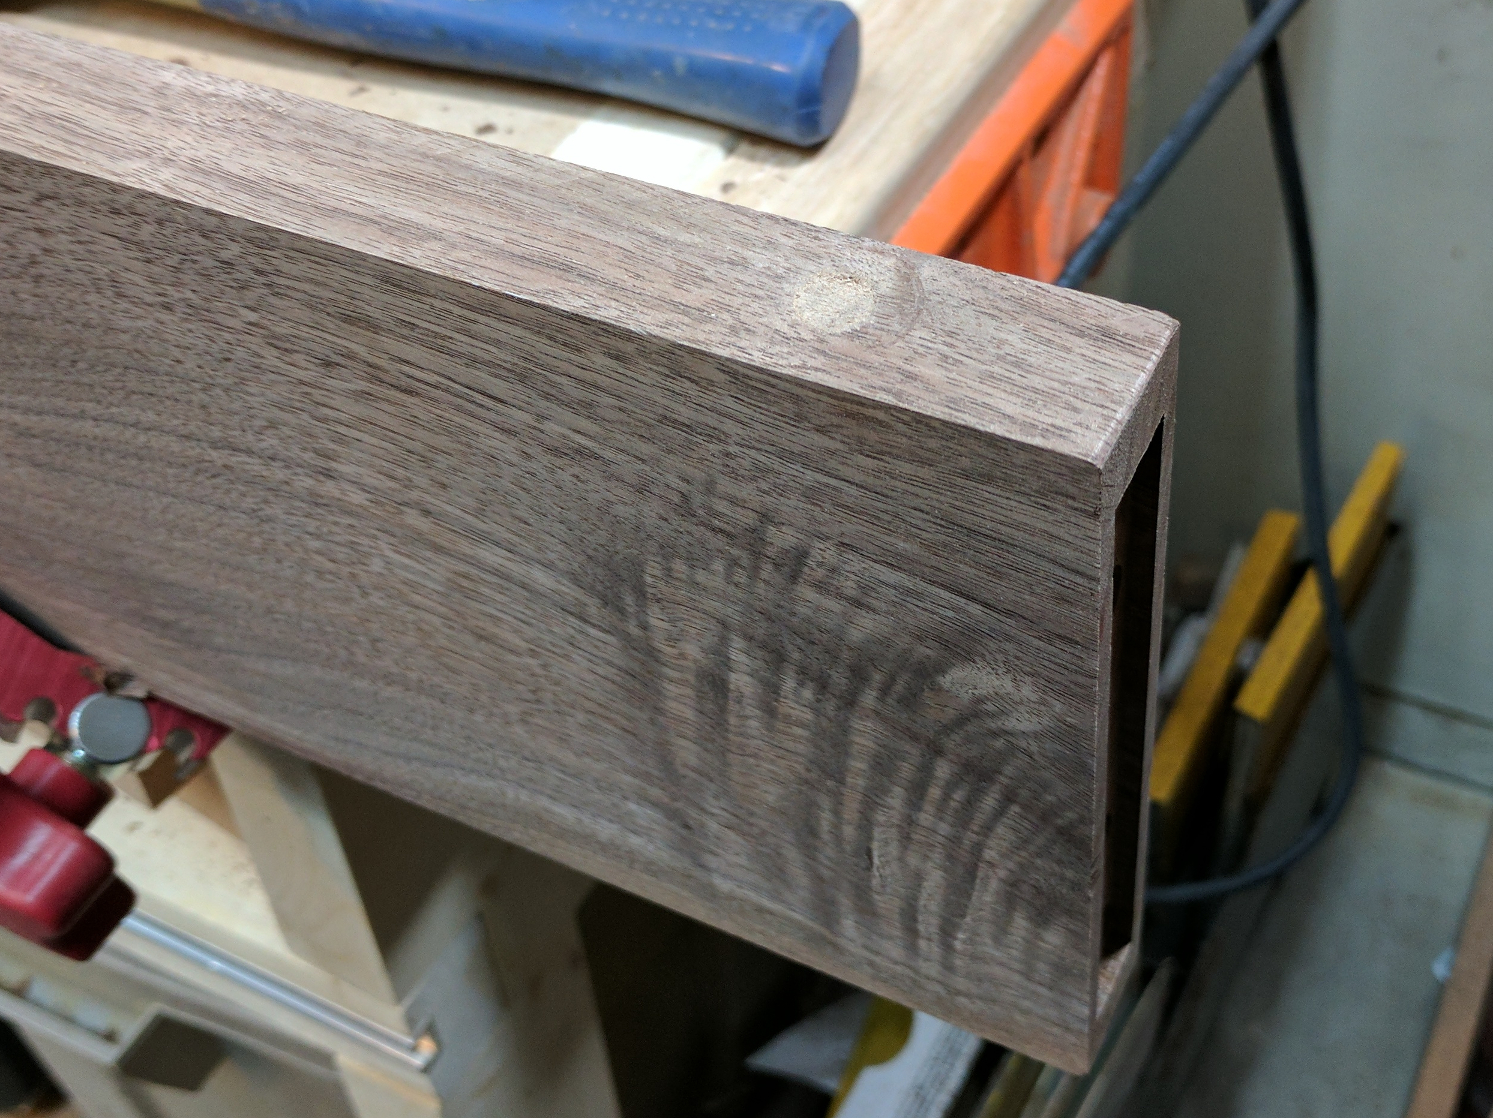
A 3/8″ dowel running parallel to the edge will give the 2-inch mounting screws something to bite into.
These pieces were way too big to take to the drill press, so I drilled by hand. I did use the drill press to drill a 3/8″ hole through a thick scrap block and used that block as a guide for my corded 1/2″ drill with a 6-inch long bit. Once I had the hole started I could remove the block and finish without it, drilling to a depth of 5-1/2″ so it wouldn’t break through the visible top edge of the rail. The dowel went in with a few taps of the mallet and then I cut it off flush with a hand saw.
With that, all of my base components were ready for sanding.


Recent Comments