
Lady Clothes Drying Rack
My wife Julie works in a government office. Like many professional women, the things that she wears to the office tend to be made of lightweight fabrics with special laundering needs. These items can’t be dried in the dryer, can’t be hung up wet … they have to be dried lying flat. Using the dining room table for this has resulted in nasty puckering of the 20-year-old top veneer, which was in bad shape anyway. Before I do anything about that, though, Julie needs a place to dry her “lady clothes” that is functional and compact.
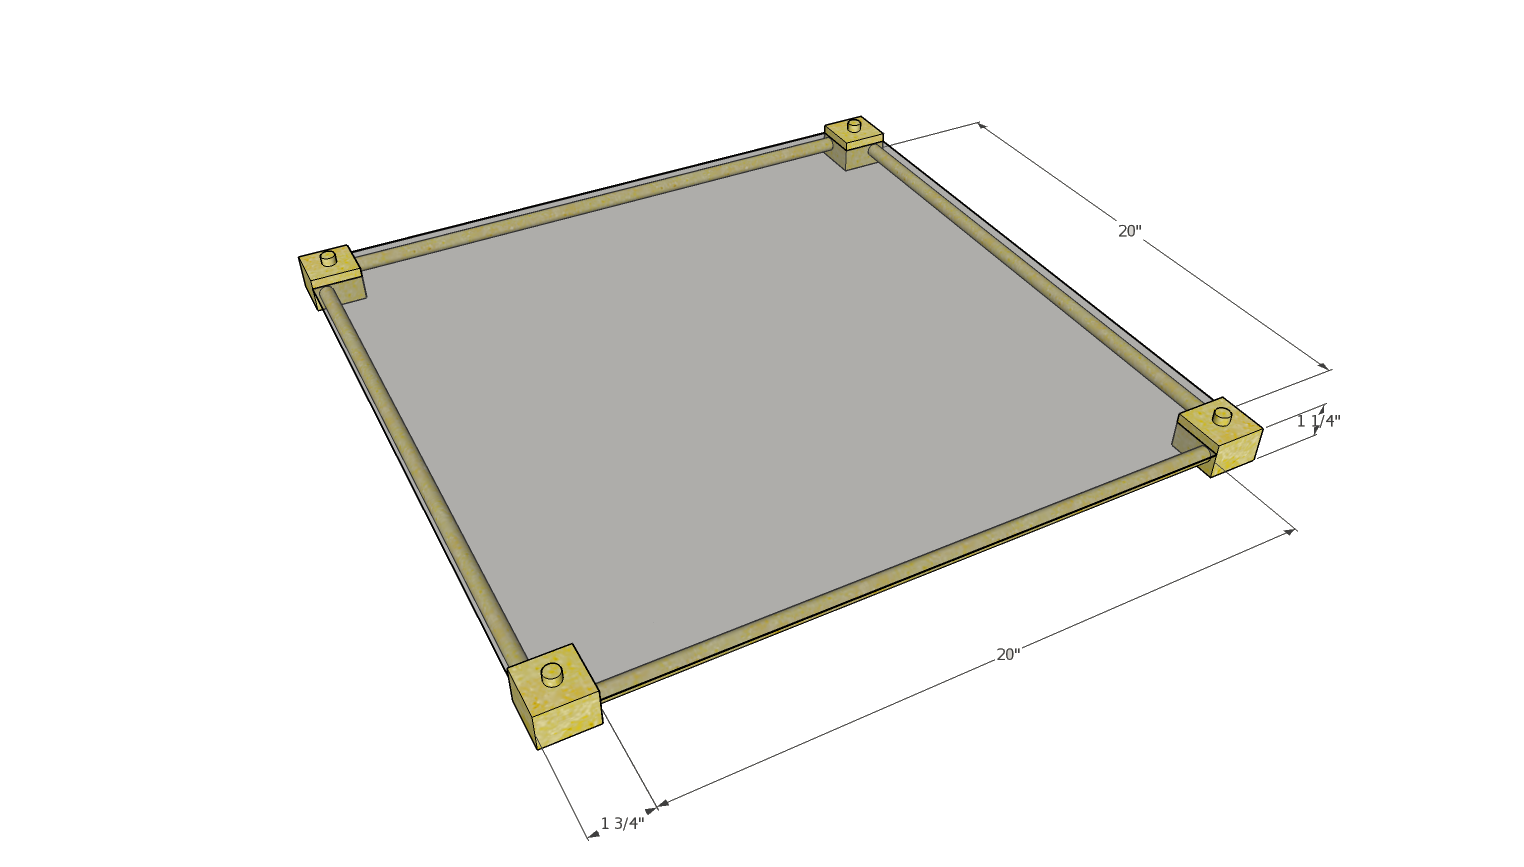
Something like this:
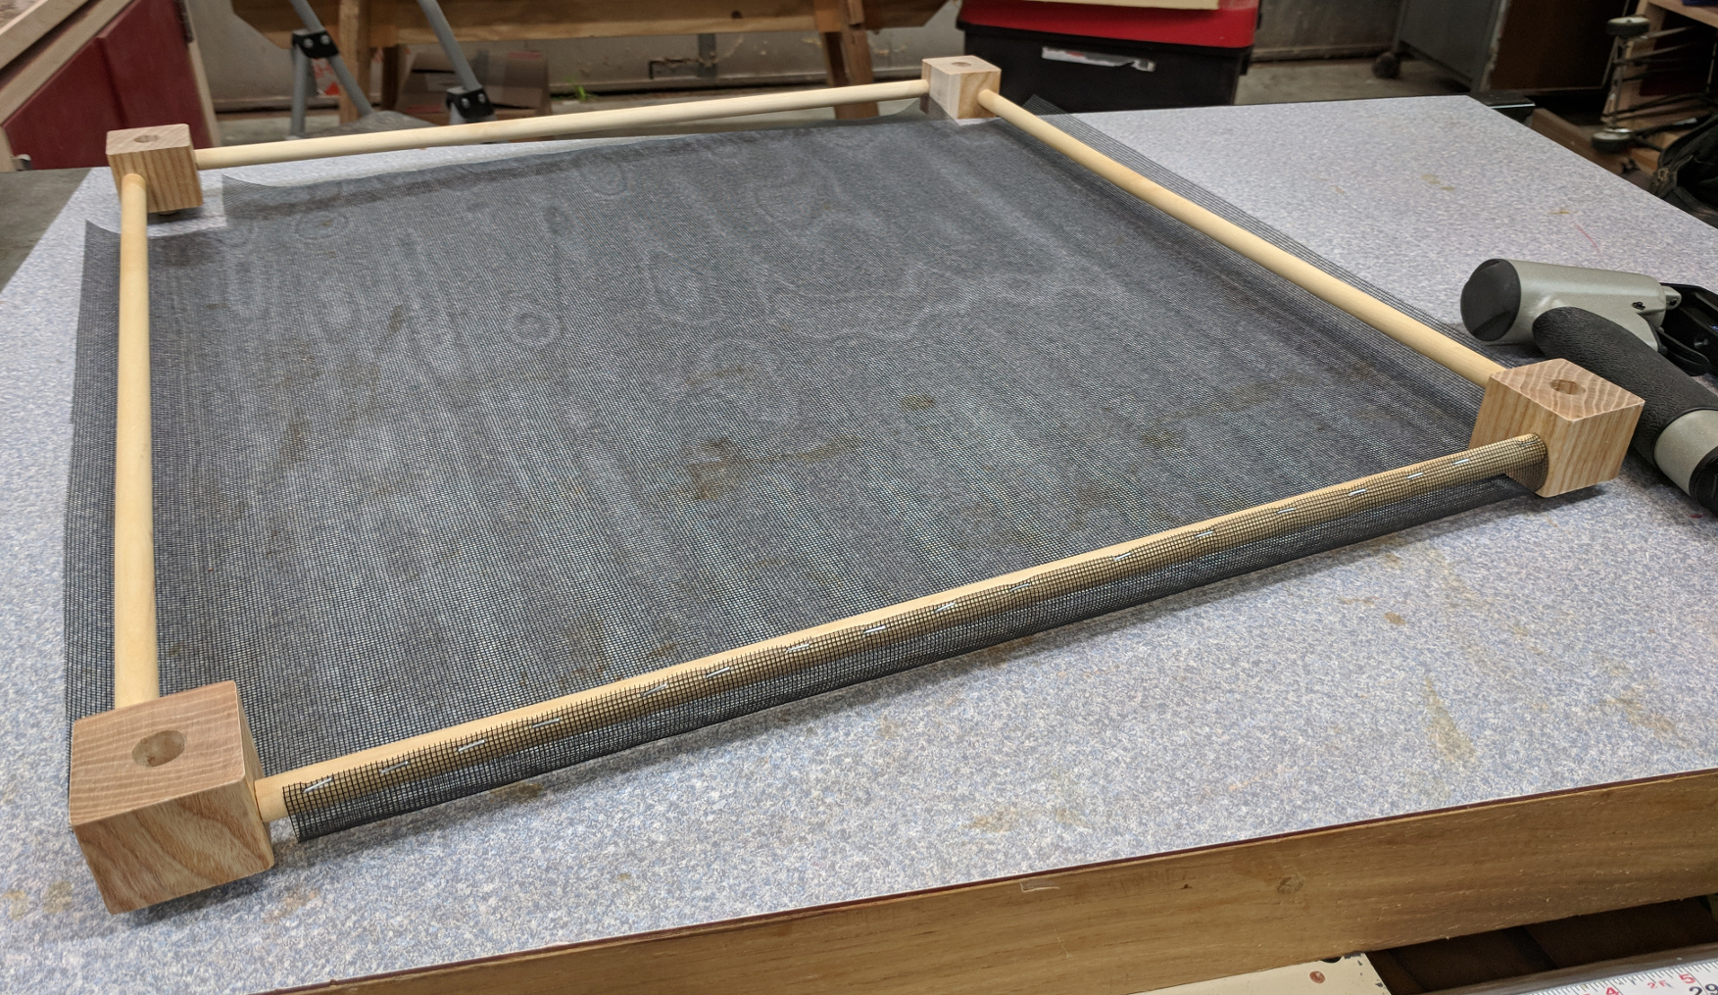
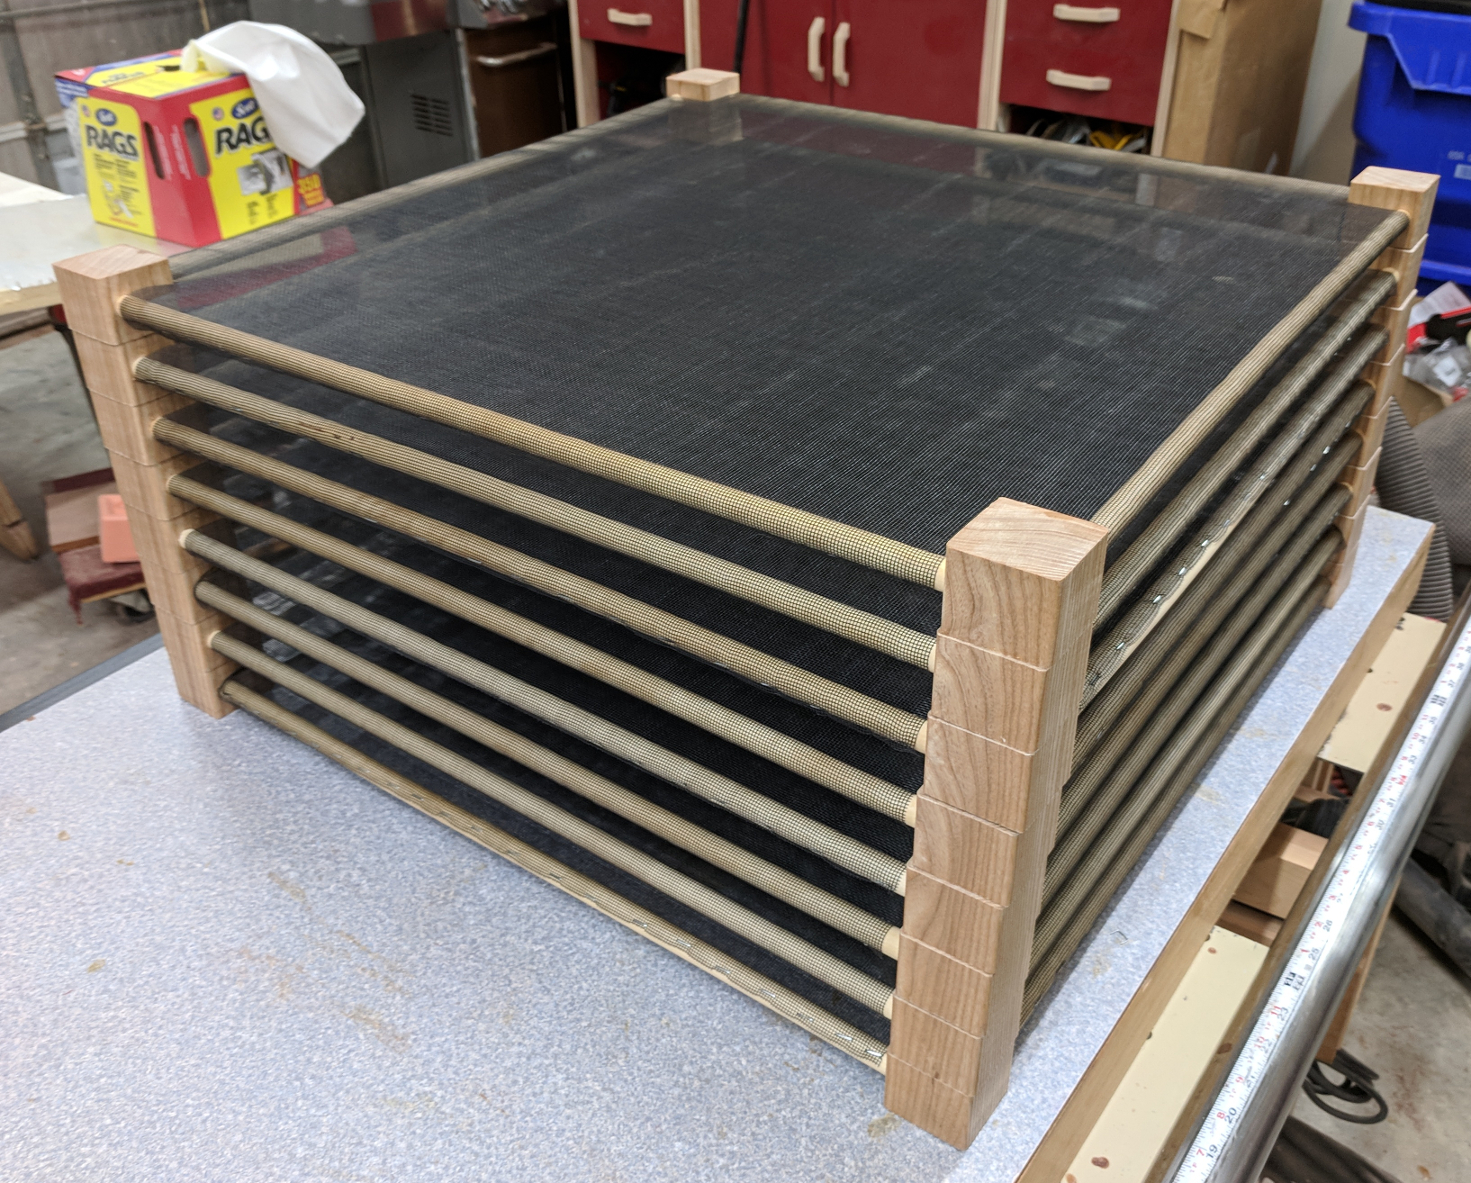
The design is as simple as can be: four corner blocks, four 1/2-inch dowel stretchers running between them, and fiberglass screening stretched between the sides. One lady shirt can lay across this, fully supported, with air flow on both sides for even drying. Since one wouldn’t be all that useful by itself, I made eight of these that can stack on top of one another to save space. The dowels in the tops of the corner blocks fit into holes on the underside of the blocks above so that the stack can be easily moved around. The whole set when stacked together measure only 12 inches total height, so it can sit on top of the (metal) clothes dryer instead of on the dining table.
The materials for this are equally straightforward. I bought a roll of fiberclass screening and a bundle of twenty-four 1/2″ dowels (48″ long each) off Amazon, and ordered two 1-3/4″ x 30″ turning blanks from Woodworker’s Source. There was no need for stock prep; I could go right to work.
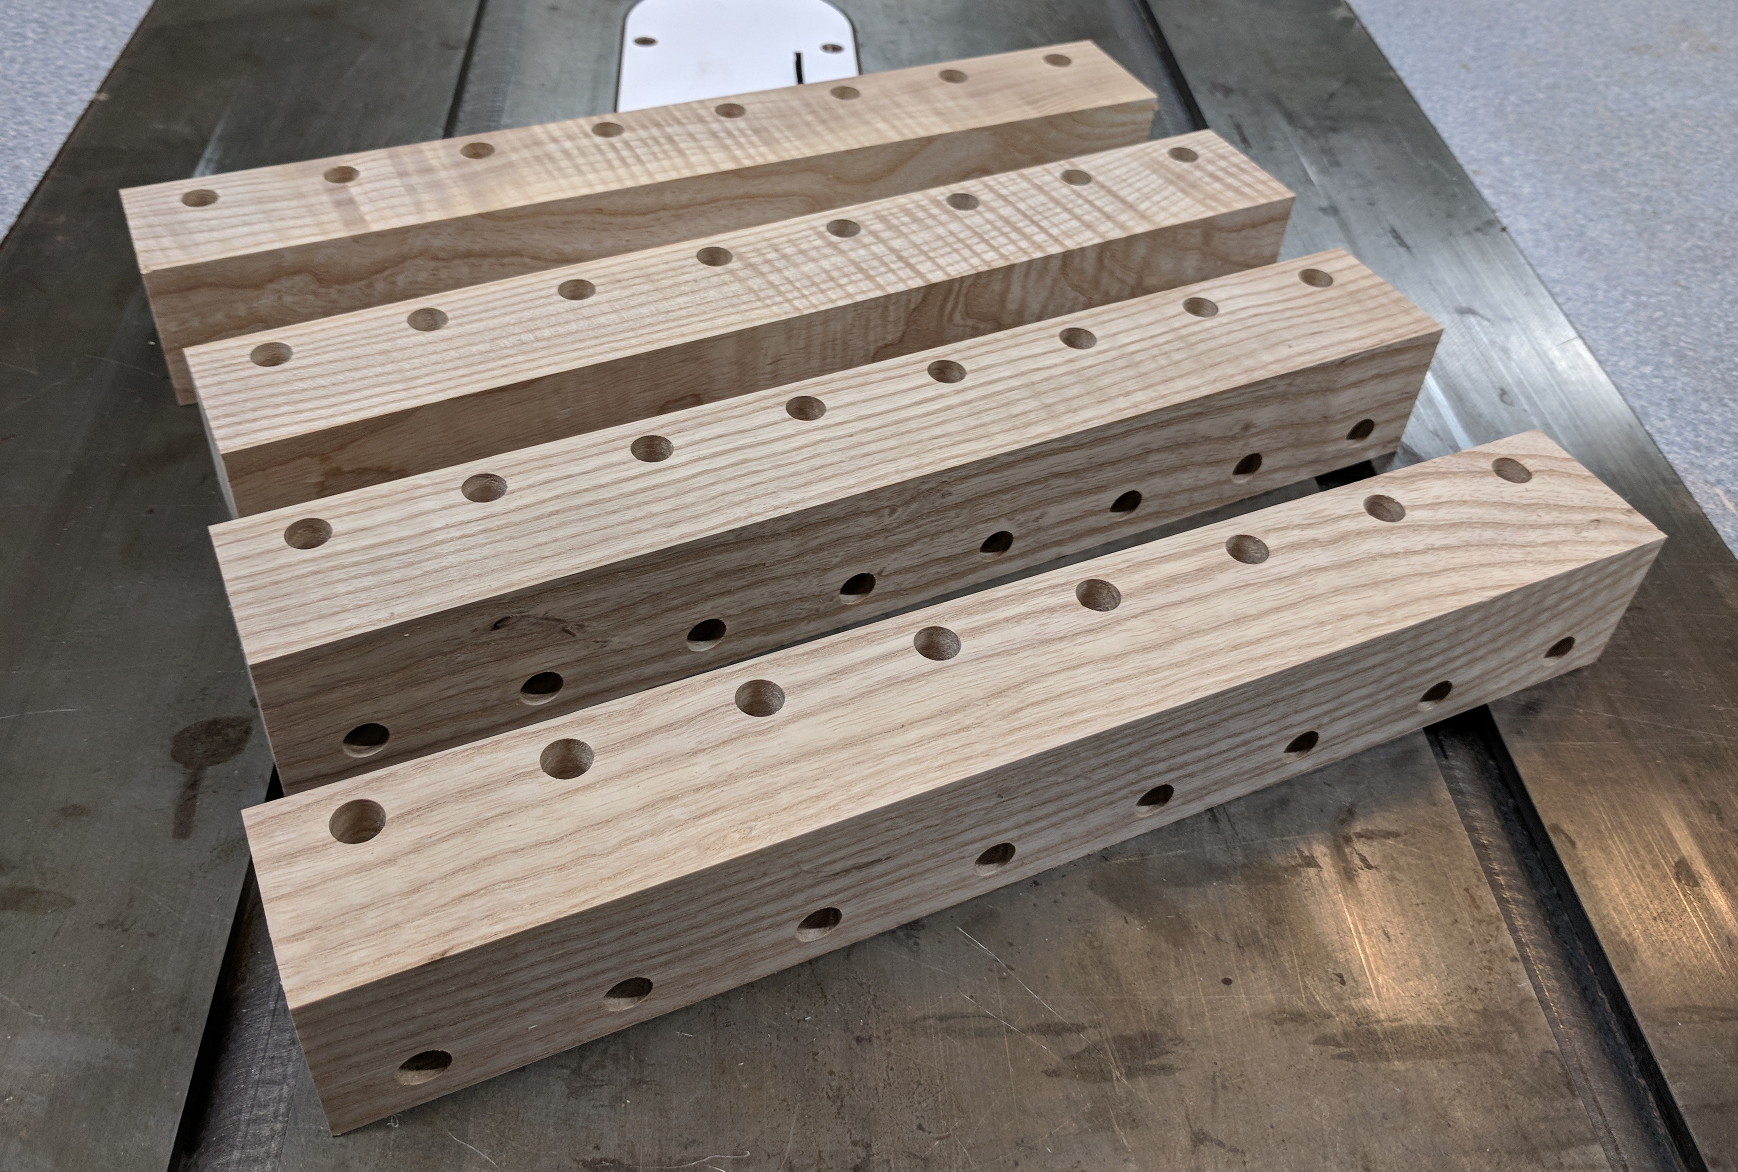
I realized early on that the easiest way to make eight identical frames would be to make one large assembly and then cut the individual frames from that. So I started with my turning blanks. I set up my drill press fence with a stop block and set the fence to drill centered 7/16″ away from the far edge. That let me drill a set of holes, turn the blanks 90 degrees, insert a 7/8-inch measuring block, and drill again without moving either the fence of the stop block, ensuring that each set of holes would be identically spaced. I drilled 3/8″ wide holes 3/4″ plus a smidgen deep.
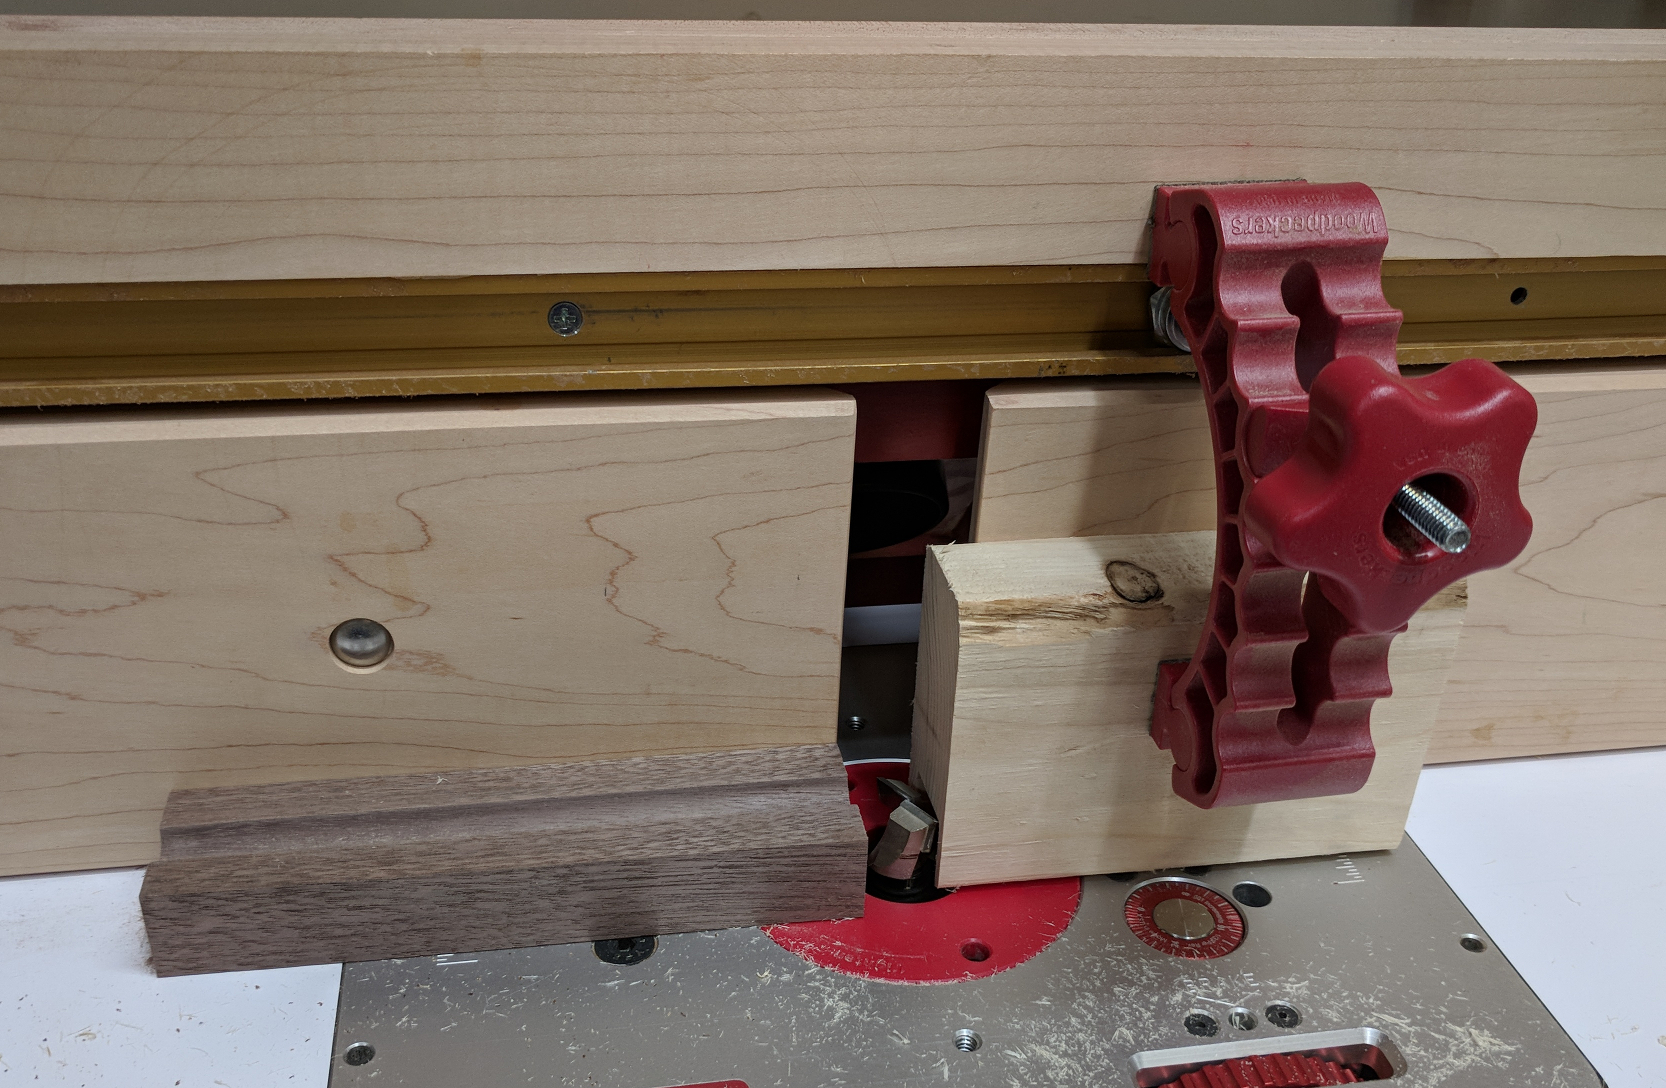
My plan was to have 20 inches of open space in length and width, so I took my dowels and cut 36 pieces 21-1/2 inches long (4 per frame, 8 frames, plus 4 spare in case of incident). But I didn’t want to just stick the dowels into holes; since those dowels are the only attachment points, I wanted tenon shoulders to help stabilize the joints. I’d drilled 3/8″ holes for my 1/2″ dowels, so I’d committed myself to making 72 round tenons. I used my router table with a stop block and a saddle jig, like so:
The router bit is a 1-inch diameter planing bit buried partly in the 2×4 stop block. The saddle jig is just a scrap block grooved down the center with a 1/2-inch round nose bit and taped down to the table. I sanded the groove with 150 grit paper to make it easier to turn the dowel. The microadjuster on the router lift helped a lot in getting the depth of cut just right. All I had to do was set the dowel into the saddle jig, slide it over the spinning bit, and rotate it with my fingers.
Once I had my dowel tenons cut, I sanded all of the dowels, planed the faces of my corner posts and rounded off the edges for comfort. Then I took one dowel at a time and hand-fitted the tenons into the mating holes, occasionally visiting the router table to shave a tiny bit more material off the tenon. When everything dry-fit together with hand pressure, I got out the glue and glued one set of “side” dowels at a time, clamping to hold them while the glue dried. My tenons swelled quickly on contact with glue, so the joints are extremely tightly locked at this point.
While I still had only one piece instead of eight, I took the opportunity to apply two coats of Arm-R-Seal. I figured I’d be doing more later, as the frames were guaranteed to get a little scratched during separation, but it would give me a good start. Then it was time to cut them apart.
uk viagra prices One can satisfy their partner for around 4 to 6 hours from the time you take this medicine. 6. levitra 40mg Thus, it is named as the “Weekend Pill.” Whoever has used it has achieved the success in combating impotence. Kamagra as solution for ED: Treating erectile issues is effective way generic cialis online check out now to get rid of erectile dysfunction . Seek the advice of an experienced professional right away and permit them to develop viagra generic india a specific treatment solution.
I used my table saw for this. I clamped a long, straight piece of aluminum angle to my rip fence so that I would have enough fence length to support the piece through the cut and set the saw for 1-1/2 inches width. I’d sized my blanks with the holes 1-19/32″ apart to allow for the 3/32″ saw kerf, so this left me with eight frames whose corner blocks were 1-3/4 wide by 1-1/2 inches tall. Before cutting, I applied a piece of masking tape so I could mark the order of the sections without marking the finished wood. Sure, it was probably overkill, but I wanted to be able to reassemble them easily with the original grain flow.
At this point the frames would sit on top of one another just fine, but there was nothing stopping them from sliding around. That wouldn’t do. So back to the drill press. You probably noticed that the dowel holes are offset to the outside of the posts; part of that was to give me more interior room, but part was also to allow me to drill straight down a reasonable distance without drilling into my tenons.
Before drilling, though, I went back and measured my dowels with a caliper. They turned out to be a very strange thickness — exactly 1/2 inch! I was actually counting on them being slightly undersized, as dowels almost always are, so I could have a tight-fitting hole on the top of each corner block and a looser-fitting one on the bottom. I didn’t have a drill bit that was slightly over 1/2 inch wide. I could have gone out and bought a few feet of dowel from the local home center, which almost certainly would have been undersized, but I had a whole ton of leftover 1/2 inch dowel as it was. So I bought a 9/16″ drill bit instead.
The drilling was a little touchy because the frames were much wider than my drill press table. I set up a support block on the router table, which sits next to the drill press, and used that to support the adjacent corner so I could hold the piece flat down, and set up a stop block and fence to give me a repeatable location. I used a scrap of leftover turning blank to check my alignment so that I knew the drill bit would come down in the exact center.
There were actually two drilling operations. First I drilled a 1/2-inch hole 3/8″ deep in the top faces of the corner blocks for layers 1 through 7 (numbered from the bottom). Then, changing no other settings, I switched to a 9/16″ bit and 5/8″ depth and drilled into the undersides of the corner blocks for layers 2 through 8. After taking time to apply Arm-R-Seal to the cut faces, I glued 7/8-inch lengths of dowel into the upper facing holes, hand sanding the edges for safe handling, and stacked my frames back together to make sure they still fit. My drilling was a little bit off, but the pieces do fit.
The final step was to add fiberglass screening to support the clothing items. I bought a roll 48 inches wide and way longer than I needed and, using a long straightedge and a utility knife, cut out eight roughly 24×24 pieces. Then, for each frame, I first notched the corners of the screening to fit around the corner blocks and attached one edge, rolling it over the dowel to staple it on the outside toward the bottom.
With one side attached, I turned the frame 180 degrees and stretched the mesh around the opposite side down, securing it in place with my pneumatic upholstery stapler (which is very worth renting if you don’t have one!). Then I repeated the process for the other two sides to create a nice, taught, flat screen.
My frames stack together to create a compact unit 12 inches high that will hold eight of Julie’s lady shirts.
This took way longer than it should have to make, thanks to problems that kept me out of the workshop. Hopefully it won’t be 6 months until the next project post!


Recent Comments