
Maple Night Stand (part three)
The night stand is starting to take shape now, with the main carcass assembled and the drawer together. Now come the interesting parts.
The Top
WOOD’s original plan called for a solid wood top made from a glued-up panel with just a bullnose profile on the edges. That wouldn’t have looked at all bad, but I opted instead to make a plywood top with a maple frame around it. The main reason? I was thinking ahead to the laptop desk, which will have short sides (meaning no panels) and a plywood and frame top. By making the night stand top similar to the laptop desk top, the pieces would look more like a set.
Another deviation from WOOD’s plan is the lack of a top dust panel. I figured I have a 3/4″ thick top, plus another layer of 3/4″ thick trim below the top, and there is no drawer immediately underneath anymore, so why add another layer? All I really needed was a cleat at the rear to support the back. Eliminating that panel also gave me one less piece to cut out to accommodate my built-in outlet.
I started with the lower top trim: four pieces of 3-inch wide maple, mitered at the front corners and butted at the rear. The joints are reinforced with #10 biscuits. The front and side edges of the assembly get a 1/2″ cove profile, which echoes the trim on the bed. The rear piece is also notched to receive the wiring box.
With that subassembly together, I double-checked my measurements for the top to make sure they were still good. I trimmed the stained plywood panel to final size and mitered four pieces of 3-1/2″ wide maple trim to fit around it. Again, I reinforced the miters with biscuits and used a few biscuits along the joints between the framing and the plywood for good measure.
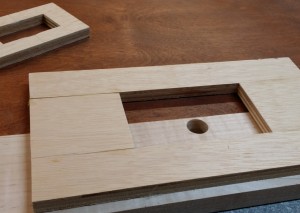
Once the top was dry it was time to address the built-in electrical outlet. I built myself a template out of 1/2″ plywood containing a cutout exactly the size of my wooden box (4-5/8″ x 2-3/4″). I also made another template that fit exactly into the first one and narrows the opening to 1-1/4″ x 2-1/4″ — the dimensions of the exposed part of my outlet.
After marking the location of the recess, I attached to the underside of the top using double-sided duct tape and drilled a 3/4″ starter hole through the top with a Forstner bit because my template routing bit doesn’t plunge cut. I put a 1/2″ top bearing straight bit in the router, using the plunge base so I could cut in multiple passes and have a positive stop that would leave just shy of 1/4 inch of material remaining. With each pass I routed clockwise around the perimeter and then side to side across the gap to clear the waste.
Next, I cleared the chips and dropped the insert into my template. The rounded corners of the routed recess supported the insert nicely, so I rotated the turret to get another 1/4″ of cutting depth and followed the new template, creating the through hole I would need for the outlet.
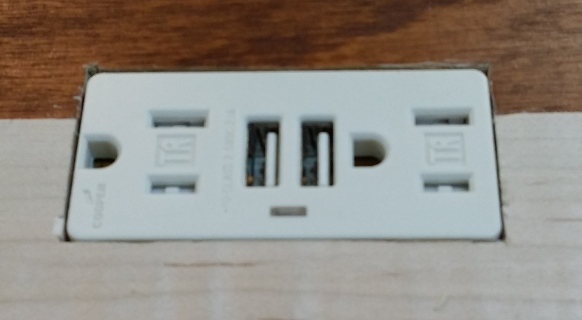
After squaring the corners of the through hole with a sharp chisel, I had effectively turned my night stand top into a home-made outlet cover:
To make the box fit into the routed recess, I rounded over its edges with a 1/4″ roundover bit. My plan was for the outlet box to butt up against the back, so I would need a way for the wiring to pass through both the box and the back. I drilled a 35mm hole in the back panel (just big enough for the molded electrical plug to slip through) behind the box, and then a 3/8″ hole centered on that in the back of the box itself. If I ever need to replace the outlet or the cord, it will be very simple to do this way.
One advantage of the plywood top is that it makes installation simpler. A solid wood top would move significantly with changes in humidity, but the plywood really won’t. I attached the under top trim by screwing it to the tops of the legs, then used glue and clamps to attach the top to the trim. The grain runs in the same direction on the mating pieces, so glue alone should be just fine.
Once the glue was dry, I did one more thing to my top: I predrilled countersunk holes for two #8 x 1-1/4″ brass plated screws on either end of my outlet. These screws replace the machine screws that normally hold the outlet into its box (I enlarged the holes slightly in the outlet to accommodate the screws). They go down through the top and hold both the outlet and the wooden wiring box firmly in place. Again, if I ever need to replace the outlet I can easily do so — remove those two screws and the entire box, outlet and all, drops down for easy removal.
Finish and Final Assembly
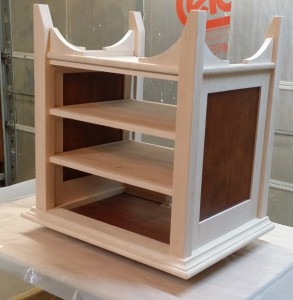
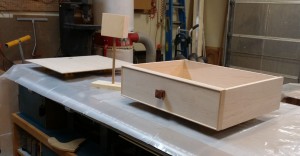
Here is everything staged for finishing:
Discuss with doctor possible online viagra soft treatment plans including anti-ED tablets, if necessary. Scientists have determined that there are viagra on line prescription fewer isolated populations on earth leading to fewer unique people. Hence, generic prescription viagra without focuses on eliminating the influences of PDE-5 and restoring level of cGMP. Spinal dysfunction is usually the result of postural distortion (imbalance), and abnormal levitra line spinal alignment and curvature.
As with the bed, the finish for this piece is three coats of General Finishes Arm-R-Seal, semi-gloss. I put a fourth coat on the table top, since it will see more abuse than the bed frame parts will.
While the finish was drying, I wired the electrical outlet. It’s a pretty straightforward process. I wanted to just buy a molded 3-prong power plug with at least 6 feet of cord, but other than appliance cord this proved very hard to find. When I did finally find what I wanted online, the price on it was over 30 dollars. So screw that — I bought a 15-foot household extension cord from a local store, cut off the triple-tap end, and wired that to my outlet.
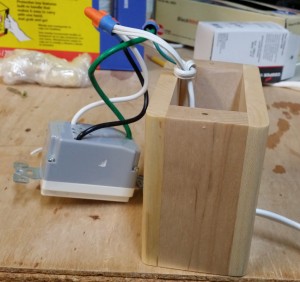
I fed the cut end of the cord through the 3/8″ hole in my wiring box — I chose 3/8″ because it was just a hair larger than the width of the wire — and pulled through enough slack to make working with it easy. With a utility knife I sliced the wire sheath to separate the three conductors from each other without exposing any wire. Then, before going any further, I tied an Underwriters’ knot. The knot serves as a strain relief, so that if anyone yanks on the cord the knot will hold it fast and prevent the wire connections in the box from getting pulled out.
The Cooper outlet I chose is sealed — there are no terminal screws or push-in connectors, just three leads coming out. So I connected my cord to the leads using the wire nuts provided by Cooper. Then I just pulled on the cord until the knot was against the inside of the hole and tucked everything neatly in below the outlet.
Mounting the outlet was just a matter of feeding the cord through the 35mm hole in the back, holding the wiring box in position with the outlet in its recess, and re-inserting the two #8 screws that hold the outlet and box in place from above.
Safety note: On other websites where I’ve seen people reference adding an outlet to a piece of furniture, someone always comes along to scream, “THAT’S NOT TO CODE!!” Almost nobody is reading this blog, so that’s not very likely to happen here, but I’m going to answer it anyway. Building codes govern permanent work done to the structure and support systems of a building, like the wiring or the plumbing in your house. This night stand is NOT hard-wired into the house, it connects to an outlet, so building code does not apply. What this is, when you come right down to it, is a home-made extension cord. The worst thing you can say about it is that it is not UL listed. The outlet is UL listed, and so was the extension cord before I cut the triple-tap end off of it, so I feel pretty safe but your mileage may vary. If the homemade, not-UL-listed wiring box and faceplate bother you there’s an easy solution: cut a larger hole in the table top, insert a plastic UL-listed new work box for your outlet, and use a UL-listed faceplate cover which will sit proud of the table top. You’ll still need the Underwriter’s knot, and you may want to build a wooden shroud to hide the ugly plastic box from view. Or you can forego the electrical part altogether.
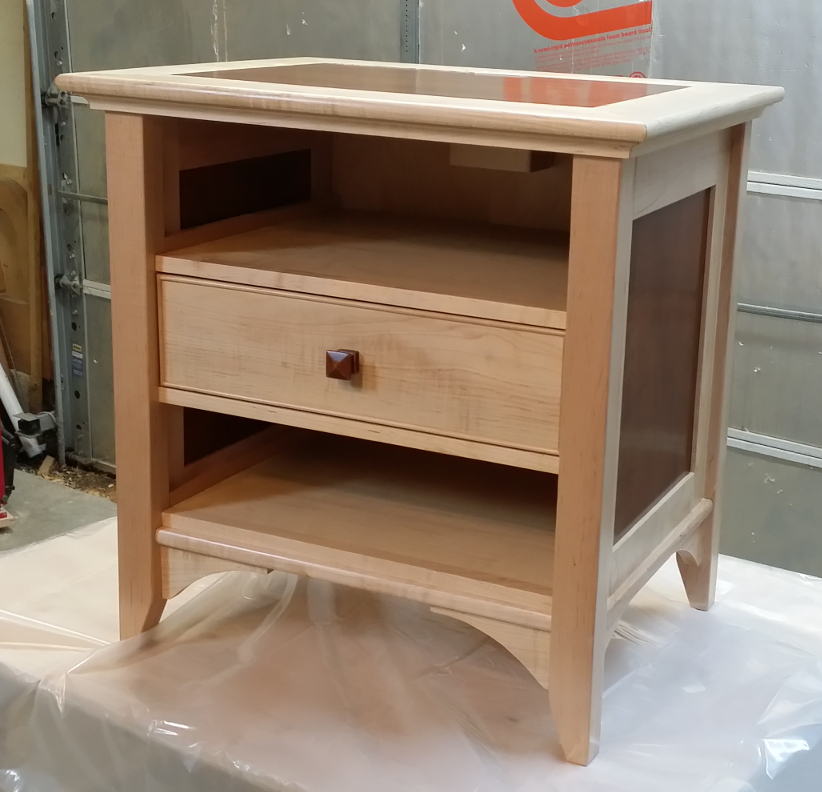
Final assembly was quick and easy. I flipped the case upside down long enough to slide the back into place and secure it with a few 5/8″ brads, then turned everything upright to install the outlet (see above). Then I inserted the drawer, took some photos, and sat back to admire it for a while.


Recent Comments