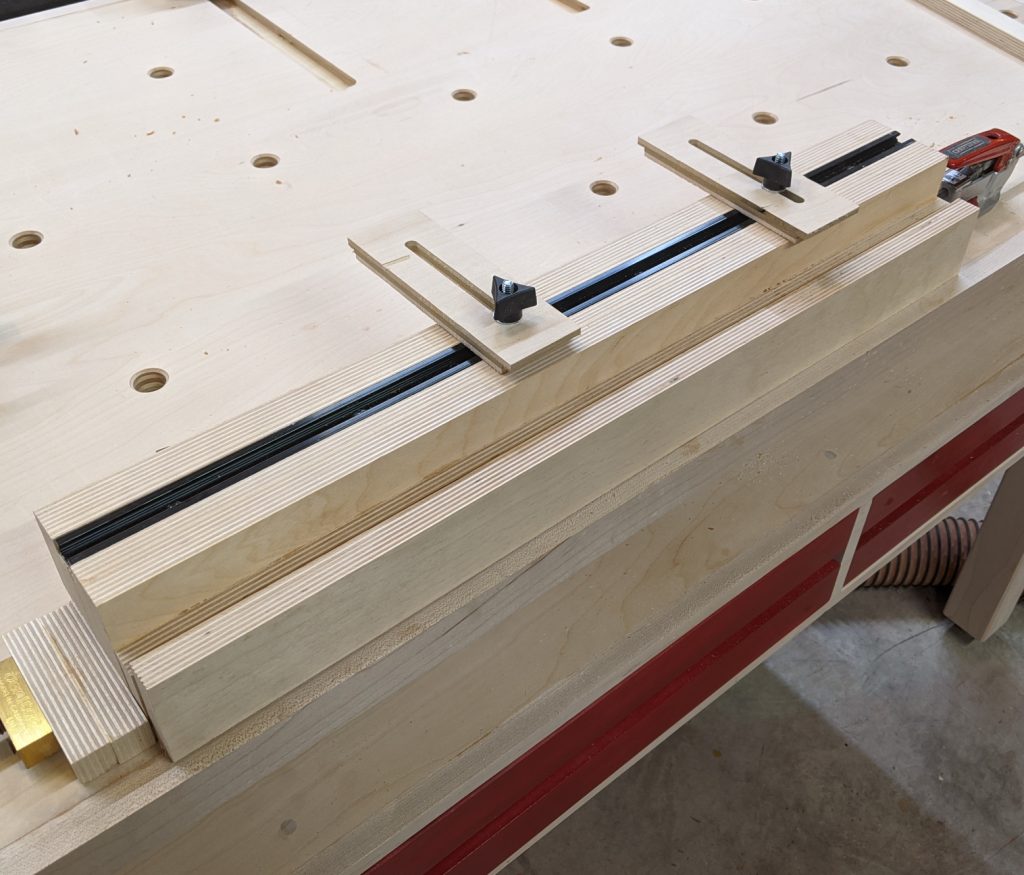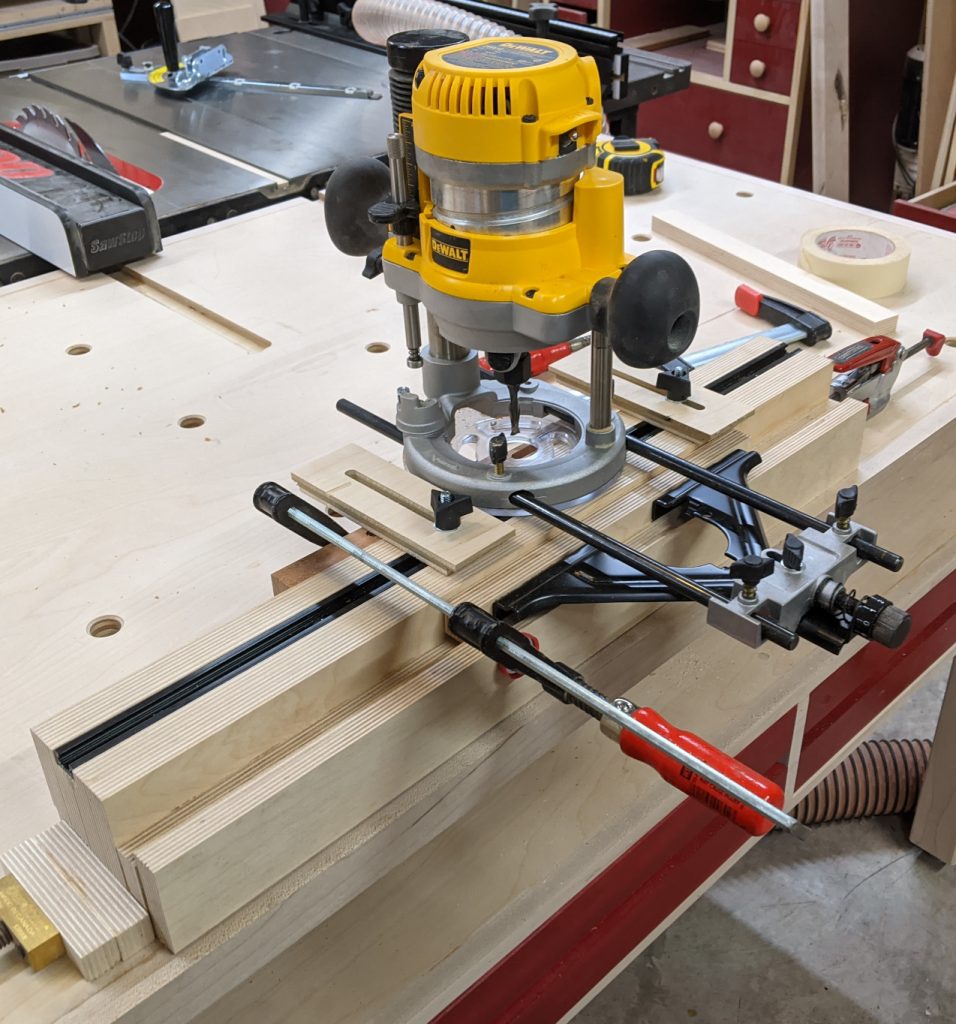
Mortising Block
This is another of those been-meaning-to-get-around-to-it projects. It doesn’t have anything to do with getting a new table saw, but I did use cutoffs from the storage unit to make it.

This mortising block is based on a design by master chairmaker Jeff Miller, a guy who knows a thing or two about mortising with a router. I added the T-track on top after seeing a video from Fine Woodworking magazine.
It’s pretty simple to construct. I laminated 4 pieces of 18mm plywood because that’s what I had handy, but you could also use solid wood if you have some thick stock lying around. The block is roughly 3 inches thick and wide. The length can be arbitrary; mine is a touch over 24 inches but you could make it longer or shorter without harming the functionality — just make sure it’s long enough to accommodate your longest likely mortise plus half the width of your router on either side.
The critical dimensions are the width and height of the last two pieces. You have to have an edge guide for your router (homemade, manufacturer-made, or third party doesn’t matter) and the dimensions of that drive these two pieces. The inner piece needs to be the exact thickness of your edge guide’s bearing surface — it’s easiest to just use a cutoff from that piece and screw it to your edge guide, but make sure it hangs lower by at least 3/8 of an inch. Then the final piece has to come up enough to capture the edge guide between itself and the main block. The router needs to slide from side to side but have no movement otherwise. (Like the runners on any table saw jig, really.)
It’s very simple to use; measure out the mortise on the stock, paying particular attention to the stop and start points and the center of its width (which doesn’t have to be the center of the board). Then clamp the stock to the far side of the mortising block flush with the top. The horizontal stops help here because you can tighten them down and use them to reference the top of the jig.
Now, place your router in the jig already equipped with the bit you will use for the mortise. Align the center of the bit with the center of the mortise (this is easy if it’s a spiral upcut bit, which is the best kind for mortising). Plunge it to the surface of the material while powered off and place it at one end of the mortise. Place a stop block against the base there and tighten it down, then do the same at the other end. Set your maximum depth of cut to your desired mortise depth. Now turn the router on and route:

The wide block provides a nice, firm base no matter how thin or thick the workpiece may be. The captured edge guide keeps your router running straight; the only variable is the depth of cut. Route left to right, taking a little at a time (no more then the width of your bit generally), until you hit your maximum depth.
If the router doesn’t run smoothly, use some paste wax on the top of the block and in the channel for the edge guide as well as on the wooden runner itself. That should free things up nicely.
So, why build this when I have a hollow-chisel mortising machine? I asked myself this a lot, which is partly why it took me so long to decide to do it. This offers a couple of advantages over the mortiser:
- It can make any width of mortise, depending on what bit I use in the router, in one pass. To make a 5/16″ wide mortise, for example, I would either need a special bit/chisel set or I’d have to make overlapping passes with a 1/4″ bit. A 5/16″ router bit is cheaper and more likely to get used again.
- I can take the jig to the work when necessary, like to mortise door parts or the end of a bed rail. It’s really hard to do that with a 100-lb machine.
- It can make mortises on non-square parts more easily; I just have to orient it so that part that I need to mortise is flush with the top of the block. The underside can be as curved as it wants to be.
- Batching a lot of identical mortises is really easy with this block — I just set a stop block and keep swapping pieces in and out. That only works on the mortiser if I have room for two stop blocks, which its narrow width doesn’t often allow for.


Recent Comments