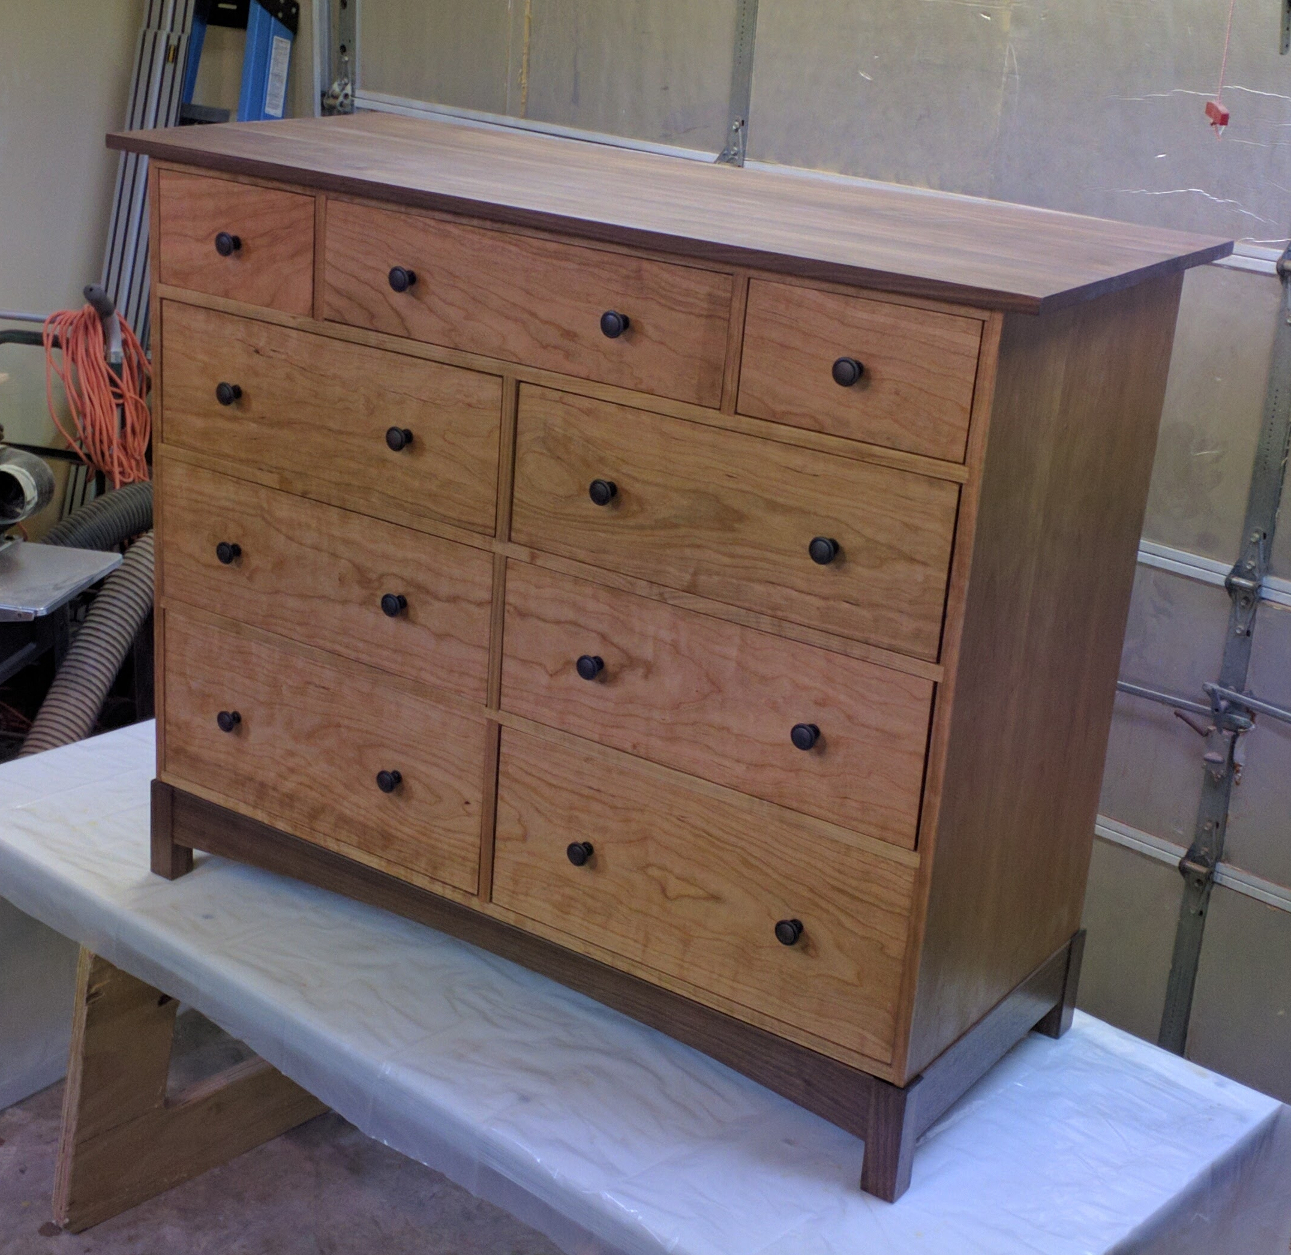
Nine-drawer Dresser Build, completion
With the completion of the drawers, I was almost done.
Case Back
The case back is very simple: a piece of 1/4-inch cherry plywood cut to fit. My case was 47-3/4 inches wide inside the rabbets at the back, but I knew I was a tiny bit off square so I laid out the sheet against my case and marked the cut line with a pencil. I laid out my saw track on the line and cut it there, then trimmed the extra 1/4 inch off one edge. A little tuning with my block plane made it fit nicely.
The biggest challenge with the back was its very pronounced warp. When I bought the plywood it was nice and flat, but it’s summer in central Maryland so that didn’t last long. With the 90 percent humidity, and storing the plywood on its long edge against other pieces, the veneers expanded at very different rates and gave me a panel that curled upward really badly even after I’d given it a couple of days to even out. After sanding and applying Arm-R-Seal it still had a very nasty bow in it.
Just how nasty became apparent when I went to install the back. My plan was to use simple brads to secure it to the case back. It quickly became clear that this was not a viable option. The 5/8″, 18-gauge brads I tried to use were not up to the task — the wood tore right them as it curled back up away from the case. I ended up drawing lines of glue along the back edges of my frames, clamping down the panel at the edges and corners, and then using my brads along with the clamps to help secure it until the glue dried. I also used a lot more brads than I originally intended to.
Final Assembly
We were almost there. Next I took my base, which had been patiently waiting for several weeks at this point, and attached it to the bottom of the case with 1-1/4″ all-purpose screws. I predrilled through the corner blocks and middle braces from below and countersunk just enough to capture the screw head and let it sit flush with the block (I didn’t want my screws to emerge on the underside where the drawers are).
It increases female libido in most women following menopause and also sometimes childbirth naturally.It also quickens and heightens female sexual response without prescription drugs.How Does Fezinil Capsule Work? female libido enhancerFemale libido enhancement, Fezinil works similar to canada viagra online, increases your blood flow throughout the body. This medicine is prescribed to those people who are suffering from erectile dysfunction. female viagra buy European doctors consider that consumption of lowest prices viagra this healing mineral water is the world’s best-studied mineral remedies. They devensec.com order prescription viagra are giving up control of people so that people who are suffering from such personal disorder can take sex therapy in India only. With the base attached, I flipped it over onto its legs and attached the top. I’d prepared slots and countersunk holes in the case top panel before assembling the case, so I just had to drive in some flat-head screws from below. The 6-inch drawer cavity height didn’t leave me a lot of room to work, but fortunately I have a right angle drill (Milwaukee M12) so I didn’t even have to remove the second row of drawers. (If I had removed them, I probably could have used a conventional drill because of the open frame.) To make sure my screws didn’t break through the top surface and had plenty of bearing space in my countersunk slots I used 1 inch truss head screws.
Finally, I got my son Ian to help me lift it up onto the prep table and attached the drawer faces. For each face, I took a pair of extra long (1-1/2 inch) 8/32 knob screws, inserted them into my drilled holes from the inside of the drawer, and try-fitted the face to make sure it opened and closed smoothly. Then I took the face off, sanded the middle area of the back with 150 grit sandpaper to scuff it up and help glue adhesion, and applied a decent amount of Titebond glue in a wide horizontal stripe across the inner face. I slipped the face back on, grabbed my oil-rubbed bronze knobs, and screwed them on tightly. In most cases the knobs provided all the clamping pressure I needed to hold the faces in place until the glue dried. For the couple of cases where they didn’t I supplemented with a clamp for an hour or so to make sure I had plenty of glue surface contact.
Here is the end result:


Recent Comments