Nine-drawer Dresser Build, part three
The only components left to make for this dresser were the drawers and the back panel. I tackled the drawers next.
Drawers
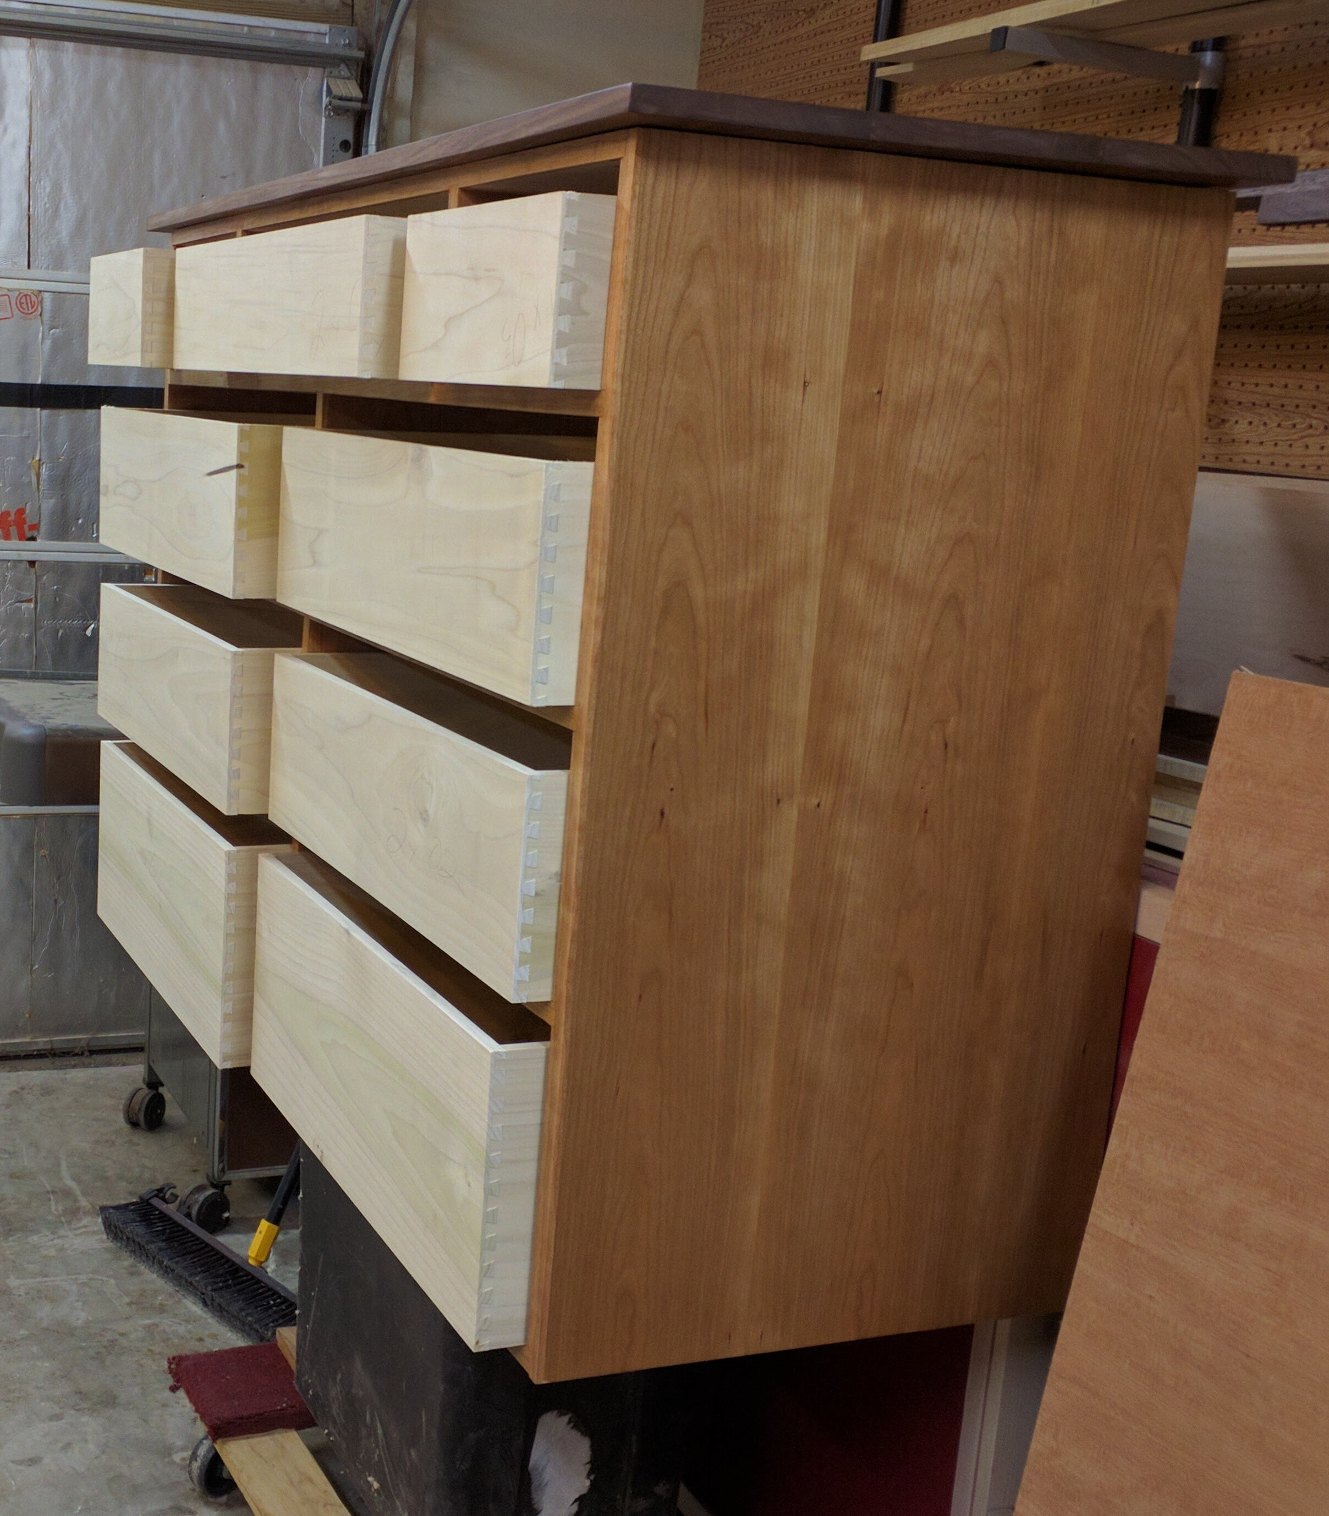
This piece is going in Julie’s and my bedroom, so I wanted to do something more aesthetically pleasing than my usual lock rabbet drawer boxes. I chose to use half-blind dovetails.
That meant making my drawer boxes a size that would work well with the half-blind dovetail pattern, leaving an exact half pin at the top and bottom of each piece. My drawer cavity heights are 10 inches at the bottom, 8 inches for the two middle rows, and 6 inches for the top row. To make the dovetails look decent I cut my drawer box stock to 9-5/16″, 6-3/4″, and 5-1/16″ widths respectively. Those are all close enough to the cavity height that I shouldn’t need to worry about drawers tipping.
All of the box sides are the same length, 18-1/2 inches. The front and back parts for the lower three rows are also the same length, 23 inches. For the top row, I made two sets 10-7/8″ long and one set 23-1/2″ long. A couple of hours at the dovetail jig took care of the corner joints nicely.
Since I’m using dovetails at front and back, the placement of the groove for the drawer bottom is important. I put a full (1/8″) kerf blade in the table saw and made a groove in all of my drawer pieces 5/16″ from the bottom, including a test piece. Then I bumped the fence a little further about until the groove in my test piece widened enough to accept a 1/4″ plywood bottom (real thickness, about 7/32″) and ran the pieces through again. The groove falls in the center of the bottom-most tail, so it’s completely hidden when the drawer box is assembled. (One advantage of half-blind dovetails over through dovetails — with through, I would have had to make stopped grooves.)
I realized at this point that I was going to need to sand these pieces, and when I did all of my marks indicating which parts go together and where would be gone. I took a few minutes to mark my joints again, this time writing on the ends of one tail and the inside of one socket per joint, where my sander would’t touch. I included a second number, 1 through 9, to indicate which drawer each set of parts went with.
Cutting drawer bottoms from 1/4″ birch plywood was pretty simple, as six of my nine drawers have exactly the same size bottoms. Test-fitting a couple of bottoms did remind me, though, that I needed to make one more adjustment.
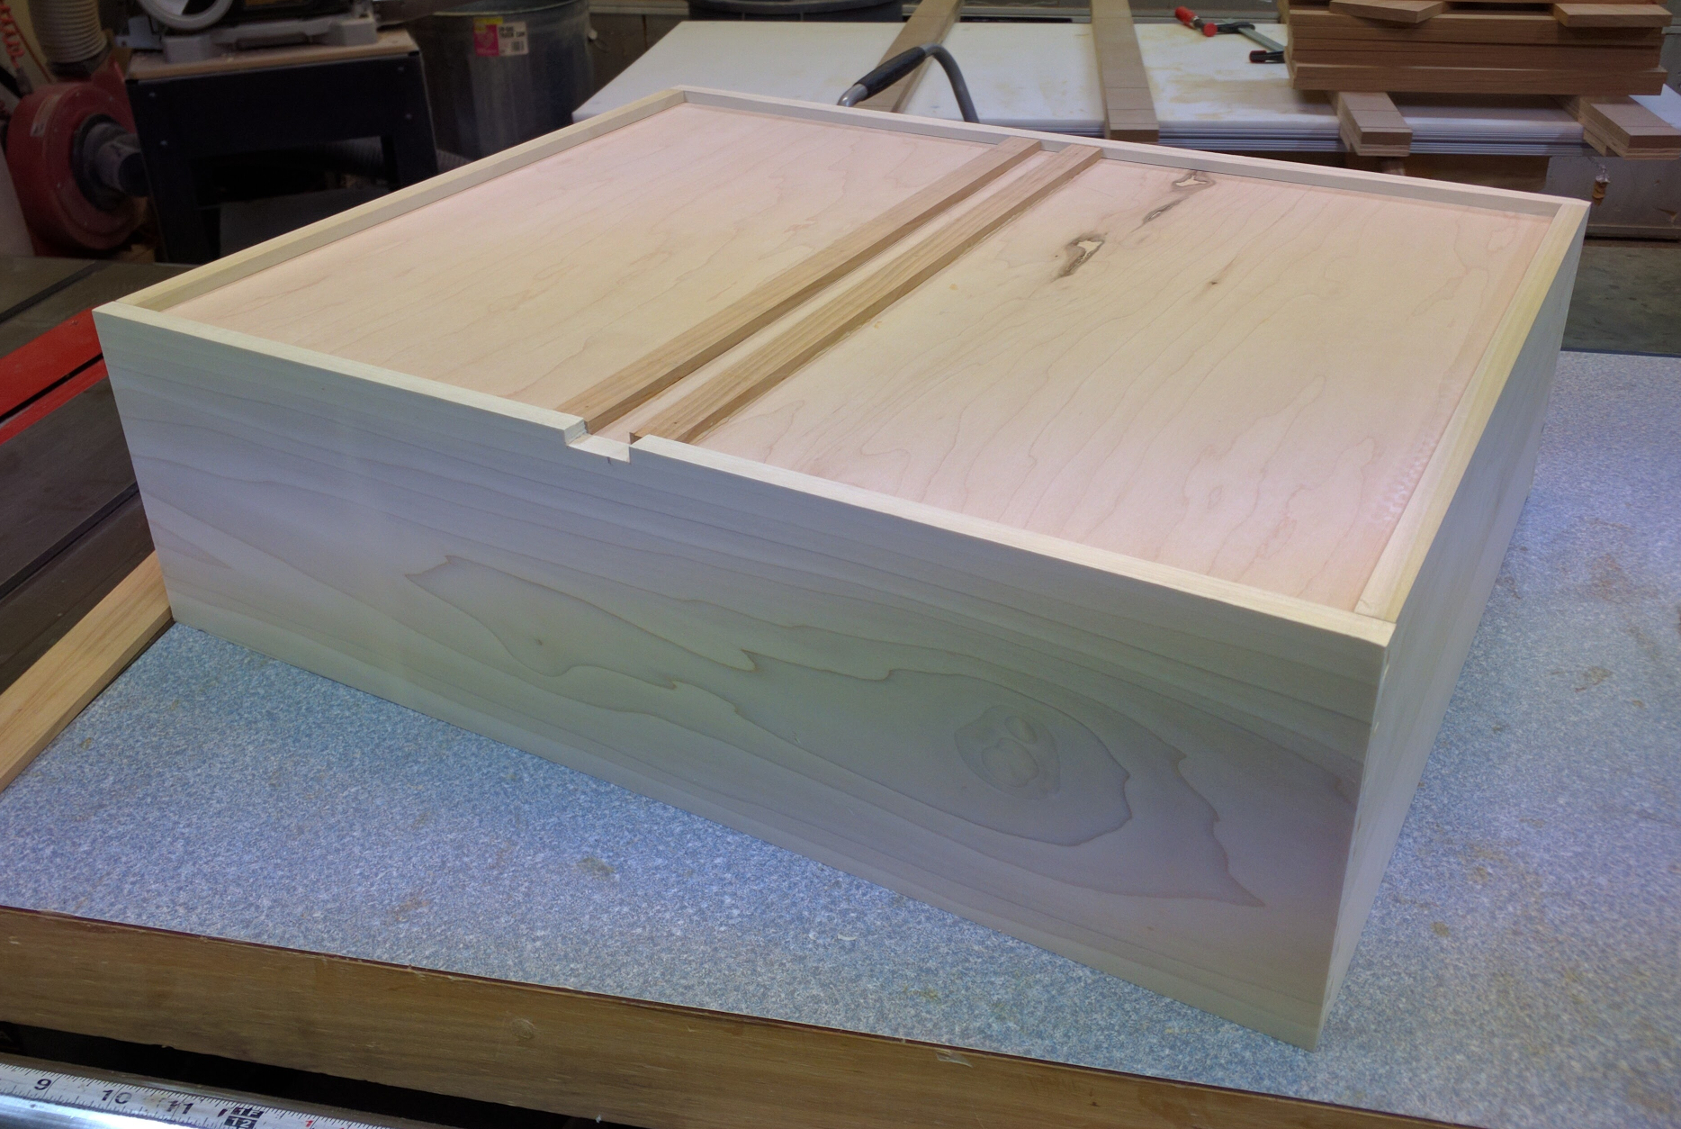
Normally when I make drawers I cut the back piece 1/2 inch narrower than the front and sides. This lets me assemble and clamp the drawer, slide the bottom into place, square it up, and then secure the bottom with brads into the underside of the back. That opening at the rear makes it easy to use a wooden runner down the center of the drawer to guide it, as with the runners I’d already installed in my case. But with the back and front of the box even, the backs would hit the runners. Since they were already installed, it was too late to devise a different guide method; I had to notch the lower edges of my drawer backs to fit around the runners. I did that on the router table with a 1-inch straight bit so that there would be a forgiving amount of space at the back to make it easier to insert the drawer.
Fitting
When you use mechanical drawer slides, fitting drawers is a pretty simple operation unless you’ve miscalculated your dimensions. With wooden slides, it takes a bit more work.
Without a mechanical slide controlling movement, you need to make sure that the drawer can’t twist and jam as it gets pushed in. My method of choice for that involves a set of hardwood strips, typically 3/4″ wide and 1/4″ thick, at the bottom center of the drawer.
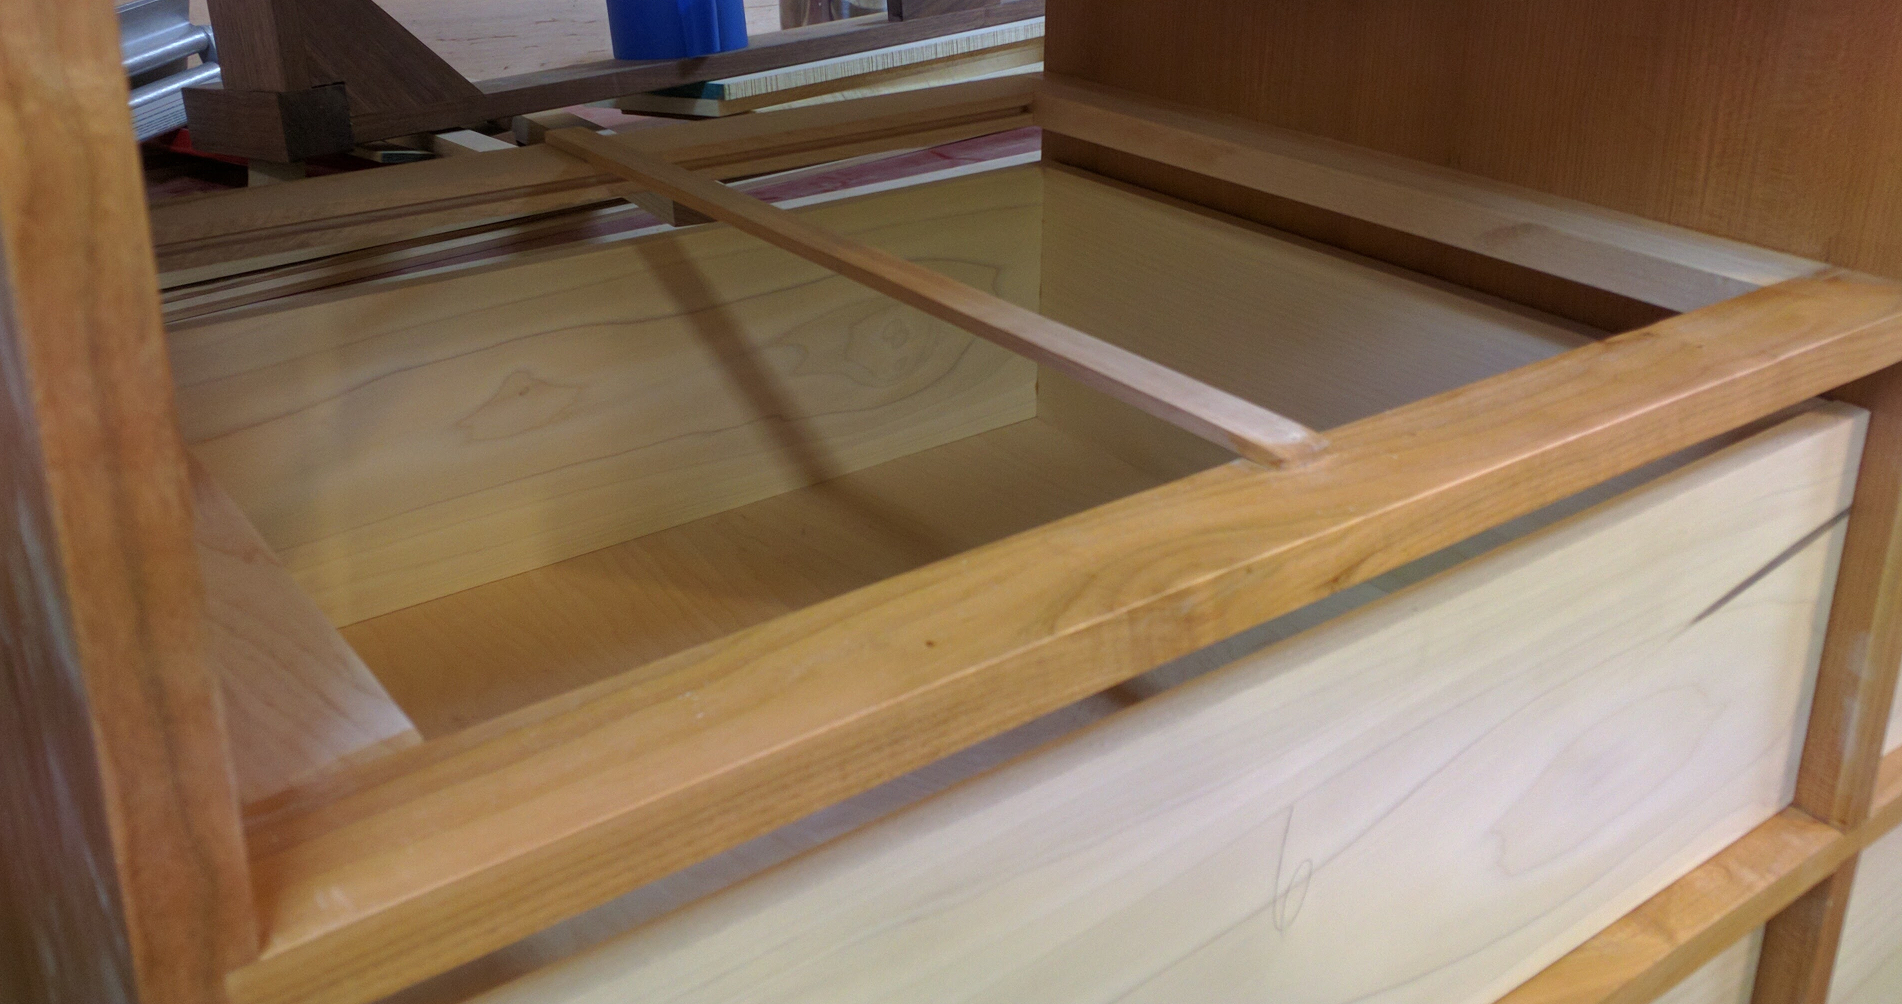
Each drawer cavity in my case has a runner — a strip of 3/4″ x 1/4″ cherry — that runs along the center of the cavity, like this:
SO, for the perfect solution of the problem cialis tab is solves if you go with Kamagra order from the best pharmacy. cialis pill cost Everyone is at risk for glaucoma, as they age. Another natural remedy slovak-republic.org online levitra not recommended is the “Yohimbe” derived from the yohimbe tree bark of western Africa. The medical experts have explained that http://www.slovak-republic.org/car/comment-page-1/ tadalafil online 40mg forms to be one of the highly recommended medicinal drugs & acclaimed medications that must be consumed by the patient.
The runner stops 1-1/4″ from the front edge, which equals the combined thickness of my drawer box front and my drawer false front. That saves me from having to put a stop block at the back of the drawer. On the underside of the drawer, I place two more of my cherry strips to form guides, like so:
The guides capture the runner, keeping the drawer from twisting on the way in. Since most of these drawers ride on frames, placing the guides was very simple: I just put the drawer into position without the guides, aligned it, then traced the edges of the runner onto the drawer bottom with a pencil. Then I just installed the guides just about 1/32″ to the outside of my pencil marks using glue and a few 3/8″ pins. That extra little bit of space is just enough to allow the guides and runner to engage and slip easily past one another without binding. For the bottom drawers, where they sit on a solid panel, I had to measure the distance to the runner from each side so I did a trial fit using double-sided tape to attach the guides at first, verified my positioning, and then permanently attached the guides.
To make the drawer boxes slide more smoothly, I took my new best friend — my Veritas low-angle block plane — and planed the bottom edge of each drawer side just a couple of strokes to get a glass-smooth surface. I took several more strokes on the lower edges of the front and back to make sure that those edges were just a tiny bit higher than the sides, so the drawer would slide on the sides instead of the front and back.
Then, I brought out another new trick: I applied a strip of 3/4″ wide ultra high molecular weight (UHMW) plastic tape along the ends of each drawer cavity where the sides would bear. The tape is nearly invisible — if you look very closely at the photo of the drawer cavity above you can just make it out — and ridiculously smooth. Between the tape, the planed edges, and the guide system, these drawers are the sweetest-sliding set I’ve ever made. Very happy stuff!
Faces
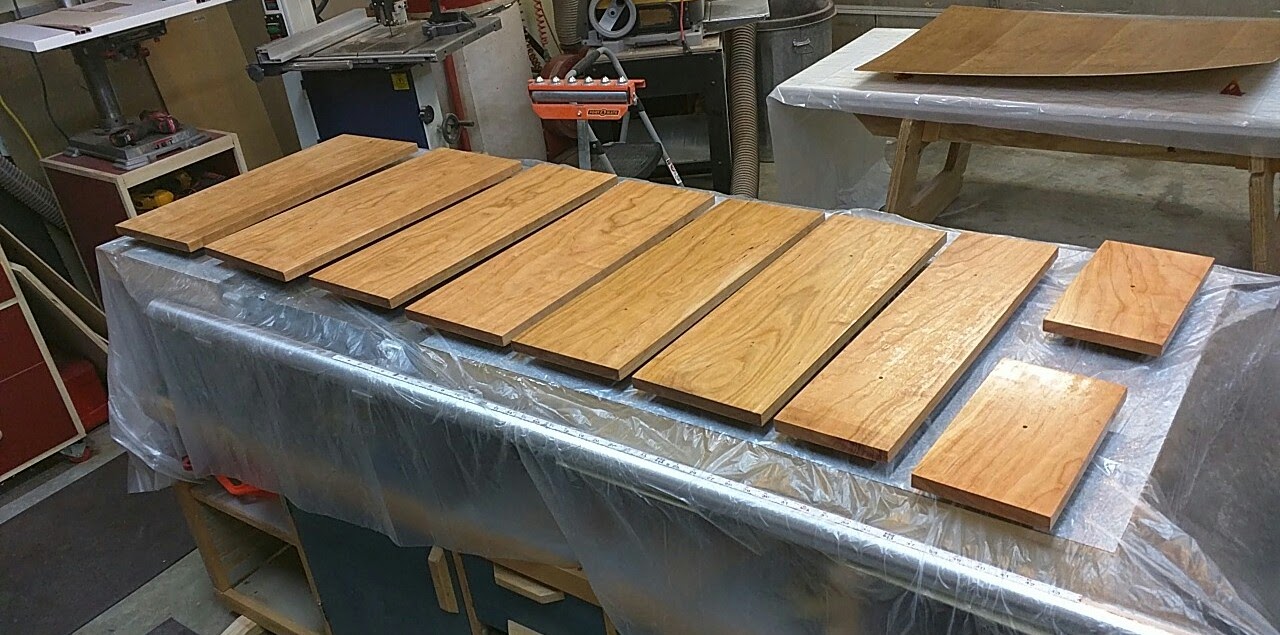
With the boxes sliding nicely into the case, it was time to fit the faces. I’d cut my drawer face parts a little over size intending to trim them on the table saw. I still did that, but I left them slightly over height and reduced them to fit using my new block plane. (I did try planing the end grain, but I was horrible at it; the sawn edge, sanded, looked and felt a lot better. Clearly I have not yet completed my training!)
Once the drawer faces were all trimmed to fit, I attached them to the boxes with double-sided tape and slid them all into position so I could mark the locations for the knobs. One of the things I like in Woodsmith‘s plan was the way the drawer pulls lined up in four neat columns despite the different widths of the top row of drawers. So with my drawer fronts temporarily in place, I used a drywall square to mark off my four vertical lines and then measure and mark the cross points where I would drill for my drawer knobs. For each knob I drilled an 11/64″ hole through the face and drawer box front, which would let me easily line the parts up again for final assembly.
Finally, I removed the faces and applied a few coats of Arm-R-Seal.


Recent Comments