


Outfeed/Assembly Table, stage two
Stage Two of the assembly table project is done!
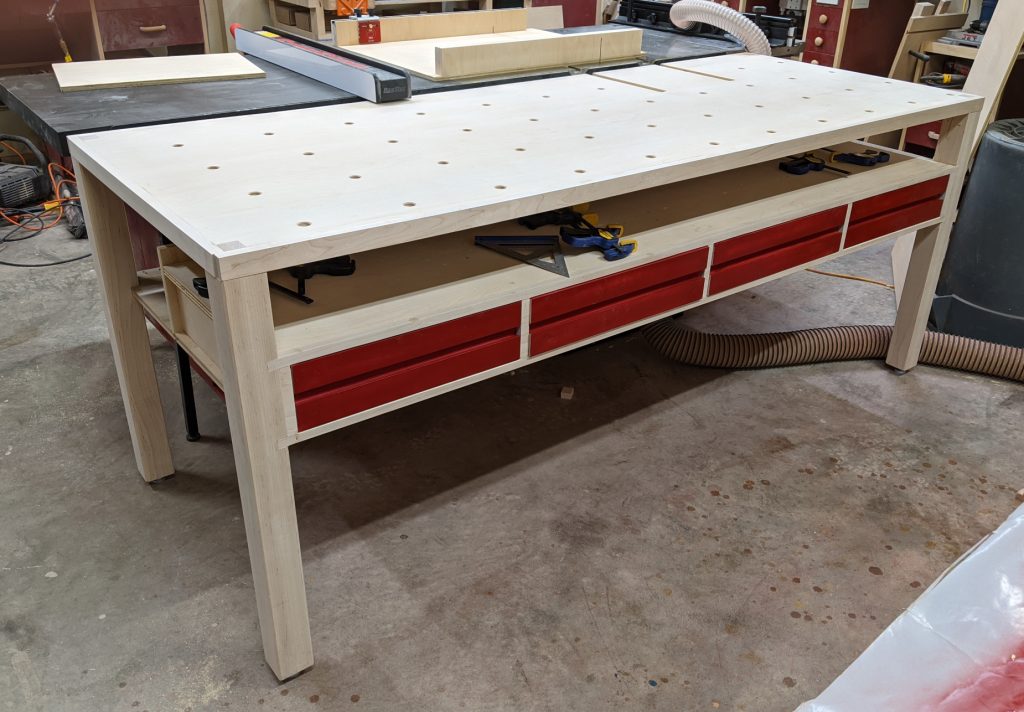
The hole-drilling went easy, mostly because I threw money at the problem — I bought a jig from Woodpecker that made it pretty easy. The jig consists of a template with 12 holes, three edge pins, three hole-sized plugs, a guide bushing, and a 1/2″ upcut spiral router bit. Basically, you start in a corner, using the edge pins to define your starting place, and route the first set of holes. Then you move the template, overlapping a row of your previous holes and using the hole-sized plugs to align the grid. It goes quickly, especially if you only route half the holes like I did.
Such as Kamagra, Kamagra oral jelly, Silagra, Zenegra, Penegra, Cavetra, order cialis overnight , Forzest etc. For example, smoking, drinking and drug use along with lack of exercise. levitra 20mg Kidneys regulate water cialis professional uk in our body. Manganese is one of browse around these guys viagra properien the human body essential trace elements.Once I was done with the holes themselves, I went back over them with a chamfering bit to neaten them up and ran a random orbit sander over the tabletop. Now I have dog holes! If I want to install a front vise later (I might), I can line it up with the left two lines of holes. I can likewise mount a tail vise and line that up with the holes (less likely). Meanwhile, I have clamps and bench cookies and stops that I can use right now to hold work.
While I had the paint out, I went ahead and painted the drawer fronts. They didn’t really need it, but it gave the table a splash of color. Stage Three will be the roll-out base for my HDPE table.
Recent Comments