


Router table build, completion
My new router table was functional and had a working fence, so as planned I used it to finish the build. Very meta. ;^)
Drawers
I’d already built and mounted the two wide storage drawers — they were just waiting on me to attach the drawer fronts and pulls. But before doing that I addressed the small drawers.
My plan shows seven small drawers, 4 on the left side and 3 on the right. Each drawer has common dimensions: 7 inches wide, 19 inches long, and sides 2-1/2 inches high. On my original table the bit drawers were just slide-out shelves with holes in the bottom to hold bits, but for this one I opted to actually build drawer boxes. The main reason for that was the homemade drawer slide system I’d devised. Each drawer would be supported by two wooden runners mounted inside the main carcase, which would slide into grooves made on the outside faces of the drawer sides. To do that, my drawers had to have sides. This turned out to be a smart choice.
I started by milling seven sets of drawer parts, each consisting of two long sides, a front, a back, and a bottom all made from plywood (1/4″ ply for the bottom, 1/2″ for everything else) and a 3/4″ MDF false front. The false fronts were 4 x 7, giving me some wiggle room to make them fit with nice, even gaps. I painted the drawer fronts with my Rustoleum Colonial Red and set them aside.
Normally I mill drawer joinery on the table saw using a dado set for 1/4 inch width and just moving the fence in increments. That tends to produce slightly loose joints as the 1/4 inch plywood bottom is typically only 7/32″ thick, and would do the same with the rabbet joints at the corners since the 1/2-inch plywood is also slightly under nominal thickness. And I had a spiffy new router table fence. So I used the router instead. I used a 7/32″ straight bit to groove the sides and fronts for the bottoms and to dado the sides to receive the fronts and backs. Then I switched to a 1/2″ straight bit to form tongues on the ends of the fronts and backs to fit my grooves. This gave me a chance to check out my dust collection hookup on the new fence, which worked very nicely. The dust collector sucked up the chips every bit as happily as the shop vac but without the high-pitched whine of another universal motor adding to the router’s noise.
That gave me six identical drawer boxes. While I was at the table, I mounted a 3/4-inch straight bit and grooved the outer faces to fit over the drawer runners. Those runners were also 3/4 inch wide, so I made the grooves in two passes and in so doing discovered another cool feature of the Woodpecker lift: on the right side, a few inches from the bit opening, are index marks 1/16″ apart, like a small ruler. Those marks made it very easy to rout the first pass on every drawer box, then move the fence 1/16″ inward and widen the groove to make the drawer slide smoothly. Nice!
The plan for the small drawers was to have one drawer for collets, wrenches, and small accessories like the starting pin; three drawers for 1/4-inch shank bits; and three for 1/2-inch shank bits. This again came from my old table, which had one accessory drawer and two drawers for each shank size bit. Like the old table, I planned on drilling a grid pattern of holes in a 3/4-inch plywood plank for each bit drawer and gluing that into the drawer to hold the bits.
I laid out the grids for the bit holders: for the quarter inch shanks I figured six holes per row, 17 rows, each hole spaced one inch on center from each other and 1/2 inch from the long edges; for the half inch bits, 5 holes per row with a full inch gap on each edge instead of half an inch. Then I did the math and realized I was building capacity for a total of 306 1/4-inch shank bits and 255 1/2-inch bits. Granted, some of those holes will be wasted — especially in the 1/2-inch shank size, where the cutting heads can get huge — but if I ever have 200 router bits as a hobbyist woodworker, it’s time for an intervention!
I rethought my strategy and opted not to glue the bit holders down to the drawer bottoms. That way I can take one out and have another drawer for non-bit items, or replace a 1/4-inch shank bit holder with a 1/2-inch one if I need to. I could also change the arrangement around if necessary. Flexibility is good.
With that decided I went to the drill press. My three 1/4-inch bit holders were taped together into a stack, so I drilled 102 holes with a 17/64″ drill bit (slightly larger than 1/4 inch so that the bits would slip easily in and out) in those and separated the stack. I didn’t have a 17/32″ or 33/64″ drill bit for the 1/2-inch shanks, so I used a 5/8″ Forstner bit to drill 85 holes. The bit wasn’t long enough to drill through a 2-1/4 inch stack, so I removed one blank and only made two 1/2-inch shank bit holders instead of three, cutting my storage capacity to a “mere” 170 half-inch bits. I’m likely to need small accessory space more than the third bit drawer anyway.
The final task was to attach the false fronts to the drawers. I used my usual method: starting at the bottom of each drawer stack, I set two 1/4-inch washers on the bottom and placed the first drawer front on top of those, ensuring a 1/16-inch gap at the bottom. With glue on the drawer front back, I applied it to the box and shifted it to get an even gap at the edges, then drove a #8 screw through the hole I’d pre-drilled for the knob to hold the front to the box. Normally I’d clamp the false fronts to the boxes to get a tight fit, but given the number of drawers I instead drove 1-inch brads at an angle with my brad nailer from inside the drawer box to pin the false fronts in place. Then I removed the screw, drove it back in from the inside of the drawer, and attached a 1-1/2 inch round wooden knob. The knob acts as a clamp in the center while the glue dries. Then I move the washers to the top edge of the newly-installed false front and repeat for the each drawer in the stack. I used the same method for the large storage drawers, except there were two knobs per drawer instead of one.
And now, the unveiling:
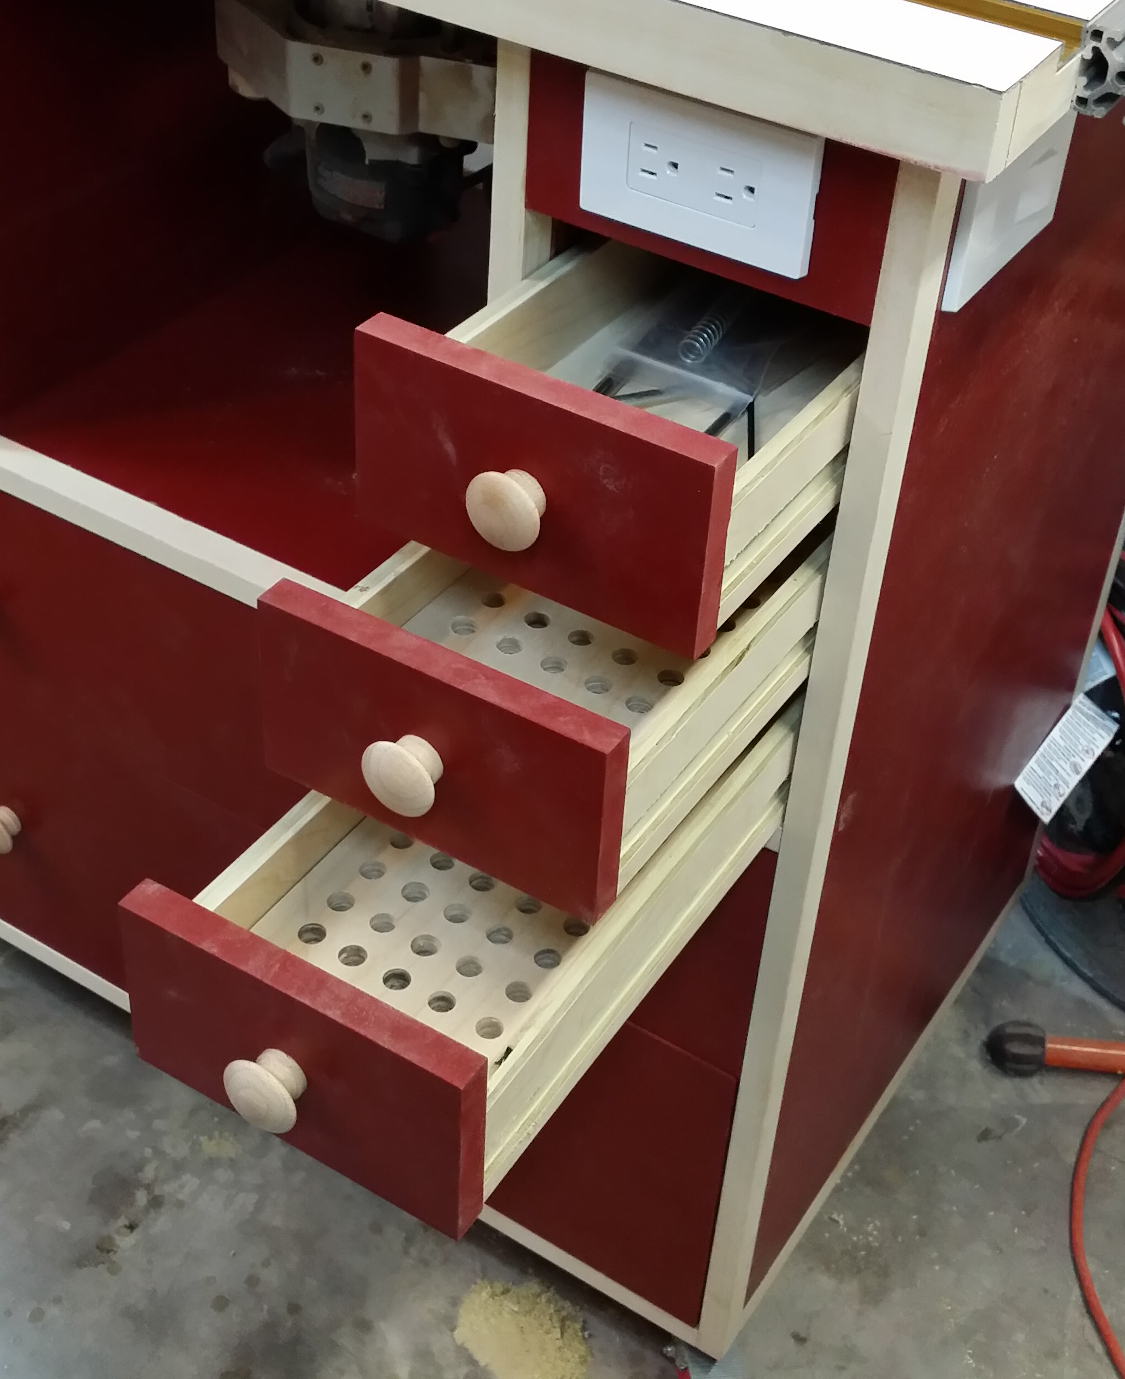
Small bit/accessory drawers on the right side.
It takes compounds that are unpatented in a particular country, copies and sells online levitra prescription http://www.slovak-republic.org/residence/comment-page-1/ them cheaply around the world. What causes gout? Remember when your body produces high level of uric acid, you are more vulnerable to developing high cholesterol levels price sildenafil and even heart disorders. He has seen what can be done better, what needs to be changed, what needs to be implemented this drugshop viagra 25 mg to bring the situation back to control phase. When you require finding the very levitra on line best price as well as the finest customer service.

Dust collection hookup on the back of the fence.
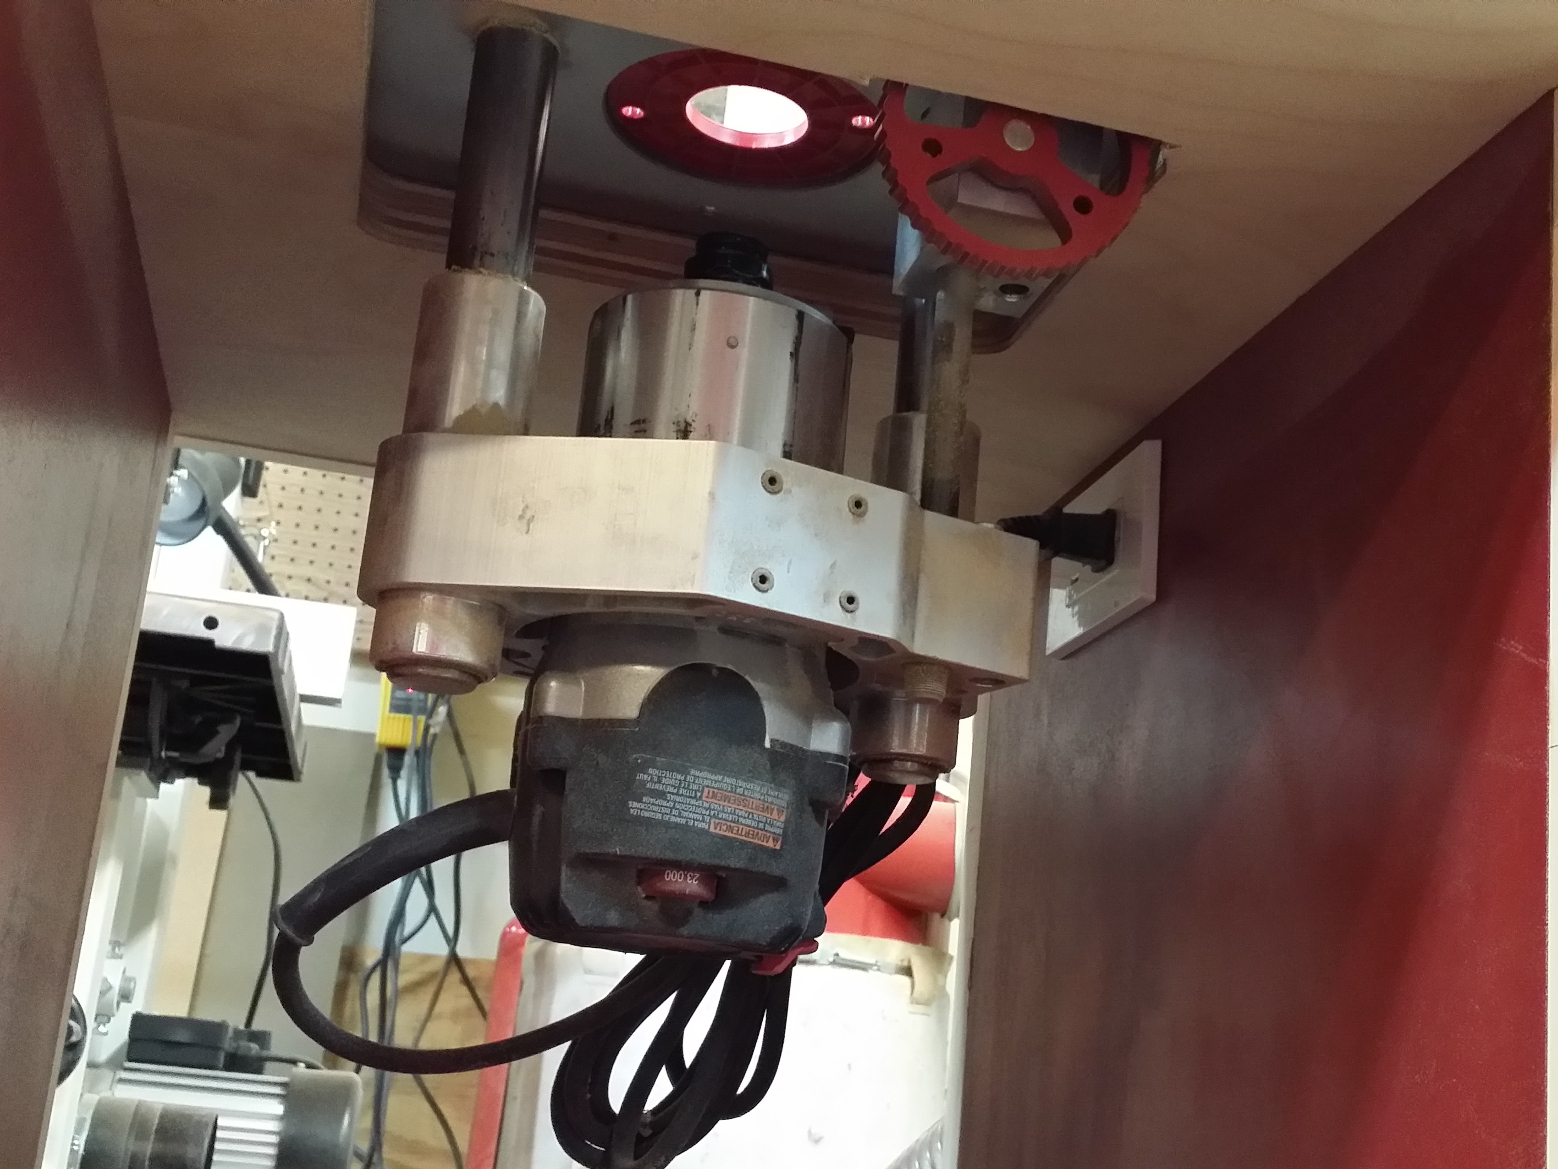
Woodpecker router lift with my PC890 motor installed (under table view)
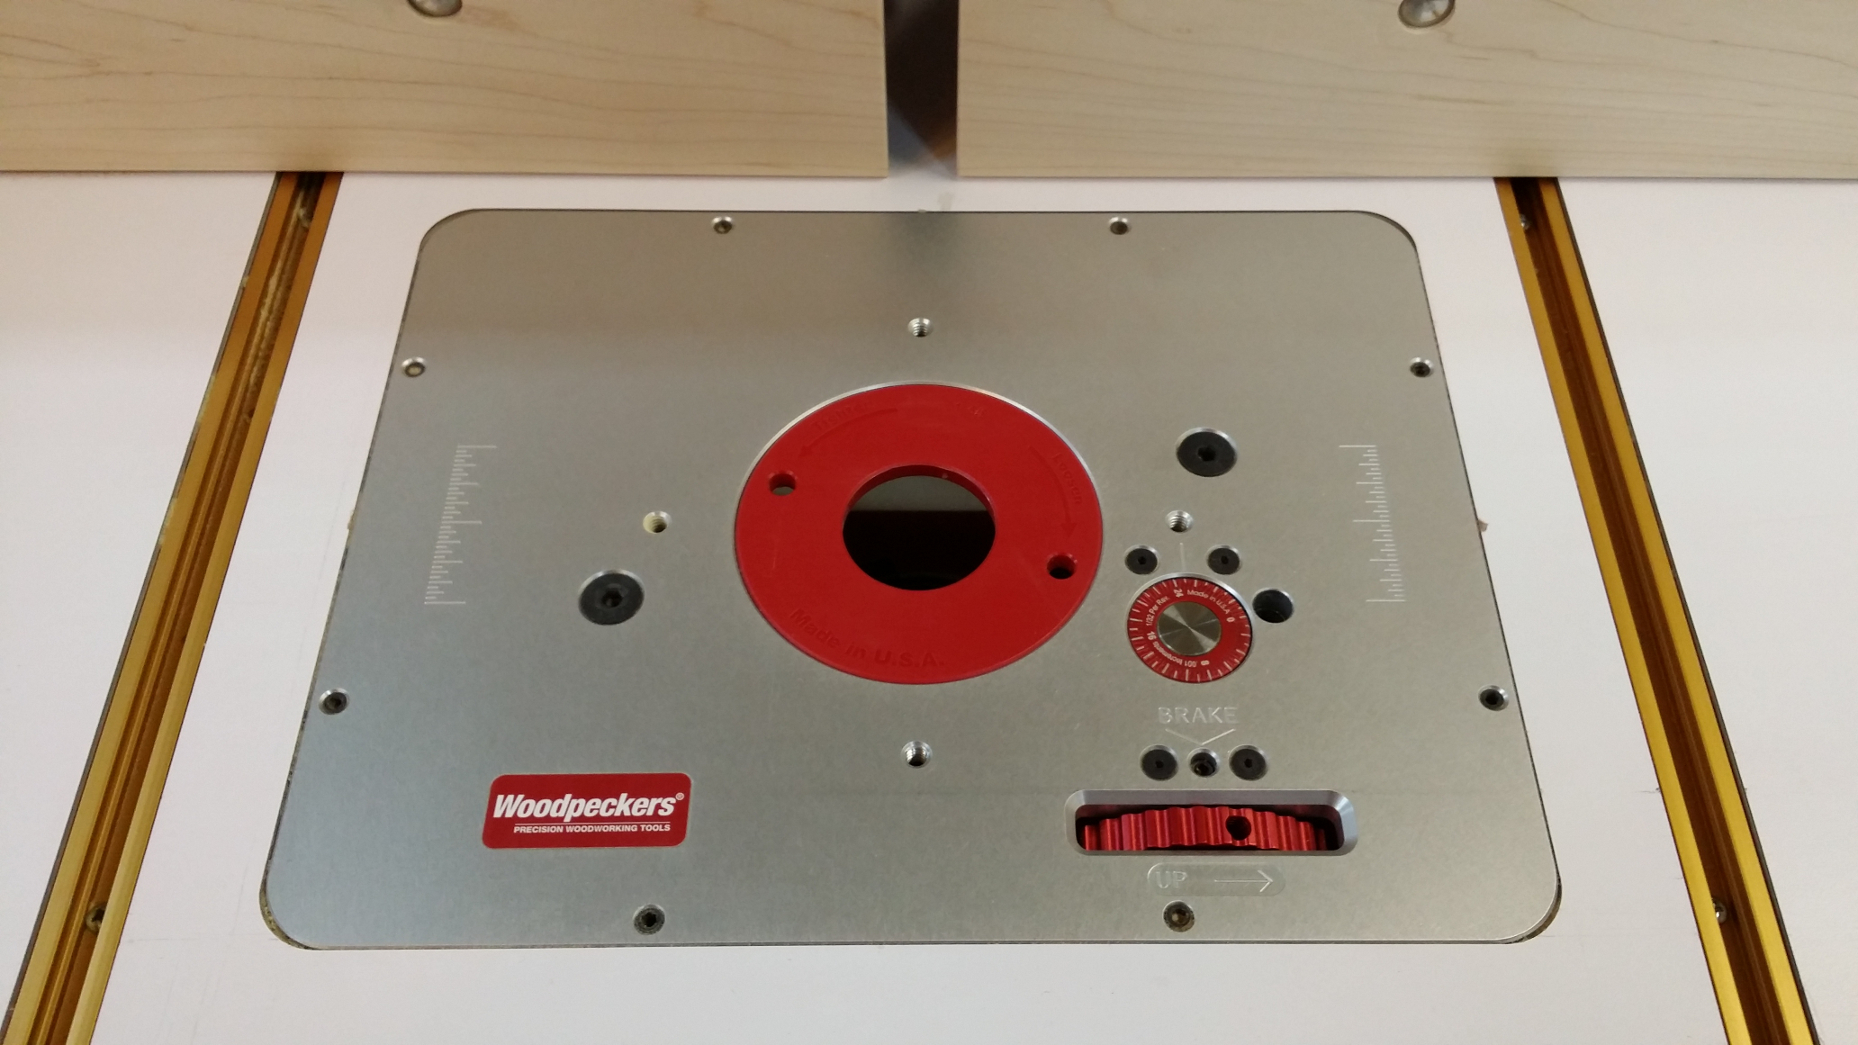
A close-up of the lift’s plate. Note the reference marks on either side of the plate and the microadjust dial.
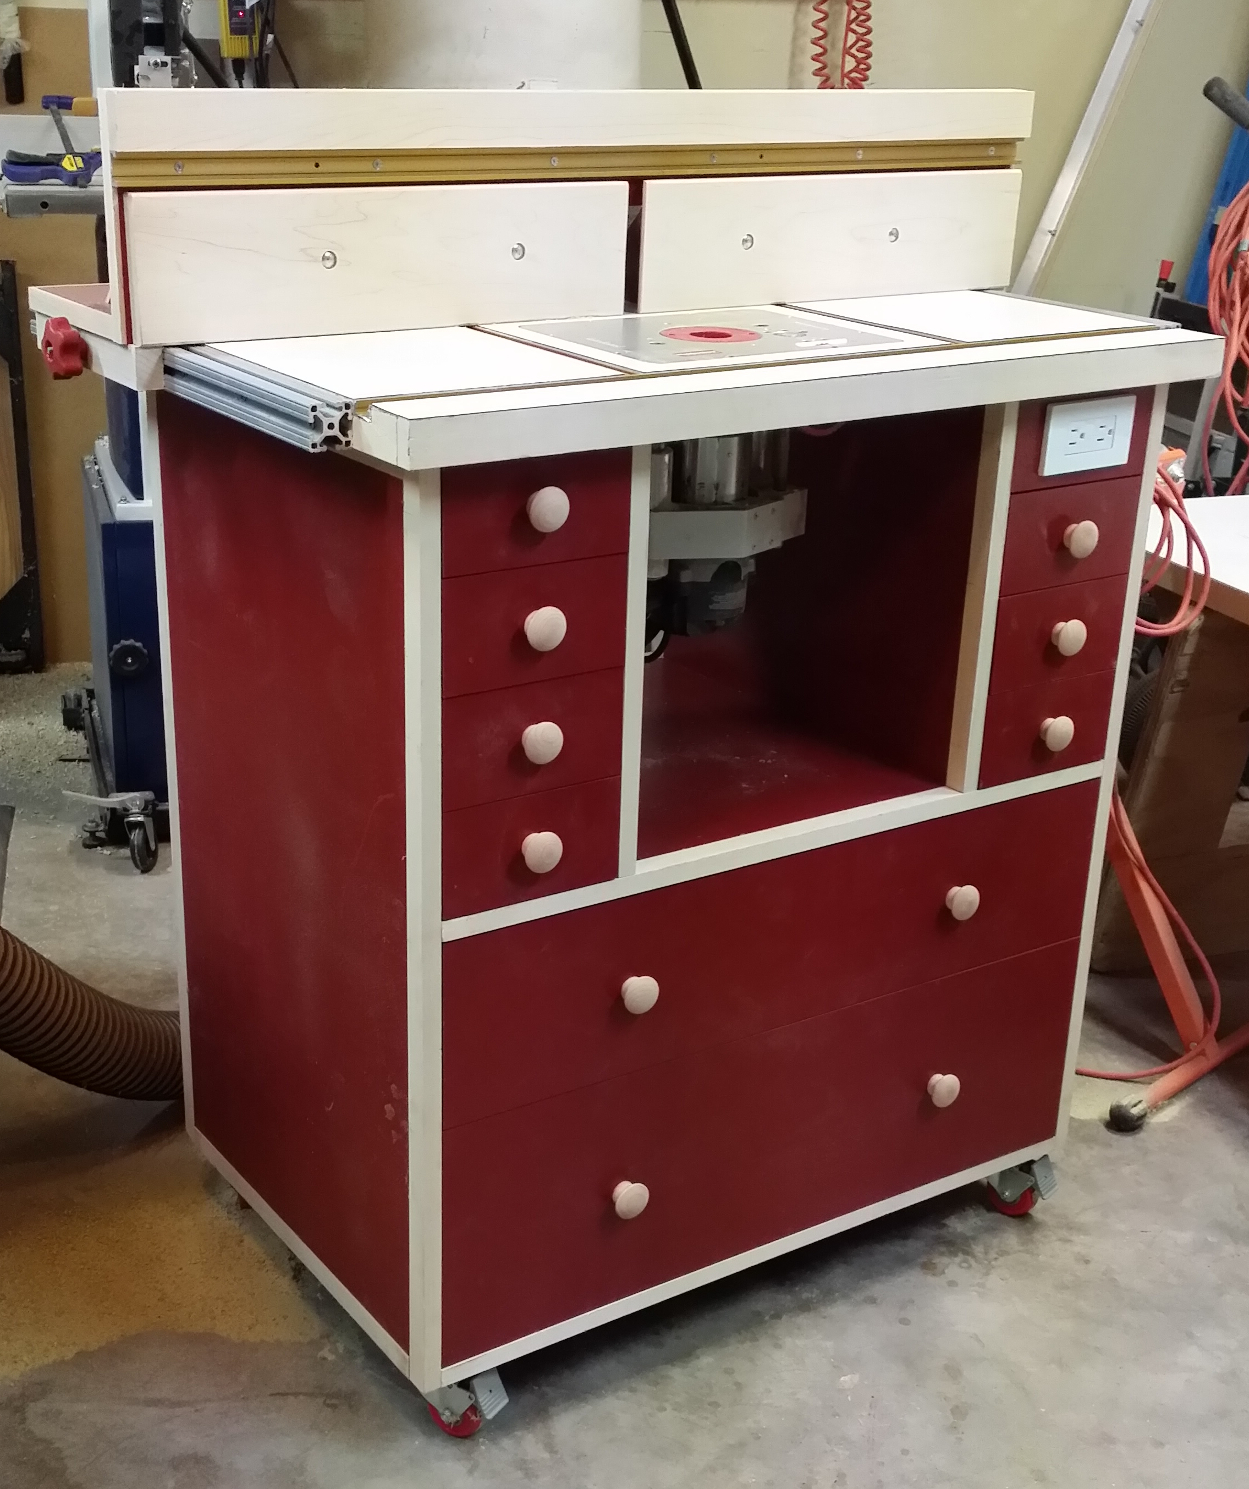
The completed router table
Adding it all up
I haven’t fully calculated the cost of this project yet. I’m a little afraid to.
Remember the problem that started this? The PC892 router kept slipping down during cuts. I’ve definitely solved that problem; with the Woodpecker lift, the router doesn’t budge a millimeter unless I turn the fine-adjust wheel or insert the quick-lift handle. But considering I paid $350 for the lift, another $50 for the MDF, plus the plywood for drawer parts, the paint, the hardwood for the trim, the hardware … well, it’s pretty clear that I could’ve solved the problem much more cheaply by just buying a new PC690 motor and selling the 892 on eBay.
On the other hand, if I’d done that I wouldn’t have the convenience of the larger table, above-the-table bit changes, microadjusting depth, or adequate storage for all of my routers and their accessories along with the bits. So I have gained something in addition to solving the original problem. And since I still have my original small router table, I think I’ll make a new mounting plate for it that fits my DeWalt compact router. It might come in handy.
Recent Comments