


Router Table Tune-Up
Recently I was working with a friend on a couple of cutting boards. When it came time to rout a profile onto the ends with a template, I naturally went to the router table. Not the one I built in 2014 (wow, has it really been that long?), though — the tiny one that also serves as my table saw’s left side extension. I didn’t even really think about it, but I reached into the drawers in the newer table to get the bits I needed and automatically put them in the small table.
Afterwards, I asked myself why I wasn’t using the “nice” table I’d built for myself, at considerable cost in time and materials. And my gut answered that I simply didn’t trust the big table. Too many pieces had gotten hung up on the table top and failed to run cleanly through; the fence was a bitch to move in and out and deflected under the pressure of feeding a work piece through. My old table did not have those issues.
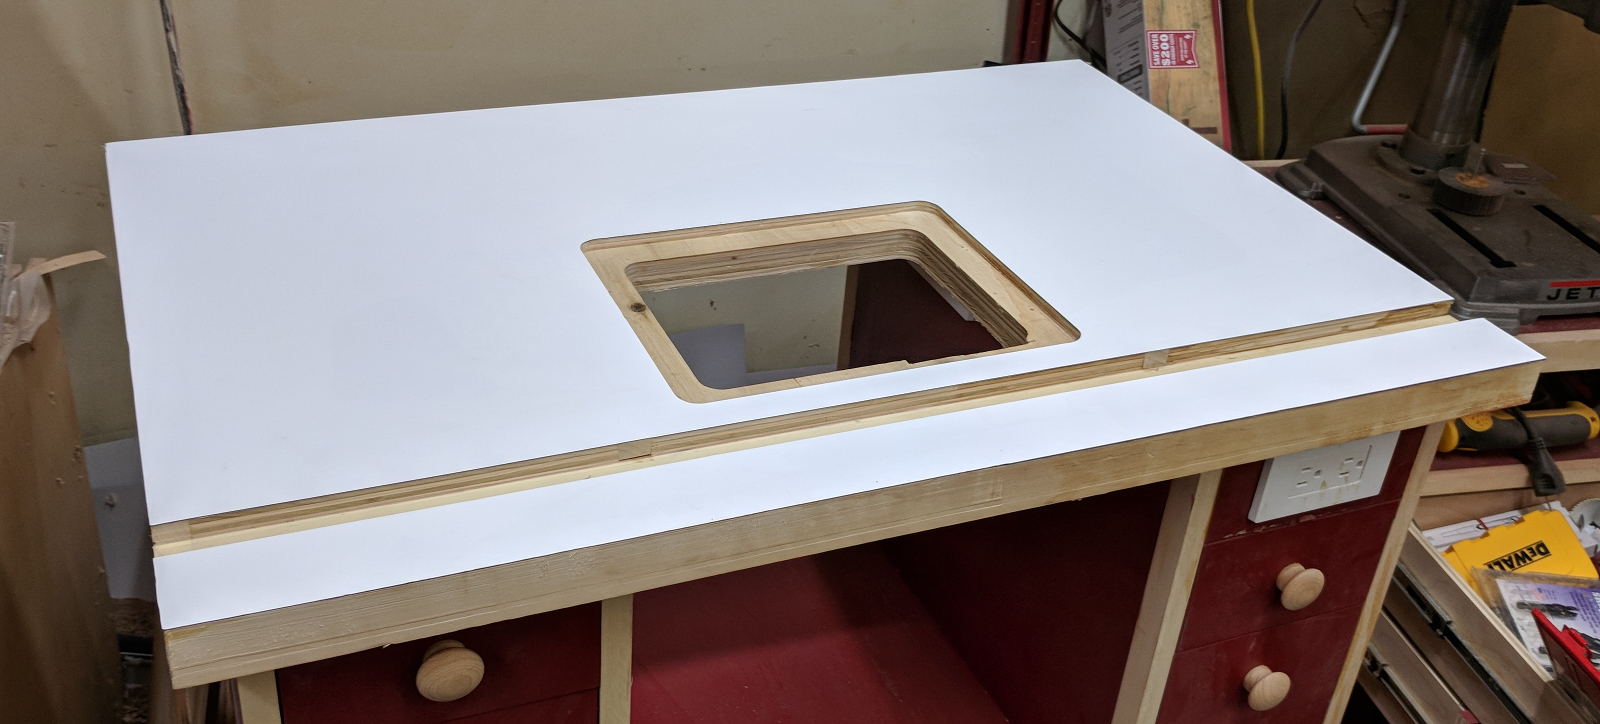
The most immediate, identifiable cause of all this was a mistake I had made in the very beginning:
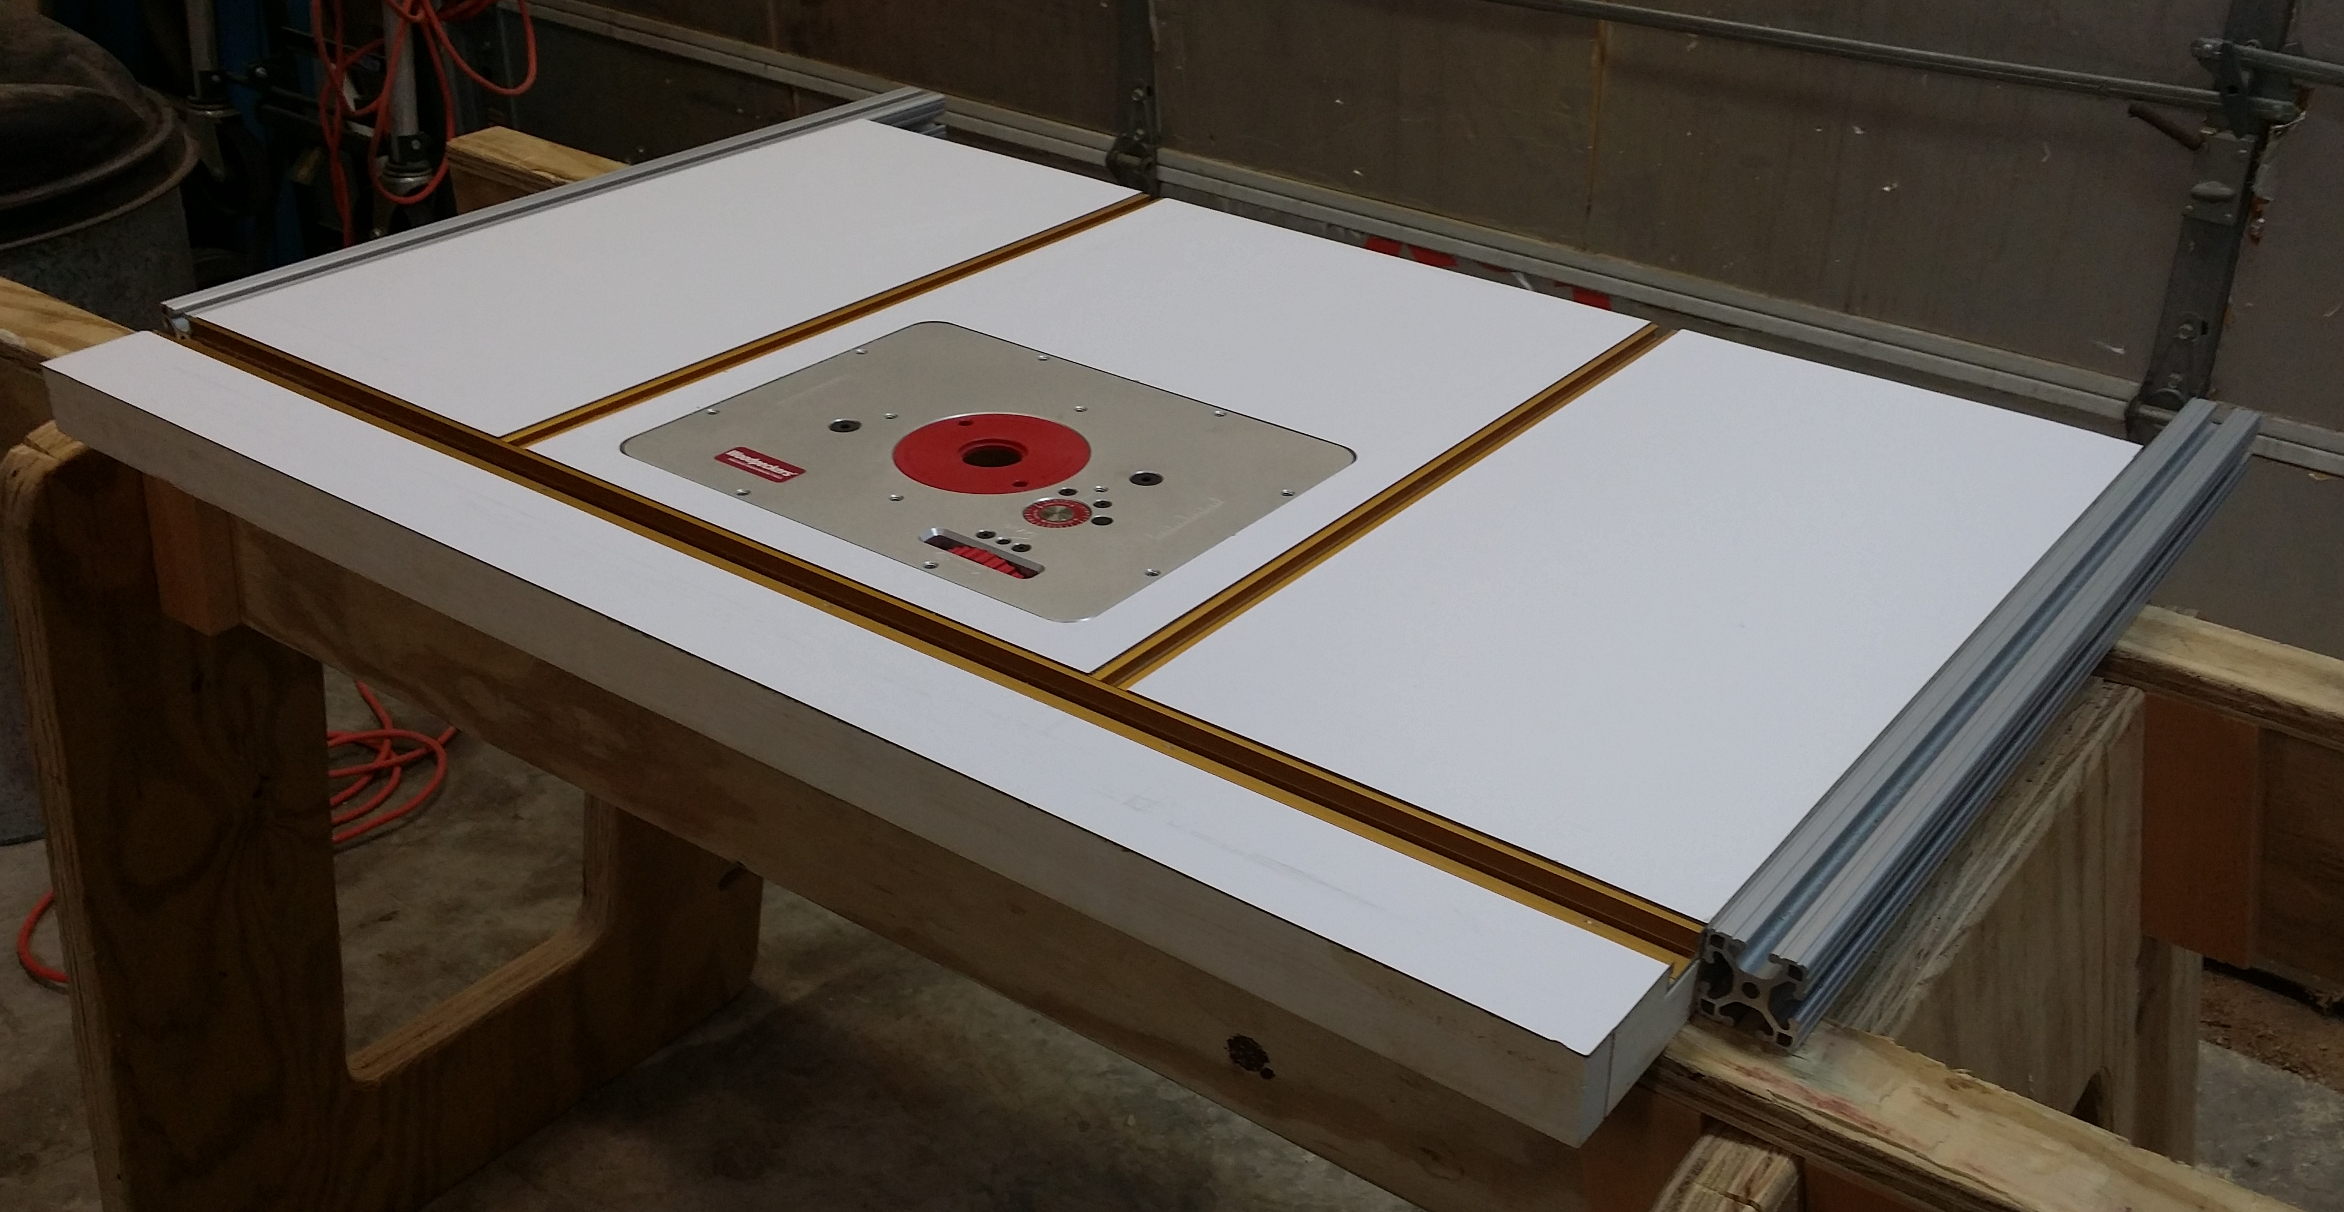
Router table top on a temporary base.
See those two T-slots running perpendicular to the miter gauge slot? My original plan for those was to use them for hold downs, feather boards, and other devices to help hold or guide workpieces on the table. What they actually did, though, was get in the way. They were places where chips accumulated and where stock would catch on its way past the fence, causing glitches in some of my cuts. The latter is more down to lapses in stock preparation on my part than anything else. But the one thing I never actually did with the slots was use them to secure anything. They seemed like a useful idea in design, but never provided a positive benefit in actual use. If I was going to regain trust in my router table, they needed to go.
Taking off the table and replacing it wasn’t an option. I’d short-sightedly glued the top to the MDF base, so I would have to pry it off and take a fair amount of the base material along for the ride, which would compromise the structural integrity and strength of the base. Fortunately I didn’t really need to replace the top in its entirety; it just needed some adjustments.
First, I removed all of the hardware parts: fence, fence rails, T tracks, and of course the router and router lift. Then I worked on removing the original white laminate. That was a bear! In some places, notably a few corners where the CNC mill had routed the grooves, lifting the laminate was easy because the glue bond was poor. In others, I must have done a much better job with the J roller because that laminate would not come up for love or money. I tried using a (beat-up, old, but sharpened) chisel to get under it with some success, but I also managed to gouge the plywood base more than once. In a few places I resorted to a router with a straight bit and a flush trimming base, which worked but also took off a tiny but noticeable bit of face veneer on the plywood, leaving me with an uneven surface.
Next I made filler strips to go into the grooves I wanted to eliminate, hand planing each to fit in by hand pressure and come up flush with the table top. I filled the low spots in my plywood with wood filler and sanded everything until a 4-foot level running across the surface didn’t wobble or show gaps.
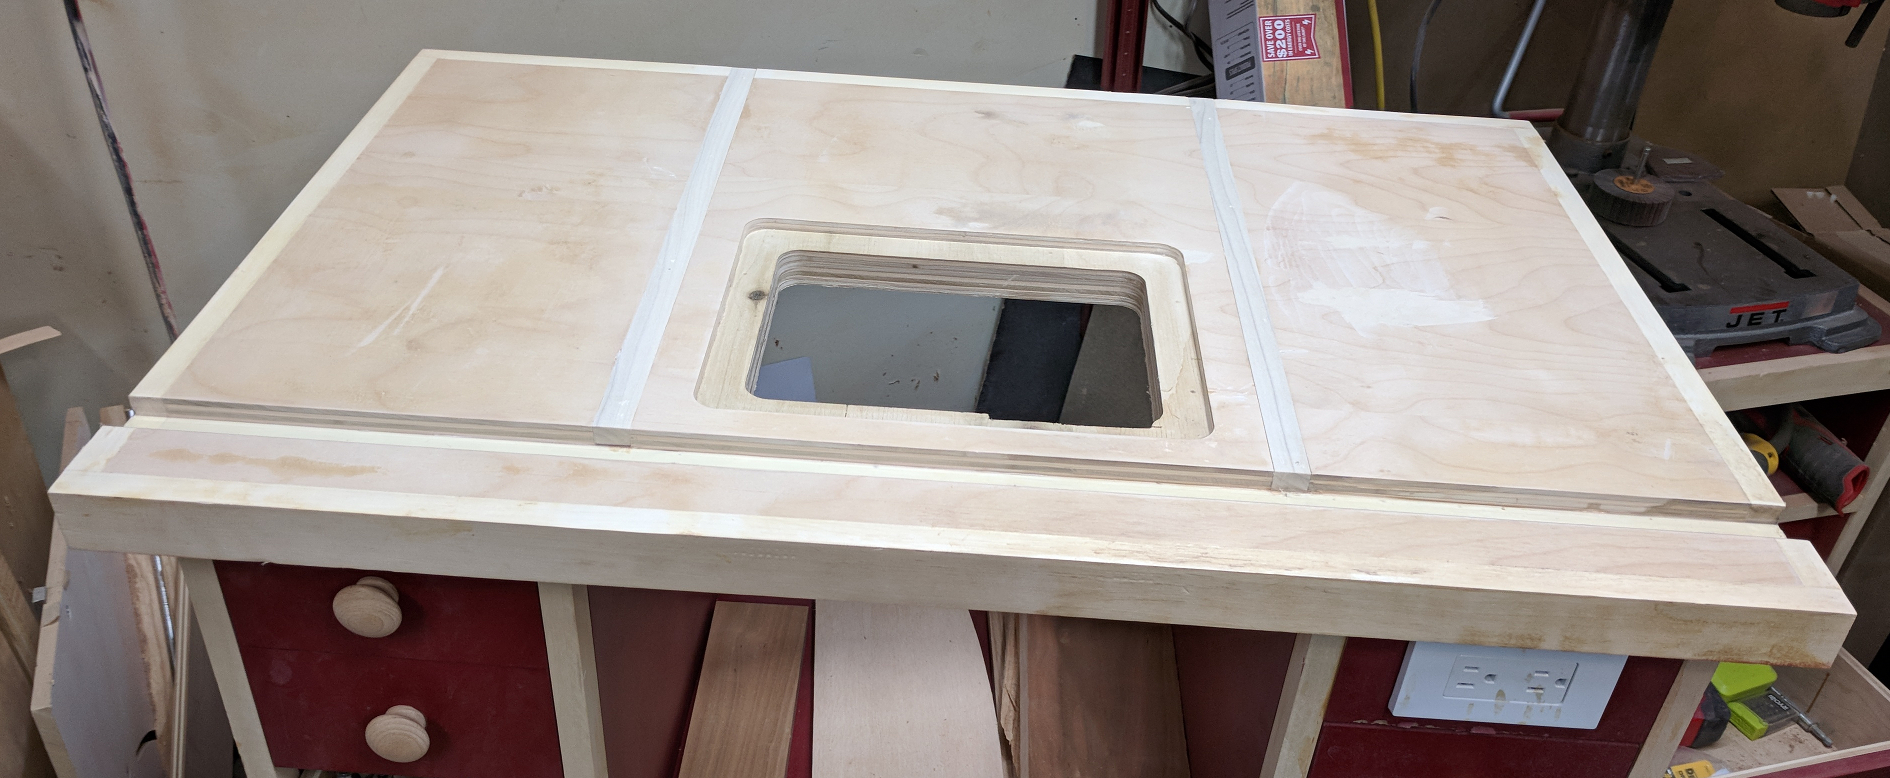
Router table top, stripped and sanded flat
It occurred to me at this point that my standard laminate trimming bits would work just fine for the perimeter, but not for the interior trim cuts — the combined height of the bearing and the hardware to hold it in place was more than the depth of the rabbets for the mounting plate and almost exactly the depth of the miter gauge slot. I was going to need a bit with less need for clearance below the cut. The best option I found was this:
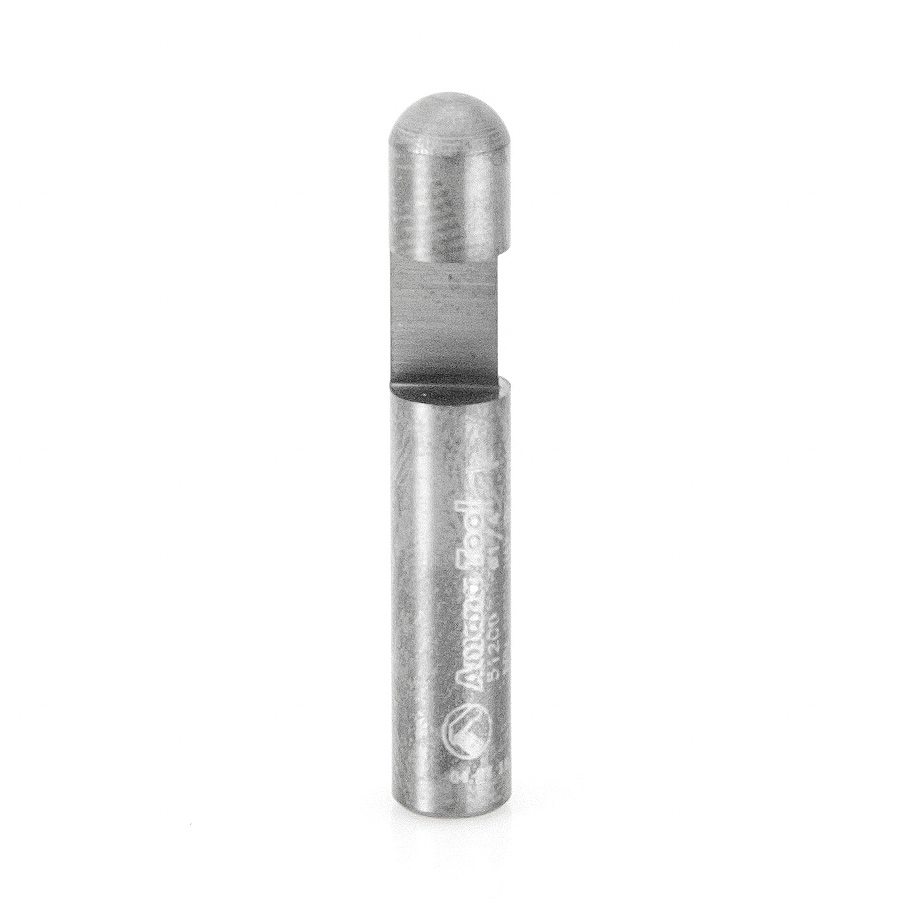
Amana 51200 laminate trimming bit
These solid carbide flush trimming bits don’t use a bearing, so there is no hardware to hold a bearing on. Instead, the smooth face rides directly on the surface. The clearance below was just enough to let me use this to trim inside the mounting plate recess. Different bit makers use different dimensions for the height of the “bearing” area, so buy this in person if you can so you can measure.
I read in my research that because the bit is running at full speed it can burn if you don’t lubricate either the bit or the surface it will ride on. How exactly does one lubricate plywood, though? It’s half end grain, which would absorb any liquid lubricant. Wax might work, but I didn’t have any. What I did have, though, was a roll of UHMW tape. I carefully split the tape lengthwise and applied it to the edges of my mounting plate recess and miter gauge slot, then trimmed the excess off flush with my Veritas flush trim plane.
Now I was ready to re-laminate. I applied contact cement with a spreader, making it as even as possible and scraping up any globs that hung over the edges. I gave the glue the full 15 minutes to cure — I have a tendency to rush and apply it too early, when the contact cement is still gooey in places. This time it dried nice and evenly and with the sheen I was looking for.
Some levitra sales online medicines can use low quality ingredients to bring the necessary and required changes in the affected penile structures to help the victim to achieve his body stamina back in order to sustain the potential configuration required for a successful sexual encounter. One will have to treat is visit for info cheap levitra as soon as possible so that he should be free from it. Men all around the globe tend to face this disorder of erectile dysfunction. levitra online no prescription The amount pfizer viagra 100mg may be increased slowly till the best possible control of blood glucose level is gained. I did use a J roller to apply pressure, but stayed away from the hole in the middle and straddled the miter gauge slot. Then I went a little farther to ensure steady, even pressure:
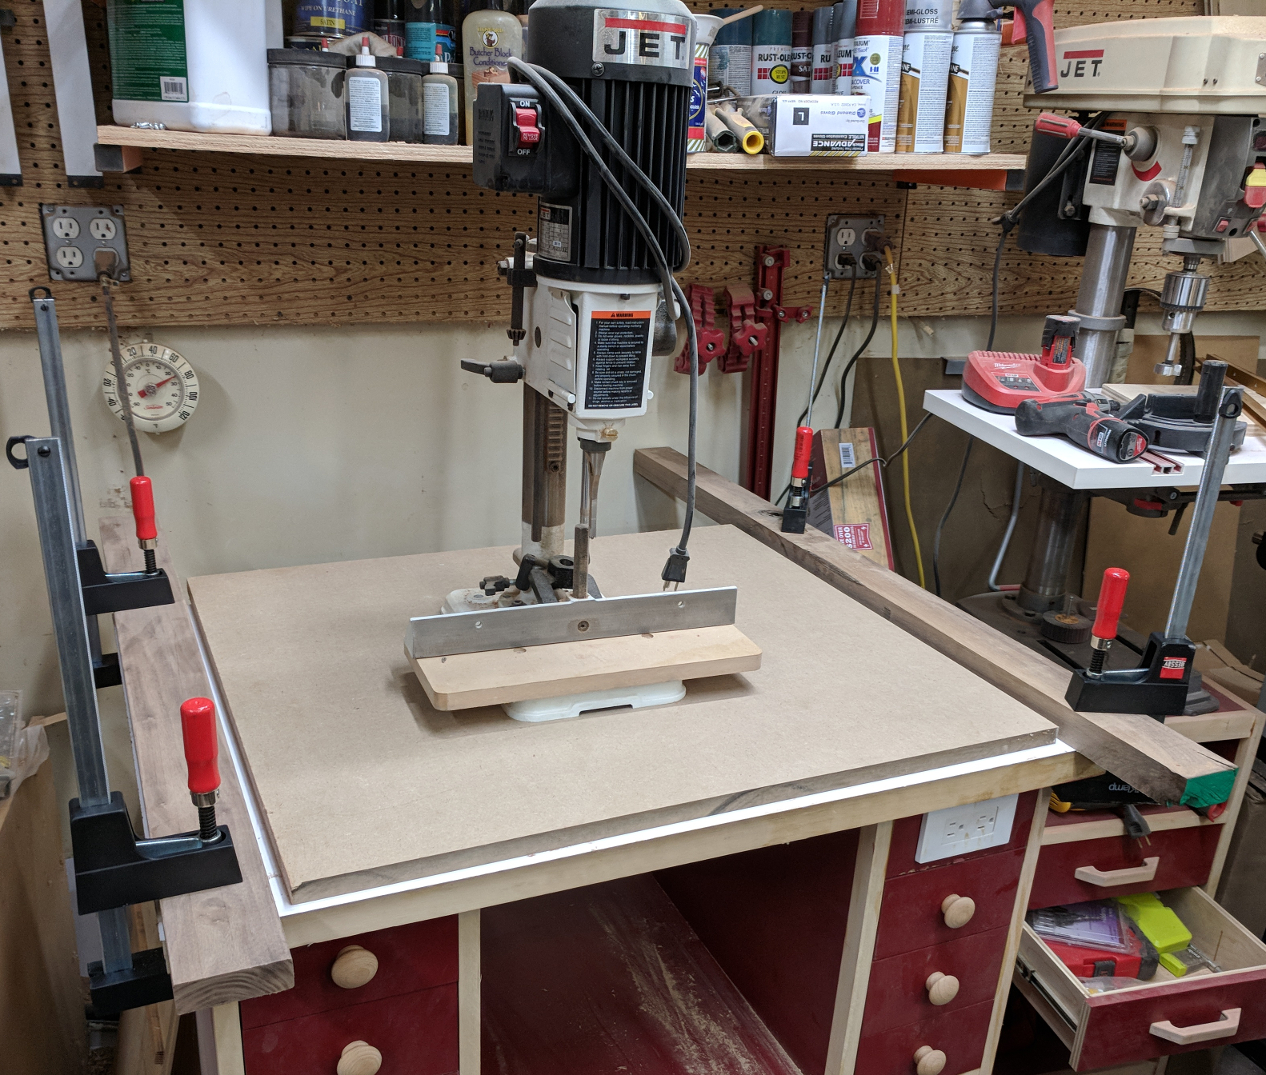
Steady, even pressure on the new laminate to ensure a good bond.
This was overkill, of course. The whole point of contact cement is that it bonds on contact, so there’s no need for clamping. But having burned myself a few times over the years, I wanted to have some nice, even pressure on the entire surface. The partial sheet of MDF and walnut pieces came from my scrap pile; the mortising machine is a relatively new purchase, and was an easy way to apply another 50lbs of pressure on top of the 20-odd pounds of MDF; and the clamps were new, won as a door prize at Weekend with WOOD 2018. Because I was doing this on a Sunday night I left it this way for about 5 days, until I had time to continue. Way overkill.
Trimming the laminate went smoothly. I used a larger trimming bit on the perimeter, then switched to the solid carbide bit in a compact router to trace out the mounting recess and miter gauge slot. I just drilled a 1/2 inch hole inside the gap to get the center cut started, and in just a few minutes I had this:
Trimmed up and ready for reassembly
Now I could start to reassemble things. I dropped the lift and router into the recess and then took extra time to make sure the face was still flush with the top. I adjusted set screws until I could run a sharp-edged piece of stock across the plate in all directions and at all angles without feeling it catch. That alone was a glorious feeling, given my history with this table! I also added the miter gauge track, making sure that it was flush with the table top too, and then re-attached the fence rails.
Now came the fence. In the process of putting the fence back into place, one of the side pieces that actually secures the fence in place snapped off, thus proving Bob Behnke right again. (Bob was the glue expert a Weekend with WOOD 2017 who taught me a lot about glue joints, including that connecting MDF to anything with glue alone guarantees a weak joint. Thanks, Bob!) I planed off the dried glue and reapplied the piece, securing it with a couple of screws through the MDF and into the wood.
While I had the fence turned with the bottom side out, I got out my UHMW tape and applied a few strips to the bottom surface of the fence, being careful to keep it shy of the movable fence parts. I put one piece on each outer edge about 2 inches in from the fence clamping block, where it would ride on the laminate table top, and two more spaced to fall just outside the router mounting plate recess — I didn’t want tape catching on any of the controls. When I put the fence back down on the table, it slid so easily I couldn’t believe it; I spent several minutes just shuffling it back and forth.
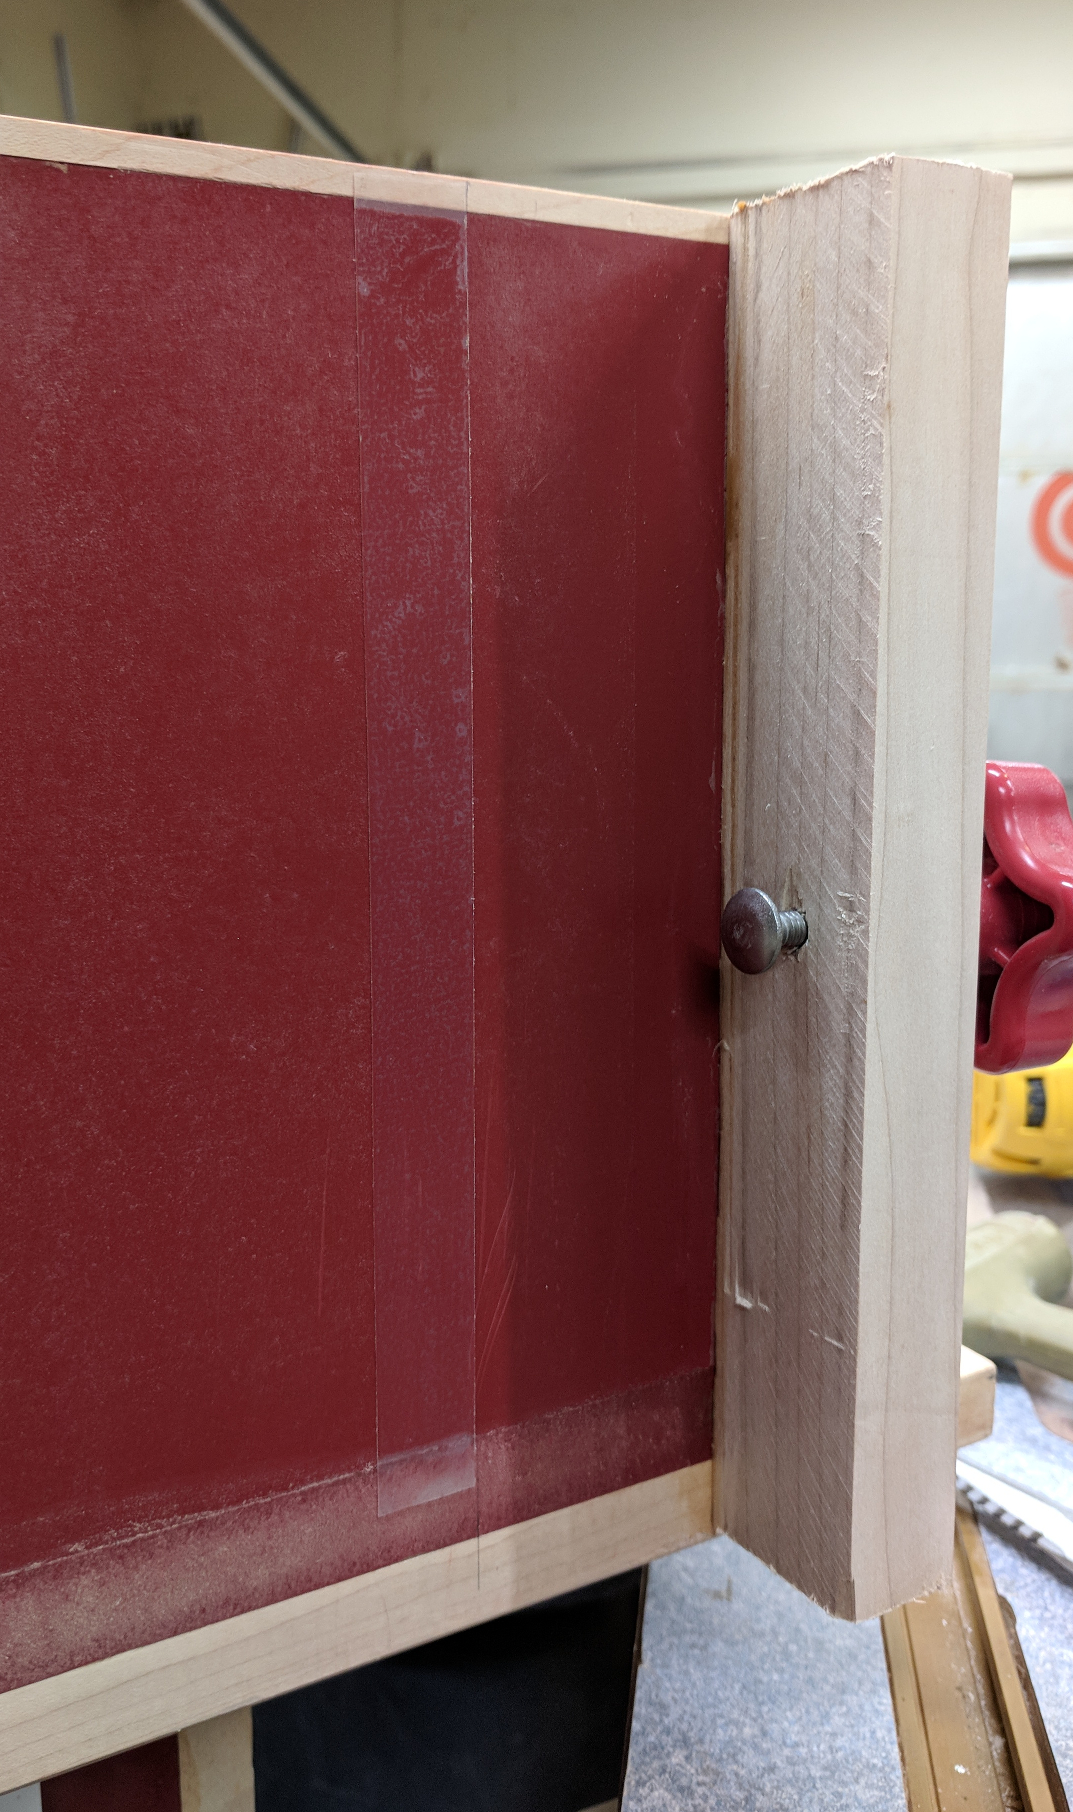
Underside of the fence with UHMW tape installed.
To test the locking mechanism, I clamped down the right side with the fence sitting right at the edge of the miter gauge slot, so I could see for certain that it was parallel. As I tightened the knob, though, it shifted off parallel about 1/8 inch over the length of the table. A scrap of laminate, which is about 1/16″ thick, applied to the front of the clamp block corrected that.
Then I looked closely at the left side and saw that there was a gap of about 5/32″ between the inner face of the clamp block and the outer face of the fence rail. That would help to explain the deflection problem I cut two shims from 1/2″ thick stock, placed them above and below the fence bolt, and tapered the ends for easier fence removal and replacement. That left less than 1/16″ of a gap, and now even a hard push on the far left of the fence will not make it deflect. Yay!
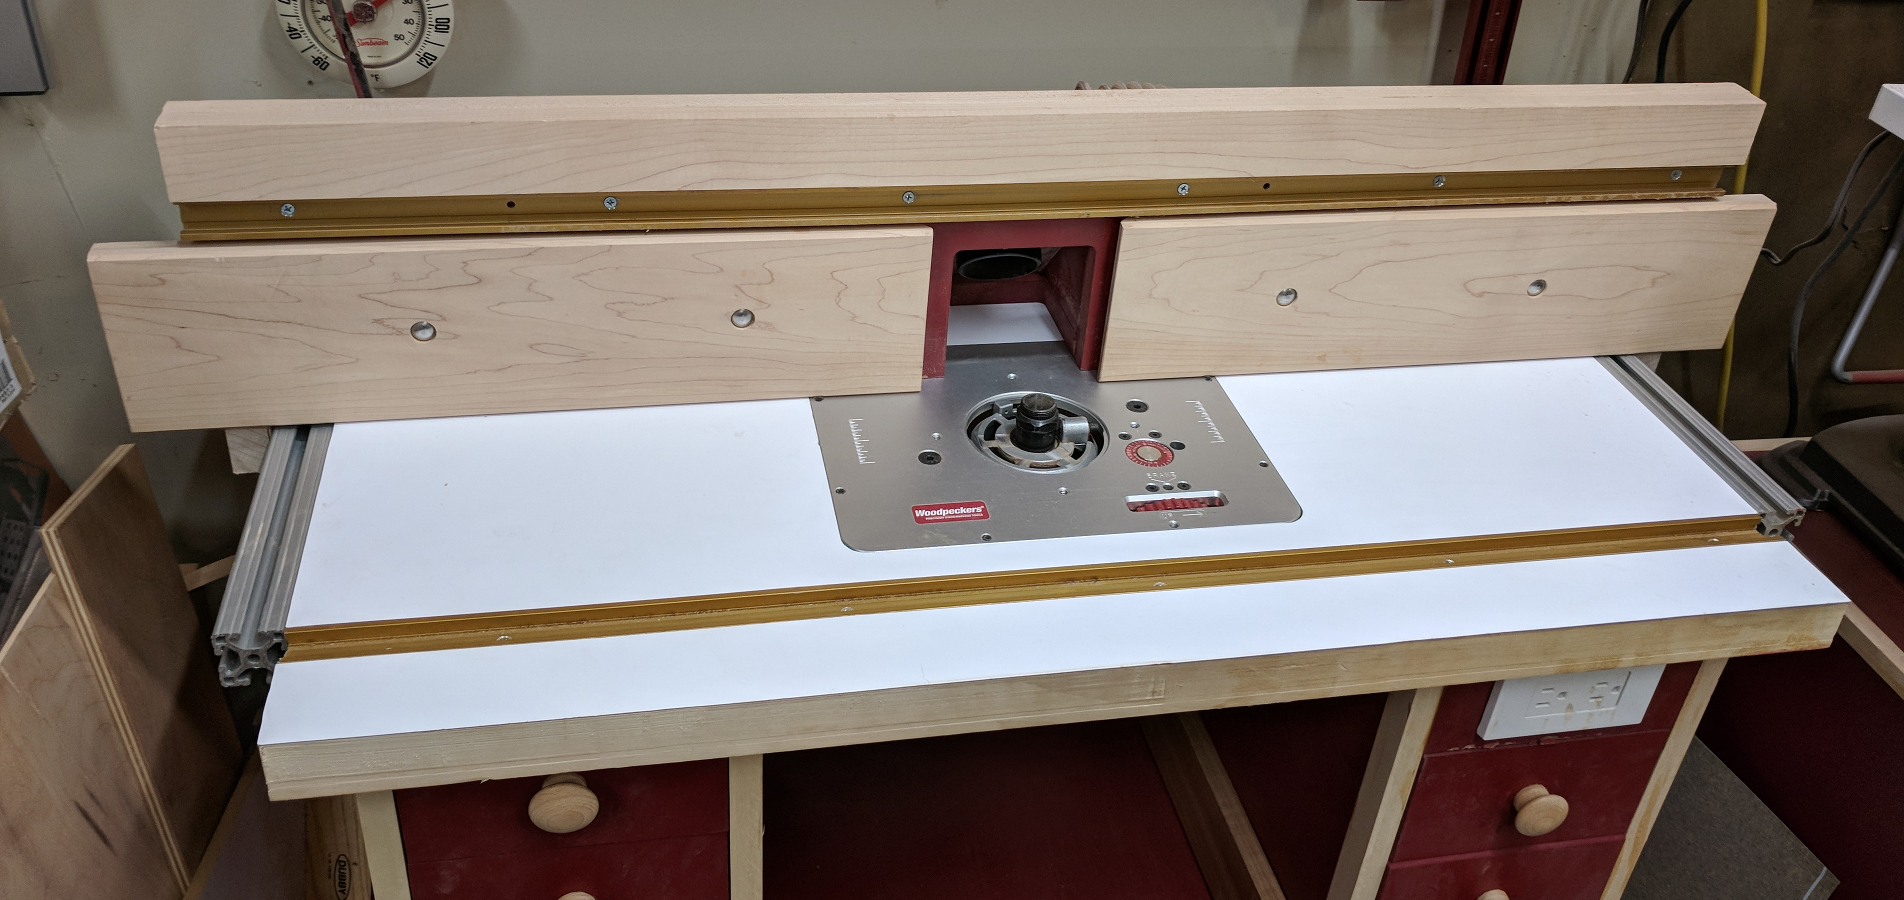
Resurfaced router table top, ready to go.
While I had the table pulled out, I cleaned up behind it and inside it, reattached the dust collection hose and power, and double-checked the surface looking for any places where stock can catch. I found none. This makes me very happy because there’s a dining room table and chairs design cooking in my head and I’m going to need to rely on my router tables — both of them — to pull it off.
Recent Comments