
Sewing table, part 3
After that huge fumble on the top, I figured I was probably going to be okay with the Law of Averages for a while. And, I have to admit, the new top was better-looking than the original.
Drawers
The drawers for this are mostly unremarkable. Two at 3.5 inches high, one at 5 inches, and one at 5 but looking like 6 because it came down to cover the bottom of the drawer box. The sides are 1/2″ plywood, the bottoms of three made from 1/4″ plywood, and false fronts of curly maple for contrast.
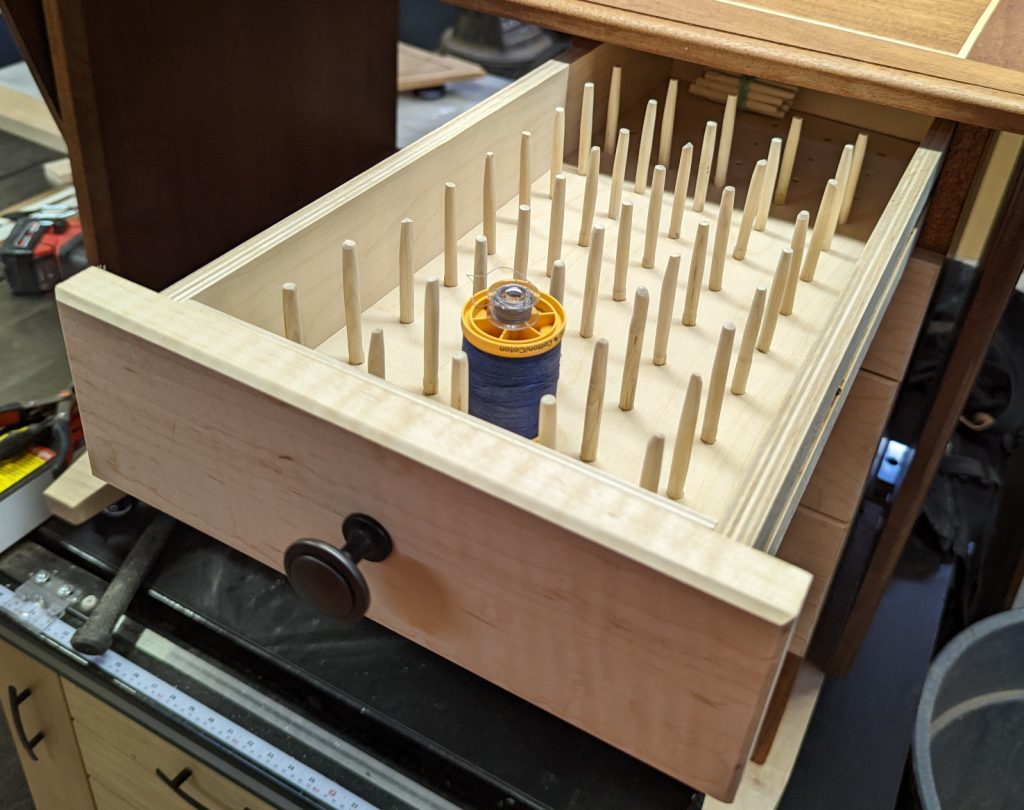
One drawer is particularly interesting. I put a 1/2″ piece of plywood into the CNC and made it with sixty 1/4″ holes halfway through. Then I cut 60 pieces of quarter inch dowel at 3 inches length, and discovered that while they fit a spool of thread, they were a little wide to support the bobbin too. Dammit!
The easy and obvious solution was to take each dowel, chuck it into my drill, and run it against my stationary belt sander to slightly taper and then round off the top. That made the spindles able to fit one spool of thread and a matching bobbin, which was the original goal. It took me some time to get acceptably good with the drill/sander combo, but it worked.
Swing supports
To support the drop-leaf table sections, I designed two swing supports to sit under the sides. The weight will be transferred to the side of the case, and I designed a custom hardware set that could handle the weight because hinges just seemed too flimsy, especially in plywood.
The plan calls for something roughly wing-shaped, but I wanted more mass and a good spread between the load-bearing points so I ended up with a triangle. It’s curly maple, so there’s a very nice but subtle grain pattern going on, and I repeated the inlay method from top and inlaid a band of sapele on both sides. (This time it’s a true inlay, 3/16″ wide and deep, to keep the grain consistent across the inlaid band.)
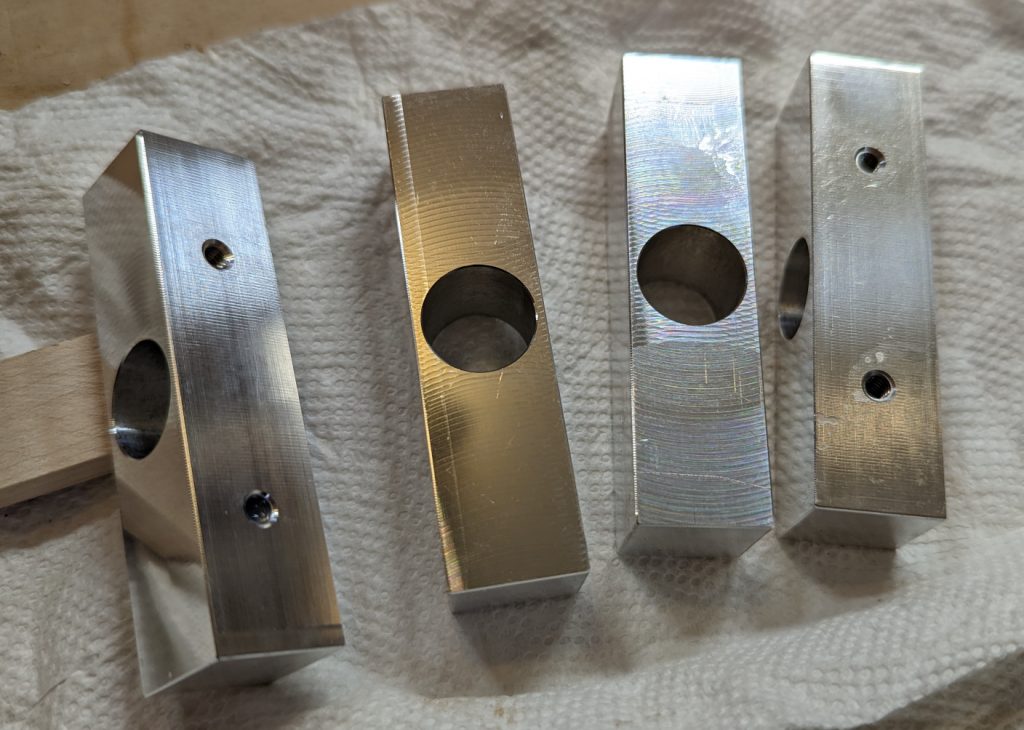
The hardware was interesting. For strength, I didn’t want to just have a piano hinge at the back. I designed a block of maple with a 5/8″ hole in it to receive a dowel glued into the back of the wing, and that seemed like a good idea until I realized that because of limited space the walls would only be 1/16″ thick where the weight bore on them — not such a good idea after all.
But fortunately, my son Adam was able to make the exact part out of aluminum, which would be plenty strong, with the added benefit of threaded mounting holes, so I could take it on and off if necessary.
And for the tabletop, I went with a simple adjustable foot in a threaded insert, so it can be set to keep the top exactly level. Here is a finished swing support installed.
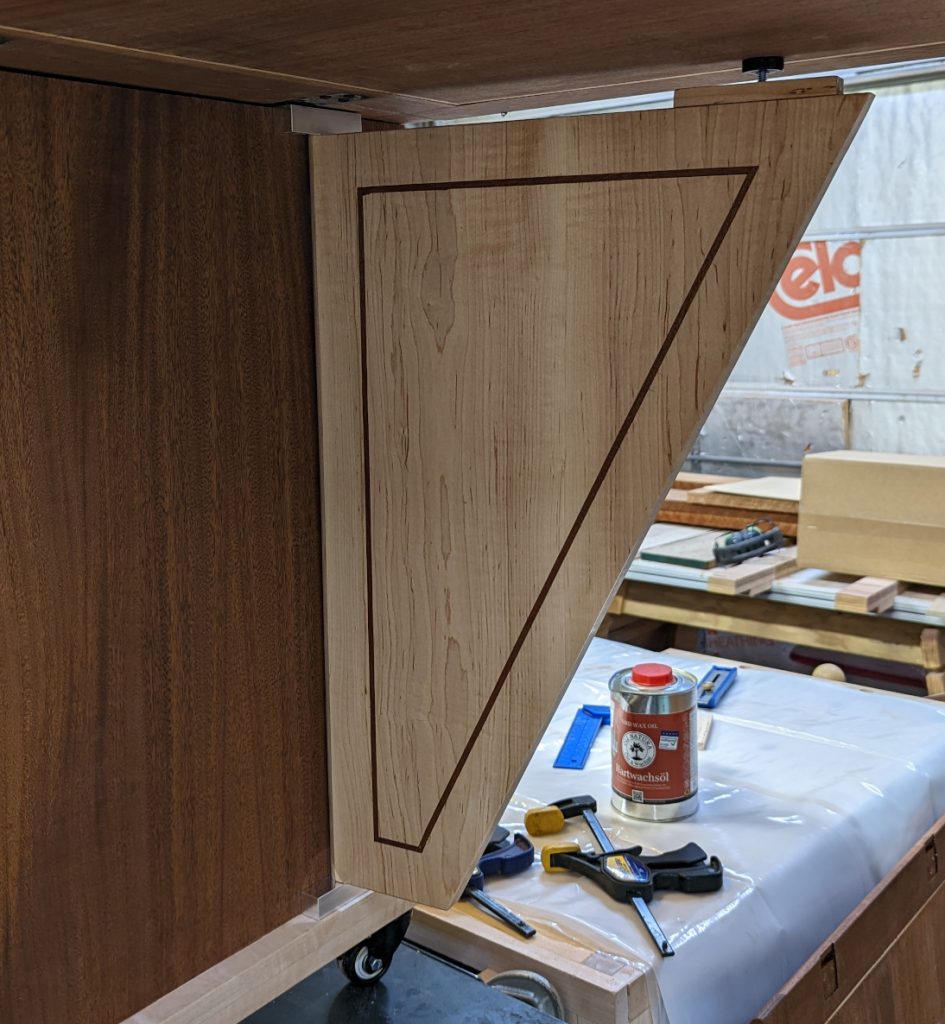
One benefit of this swing support is that it can go anywhere under the table as opposed to looking for a particular spot, so it’s easy to pull out and push back.
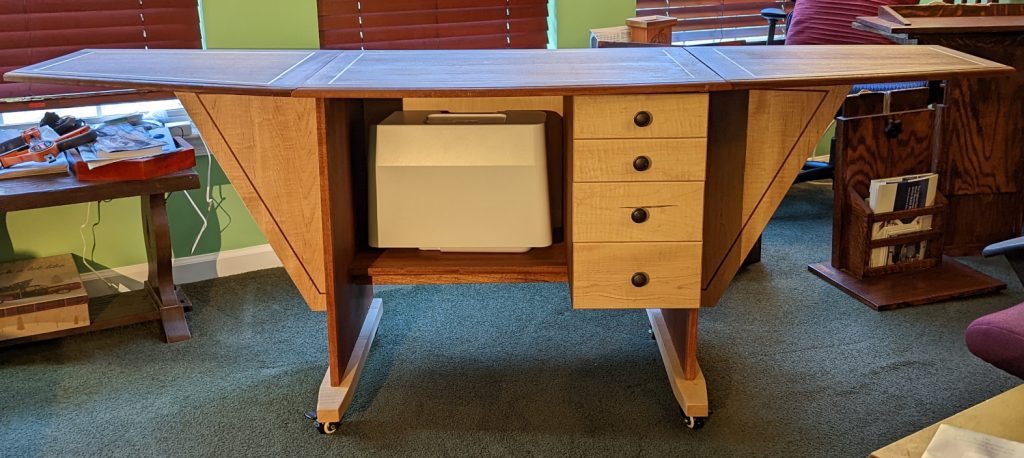
Once that was done, all I had to do was nail on the back panel and this one was finally done. Here’s what it looks like closed:
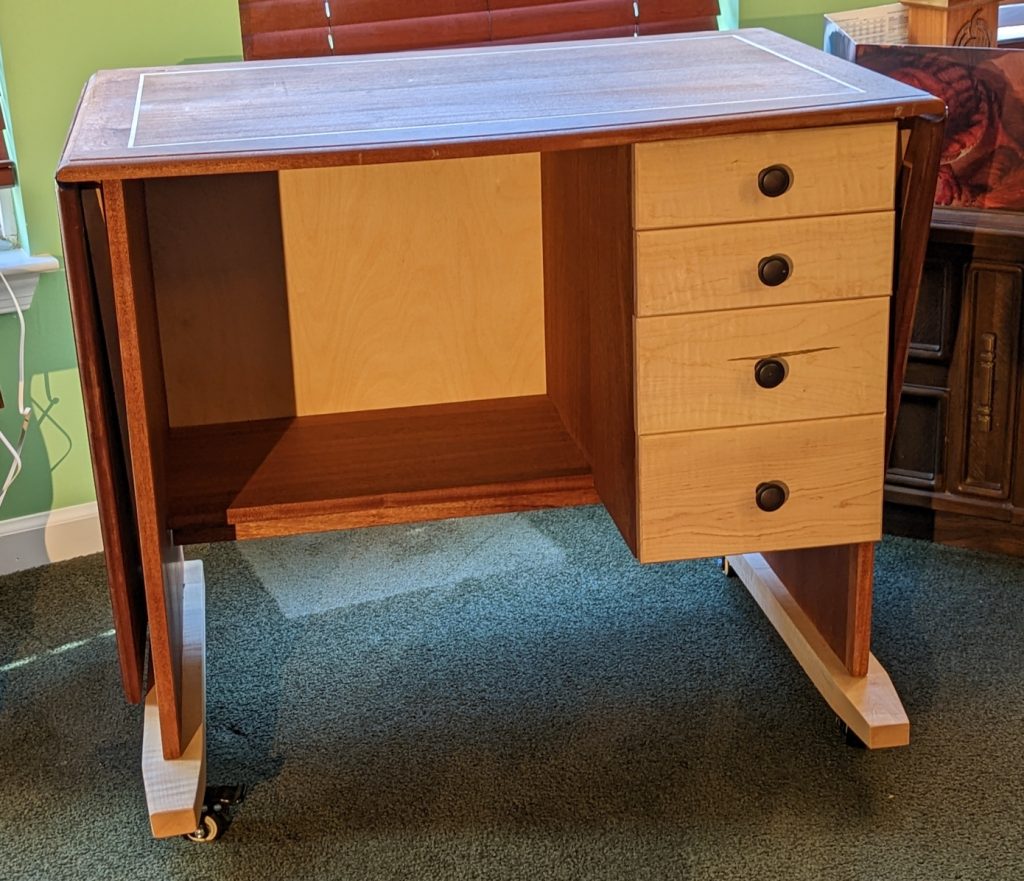
And here it is opened all the way up:


Recent Comments