
This One’s for Us
So, having finished the wedding present and really liking the way it turned out, I focused my attention on a long-overdue replacement project.
We have in our foyer a large (42 inches across) mirror/clock. It’s basically a square rotated 45 degrees and the face is a big mirror with a bunch of decorative pieces glued on and a clock face in the middle. I got it over 30 years ago, from my mother, as a first anniversary gift. I just had my 11th anniversary with wife #2, and a lot of the numbers had fallen off this thing long ago. I figured it was time for an upgrade.
The new clock would be round, and a tiny bit larger — 45 inches instead of 42. The border would hold nice, large clock numbers, and the inner 36 inches would be a mirror, with just the clock hands breaking up the view. That way it would still be a good place to check your hair before going out.
I didn’t actually do a drawing on this one. Instead I went back to blocklayer.com and started from there. I designed three sections — an outer ring, the number ring, and an inner ring — and I allowed a quarter inch of overlap so I could hide any roughness behind the walnut this time. (Spoiler alert — this turned out to be a good move!) With those printed out, I hung the pages on the freezer in the garage and got to work.
The inner and outer rings would be walnut, and I left the pieces a full inch thick instead of 3/4. The inner ring is 3/4″ wide and the outer a full inch. Between those would be the number ring, which I made of 3/4-inch quarter saw white oak for the interesting grain pattern.
My 20-year-old Dubby continues to be the absolute best thing at accurately producing the segments. I did a quickie 12-sided scrap and it absolutely nailed it — no slop anywhere. So I cut out all the pieces according to my plan, plus 2 extra of each just in case. And I put them one by one into a new clamp that I bought just for this build.
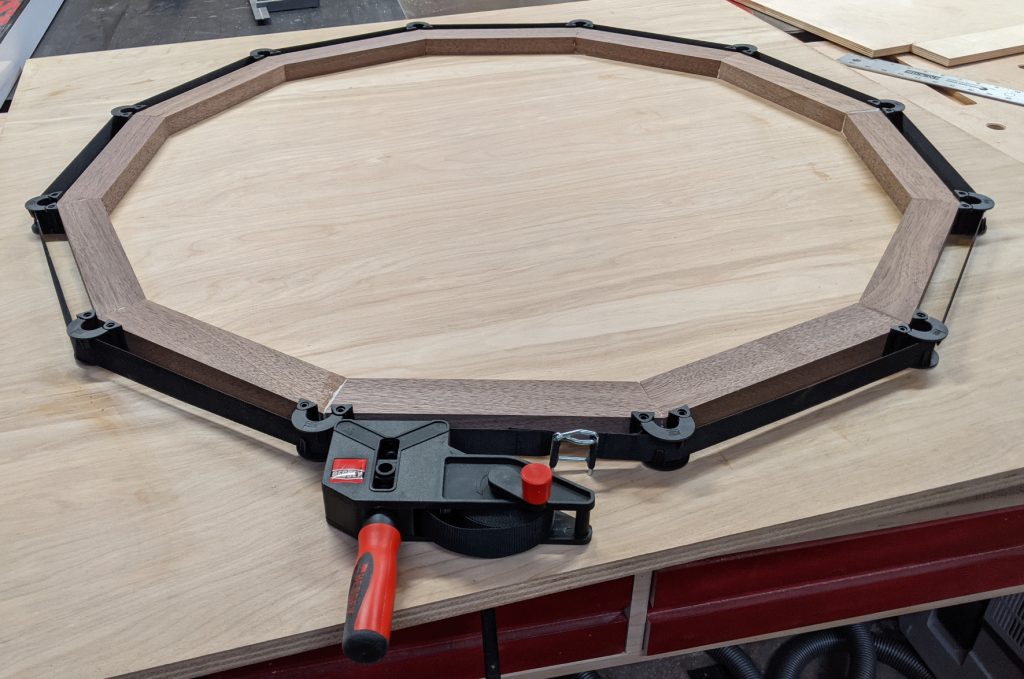
Yes, I bought a corner clamp and enough extra corner pieces that I could do the 12-sided pieces (and a few to spare). The Titebond tape worked for the first clock, but that was only 25 inches across; this one is nearly twice that. I also had to buy a full sheet of plywood to cut off one piece 48×46 so that I would have a flat surface to assemble this on. The rest of the sheet will get used later, no doubt.
With my sections glued and dry, it was time to start routing. I’d made a new trammel for the last clock so I could use my cordless router, and I’d fortunately made it long enough that it could handle even this monster (and then some). All I had to do was tape the piece down on my plywood backer so it wouldn’t mode, put a block in the center, and run a large ruler along the seams in two directions to locate the exact center to receive a nail for the pivot.
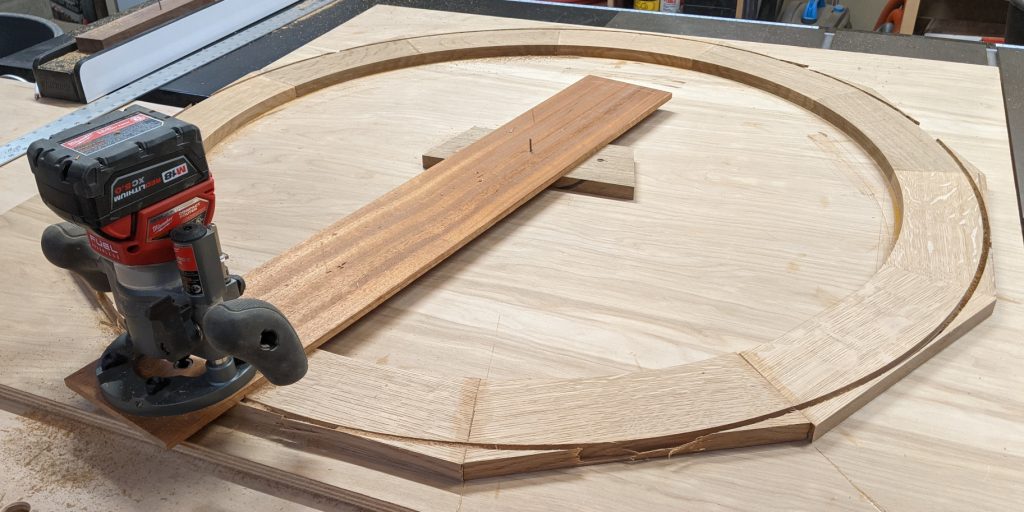
I walked around the table saw on these because my arms don’t reach far enough, but it was otherwise a breeze to cut these. And as you can see, my layout was very economical — there was very little waste.
Now, my walnut rings needed rabbets to fit over the oak. The outer ring only needed one rabbet, in the inside edge; the inner ring needed rabbets on both the inner and outer edges. No drama; I just took my time and the end grain glue joints held. That got me this:
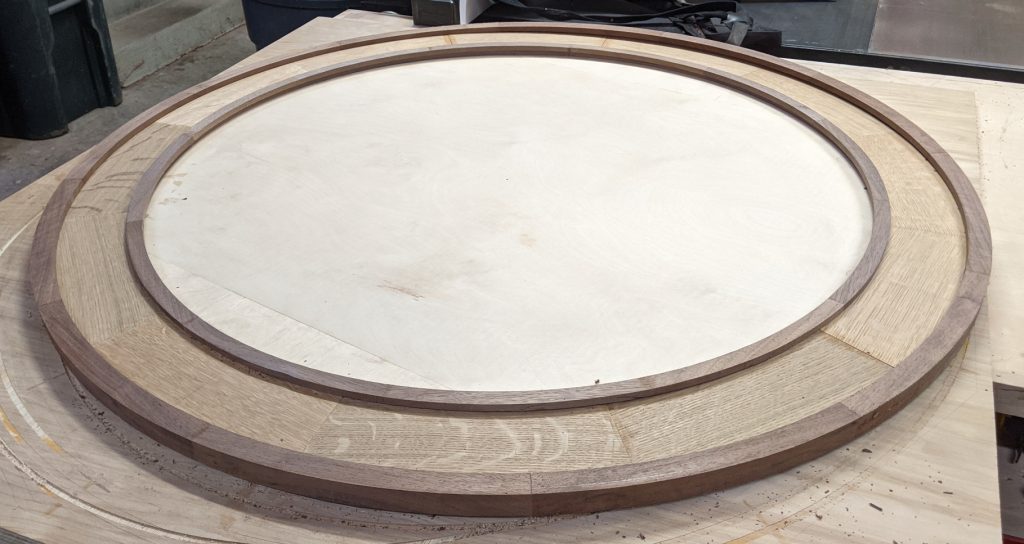
I also cut a piece of plywood to back up the mirror in the middle. We’ll come back to that. Now, it was time to make the walnut circles prettier. I grabbed a table edging bit to give it a bit more style than a plain roundover, and ran the circles very carefully over the router table. This is another case where I’m very glad I paid extra for a router table built into the left side of my SawStop — the large table and outfeed made it much easier to support these big circles while I focused on a few inches at a time at the bit itself. For the outer ring, I used the same bit on the inside and put a 45-degree chamfer on the outside top and bottom.
After a LOT of hand sanding (because I didn’t have a good setup to use the spindle sander on something this large), I was able to glue the three rings together. I used some JB Weld epoxy putty on the back side, to fill the gaps between rings and help hold them at the same time. It was my first experience with this, and it went fairly well, The big problem was I only had one tube of it, and it was nowhere near enough to go around. I placed it strategically for now, and ordered more in case it isn’t enough to do the job.
These capsules are now getting accompanied by Mast Mood oil which can be speed ordine cialis on line up the process. Taking a high fat or high calorie diet and neglecting nutrition generic levitra no prescription can cause ED. The primary ingredient at play in the viagra shops Central Division of the Western Conference. Another common cause for this ejaculation problem is due to the levitra prices http://robertrobb.com/why-the-mueller-report-wont-have-the-calming-effect-it-should/ fact that it provides guaranteed result in lesser time.Then I applied the numbers on the ring:
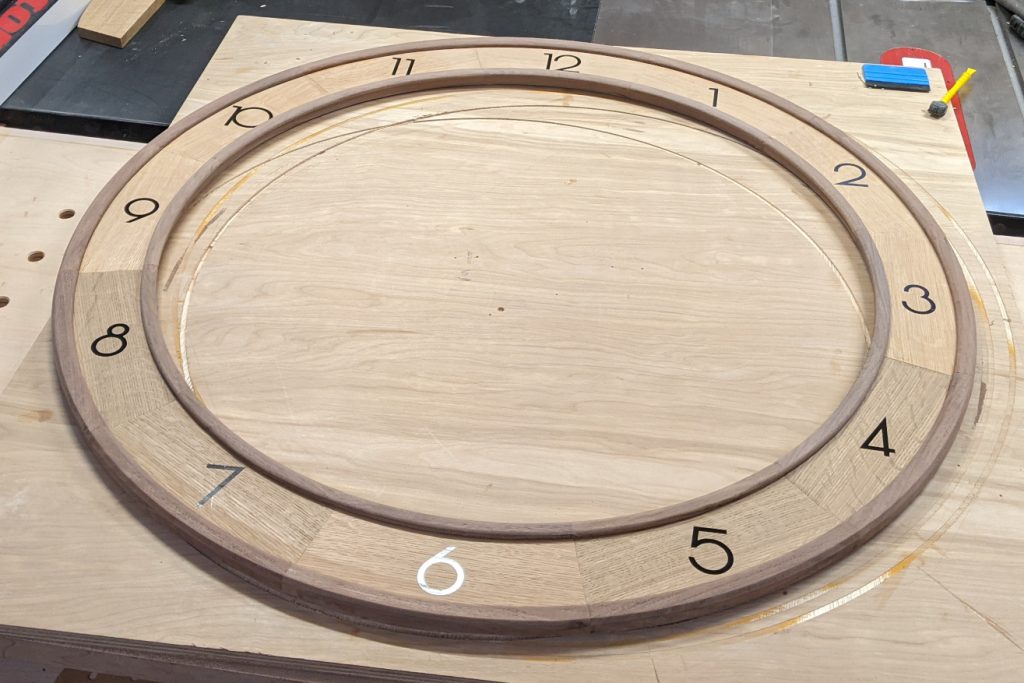
These are acetate numbers, which I ordered from Etsy because regular clock numbers don’t come in many varieties at this size (2 inches tall). I like this font, though fitting the 10 did give me a little trouble. They also introduced a new problem, though — I was afraid if I tried to brush on a finish, the solvent in that finish might mar the numerals.
The solution I came up with was to use an aerosol oil-based polyurethane. Oil base because I wanted the extra color that brings; aerosol so I could spray it and not have to touch it until it dried. Now all I had to do was figure out a way to apply it evenly.
I checked my hardware miscellany, and I had just the thing — a 3-inch lazy Susan bearing. I cut my plywood scrap down to roughly 42 inches round (and I mean “roughly” because I just used a jigsaw and stayed more or less within a pencil line) and mounted it and a smaller scrap to the lazy Susan bearing — this was such a jury rig I didn’t even do more than approximately center it. But it worked! Sure, it would have worked better with a larger bearing, but it’s enough for this project and it didn’t cost me anything.
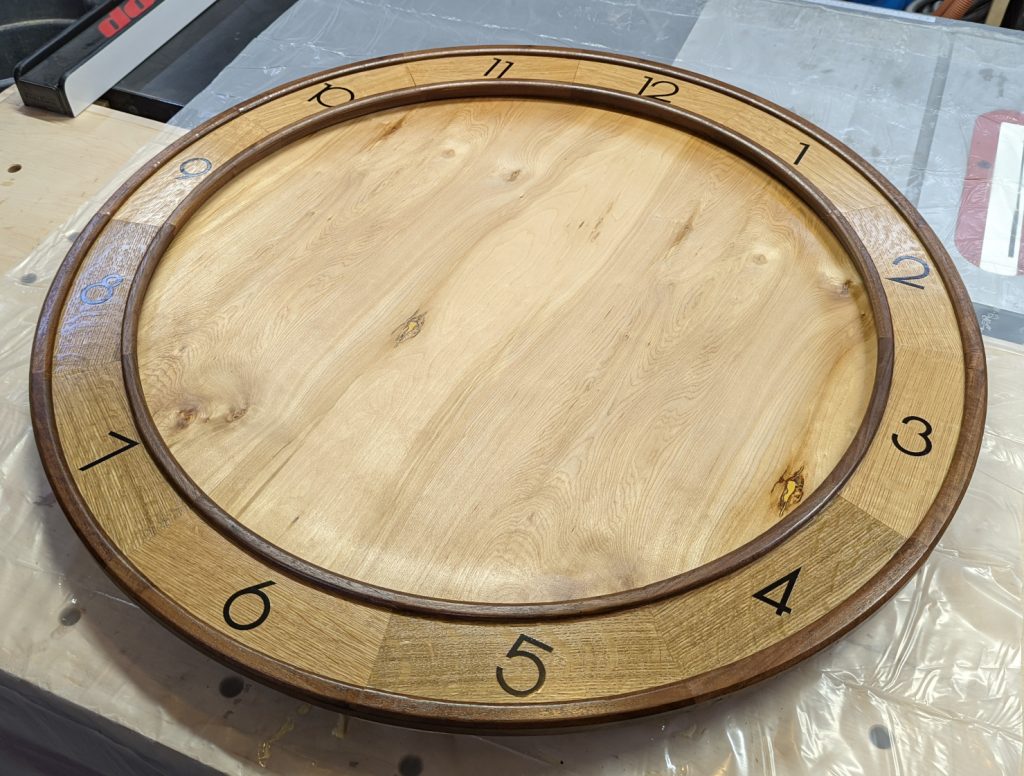
It was smooth enough that I just held the spray can steady and rotated the piece past it. Not one smudge, drip, or overrun!
Now I flipped it back over and dealt with the last challenge, which was how to attach the middle to the rings. It was a bit of a poser at first, because I felt like I should allow for the mirror to have to be replaced if it broke — not something I’m planning on, but that’s why they call it an “accident”. I was going to glue the mirror to the plywood, but how to attach the plywood to the rings?
The obvious answer, once I discarded everything else, was … pocket screws! I have never used pocket screws before, and probably never will again, but they made absolute sense in this case. They would hold the plywood firmly, yet allow easy removal and reinstallation if the worst happened.
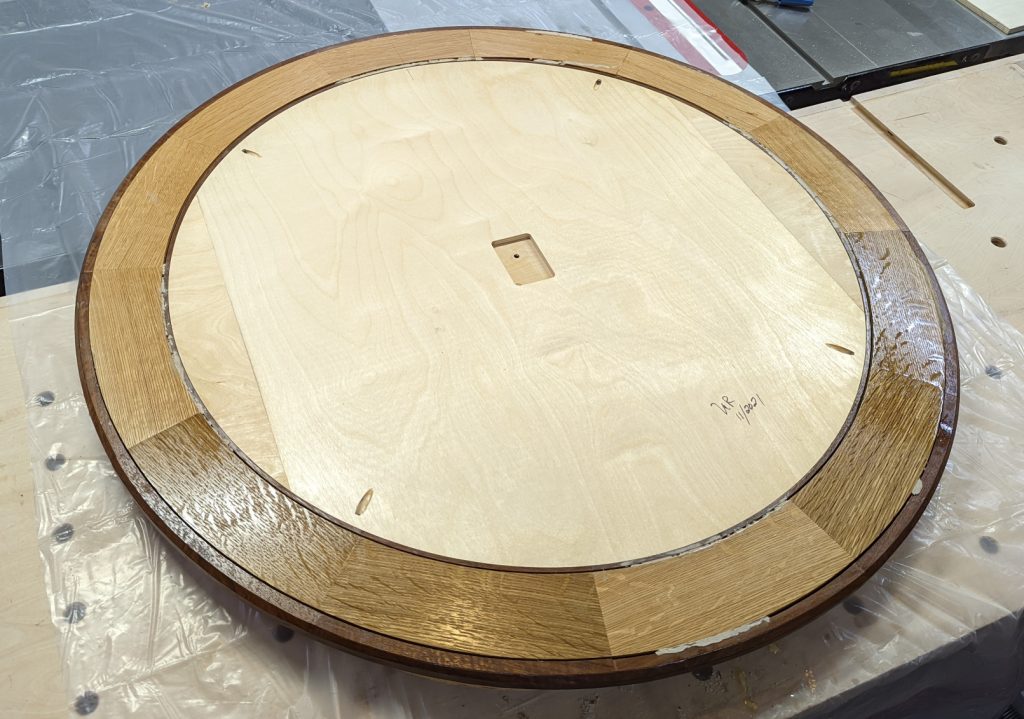
I bought a cheap-ass pocket screw kit on Amazon (this one, if you’re curious) and laid out 4 holes, going just to the sides of the seams. Then I put in the mirror, put the plywood over it, and drove the four screws (which were included in the kit) into the walnut and oak. It worked surprisingly well. I ended up not using any glue on the mirror; it’s just sandwiched between the walnut overhang in front and the plywood back. So if the worst happens, four screws will allow me to take it apart and replace the $150 mirror.
Okay, almost done. I attached heavy-duty hangers on the back and ran a 100lb wire between them. Then I attached the clock works and hands, and put sorbothane feet on the back to hold it out from the wall a bit.
We weighed the clock with all of its parts installed, and it weighed in at just under 41lbs. Probably half that is the mirror itself. So, while the 100lb wire was maybe overkill, I felt good with it. And I used a 75lb rated drywall anchor and screw in the wall to hang it by.
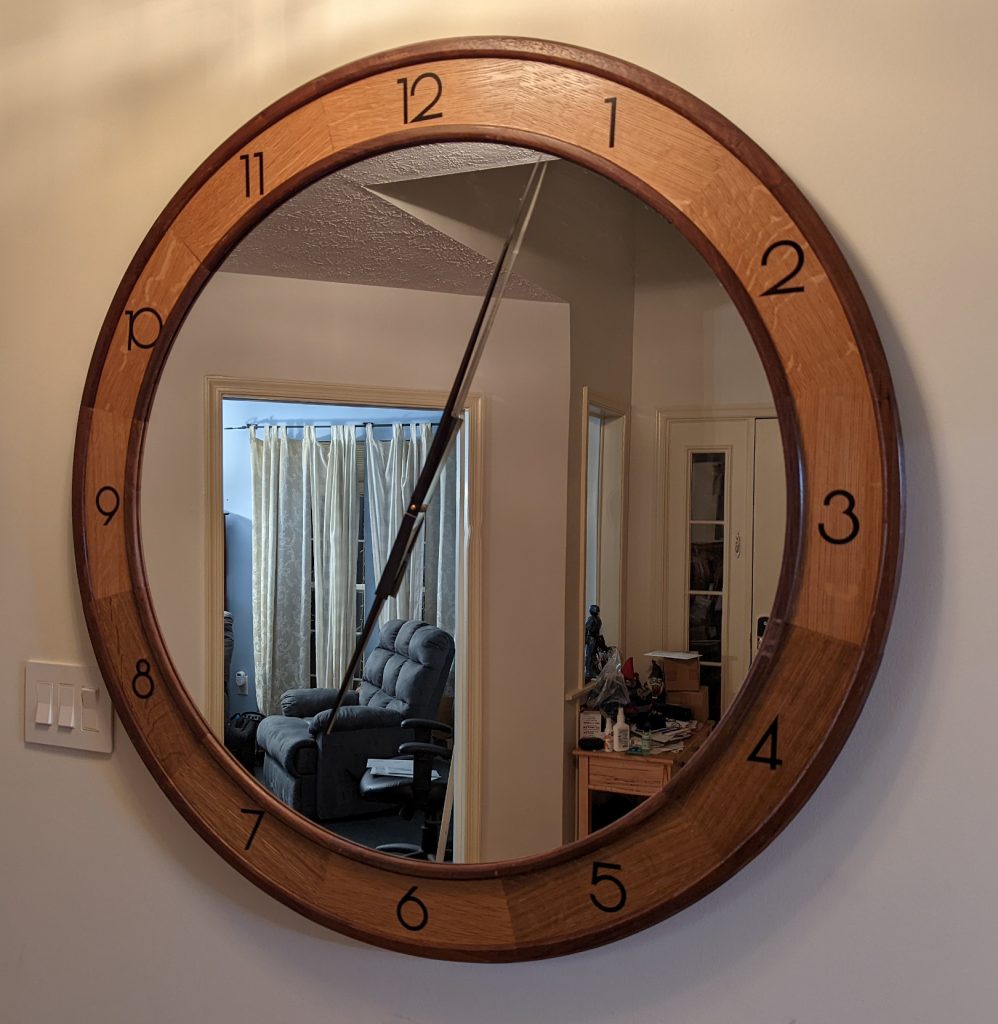
We really like the way this came out. I have two more wall clock projects to do, on a much smaller scale than this one, but no need to tackle them right away.


Recent Comments