


Three more boxes
I’m continuing my rehab assignment (aka, not going crazy while my shoulder heals up the rest of the way) with a couple more small things.
The first was originally meant to sit on top of the toilet in our new bathroom, but I got the measurements wrong so it wouldn’t actually fit there. And of course I didn’t actually check until it was done.
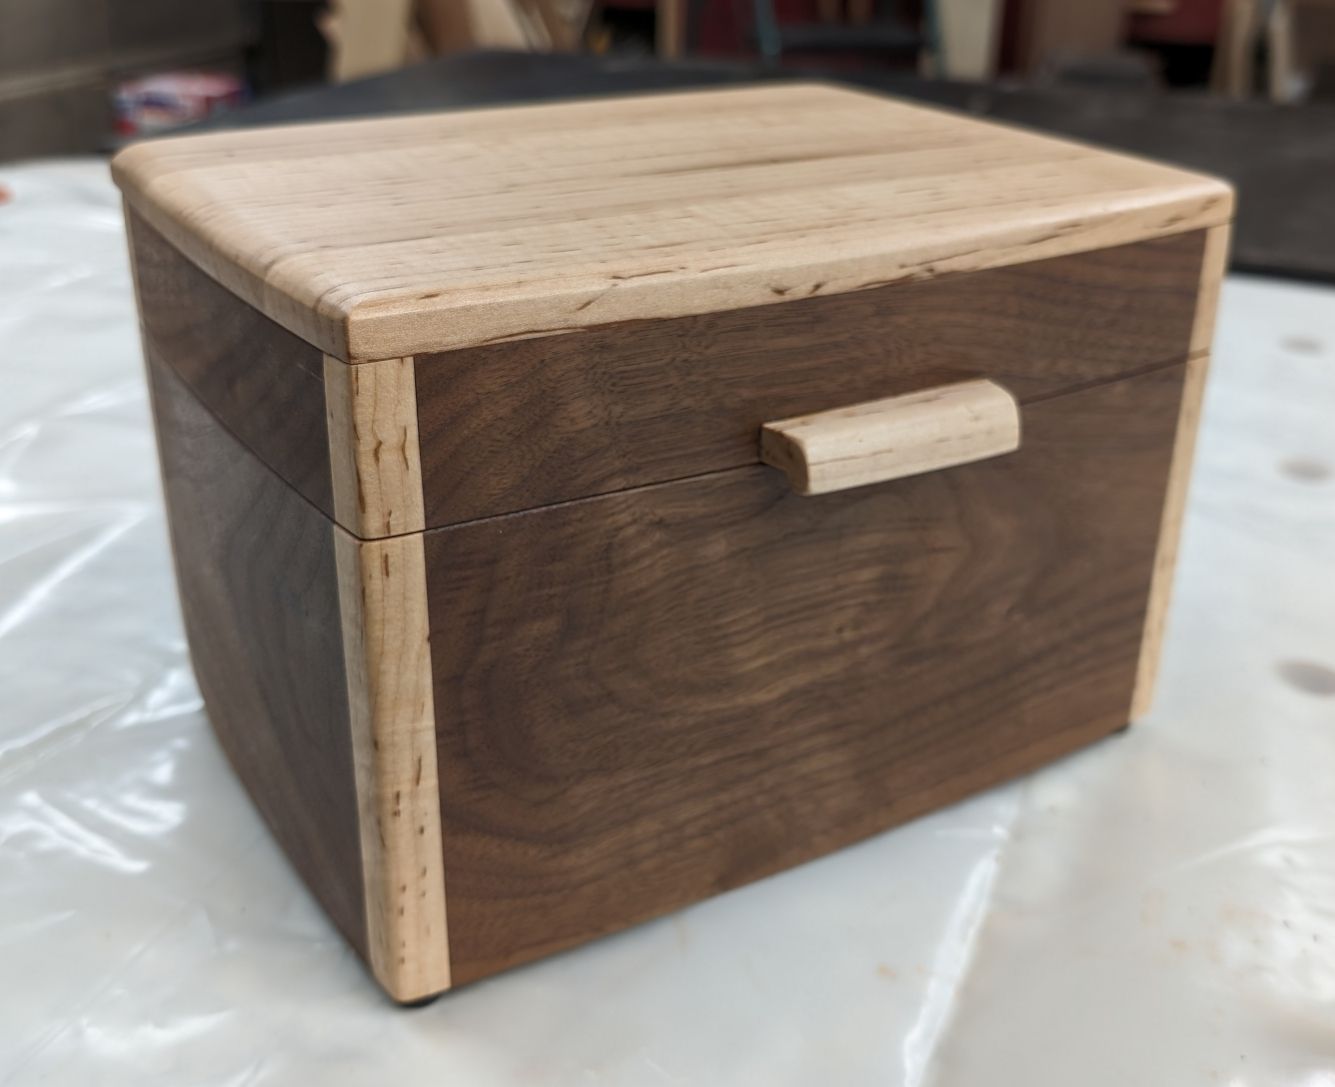
The challenge to this was that I wanted curved sides. and to have the top wrap around in the form of corner posts. And, while I was at it, I wanted to do an inner tray. I didn’t take photos along the way because I was largely improvising as I went.
Basically, I made the entire box out of 5/8 thick walnut and 3/4 thick curly maple. But once the sides were glued together, I took it over to the bandsaw the cut the outer curves on three of the four faces to get the final look you see here. The back stayed straight because it would have hinges on it, so I just took that down to 1/2″ thick by running the box over the jointer a dozen times or so.
I wasn’t sure what to do for a top until I set a piece of the curly maple on there and liked it. I rabbeted the piece in by 1/8 of an inch, then used a gentle sloping edge treatment that ended in the slight rounding. Almost as an afterthought, I added the maple lift for the top.
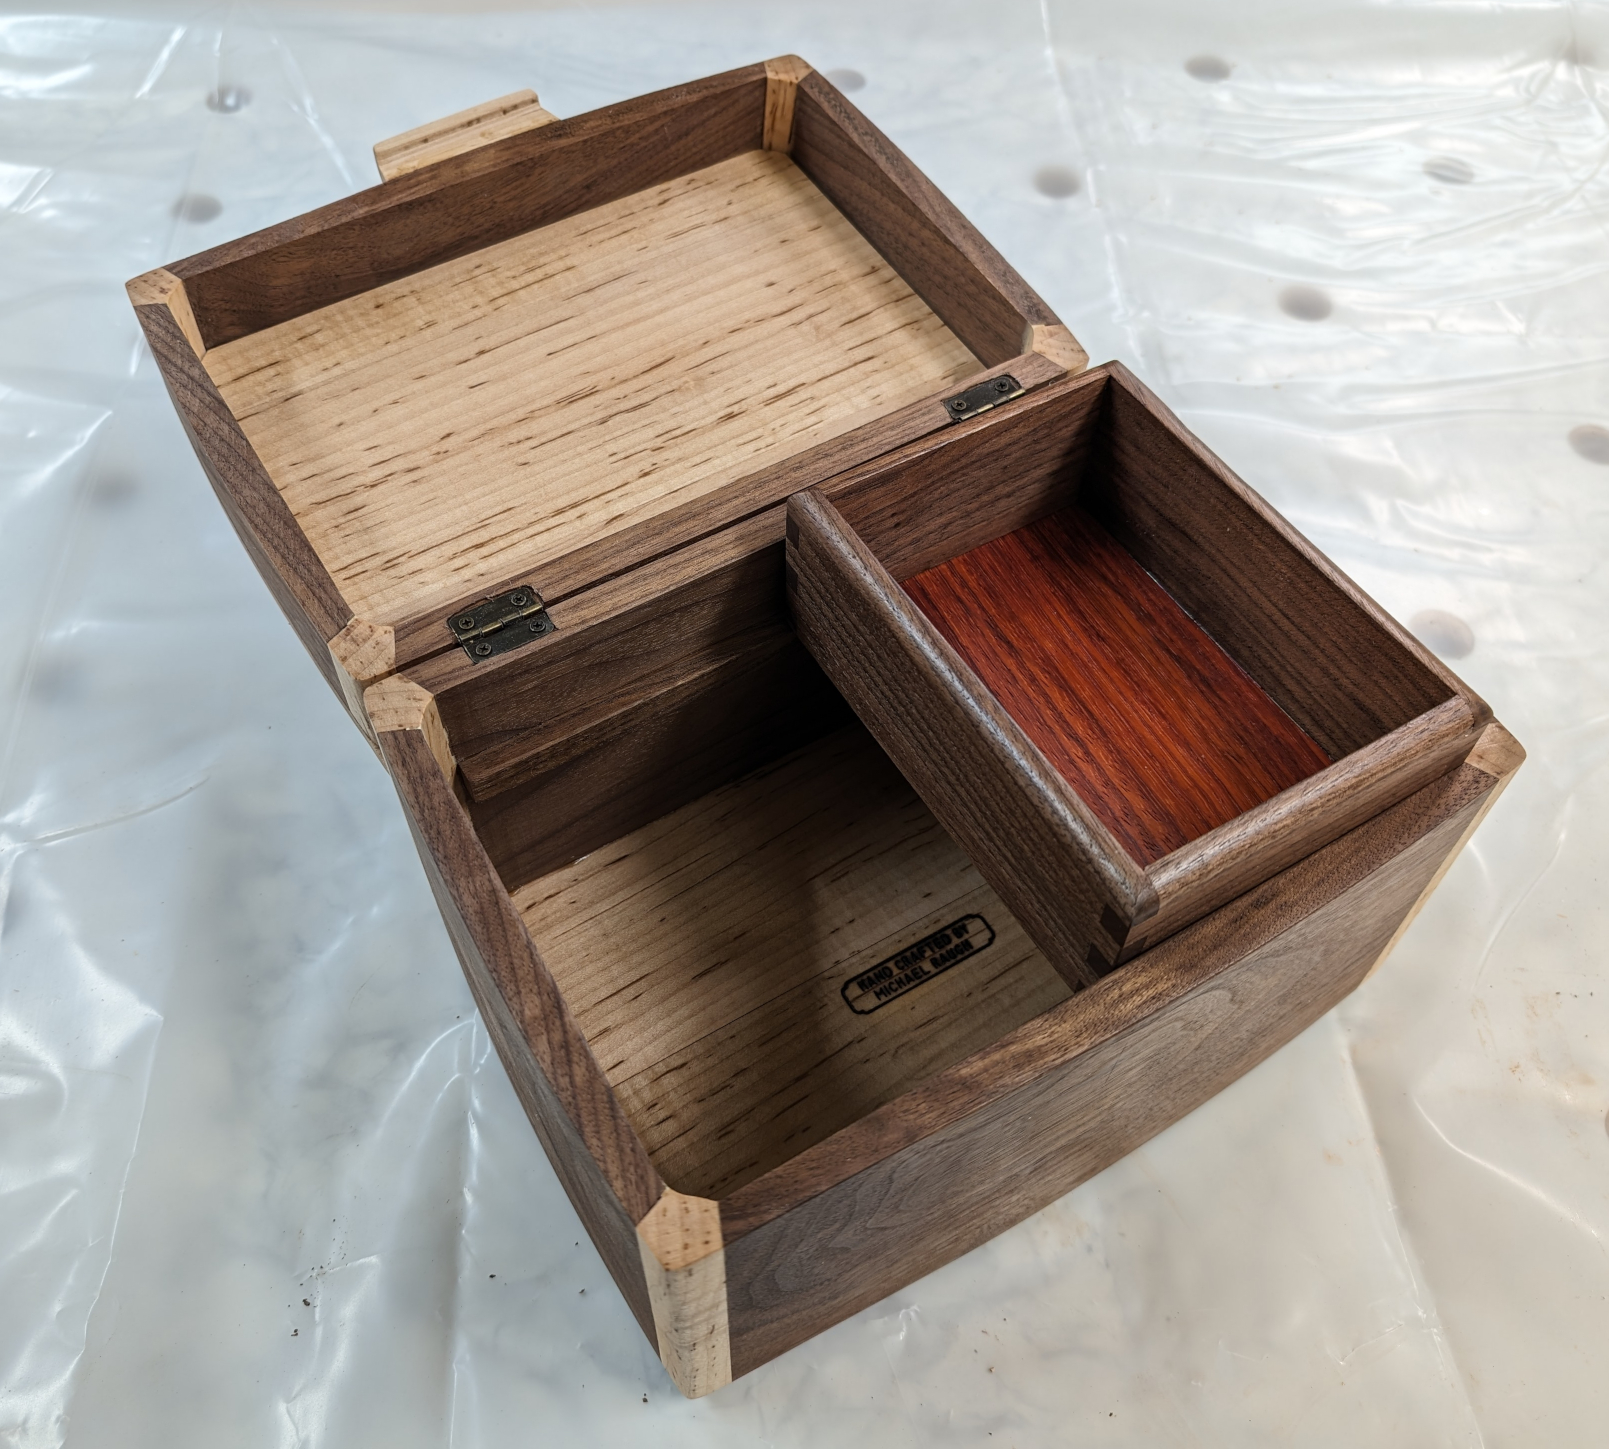
I made two rails and glued them to the inside, then fashioned a small tray to ride on them. Yes, that’s a piece of paduak left over from the tea box inside the tray.
So once I realized this was too deep for the intended location, I started over. This time I kept it simple, a rectangular box with box jointed corners and a simple top and bottom, like so:
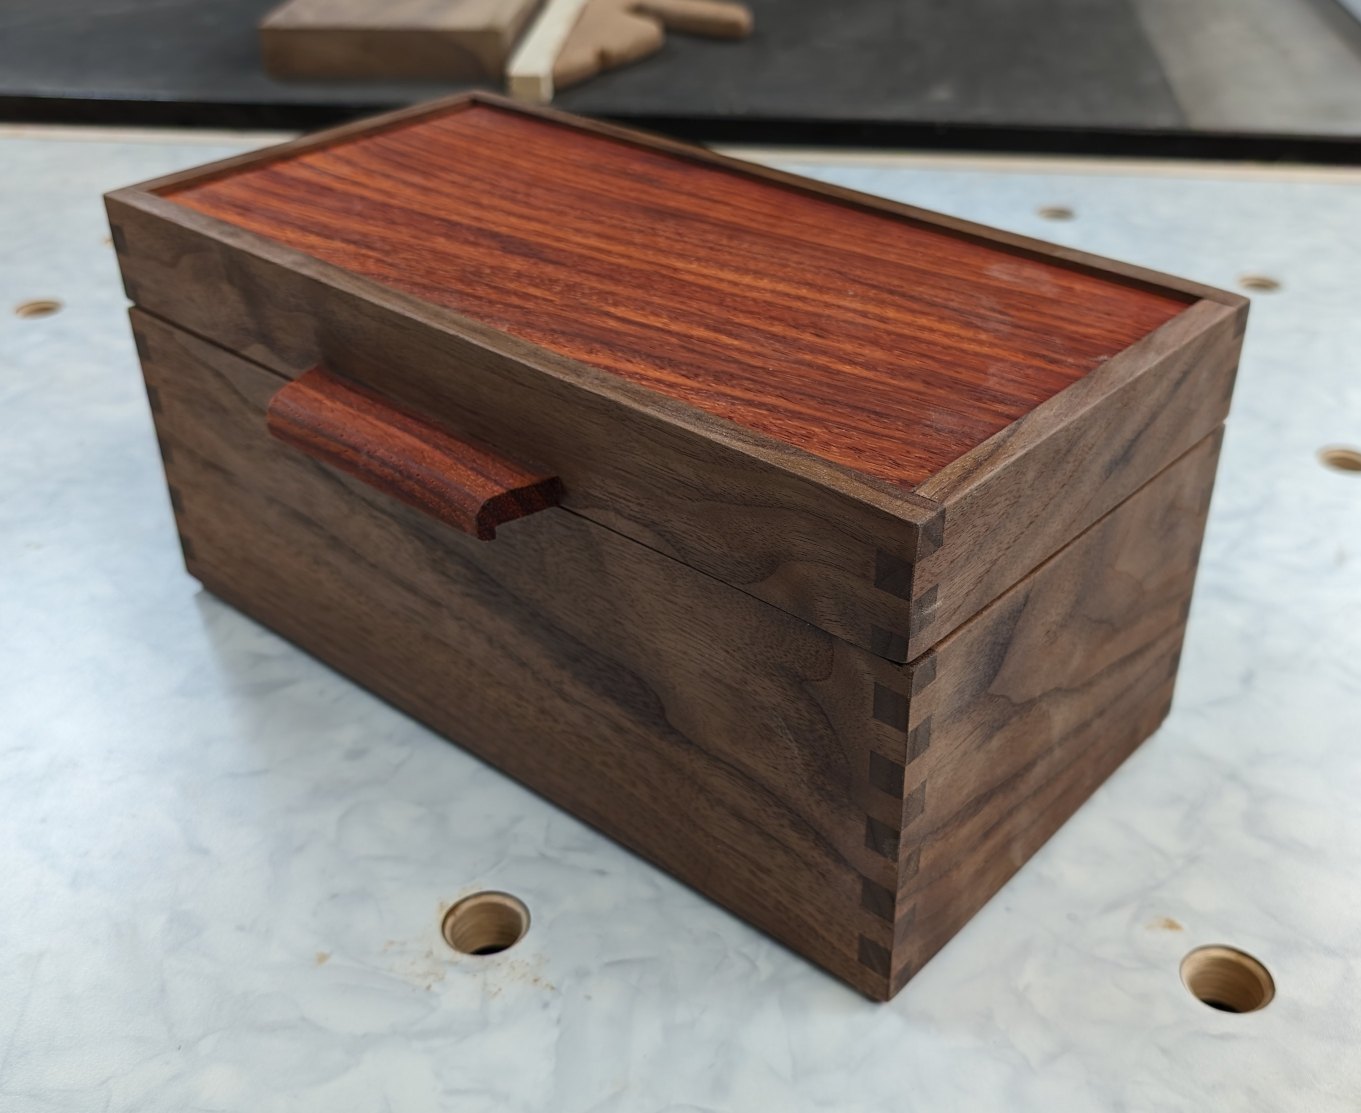
I used the Katz-Moses box joint jig again, and it worked really well. A simple box of walnut (with flowing grain, you may notice) with top and bottom panels of paduak and a lift handle to match. This one does fit on the back of the toilet.
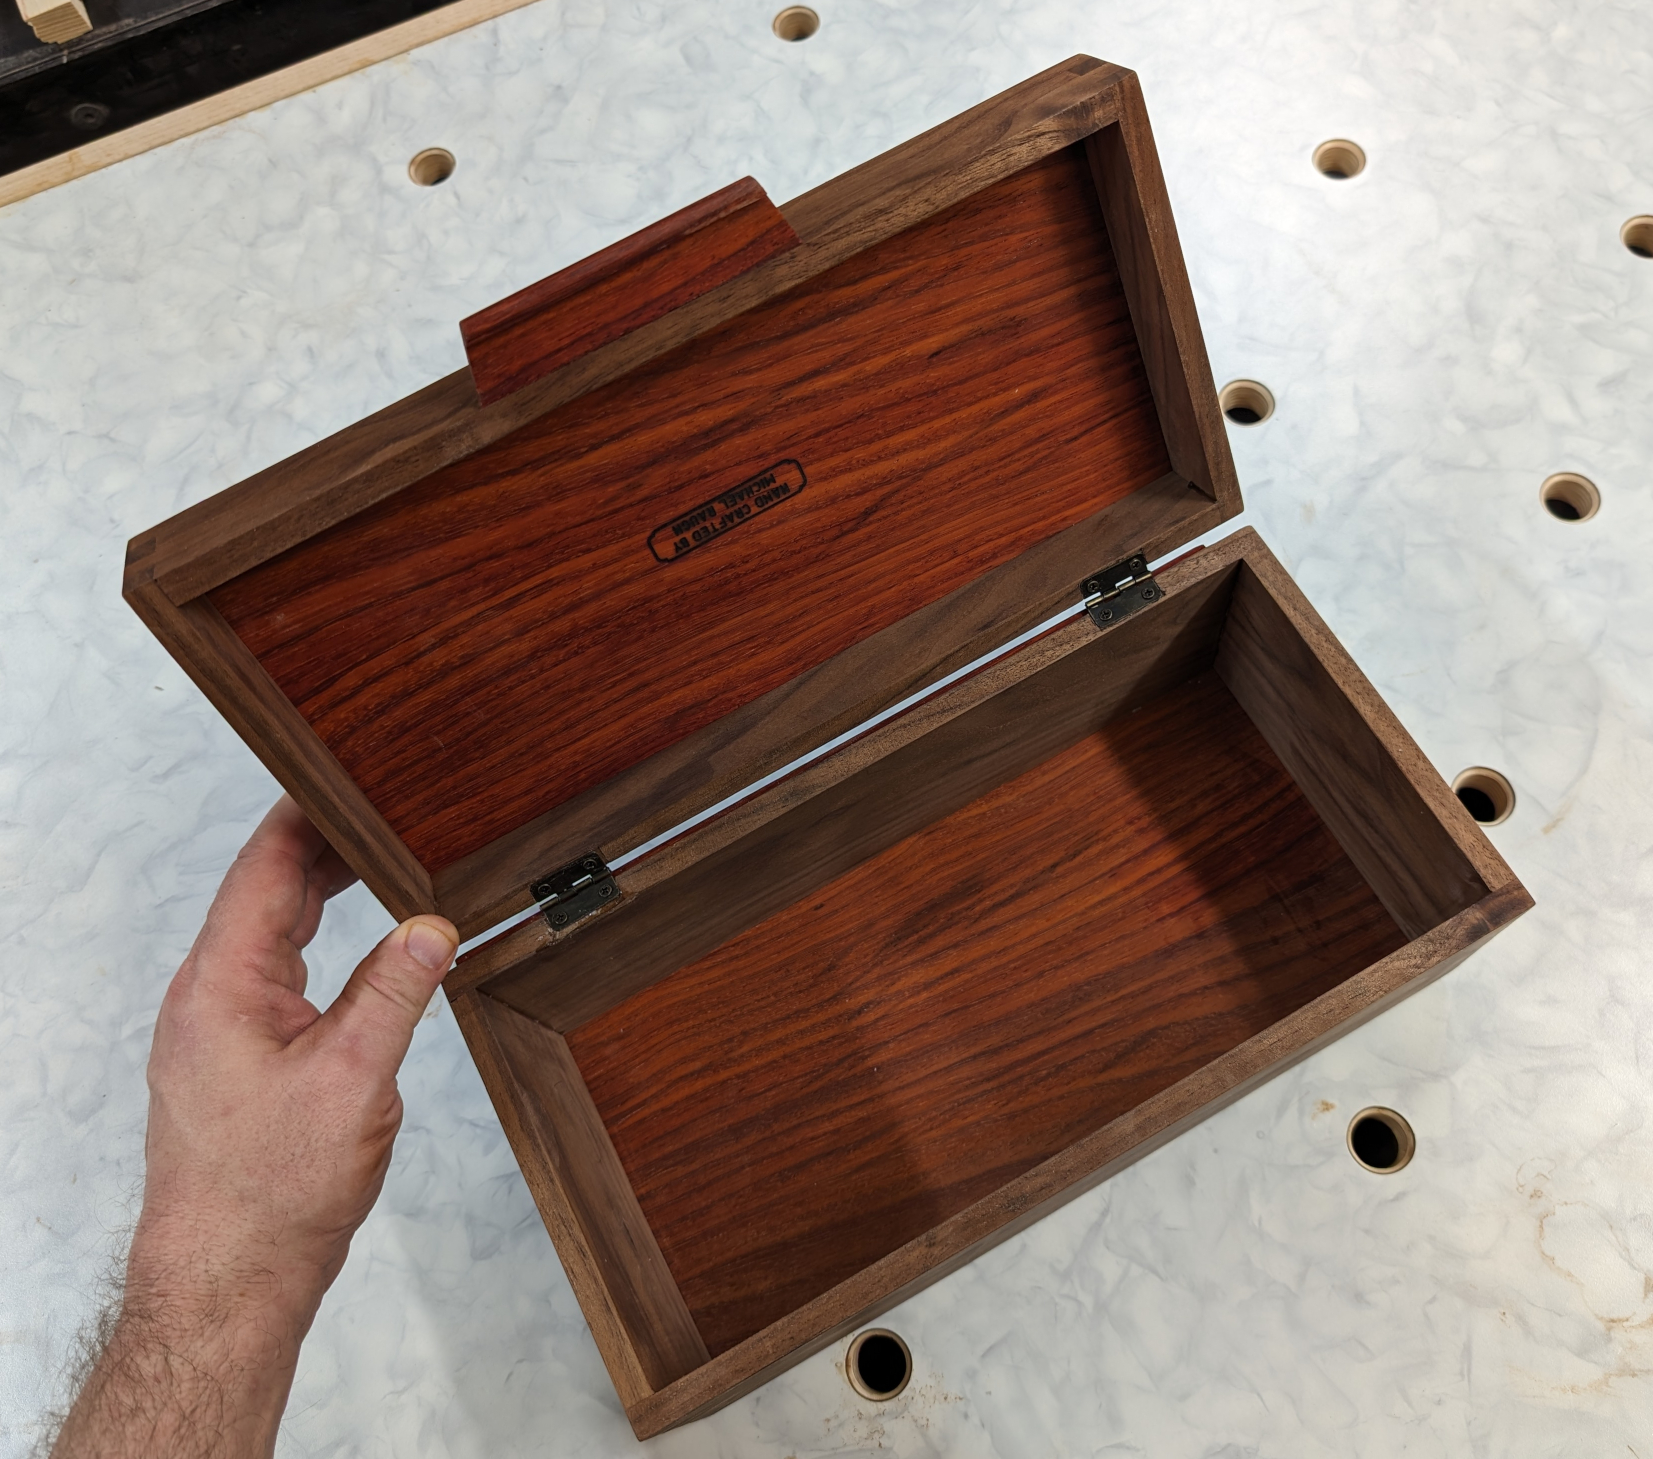
The contrasting paduak and walnut make a really nice look and fit well in the bathroom.
The final box is something a little different. We have a lot of plastic spoons, 7-inch whisks and whatnot in our kitchen, and for years now they’ve been sitting in red Solo cups that tip over if you look at them wrong. So I opted to do something about that, and to use some leftover sapele, to match the towel holder.
What I first envisioned was a wooden version of that Solo cup: something round and tapered, but with weight on the bottom so it wouldn’t tip over all the time. Then I thought, make it a little wider and divide the space into 3 compartments for different types of things (in my mind it is probably spoons, forks, and mini whisks).
I never did draw any of this up, I just went out to the garage and started building. My spares bin yielded a very long, broad piece of sapele only 5/23″ thick and another about an inch and a quarter, which I resawed into 1/2″ and 3/8″ pieces.
I started with the 1/2″ piece, cutting it up into six roughly 7″ long and 4″ wide pieces. These got tapered to make six staves that would fit together to make the basic tapered shape.
Next I made a hexagonal piece to form the base. I had the idea to drill a 2″ hole in the middle of this and fill it with lead shot pellets and CA glue to make it heavier, and I then covered it with a scrap of curly maple to make an interesting contrast.
Dry-fitting it, everything fit well. So I routed a dado at the bottom of each stave to hold the bottom, and then made a 1/8″ groove up from there in 3 of the pieces to hold my dividers.
In cutting the staves, I ended up with a number of cutoffs that were 3-sided, and one of them was a perfect equilateral triangle. This inspired me; I took that and put a similar groove in the middle of each side, then assembled what I had so far to get an idea of the shape and size I needed for the dividers. It was an odd shape, and it took me a couple of tries to get it right, but I ended up with three 5/32″ dividing walls that meet in the middle and are captured in grooves between the outer sides and the internal triangle piece.
After carefully sanding all the interior surfaces, I glued it up but left the bottom out for now. And as I looked at it, I had one more idea that Julie really liked too: what if the bottom of this could turn, like a lazy Susan?
So I grabbed a bit of 3/8″ thick stock and made another hexagon, and ordered the smallest lazy Susan bearing I could find (3 inches) from Amazon. While I waited for that, I applied 3 coats of aerosol shellac to the parts, masking the surfaces I still needed to glue. (Why aerosol? Because I really didn’t think I could brush evenly in the inside.)
When the bearing came, it was the perfect size but I didn’t like how it added 1/4″ to the height of the piece. I couldn’t recess it within the bottom because I’d hollowed that out and filled it with shot, so instead I grabbed my router and made a 3/16″ hollow in the top of my new bottom piece, allowing just enough clearance for smooth motion. That created another problem — my shortest screws were only 1/2″, so they would stick out through the bottom. So I fixed the bottom of the bearing in place with CA glue, and if that doesn’t hold I’ll mix up a little epoxy.
I applied wood glue to the edges of my top and fit it into place, then attached the bottom/bearing assembly with screws because I had the depth and enough clearance to avoid the shot cavity.
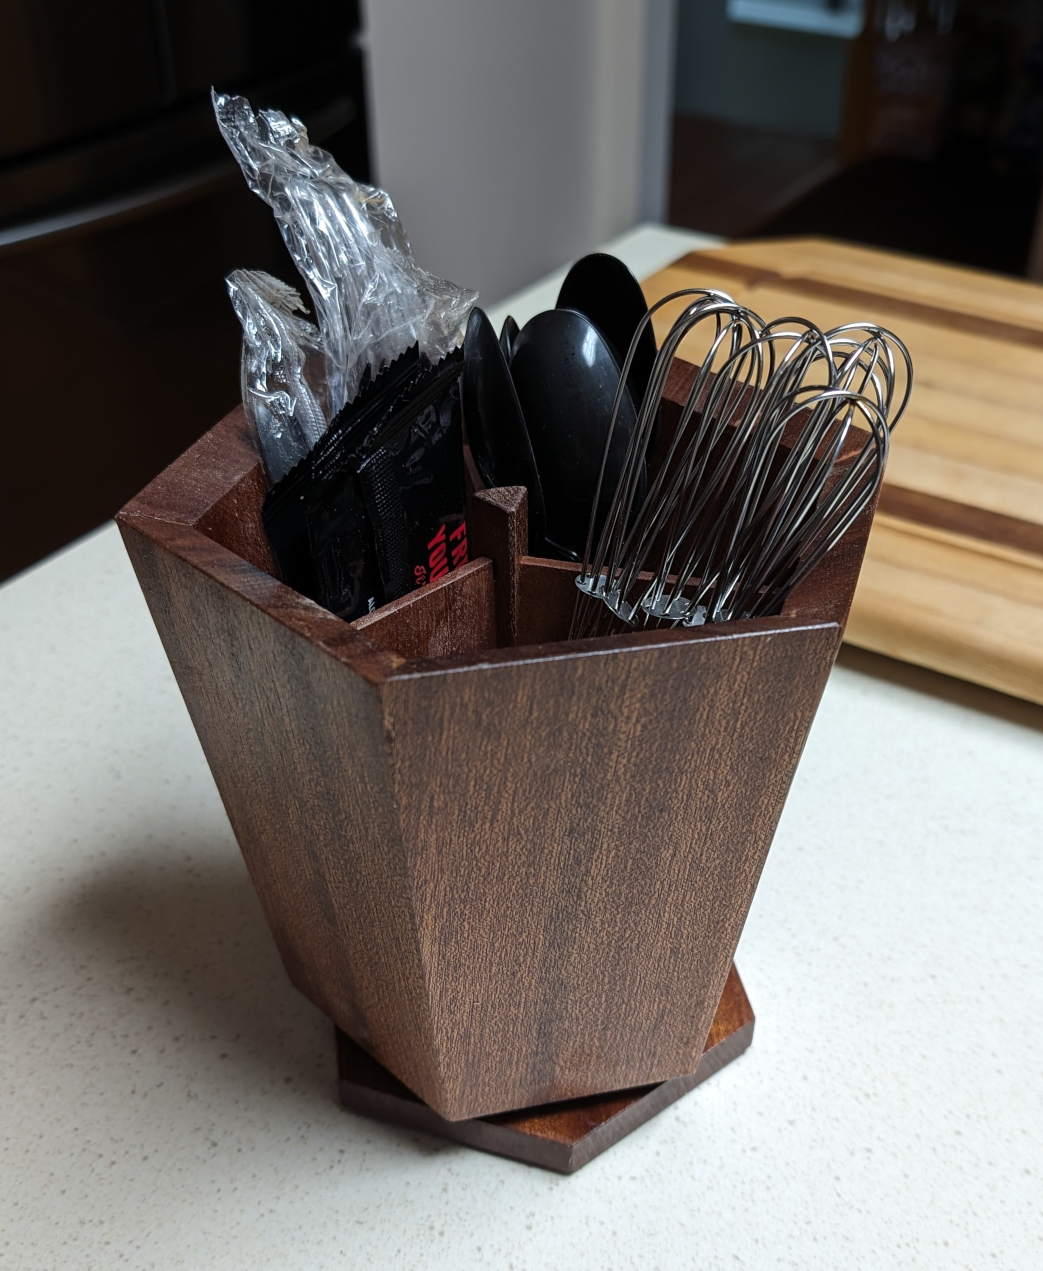
This turned out pretty sweet. It turns smoothly, has enough weight that it won’t tip easily, and holds 3 kinds of flatware (or pens, straws, etc.) within easy reach. Strictly speaking it may be a stretch to call this a box, but it’s a container.
And, more importantly, this kept me sane during the early weeks of my rehab. I’m getting stronger on the left side now, so I think I’m going to scratch another itch in the shop that’s been bothering me. Stay tuned.
Recent Comments